
Borderlands 2 Game of the Year Guide DLC Enemies
Captain Scarlett and Her Pirate's Booty
Sand Pirates
The dried-up seas surrounding Oasis are home to all manner of sand pirates. These ruthless bandits of the high sands rule the dunes on their portable sandskiffs and make their homes in countless encampments, many of them tucked deep within the canyons and atop the cliffs of the former ocean. Sand pirates come in all shapes and sizes, from the pint-sized Swabbie and Cabin Boys to the man-sized Pirates and Corsairs. Sand pirates are ubiquitous throughout the campaign, and what they lack in coordination and intelligence, they make up for with numbers and strength. Though a unique brand of bandit, many of the sand pirate types resemble the bandit varieties you’ll encounter elsewhere on Pandora, though care should be taken with the Buccaneers, Minelayers, and Anchormen. These represent the heavy hitters of the lot, not unlike Goliaths (although minus the leveling up). Fortunately, sand pirates are all made of flesh and blood and are vulnerable to fire attacks. Grab an incendiary weapon whenever there are sand pirates around (essentially everywhere outside of Washburne Refinery and Leviathan’s Lair), and light them up!
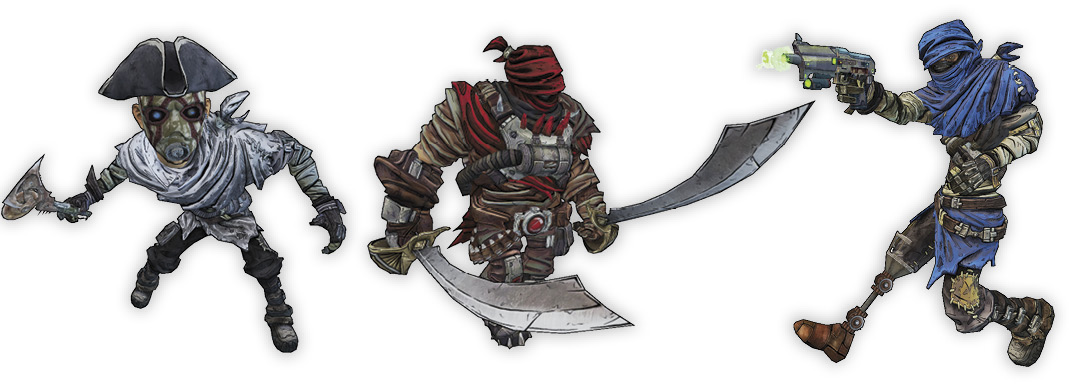
| Varieties | TVHM Name | UVHM Name | Health Multiplier. | Shield Level | DMG. Multiplier. | XP Value | Crit. Areas | Weak/Res. |
|---|---|---|---|---|---|---|---|---|
| Swabbie | Maniac Swabbie | Crazed Swabbie | 0.75 | 1 | 1 | Chump | Head |  /— /— |
| Buccaneer | — | — | 5 | 1 | 1.25 | Normal | Head |  /— /— |
| Harpooner | Whaler | Deep Sea Whaler | 7 | 1 | 2 | Normal+ | Head |  /— /— |
| Grogmaster | Manic Grogmaster | Crazed Grogmaster | 1.5 | 1 | 2 | Normal | Head |  /— /— |
| Raider | Pillager | Plunderer | 1 | 1 | 1.5 | Normal | Head |  /— /— |
| Corsair | Pirate Ninja | Pirate Mercenary | 1.5 | 1 | 2 | Normal | Head |  /— /— |
| Cabin Boy | Angry Cabin Boy | Furious Cabin Boy | 1.75 | 1 | 1 | Normal | Head |  /— /— |
| Rapscallion | Rogue | Scoundrel | 1.2 | 1 | 1 | Chump | Head |  /— /— |
| Pirate | Violent Pirate | Sadistic Pirate | 2 | 1 | 1 | Normal | Head |  /— /— |
| Gunner | DeadEye Gunner | Pirate Gunner | 1 | 1 | 1 | Normal+ | Head |  /— /— |
| Powder Monkey | — | — | 2.5 | 1 | 1.5 | Normal+ | Head |  /— /— |
| Cursed Pirate | — | — | 8 | 1 | 5 | Badass | Head |  /— /— |
| Badass Pirate | Badass Cannoneer | Super Badass Pirate | 6 | 2 | 2 | Badass | Head |  /— /— |
| Minelayer | Depthcharge | Sapper | 2 | 1 | 4 | Badass | — |  /— /— |
| Midget Boatswain | — | — | 3 | 1 | 0.5 | Normal | Head |  /— /— |
| Anchorman | — | — | 10 | 1 | 1 | Tough | — |  /— /— |
| Lil’ Sis* | — | — | 8 | 1 | 1 | Normal+ | Head |  /— /— |
| Mr. Bubbles* | — | — | 10 | 6 | 2 | Badass | — |  /— /— |
| Scarlett Crew* | — | — | 1.2 | 1 | 1 | Normal | Head |  /— /— |
| Scarlett Corsair* | Scarlett Ninja | Scarlett Mercenary | 1.5 | 1 | 2 | Normal | Head |  /— /— |
| DJ Tanner* | — | — | 6 | 2 | 2 | Badass | Head |  /— /— |
| No-Beard* | — | — | 20 | 1 | 3 | Badass | Head |  /— /— |
| Toothless Terry* | — | — | 6 | 1 | 1 | Badass | Head |  /— /— |
| Deckhand* | — | — | 7 | 1 | 1.5 | Tough+ | Head |  /— /— |
| Benny the Booster* | — | — | 5 | 1 | 1 | Tough+ | Head |  /— /— |
| Lieutenant White* | — | — | 10 | 4 | 2 | Badass | Head |  /— /— |
| Lieutenant Hoffman* | — | — | 10 | 4 | 2 | Badass | Head |  /— /— |
| Sandman* | — | — | 4 | 3 | 1 | Badass | Head |  /— /— |
| The Big Sleep* | — | — | 8 | 4 | 1 | Tough | — |  /— /— |
| Master Gee the Invincible* | — | — | 7000 | 1 | 1.5 | Normal+ | Head |  /— /— |
*Denotes unique enemy or raid boss.
Locations: Oasis, Hayter’s Folly, Wurmwater, Rustyards, Magnys Lighthouse
Sand Worms
Sand worms slither beneath the sands of Oasis and Wurmwater in an effort to detect their prey with the sensitive feelers mounted on their heads. Sand worms, unlike threshers, have neither eyes nor tentacles, but they otherwise look similar. Like threshers, areas containing sand worms are typically marked with signs warning you of their presence. Sand worms can be killed by collision with sandskiffs. They emerge from the sands in a sudden burst and attack by biting or slapping their prey if close by; otherwise, they resort to a toxic ranged attack. Sand worms and Sand Worm Grubs are quite easy to kill, particularly if you shoot them in their mouths. As with other flesh-based enemies, they are vulnerable to fire attacks. Sand Worm Queens are also susceptible to fire-based attacks but are far stronger and require a more delicate approach. Circle-strafe the Sand Worm Queen while shooting it in the mouth to avoid its dangerous spit attack.
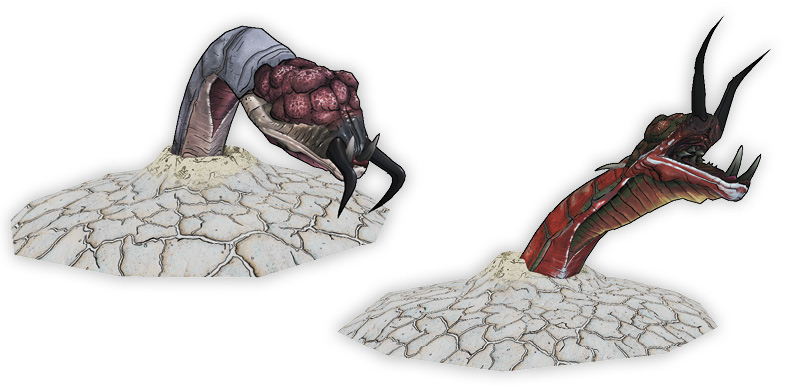
| Varieties | TVHM Name | UVHM Name | Health Multiplier | Shield Level | DMG. Multiplier | XP Value | Crit. Areas | Weak/Res. |
|---|---|---|---|---|---|---|---|---|
| Sand Worm | Savage Sand Worm | Toxic Sand Worm | 4 | 1 | 2 | Normal | — |  / / |
| Sand Worm Grub | Mighty Sand Worm Grub | Toxic Sand Worm Grub | 0.5 | 1 | 0.5 | Chump | — |  / / |
| Sand Worm Queen | — | — | 25 | 1 | 3 | Tough+ | — |  / / |
Locations: Oasis, Wurmwater, Leviathan’s Lair
Stalkers
This expansion campaign adds two new varieties of stalkers to the lengthy list of varieties encountered elsewhere on Pandora. The Rabid Stalker, true to its name, is extremely aggressive and too delirious to remember to use its cloaking ability. It attacks by charging your position and biting and clawing until one of you dies. It is a top priority enemy! Tri-Tail Stalkers are similar to Needle Stalkers but emit three needle spikes simultaneously instead of just one.
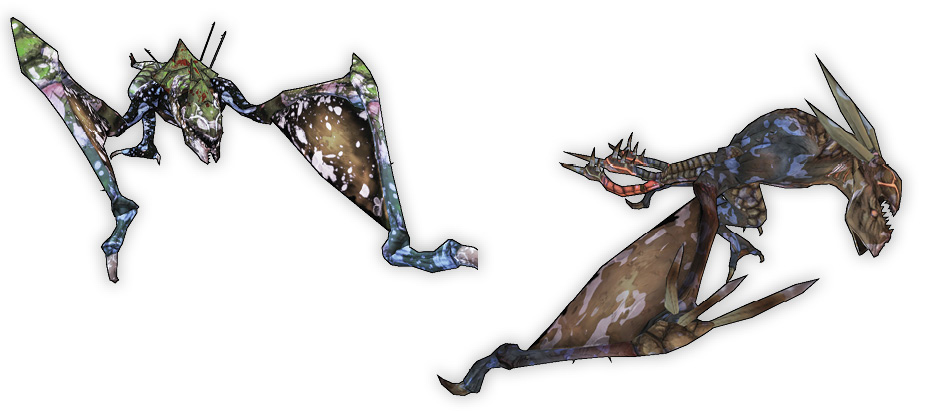
| Varieties | TVHM Name | UVHM Name | Health Multiplier | Shield Level | DMG. Multiplier | XP Value | Crit. Areas | Weak/Res. |
|---|---|---|---|---|---|---|---|---|
| Rabid Stalker | — | — | 5 | 5 | 1 | Badass | Head |  /— /— |
| Tri-Tail Stalker | — | — | 1 | 3 | 1.5 | Normal+ | Head |  /— /— |
| Tinkles* | — | — | 8 | 10 | 2 | Badass | Head |  /— /— |
*Denotes unique enemy or raid boss.
Locations: Oasis, Magnys Lighthouse
Loaders
It wouldn’t be Pandora without its puns, hence the ARR Loader. Get it? Of course you do, matey. You can easily identify ARR Loaders by their tricorn hat, eye patch, and other pirate-themed accoutrements. ARR Loaders are equipped with assault rifles on their arms and effectively behave like GUN Loaders, though they move somewhat slower. Aim for the eyes mounted in their chests for a Critical Hit and to ensure they don’t get a chance to emit their laser beam attacks. You’ll also encounter two unique Loaders during your trip through Washburne Refinery. Be wary of H3RL-E, as this oversized Loader is retrofitted with a barrel launcher attachment, much like a Bandit Technical. Take cover, and soak it in corrosive gunfire before its barrels become a threat.
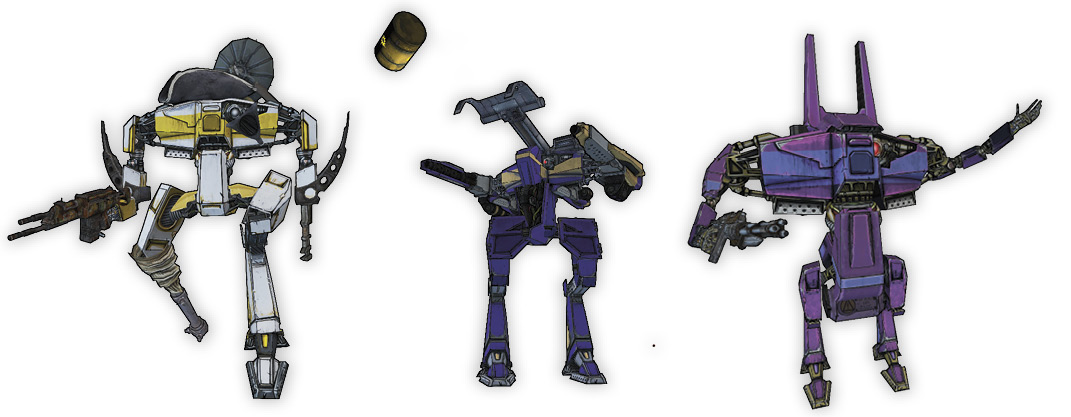
| Varieties | TVHM Name | UVHM Name | Health Multiplier | Shield Level | DMG. Multiplier | XP Value | Crit. Areas | Weak/Res. |
|---|---|---|---|---|---|---|---|---|
| ARR Loader | — | — | 6.5 | 3 | 2 | Tough+ | Arms, Eyes |  / / |
| H3RL-E* | — | — | 15 | 10 | 3 | Super Badass | Arms, Eyes, Legs |  / / |
| P3RV-E* | — | — | 1.5 | 1 | 2 | Badass | Arms, Eyes, Legs |  / / |
*Denotes unique enemy or raid boss.
Locations: Washburne Refinery
Crystalisks
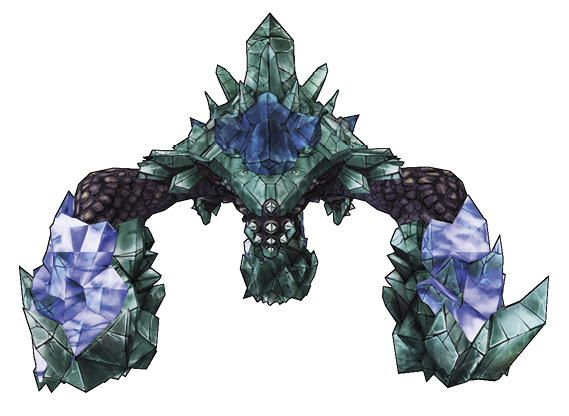
The Hayter’s Folly region contains a special breed of crystalisks known as Cave Crystalisks. These blue-colored crystalisks behave similarly to the more common Volatile Crystalisks, but they emit a shock attack when their crystal projectiles erupt or when they perform one of their patented ground-pound attacks. When battling one, as always, focus your attacks on the crystals during each of its three attacks to damage it.
| Varieties | TVHM Name | UVHM Name | Health Multiplier | Shield Level | DMG. Multiplier | XP Value | Crit. Areas | Weak/Res. |
|---|---|---|---|---|---|---|---|---|
| Cave Crystalisk | — | — | 6 | 1 | 1.5 | Tough | Crystals | —/— |
*Denotes unique enemy or raid boss.
Locations: Hayter’s Folly
Grendel
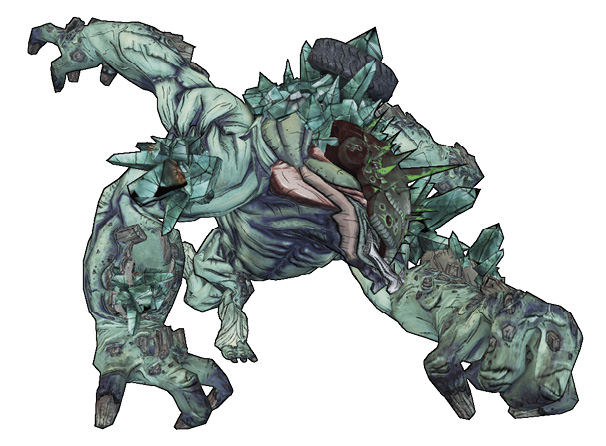
Grendel is a unique bullymong that resides in Hayter’s Folly. Accept the “Grendel” mission to have your first encounter with it. Consult the walkthrough for additional details.
| Varieties | TVHM Name | UVHM Name | Health Multiplier | Shield Level | DMG. Multiplier | XP Value | Crit. Areas | Weak/Res. |
|---|---|---|---|---|---|---|---|---|
| Grendel* | — | — | 24 | 1 | 2 | Super Badass | Head |  /— /— |
*Denotes unique enemy or raid boss.
Locations: Hayter’s Folly
Roscoe
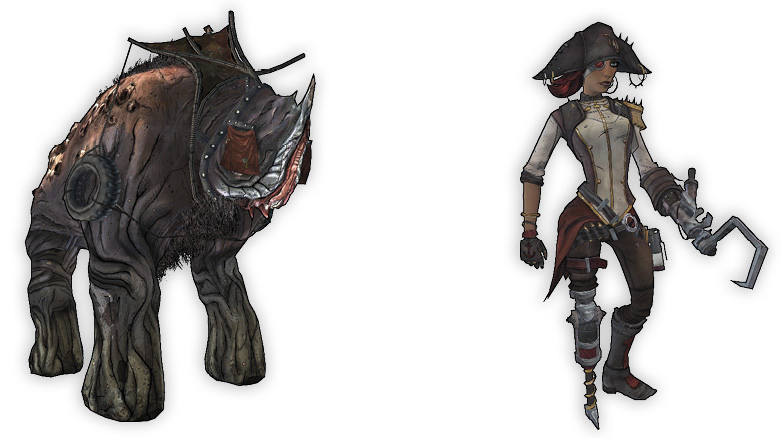
Roscoe is Captain Scarlett’s pet Rakk Hive. You’ll encounter this massive beast during the “X Marks the Spot” mission. Consult the walkthrough for additional details.
| Varieties | TVHM Name | UVHM Name | Health Multiplier | Shield Level | DMG. Multiplier | XP Value | Crit. Areas | Weak/Res. |
|---|---|---|---|---|---|---|---|---|
| Roscoe* | — | — | 60 | 1 | 1.25 | Super Badass | Eyes |  /— /— |
| Captain Scarlett* | — | — | 10 | 1 | 1 | Badass | Head |  /— /— |
*Denotes unique enemy or raid boss.
Locations: Leviathan’s Lair
Leviathan
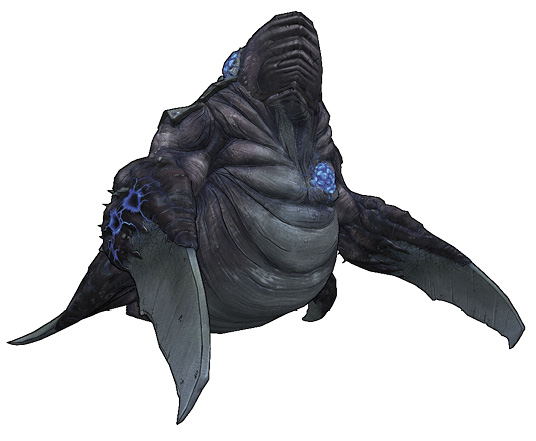
The Leviathan is the protector of The Chamber of the Lost Treasure, but is it friend or foe? There’s only one way to find out: play the “X Marks the Spot” mission. Consult the walkthrough for additional details.
| Varieties | TVHM Name | UVHM Name | Health Multiplier | Shield Level | DMG. Multiplier | XP Value | Crit. Areas | Weak/Res. |
|---|---|---|---|---|---|---|---|---|
| Leviathan* | — | — | 35 | 1 | 8 | Boss | — |  / / |
*Denotes unique enemy or raid boss.
Locations: Leviathan’s Lair
Hyperius the Invincible
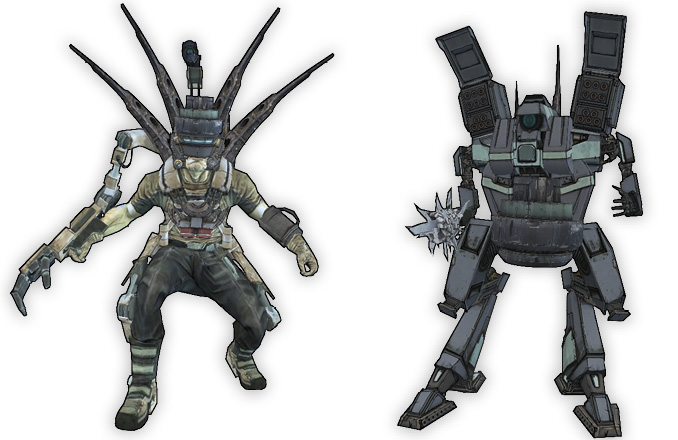
Hyperius the Invincible is one of the Seraph Guardians, a special raid boss enemy lurking within Washburne Refinery. You can first encounter Hyperius the Invincible during the “Hyperius the Invincible” mission, which unlocks after you complete the “X Marks the Spot” mission. Consult the walkthrough for additional details—and bring friends!
| Varieties | TVHM Name | UVHM Name | Health Multiplier | Shield Level | DMG. Multiplier | XP Value | Crit. Areas | Weak/Res. |
|---|---|---|---|---|---|---|---|---|
| Hyperius the Invincible* | — | — | 232 | 1 | 1 | Boss | — | —/ , ,  , ,  , ,  |
| Hyperius Minion* | — | — | 44 | 1 | 1 | Tough+ | Arms, Eyes, Legs | —/ , ,  , ,  , ,  |
*Denotes unique enemy or raid boss.
Locations: Washburne Refinery