
Borderlands 2 Game of the Year Guide DLC Enemies
Tiny Tina's Assault on Dragon Keep
Dragons
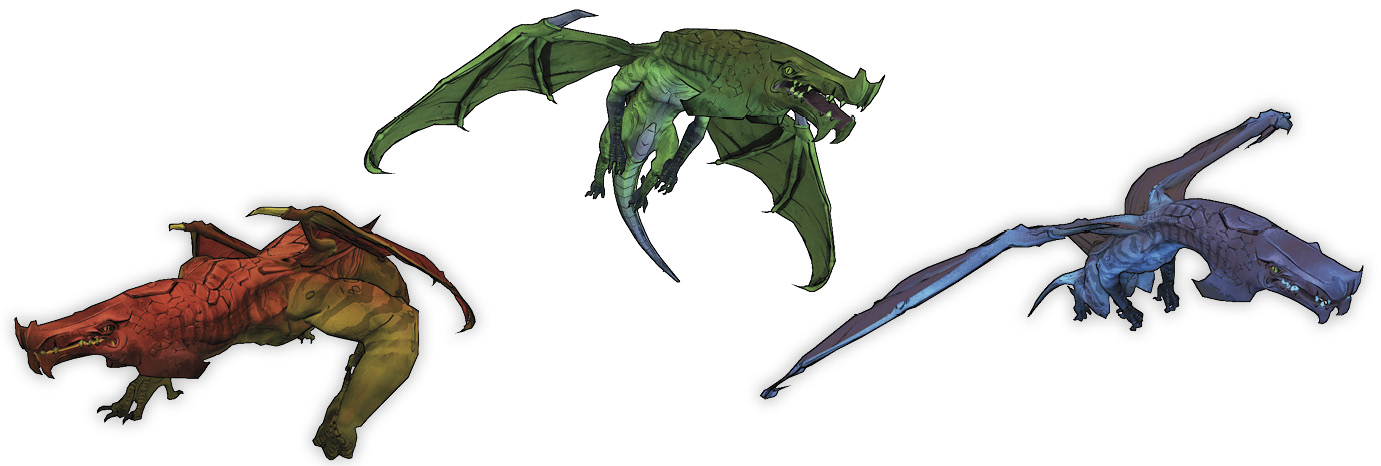
Outside of the flightless Green Basilisk, every dragon is associated with an elemental type. Dragons attack almost exclusively with that elemental type and are strongly resistant to it. Dragons are capable of hovering briefly in mid-air, but they typically soar in circles around the battlefield, performing strafing-style attacks. This gives you a good amount of time to heal up or run to cover between attacks, but they can be hard to track while in flight. High accuracy, high-velocity weapons are a must against their ilk.
| Varieties | TVHM Name | UVHM Name | Health Multiplier | Shield Level | DMG. Multiplier | XP Value | Crit. Areas | Weak/Res. |
|---|---|---|---|---|---|---|---|---|
| Green Basilisk | Slimy Green Basilisk | Scaly Green Basilisk | 2 | — | 1 | Tough | Head | —/— |
| Baby Red Dragon | Nursling Red Dragon | Puerile Red Dragon | 6 | — | 2 | Normal | Head | —/ |
| Red Dragon | Great Red Dragon | Ancient Red Dragon | 15 | — | 5 | Tough | Head | —/ |
| Purple Dragon | Great Purple Dragon | Ancient Purple Dragon | 13 | — | 4 | Tough | Head | —/ |
| Green Dragon | Great Green Dragon | Ancient Green Dragon | 18 | — | 5 | Tough | Head | —/ |
| Blue Dragon | Great Blue Dragon | Ancient Blue Dragon | 20 | — | 5 | Tough | Head | —/ |
| Handsome Dragon* | Handsome Dragon | Handsome Dragon | 50 | — | 2 | Boss | Head | —/ |
| Brood the Invincible* | Brood the Invincible II | Brood the Invincible III | 300 | — | 3 | Boss | Head | —/ |
| Boost the Invincible* | Boost the Invincible II | Boost the Invincible III | 200 | — | 2 | Boss | Head | —/ |
| Healianth the Invincible* | Healianth the Invincible II | Healianth the Invincible III | 600 | — | 2 | Boss | Head | —/ |
| Incinerator the Invincible* | Incinerator the Invincible II | Incinerator the Invincible III | 400 | — | 3 | Boss | Head | —/ |
*Denotes unique enemy or raid boss.
Locations: Dragon Keep, Immortal Woods, Winged Storm, Murderlin’s Temple, Lair of Infinite Agony, Hatred’s Shadow
Dwarves
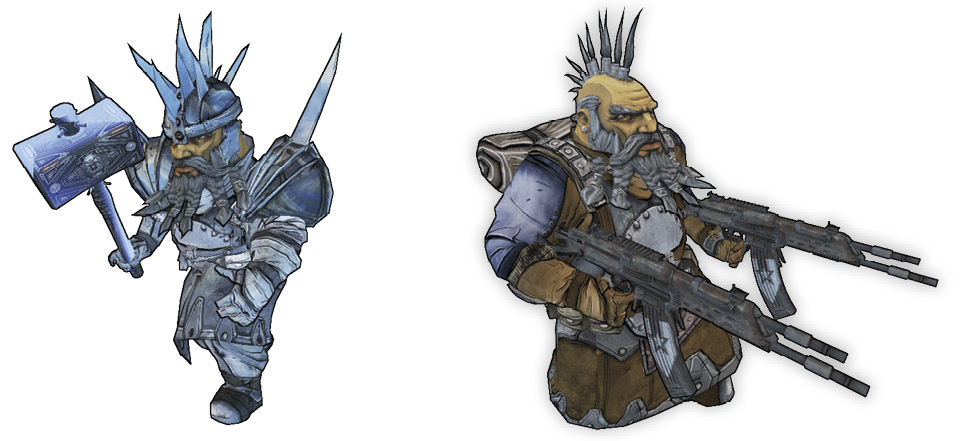
Dwarves make for hearty foes, but they are slow and fairly weak at long range. As such, they’re best fought from as far away as possible. The most potent of the bunch is by far the Badass Dwarves, who wield shock hammers that can smash through your shields as if they were crepe paper. Exploit their weakness to fire, which is something that all non-unique dwarves seem to share.
| Varieties | TVHM Name | UVHM Name | Health Multiplier | Shield Level | DMG. Multiplier | XP Value | Crit. Areas | Weak/Res. |
|---|---|---|---|---|---|---|---|---|
| Dwarfzerker | Demented Dwarfzerker | Delirious Dwarfzerker | 3.5 | — | 2 | Normal | Head |  /— /— |
| Dwarf | Dwarf Warrior | Dwarf Warmonger | 4 | — | 2 | Normal+ | Head |  /— /— |
| Dwarf Miner | — | — | 2 | — | 2 | Normal | Head |  /— /— |
| Badass Dwarf | Super Badass Dwarf | Ultimate Badass Dwarf | 10 | — | 4 | Badass | Head |  /— /— |
| Greedtooth* | — | — | 50 | — | 2 | Tough | Head | —/— |
*Denotes unique enemy or raid boss.
Locations: Mines of Avarice, Murderlin’s Temple
Golems
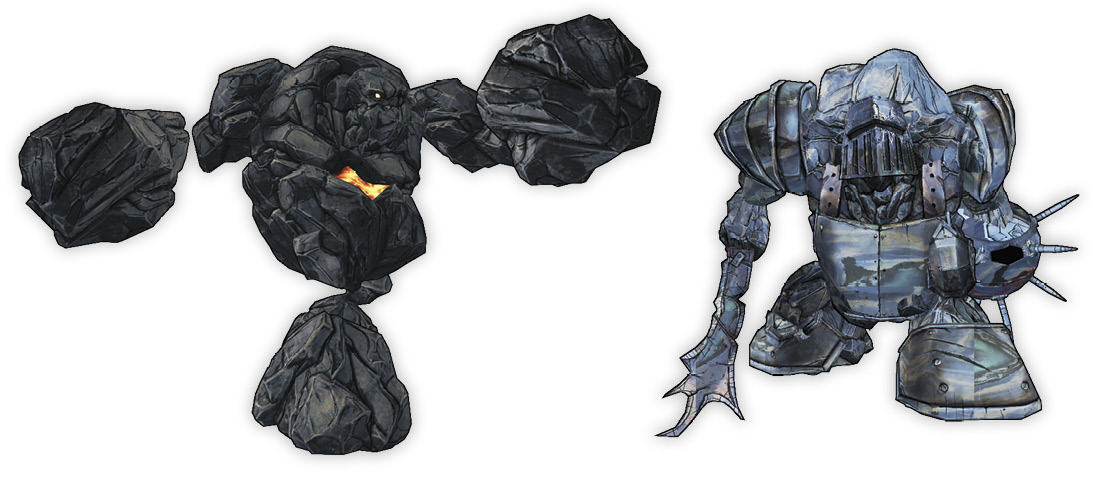
Golems are powerful creatures, but their sluggish attacks are generally easy to dodge, especially at medium to long range. Still, they’re a hassle to bring down, with lots of hit points and few weaknesses (although the metallic varieties are all weak to corrosive attacks). Golems are capable of leveling up by killing foes, and being highly territorial, they often end up in fights with the skeletons that fill Tiny Tina’s world.
| Varieties | TVHM Name | UVHM Name | Health Multiplier | Shield Level | DMG. Multiplier | XP Value | Crit. Areas | Weak/Res. |
|---|---|---|---|---|---|---|---|---|
| Rock Golem | — | — | 15 | — | 2.5 | Tough | — | —/ , ,  |
| Maxibillion* | — | — | 2.75 | — | 1.5 | Tough | — |  / / |
| Aerial Golem | — | — | 2.75 | — | 1.5 | Tough | — |  / / |
| Unmotivated Golem | — | — | 40 | — | 3 | Super Badass | — | —/ , ,  |
| Magical Golem* | — | — | 15 | — | 4 | Normal+ | — | —/— |
| Badass Iron Golem | — | — | 40 | — | 3 | Badass | — |  / / |
| Gold Golem* | — | — | 110 | — | 2 | Greedtooth | — | —/— |
*Denotes unique enemy or raid boss.
Locations: Unassuming Docks, Mines of Avarice
Knight
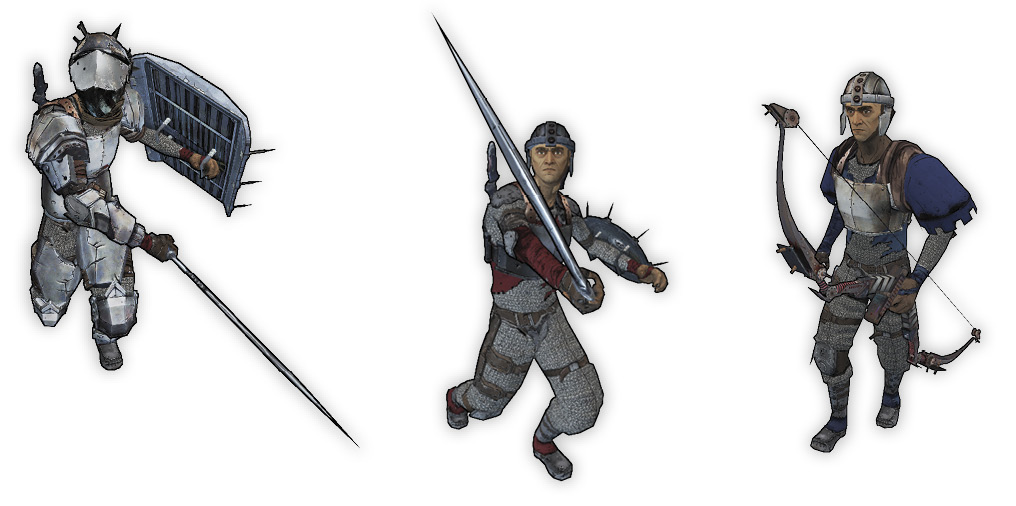
The heavily armored Knights of Tiny Tina’s Assault on Dragon Keep typically travel with their easily bested Squires and an Archer or two to provide long-range support. You should kill these softer foes first, as cutting through the heavy armor of their bosses can be very time-consuming, even with corrosive weaponry. Many Knights wield large shields that can completely negate your shots, making it difficult to fight them effectively head-on. A few Knights deviate from the norm, such as the Storm Knight, who has only a small buckler and charges aggressively with a shock damage-dealing hammer, and the Paladin, who can cast both offensive and healing spells and can generate a magical shield.
| Varieties | TVHM Name | UVHM Name | Health Multiplier | Shield Level | DMG. Multiplier | XP Value | Crit. Areas | Weak/Res. |
|---|---|---|---|---|---|---|---|---|
| Knight | Knight Templar | Knight Champion | 4 | — | 2 | Normal | Back |  /— /— |
| Storm Knight | Storm Knight Templar | Storm Knight Champion | 2.5 | — | 1.5 | Normal+ | Back |  / / |
| Squire | Able Squire | Adept Squire | 2 | — | 1 | Normal | Archer Head |  /— /— |
| Paladin | Exalted Paladin | Crowned Paladin | 6 | 6 | 3 | Tough | Back |  / / |
| Badass Knight | Super Badass Knight | Ultimate Badass Knight | 10 | — | 3 | Badass | Back |  /— /— |
| Archer | Bowman | Longbowman | 1.5 | — | 1 | Normal | Back |  /— /— |
| Badass Fire Archer | Super Badass Fire Archer | Ultimate Badass Fire Archer | 3 | — | 1 | Badass | Back |  /— /— |
| [720NoScope]Headshotz* | — | — | 2 | — | 1 | Normal | Back |  /— /— |
| 420_E-Sports_Masta* | — | — | 2 | — | 1 | Normal | Back |  /— /— |
| xxDatVaultHuntrxx* | — | — | 2 | — | 1 | Normal | Back |  /— /— |
| -=nOObkiLLer=-* | — | — | 20 | — | 2 | Badass | Back |  /— /— |
| Sir Boil* | — | — | 10 | — | 1 | Normal | Back |  /— /— |
| Sir Mash* | — | — | 10 | — | 1 | Normal | Back |  /— /— |
| Sir Stew* | — | — | 10 | — | 1 | Normal | Back |  /— /— |
| Jeffrey’s Guard | — | — | 1 | — | 1 | Normal | Back |  /— /— |
| Molehill* | — | — | 20 | — | 3 | Badass | Back |  /— /— |
| Canine* | — | — | 20 | — | 2 | Badass | Back |  /— /— |
| Prince Jeffrey* | — | — | 1 | — | 1 | Badass | Back |  /— /— |
*Denotes unique enemy or raid boss.
Locations: Hatred’s Shadow, Dragon Keep, Immortal Woods, Murderlin’s Temple
Orcs
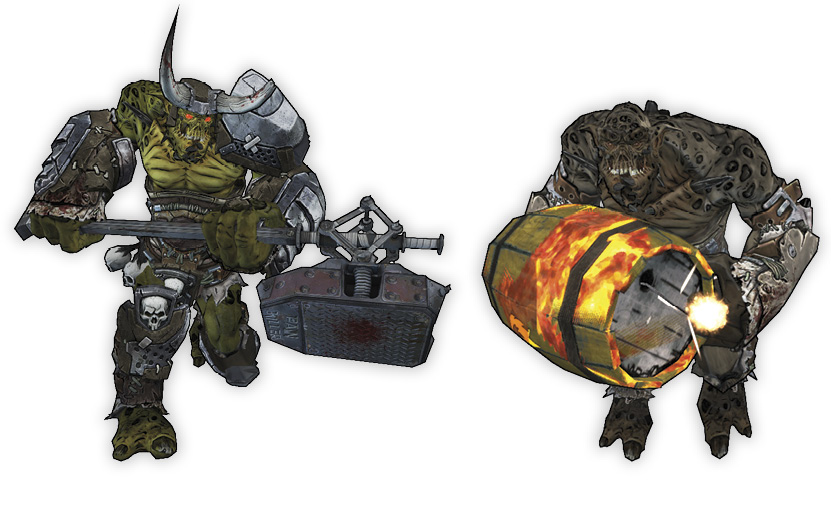
For such large foes, orcs are surprisingly spry. They typically attacks in large groups, often led by a Badass Orc Warlord capable of gradually leveling up his team. To break their initial charge, use powerful weapons like grenades, rocket launchers, and shotguns—or better yet, shoot the explosive barrels that Orc Fire Hoppers and Orc Zappers carry, and save yourself some ammo. All orcs are weak to fire, so it’s crucial to have a good incendiary weapon when venturing into their territory. Unique orcs Warlord Grug (in The Forest), Warlord Turge (in the Mines of Avarice), and Warlord Slog (in the Badass Round of the Magic Slaughter series) are Badass Orc Warlords that can level up into the mightily powerful Duke of Ork or King of Ork. Defeat them quickly before they can attain their true potential.
| Varieties | TVHM Name | UVHM Name | Health Multiplier | Shield Level | DMG. Multiplier | XP Value | Crit. Areas | Weak/Res. |
|---|---|---|---|---|---|---|---|---|
| Orczerker | Raging Orczerker | Bloodlusted Orczerker | 10 | — | 4 | Tough | Head |  /— /— |
| Orc Warrior | Battle Orc | Orc Captain | 4 | — | 3 | Normal | Head |  /— /— |
| Orc Zapper | Orc Shocker | Orc Surger | 2 | — | 1 | Normal | Head |  /— /— |
| Orc Grunt | Orc Hireling | Orc Minion | 2.5 | — | 1.5 | Normal | Head |  /— /— |
| Orc Fire Hopper | Orc Fire Jumper | Orc Fire Leaper | 2 | — | 1 | Normal | Head |  /— /— |
| Orc Bushwhacker | Orc Discharger | Orc Detonator | 2 | — | 1 | Normal | Head |  /— /— |
| Magical Orc* | — | — | 1 | — | 2 | Normal | Head |  /— /— |
| Orc Basher | Orc Charger | Orc Invader | 7 | — | 4 | Normal+ | — |  /— /— |
| Badass Orc Warlord | Super Badass Orc Warlord | Ultimate Badass Orc Warlord | 20 | — | 5 | Badass | Head |  /— /— |
| Warlord Turge* | — | — | 55 | — | 5 | Super Badass | Head |  /— /— |
| Warlord Slog* | — | — | 35 | — | 4 | Super Badass | Head |  /— /— |
| Warlord Grug* | — | — | 40 | — | 3 | Super Badass | Head |  /— /— |
| Arguk the Butcher* | — | — | 45 | — | 3 | Super Badass | Head |  /— /— |
*Denotes unique enemy or raid boss.
Locations: Hatred’s Shadow, The Forest, Mines of Avarice, Murderlin’s Temple
Skeletons
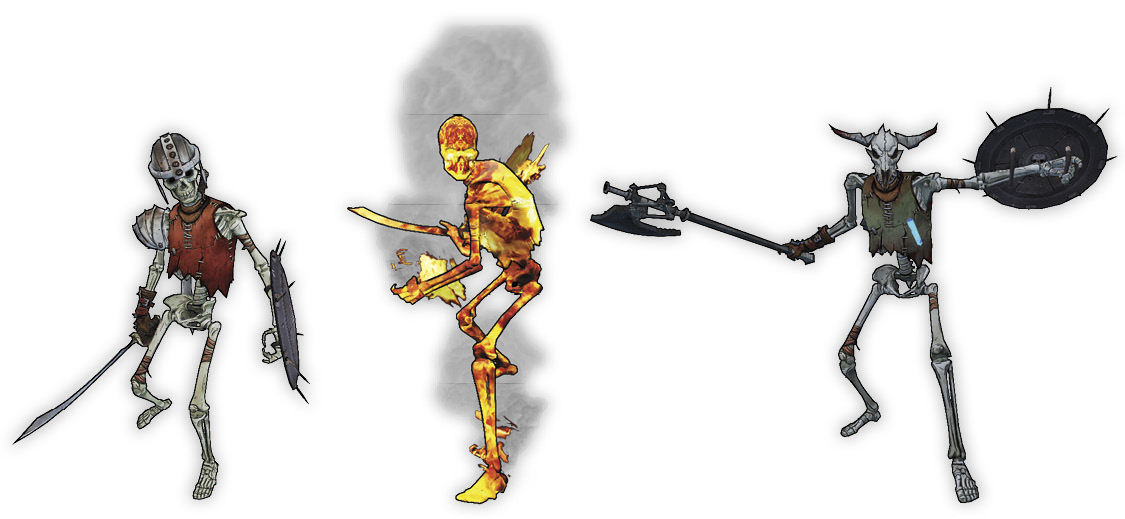
Skeletons are the most common foes in Tiny Tina’s Assault on Dragon Keep, and they come in a stunning variety of flavors. Generally, skeletons have no weaknesses and impressive resistance to incendiary attacks. But there are several interesting exceptions: Brittle Skeletons resist nearly everything but shatter easily from explosive and melee attacks, Armored Skeletons melt under corrosive attacks, and Immortal Skeletaurs can never truly be killed until you pull the blue energy sword from their fallen bodies.
| Varieties | TVHM Name | UVHM Name | Health Multiplier | Shield Level | DMG. Multiplier | XP Value | Crit. Areas | Weak/Res. |
|---|---|---|---|---|---|---|---|---|
| Skeleton Swordsman | Skeleton Warrior | Skeleton Gladiator | 2.5 | — | 2.5 | Normal | Head | —/ |
| Suicide Skeleton | Condemned Skeleton | Damned Skeleton | 2 | — | 2 | Normal | Head | —/ |
| Skeleton Midget | Lil’ Skeleton | Skeleton Halfling | 0.5 | — | 1 | Chump | Head | —/ |
| Skeleton Seer | Skeleton Conjuror | Skeleton Mage | 2 | — | 1.5 | Normal+ | Head | —/ |
| Immortal Skeletaur | Relentless Skeletaur | Eternal Skeletaur | 3 | — | 3 | Normal | Head | —/ |
| Skeleton Giant | Hulking Skeleton | Towering Skeleton | 10 | — | 6 | Tough | Head | —/ |
| Fiery Skeleton | Flaming Skeleton | Infernal Skeleton | 3 | — | 3 | Normal+ | Head | —/ |
| Brittle Skeleton | Fractured Skeleton | Crystal Skeleton | 6 | — | 3 | Normal+ | Head |  / / , ,  , ,  , ,  |
| Chubby Bones | Chubby Bones | Tubby Bones | 2 | — | 2 | Normal | Head | —/ |
| Badass Skeleton | Super Badass Skeleton | Ultimate Badass Skeleton | 7 | — | 5 | Badass | Head | —/ |
| Armored Skeleton | Platemail Skeleton | Ironclad Skeleton | 4 | — | 3 | Tough | Head |  / / |
| Enchanted Skeleton Archer | Conjured Skeleton Archer | Spectral Skeleton Archer | 2 | — | 1.25 | Normal+ | Head | —/ |
| Skeleton Archer | Deadeye Skeleton Archer | Master Skeleton Archer | 2 | — | 2 | Normal | Head | —/ |
| Skeleton | Animated Skeleton | Reanimated Skeleton | 2 | — | 2 | Normal | Head | —/ |
| Fiery Skull | Flaming Skull | Infernal Skull | 1 | — | 3 | Chump | — | —/ |
| Mr. Boney Pants Guy* | — | — | 7 | — | 0.5 | Normal | Head | —/— |
| King Seth* | King Seth | King Seth | 38 | — | 6 | Super Badass | Head | —/ , ,  , ,  , ,  |
| King Nazar* | King Nazar | King Nazar | 38 | — | 6 | Super Badass | Head | —/ , ,  , ,  , ,  |
| King Crono* | King Crono | King Crono | 38 | — | 6 | Super Badass | Head | —/ , ,  , ,  , ,  |
| King Aliah* | King Aliah | King Aliah | 38 | — | 6 | Super Badass | Head | —/ , ,  , ,  , ,  |
| Skeleton King’s Head* | — | — | 4 | — | 4 | Normal+ | — | —/ , ,  , ,  , ,  |
*Denotes unique enemy or raid boss.
Locations: Dragon Keep, Immortal Woods, Unassuming Docks, Lair of Infinite Agony, Murderlin’s Temple, Flamerock Refuge
Spiders
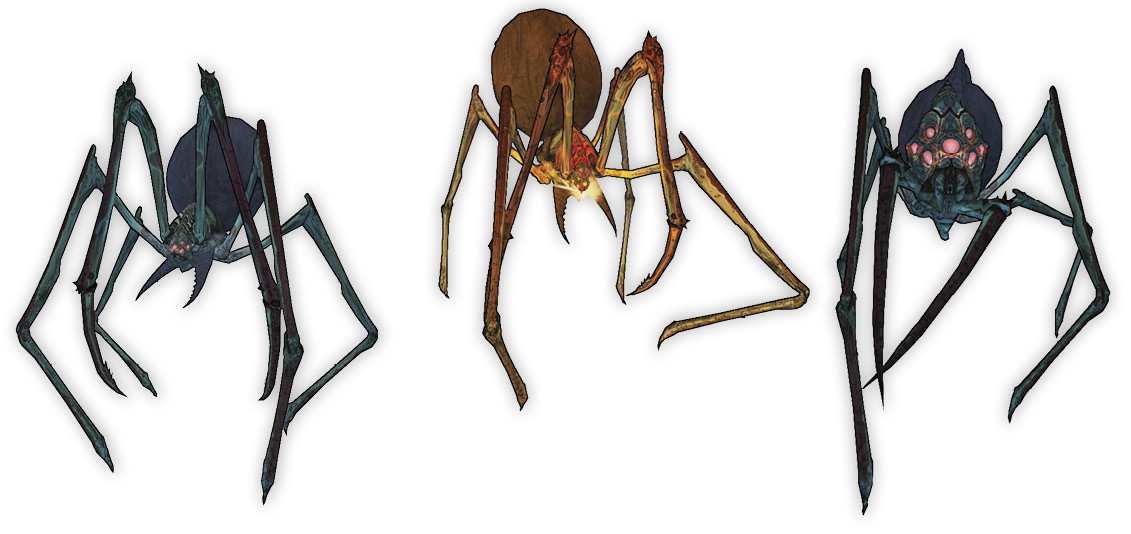
Individually, spiders are nothing to fear. They have giant Critical Hit points (their abdomens), little health, and limited long-range attack capability. However, they typically appear in large numbers or alongside more dangerous foes, and they can overwhelm unprepared adventurers. Shotguns are a great way to hit their small and sometimes hard-to-see bodies, and shotguns can also still hit effectively even when spiders’ projectile webs are blocking your vision.
| Varieties | TVHM Name | UVHM Name | Health Multiplier | Shield Level | DMG. Multiplier | XP Value | Crit. Areas | Weak/Res. |
|---|---|---|---|---|---|---|---|---|
| Suicide Spider | Unstable Spider | Destructive Spider | 1 | — | 2 | Normal | Abdomen | —/— |
| Grass Spider | Woodland Spider | Labyrinthe Spider | 1 | — | 2 | Normal | Abdomen | —/— |
| Spiderling | — | — | 1 | — | 2 | Normal | Abdomen | —/— |
| Black Widow Spider | Black Widow Weaver | Black Widow Lasher | 1 | — | 2 | Normal | Abdomen | —/— |
| Badass Spider | — | — | 4 | — | 3 | Badass | Abdomen | —/ |
| Magical Spider* | — | — | 1 | 40 | 4 | Badass | Abdomen | —/— |
| Arachne | Arachne Scourge | Arachne Reaper | 1 | — | 2 | Normal | Abdomen | —/— |
| Spiderpants* | — | — | 18 | — | 3 | Badass | Archer Head | —/ |
| Sorcerer’s Daughter* | — | — | 80 | — | 1 | Super Badass | Abdomen | —/ , ,  , ,  , ,  |
*Denotes unique enemy or raid boss.
Locations: The Forest, Lair of Infinite Agony, Mines of Avarice, Flamerock Refuge
Treants
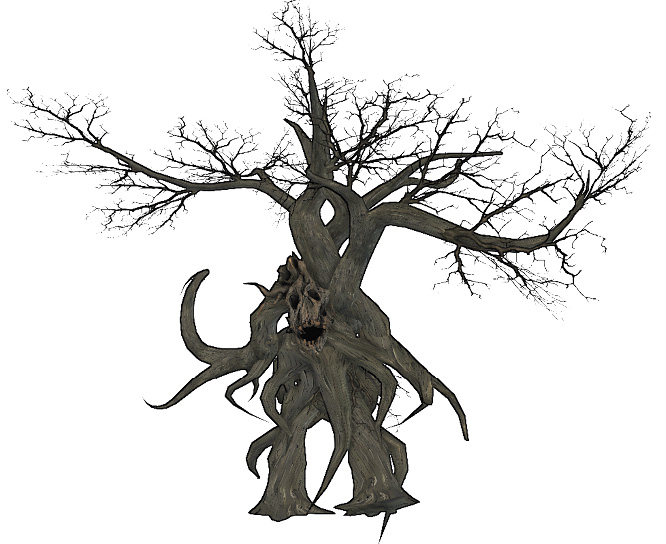
Treants and their Stumpy offspring prowl The Forest region, wreaking slow-moving vengeance on orc and Vault Hunter invaders. They’re extremely weak to fire, and it’s a lot of fun to set them up and watch them burn. But don’t get cocky; stumbling into one of the treant’s explosive blue fruits can wipe out your shields in a heartbeat.
| Varieties | TVHM Name | UVHM Name | Health Multiplier | Shield Level | DMG. Multiplier | XP Value | Crit. Areas | Weak/Res. |
|---|---|---|---|---|---|---|---|---|
| Stumpy | Damned Stumpy | Wicked Stumpy | 5 | — | 3 | Normal+ | — |  /— /— |
| Ultra Mega Badass Stumpy* | — | 5 | — | 3 | Normal+ | — |  /— /— |
|
| Treant | Elder Treant | Heartwood Treant | 35 | — | 5 | Badass | — |  , ,  /— /— |
| Ultra Mega Badass Treant* | — | 35 | — | 5 | Badass | — |  , ,  /— /— |
|
Locations: The Forest
Wizards
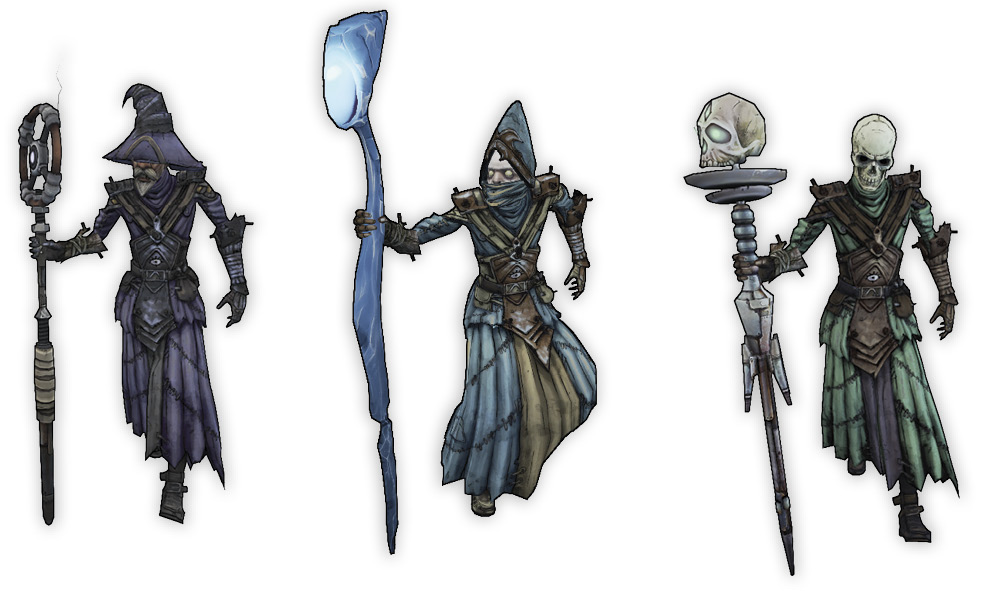
Spellcasters make for pesky foes, often hiding behind cover or in the rear of an enemy army, pelting you with elemental spell attacks that have no clear source, or tormenting you with summoned creatures like skeletons and Flaming Phoenixes. Wizards themselves are particularly hard to nail down, with evasive maneuvers like teleportation spells that allow them to flee even when you do finally chase one down. That said, there are certain perks to running across a sorcerer, wizard, Necromancer, or Fire Mage; each has a chance of dropping one of the new grenades introduced in Tiny Tina’s Assault on Dragon’s Keep, which mimics spells like Magic Missile, Fireball, and Lightning.
| Varieties | TVHM Name | UVHM Name | Health Multiplier | Shield Level | DMG. Multiplier | XP Value | Crit. Areas | Weak/Res. |
|---|---|---|---|---|---|---|---|---|
| Wizard | Arcane Wizard | Astral Wizard | 6 | 12 | 1.5 | Normal+ | Head |  /— /— |
| Badass Wizard | Super Badass Wizard | Ultimate Badass Wizard | 12 | 25 | 2.5 | Badass | Head |  /— /— |
| Sorcerer | Runed Sorcerer | Radiant Sorcerer | 9 | — | 2 | Normal+ | Head |  / / |
| Badass Sorcerer | Super Badass Sorcerer | Ultimate Badass Sorcerer | 18 | — | 3 | Badass | Head |  / / |
| Necromancer | Unholy Necromancer | Desecrated Necromancer | 8 | — | 3 | Normal+ | Head |  /— /— |
| Badass Necromancer | Super Badass Necromancer | Ultimate Badass Necromancer | 16 | — | 4 | Badass | Head |  /— /— |
| Fire Mage | Soulfire Mage | Hellfire Mage | 7 | — | 2 | Normal+ | Head | —/ |
| Badass Fire Mage | Super Badass Fire Mage | Ultimate Badass Fire Mage | 14 | — | 4 | Badass | Head | —/ |
| Simon* | — | — | 20 | — | 1 | Normal | Head |  /— /— |
| Edgar* | — | — | 20 | — | 1 | Normal | Head |  /— /— |
| Handsome Sorcerer* | Handsome Sorcerer | Handsome Sorcerer | 45 | 40 | 1.5 | Normal | Head |  / / |
| Necrotic Sorcerer* | Necrotic Sorcerer | Necrotic Sorcerer | 45 | 40 | 1.5 | Normal | Head |  / / |
| Demonic Sorcerer* | Demonic Sorcerer | Demonic Sorcerer | 45 | 40 | 1.5 | Normal | Head |  / / |
*Denotes unique enemy or raid boss.
Locations: Hatred’s Shadow, Dragon Keep, Lair of Infinite Agony, Murderlin’s Temple
Pixie
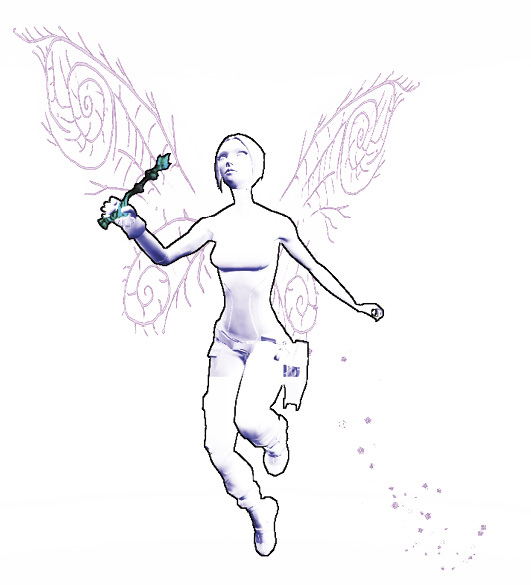
Pixies flutter overhead at certain points in the forest. If you look up and grab one, it’ll follow you around for a while, casting healing and buff spells on you. But if you take a shot at one, it’ll fight back. They’re really nothing to fear, and killing these friendly spirits is actually a decent way to farm Eridium. You’ll feel pretty awful about it, though.
| Varieties | TVHM Name | UVHM Name | Health Multiplier | Shield Level | DMG. Multiplier | XP Value | Crit. Areas | Weak/Res. |
|---|---|---|---|---|---|---|---|---|
| Pixie | Fey Pixie | Wild Pixie | 6 | — | 1.1 | —/— |
Locations: The Forest
Mimic
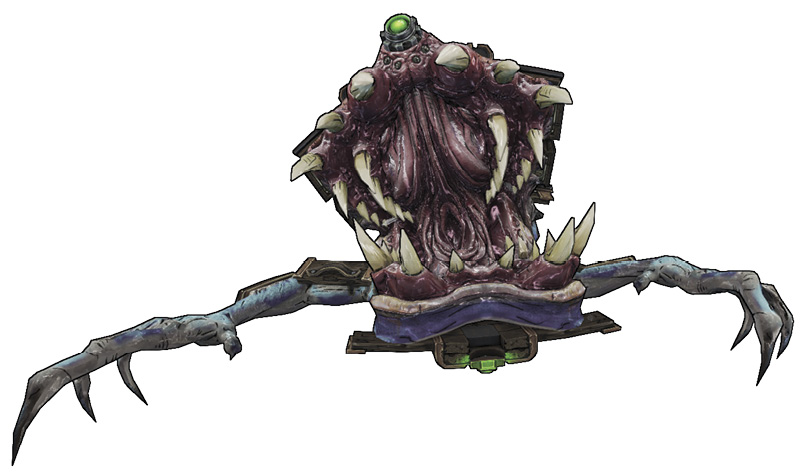
Every now and then, you’ll reach for the lid of a loot chest and—bam! A Mimic is eating your face! Mimics are startling, but they’re not particularly deadly. Grab a shotgun or other close-range weapon, and point it at their eyes for maximum damage. And you’ll still get your loot in the end; they usually drop green or blue rarity items.
| Varieties | TVHM Name | UVHM Name | Health Multiplier | Shield Level | DMG. Multiplier | XP Value | Crit. Areas | Weak/Res. |
|---|---|---|---|---|---|---|---|---|
| Mimic | Greater Mimic | Killer Mimic | 10 | — | 2.75 | Normal | Eye |  /— /— |
Locations: Hatred’s Shadow, Dragon Keep, The Forest, Immortal Woods, Lair of Infinite Agony, Winged Storm (Raid), Mines of Avarice