
Borderlands 2 Game of the Year Guide Hyperion's Most Wanted
Maya
AS THE SIREN
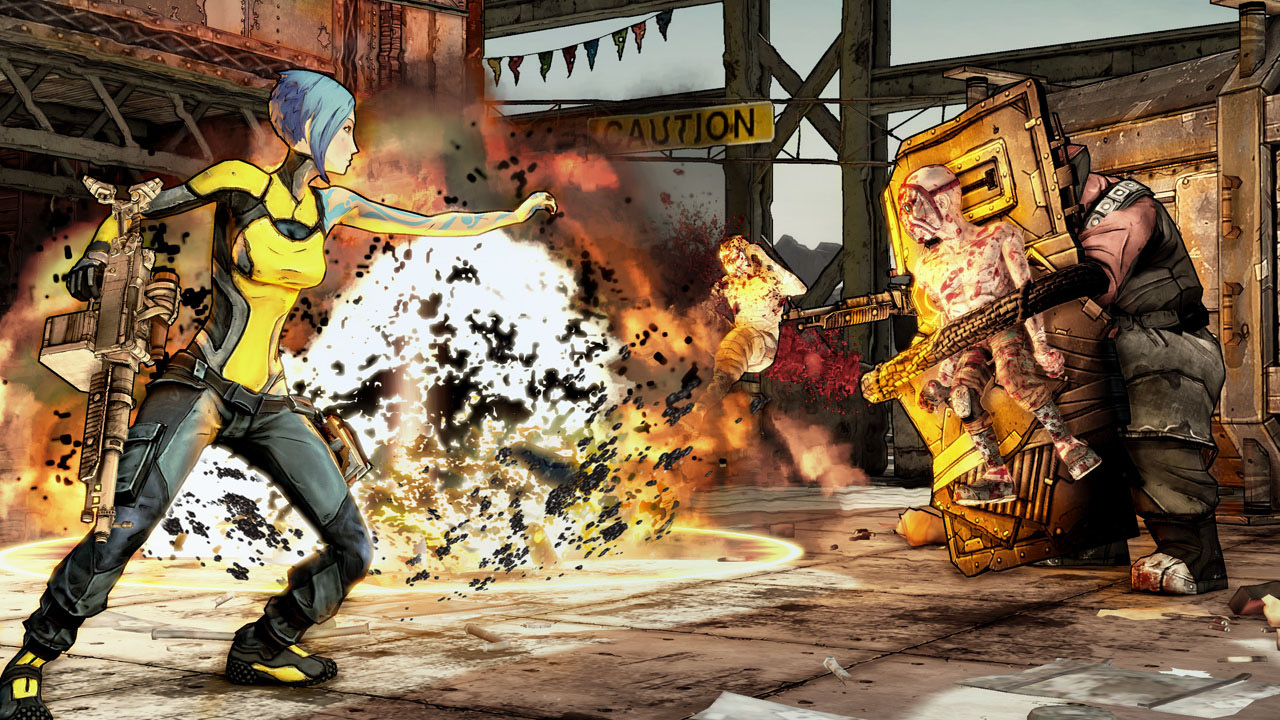
A Siren? Really? What is it with Sirens and Vault Hunting? Anyway, this one, Maya, hails from the lush, verdant world of Athenas, where the ignorant locals worshipped her like a goddess. All this adoration came at the price of severe boredom, and she rebelled against the monastic order that sheltered her. This “disagreement” ended when she shot the head monk straight in the face. Ouch. So now Maya’s on Pandora looking to understand more about her Siren powers. And melt faces with her mind. And, of course, annoy the crap out of me.
 Action Skill: PHASELOCK
Maya channels her Siren energy into a powerful offensive Action Skill she calls Phaselock. As Sirens’ powers manifest, they take form in a single spell specifically tailored to each individual Siren. Lilith had Phasewalk, Maya has Phaselock, and… you get the picture. Phaselock allows Maya to entrap a single foe in a hyper-dense anomaly of space-time, and then proceed to rend them asunder in a variety of ways that would be cruel and unacceptable to normal, decent people. Inside this little bubble of pain, Maya can assault her enemy with crushing force, all sorts of Elemental damage, and even destroy their mind, turning them into her own little slave.
Maya’s brain, or body, or spirit, or whatever it is that generates power for Sirens has a different interpretation of warping the Phase field. Center a foe in the reticle and activate Phaselock, and Maya beckons at them with her hand outstretched palm-up. As she raises her hand up skyward, so too are they hoisted off the ground and suspended, incapable of motion. An enemy suspended by Phaselock is utterly ineffectual—they can’t resist, break free, counterattack, or defend themselves. They are in stasis, totally vulnerable to anything you choose to do. You can use Phaselock to remove the toughest enemy from the battlefield so you can focus on underlings without worry of the biggest baddy stomping on you, or you can Phaselock the toughest target so you can pepper away at them without any fear of reprisal until they drop free of Phaselock.
Skills can modify Phaselock in several ways, from adding the Singularity function of grenades with Converge, to lighting on fire the Phaselock target and anyone around him, to several other functions. Phaselock is essentially a customizable instant Longbow Singularity grenade you get to use about four times a minute! It can be tailored to replenish health, to buff Maya for its duration, to control crowds, to deal scalding status effect damage, and finally to control crowds while dealing scalding status effect damage. And by adding the Res skill, it also turns Maya into the default white mage for the party, giving her the ability to revive downed friends from far away.
Phaselock has the shortest cooldown of any Action Skill, recharging in only 13 seconds. Of course, you can shrink this lower still through equipment and skills. Phaselock hits diminishing returns if you reapply it to the same target, but this should only become an issue against Super Badasses or better; few other things can last that long, if you’re actually trying to kill them. But some targets are too bulky or powerful to lift with Phaselock. You cannot, for example, Phaselock and lift a Hyperion Constructor. Instead, the few hostiles stout enough to avoid being constricted take really heavy damage all at once. And that’s it; Phaselock is just over. If you have skills like Helios and Ruin, those area-of-effect explosive splashes still happen, centered around where Phaselock struck. (This means that Phaselock can remain incredibly potent even in situations where it can hardly lift anything, like against very serious thresher swarms.) But there’s no suspension period or anything, and cooldown restarts right away.
Motion
Motion is a tree that allows you to basically redesign Maya’s Phaselock, if you choose. In the first tier, it just offers general combat upgrades; slow to start, but Ward can be a big help keeping Maya alive, and if that’s not a concern, then increased bullet damage and speed never hurt, right? (Well, the target is hurt.)Motion also includes two kill skills and another for depleted shields, designed for survivability. The rest of it is given over to extending or altering Phaselock. Converge, like all Maya’s one-point-wonder skills, is a completely appealing skill that turns Phaselock into a Singularity grenade also. Virtually the only reason not to have this is if you’re insistent upon building to Res and Ruin in co-op play, which also precludes getting Converge. Quicken and Suspension together will increase Phaselock length and shorten its cooldown; being able to have Phaselock active more and more of the time amplifies the bonus you’ll get if you also build to the Wreck, Elated, and Chain Reaction skills.
Sub-Sequence sets up a curious possibility: maxed out, this guarantees that if Phaselock has duration left when a monster dies, it will seek out another target. This means you can get more than one Harmony tree Sweet Release reward per Phaselock cast! Let’s say the entire team is in bad shape against a varkid swarm. Adults and Badasses are the reasons you’re in trouble, but there happen to be a ton of weak Larval Varkids around, too. Phaselock a weak one on purpose, kill it immediately… Phaselock swaps to another weak varkid, which you also kill immediately… and it swaps again, and you get yet another kill… and so on, and before you now it your whole team is rocking full health almost from nowhere! And Thoughtlock speaks for itself. While Thoughtlock still serves the primary purpose of crowd control and mild general damage to an area, it accomplishes these things in a totally different way than conventional Phaselock.
TIER 1
 Ward
Ward
Improves your Shield Capacity and Shield Recharge Delay.
|
Level 1 |
Shield Capacity: +5%, Shield Recharge Delay: -8% |
|
Level 2 |
Shield Capacity: +10%, Shield Recharge Delay: -16% |
|
Level 3 |
Shield Capacity: +15%, Shield Recharge Delay: -24% |
|
Level 4 |
Shield Capacity: +20%, Shield Recharge Delay: -32% |
|
Level 5 |
Shield Capacity: +25%, Shield Recharge Delay: -40% |
 Accelerate
Increases Damage and Bullet Speed with all gun types.
|
Level 1 |
Gun Damage: +3%, Bullet Speed: +4% |
|
Level 2 |
Gun Damage: +6%, Bullet Speed: +8% |
|
Level 3 |
Gun Damage: +9%, Bullet Speed: +12% |
|
Level 4 |
Gun Damage: +12%, Bullet Speed: +16% |
|
Level 5 |
Gun Damage: +15%, Bullet Speed: +20% |
TIER 2
 Suspension
Increases the duration of Phaselock.
|
Level 1 |
Phaselock duration: +0.5 seconds |
|
Level 2 |
Phaselock duration: +1.0 seconds |
|
Level 3 |
Phaselock duration: +1.5 seconds |
|
Level 4 |
Phaselock duration: +2.0 seconds |
|
Level 5 |
Phaselock duration: +2.5 seconds |
 Kinetic Reflection
Kill skill. After killing an adversary, you gain the ability to deflect enemy bullets, sending them flying toward nearby foes. You take reduced damage from deflected bullets. Kinetic Reflection only works with bullets. This effect lasts for a short time.
|
Level 1 |
Deflection Chance: 100%, Dmg. Reduction: 10%, Deflected Bullet Dmg.: 20% |
|
Level 2 |
Deflection Chance: 100%, Dmg. Reduction: 20%, Deflected Bullet Dmg.: 40% |
|
Level 3 |
Deflection Chance: 100%, Dmg. Reduction: 30%, Deflected Bullet Dmg.: 60% |
|
Level 4 |
Deflection Chance: 100%, Dmg. Reduction: 40%, Deflected Bullet Dmg.: 80% |
|
Level 5 |
Deflection Chance: 100%, Dmg. Reduction: 50%, Deflected Bullet Dmg.: 100% |
TIER 3
 Fleet
Fleet
You Movement Speed increases while your shields are depleted.
|
Level 1 |
Movement Speed: +10% |
|
Level 2 |
Movement Speed: +20% |
|
Level 3 |
Movement Speed: +30% |
|
Level 4 |
Movement Speed: +40% |
|
Level 5 |
Movement Speed: +50% |
 Converge
Action Skill augmentation. Your Phaselock ability now also pulls nearby enemies toward the original target. This deals a small amount of damage to the affected foes.
|
Level 1 |
“Gather thine enemies together that thou mayest blow them to tiny bits.” |
 Inertia
Kill skill. Killing an enemy causes your shields to quickly regenerate and increases your Reload Speed for a few seconds.
|
Level 1 |
Regenerates 0.8% of your shield per second. Reload Speed: +10% |
|
Level 2 |
Regenerates 1.6% of your shield per second. Reload Speed: +20% |
|
Level 3 |
Regenerates 2.4% of your shield per second. Reload Speed: +30% |
|
Level 4 |
Regenerates 3.2% of your shield per second. Reload Speed: +40% |
|
Level 5 |
Regenerates 4.0% of your shield per second. Reload Speed: +50% |
TIER 4
 Quicken
Increases the Cooldown Rate of your Phaselock ability.
|
Level 1 |
Phaselock Cooldown Rate: +6% |
|
Level 2 |
Phaselock Cooldown Rate: +12% |
|
Level 3 |
Phaselock Cooldown Rate: +18% |
|
Level 4 |
Phaselock Cooldown Rate: +24% |
|
Level 5 |
Phaselock Cooldown Rate: +30% |
TIER 5
 Sub-Sequence
Action Skill augmentation. When an enemy under the effects of your Phaselock dies, there is a chance for your Phaselock ability to seek out and affect another target.
|
Level 1 |
Chance to Phaselock another target: 20% |
|
Level 2 |
Chance to Phaselock another target: 40% |
|
Level 3 |
Chance to Phaselock another target: 60% |
|
Level 4 |
Chance to Phaselock another target: 80% |
|
Level 5 |
Chance to Phaselock another target: 100% |
TIER 6
 Thoughtlock
Action Skill alteration. Phaselock causes enemies to turn on their friends instead of being locked down. Additionally, Phaselock’s Duration is increased, but so is its Cooldown.
|
Level 1 |
+100% more enemy-on-enemy combat. Phaselock Duration: +4 seconds, Phaselock Cooldown: +3 seconds |
Harmony
In Harmony, we see Maya become a partial spiritual successor to Roland, as the Vault Hunter best able to build to be a real medic for both herself and the others. That doesn’t mean Maya can’t also kick ass—for raw damage to groups of targets, Maya’s Cataclysm tree cannot be beat, and that’s something no other character does really well innately. But for teamwork and getting out of binds in co-op, it’s hard to argue with having multiple ways to heal friends and being capable of remotely raising them! The impact of remote revives with Res is obvious, but Restoration in particular can also force a rethink of how you play. If a Zero or Salvador on your team is mucking it up right in the grills of some baddies, you can switch to a weapon with lots of splash damage, like a rocket launcher or any Torgue-barreled gun, to completely turn the tables in your teammates’ favor —healing them up while blasting their aggressors to bits.
Other skills are primarily tailored to keeping Maya herself filled with all that good red blood, but if you’re looking to boost shield ability also, you’ll have to look in the Motion tree. The capstone is a bit from left field, but it’s a delightful and unique addition to Maya’s potential arsenal. To some degree, every character can actually be many characters through skills, but only Maya gets to essentially be three mage characters who are totally different!
It’s worth noting that thanks to the odd confluence of health-related survival skills here paired with a capstone that alters the melee function, Maya can be made into a kind of flaming glass cannon Zero… the Orb of Slag itself is wide and slow enough to actually make a good melee range tool, which happens to inflict Slag. There are shields to be found that trigger tremendous melee bonuses but only when shields are depleted, and here there are several skills strictly devoted to health regen, none to improving shields. There are, of course, bladed weapons that will always improve melee damage and Relics to improve it further still. And then halfway down the Cataclysm tree, you’ll find Backdraft, enhancing melee and causing powerful Helios-like fire blasts whenever your shield is depleted! And that’s not mentioning that as you’re swinging away with whatever buffs you bring along, you’ll still have Phaselock. Sirens!
TIER 1
 Mind’s Eye
Increases Critical Hit Damage and Melee Damage.
|
Level 1 |
Critical Hit Damage: +5%, Melee Damage: +6% |
|
Level 2 |
Critical Hit Damage: +10%, Melee Damage: +12% |
|
Level 3 |
Critical Hit Damage: +15%, Melee Damage: +18% |
|
Level 4 |
Critical Hit Damage: +20%, Melee Damage: +24% |
|
Level 5 |
Critical Hit Damage: +25%, Melee Damage: +30% |
 Sweet Release
If the enemy you have Phaselocked is killed, it generates Life Orbs that automatically seek out and heal you and your friends. The healing is stronger when you or your friend’s health is low.
|
Level 1 |
Life Orbs created: 1, Each Life Orb restores up to 15% of your health |
|
Level 2 |
Life Orbs created: 2, Each Life Orb restores up to 15% of your health |
|
Level 3 |
Life Orbs created: 3, Each Life Orb restores up to 15% of your health |
|
Level 4 |
Life Orbs created: 4, Each Life Orb restores up to 15% of your health |
|
Level 5 |
Life Orbs created: 5, Each Life Orb restores up to 15% of your health |
TIER 2
 Restoration
Shooting other players heals them. Also increases your Maximum Health.
|
Level 1 |
Maximum Health: +3%, Converts 6% of your damage into healing |
|
Level 2 |
Maximum Health: +6%, Converts 12% of your damage into healing |
|
Level 3 |
Maximum Health: +9%, Converts 18% of your damage into healing |
|
Level 4 |
Maximum Health: +12%, Converts 24% of your damage into healing |
|
Level 5 |
Maximum Health: +15%, Converts 30% of your damage into healing |
 Wreck
Wreck
While you have an enemy Phaselocked, you gain increased Fire Rate and Damage with all gun types.
|
Level 1 |
Fire Rate: +10%, Damage: +6% |
|
Level 2 |
Fire Rate: +20%, Damage: +12% |
|
Level 3 |
Fire Rate: +30%, Damage: +18% |
|
Level 4 |
Fire Rate: +40%, Damage: +24% |
|
Level 5 |
Fire Rate: +50%, Damage: +30% |
TIER 3
 Elated
While you have an enemy Phaselocked, you and your friends regenerate health.
|
Level 1 |
Regenerates 1% of your health per second |
|
Level 2 |
Regenerates 2% of your health per second |
|
Level 3 |
Regenerates 3% of your health per second |
|
Level 4 |
Regenerates 4% of your health per second |
|
Level 5 |
Regenerates 5% of your health per second |
 Res
Res
You can instantly revive a friend in Fight For Your Life by using Phaselock on him/her.
|
Level 1 |
“Rise from your grave.” |
 Recompense
When you take Health Damage, there is a chance that your attacker takes damage equal to the amount of health you lost.
|
Level 1 |
10% chance to hurt your attacker |
|
Level 2 |
20% chance to hurt your attacker |
|
Level 3 |
30% chance to hurt your attacker |
|
Level 4 |
40% chance to hurt your attacker |
|
Level 5 |
50% chance to hurt your attacker |
TIER 4
 Sustenance
You constantly regenerate health. The lower your current health, the more powerful the regeneration.
|
Level 1 |
Regenerate up to 0.4% of the health you are missing every second |
|
Level 2 |
Regenerate up to 0.8% of the health you are missing every second |
|
Level 3 |
Regenerate up to 1.2% of the health you are missing every second |
|
Level 4 |
Regenerate up to 1.6% of the health you are missing every second |
|
Level 5 |
Regenerate up to 2.0% of the health you are missing every second |
TIER 5
 Life Tap
Kill skill. Killing an enemy causes you to steal health from any adversary you damage. This effect lasts for a short while.
|
Level 1 |
Life Steal: +1.2% |
|
Level 2 |
Life Steal: +2.4% |
|
Level 3 |
Life Steal: +3.6% |
|
Level 4 |
Life Steal: +4.8% |
|
Level 5 |
Life Steal: +6.0% |
TIER 6
 Scorn
Scorn
Melee override skill. Press (Melee Button) to throw an Orb of Slag that constantly damages enemies near it. This ability has a cooldown. Pressing (Melee Button) when Scorn is on cooldown performs a regular melee attack.
|
Level 1 |
Scorn Cooldown: 18 seconds |
Cataclysm
Most of the enemies in the game will take the most damage if you properly match up either Fire or Corrosive weapons to their weakness. And other Vault Hunters have to mostly rely on Maliwan weapons, or other guns with Elemental tech capacitors in them in order to grab this advantage. Maya’s Cataclysm tree, on the other hand, is riddled with skills that make Maya paint Elemental damage all over everything just by being around, basically. You won’t even have to think about it—in the normal course of hitting high-value enemies with Phaselock and then just generally shooting everything that moves until the next time Phaselock is ready, you can easily make it so you’re splashing both Fire and Corrosion on just about any target, covering all bases and often inflicting both effects… And if you cap off the category, you’ll be able to put every status effect on every target the party encounters without even breaking a sweat—with Ruin, Phaselock becomes your one-stop shop for all the damage.
Cataclysm also contains the sneaky-good Reaper skill, which can greatly increase Maya’s gun damage against any target with over 50% life remaining. It cannot be overstated how effectively this jives with teammates… you can focus on just whittling down at the first half of any given enemy, hopefully leaving them Slagged, burning, corroding, etc., and then you can move on the next target, satisfied your teammates can finish what you started. This can be especially deadly paired with a melee-happy Zero and his Killing Blow skill, which grants increased melee damage against low-health enemies. You won’t want to select any kill skills—you won’t be killing anything—but friendly XP is shared anyway, so don’t sweat it.
TIER 1
 Flicker
Increases your chance to cause status effects with Fire, Shock, Corrosive, and Slag guns.
|
Level 1 |
6% more likely to cause elemental effects with guns |
|
Level 2 |
12% more likely to cause elemental effects with guns |
|
Level 3 |
18% more likely to cause elemental effects with guns |
|
Level 4 |
24% more likely to cause elemental effects with guns |
|
Level 5 |
30% more likely to cause elemental effects with guns |
 Foresight
Increases Magazine Size and Reload Speed with all weapon types.
|
Level 1 |
Magazine Size: +4%, Reload Speed: +5% |
|
Level 2 |
Magazine Size: +8%, Reload Speed: +10% |
|
Level 3 |
Magazine Size: +12%, Reload Speed: +15% |
|
Level 4 |
Magazine Size: +16%, Reload Speed: +20% |
|
Level 5 |
Magazine Size: +20%, Reload Speed: +25% |
TIER 2
 Immolate
Adds Fire Damage to all shots fired while in Fight For Your Life. The additional Fire Damage is based on the Damage of the weapon you’re firing.
|
Level 1 |
Deal +10% Damage as Fire Damage |
|
Level 2 |
Deal +20% Damage as Fire Damage |
|
Level 3 |
Deal +30% Damage as Fire Damage |
|
Level 4 |
Deal +40% Damage as Fire Damage |
|
Level 5 |
Deal +50% Damage as Fire Damage |
 Helios
Phaselocking an enemy causes a fiery explosion, damaging all nearby enemies.
|
Level 1 |
Helios Damage: Rank 1 |
|
Level 2 |
Helios Damage: Rank 2 |
|
Level 3 |
Helios Damage: Rank 3 |
|
Level 4 |
Helios Damage: Rank 4 |
|
Level 5 |
Helios Damage: Rank 5 |
TIER 3
 Chain Reaction
While you have an enemy Phaselocked, all of your shots that hit enemies have a chance to ricochet and hit another nearby adversary. Chain Reaction only works with bullets.
|
Level 1 |
Ricochet chance: 8% |
|
Level 2 |
Ricochet chance: 16% |
|
Level 3 |
Ricochet chance: 24% |
|
Level 4 |
Ricochet chance: 32% |
|
Level 5 |
Ricochet chance: 40% |
 Cloud Kill
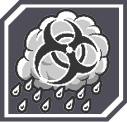
Shooting an enemy creates a lingering acid cloud, dealing constant Corrosive Damage to adversaries that touch it. Only one acid cloud can be active at a time.
|
Level 1 |
Cloud Kill Duration: 5 seconds |
 Backdraft
Your melee attacks deal additional Fire Damage. Also, when your shields become depleted, you create a fiery explosion, damaging nearby enemies. Your shields must fully recharge between explosions.
|
Level 1 |
Backdraft Damage: Rank 1 |
|
Level 2 |
Backdraft Damage: Rank 2 |
|
Level 3 |
Backdraft Damage: Rank 3 |
|
Level 4 |
Backdraft Damage: Rank 4 |
|
Level 5 |
Backdraft Damage: Rank 5 |
TIER 4
 Reaper
You deal increased Gun Damage to any enemy that has more than 50% of its health remaining.
|
Level 1 |
Gun Damage: +8% |
|
Level 2 |
Gun Damage: +16% |
|
Level 3 |
Gun Damage: +24% |
|
Level 4 |
Gun Damage: +32% |
|
Level 5 |
Gun Damage: +40% |
TIER 5
 Blight Phoenix
Kill skill. Killing an enemy causes you to deal constant Fire and Corrosive Damage to nearby adversaries for a short time. The damage is based on your level and the level of Blight Phoenix.
|
Level 1 |
Damage Level 1 |
|
Level 2 |
Damage Level 2 |
|
Level 3 |
Damage Level 3 |
|
Level 4 |
Damage Level 4 |
|
Level 5 |
Damage Level 5 |
TIER 6
 Ruin
Ruin
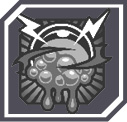
Action Skill augmentation. Phaselock now Slags, Electrocutes, and Corrodes all nearby enemies.
|
Level 1 |
“Ignorance and inconsideration may be greater causes of ruin, but they are slow and lacking in spectacle.” |
Solo Play
In solo play, there’s not much incentive for Maya players to work up the Harmony tree very much—although she doesn’t have the raw survivability skills of other characters, you can still slap a Pangolin shield with great recharge speed on Maya, then just regard a broken shield as an absolute red alert to hide for a spell. Rely on Transfusion grenades for health, and perhaps a few points into Sweet Release, especially early on when health pools aren’t too big and you can’t build skills to a razor peak yet, anyway. Later on, you can probably get away without Sweet Release, too, and just build Maya for unabashed chaos—she’s good at it, in case the suite of plagues featured in the Cataclysm tree didn’t clue you in. You won’t be beating raid bosses solo without any survivability skills, but Maya’s innate crowd control and potential group damage—effortless group damage, since so much of it is status effects—means she can eventually wipe out entire dens of enemies before they press her health in the slightest.
If you want to boost your solo survival, then pick up the Immolate skill, which all but guarantees you can easily score Second Wind against any non-armored target. This represents most bandits and most of the first half of the game in general. (In the second half, against more and more Loaders, the usefulness obviously decreases.)
Co-operative Play
Maya experiences perhaps the most radical transformation of priorities in the transition from solo to co-op play. Relatively early on, she can be built down to the Res gamechanger in the Harmony tree, enabling remote revivals on friends. In a team environment, this get-out-of-trouble-free card trumps any kind of extra damage you might inflict with points spent elsewhere. A friend alive and fighting, and without you having to focus on finding the time and safety to revive them manually, is difficult to argue against.
But no matter what, Maya remains a combat medic, a bit of a red mage. After you gear up with Restoration and Res (and perhaps Sweet Release), you can choose to bolster crowd control through the Motion tree, or status effect damage through the Cataclysm tree. Phaselock grouped with Converge, and potentially Thoughtlock, does a great job of taking the attention of several enemies off the entire party for a few moments. And the continual damage of Cataclysm is always appealing. But you can also choose to proceed directly to capping the Harmony tree with Scorn, which allows Maya to take over Slag duty as well as medic responsibilities. (Maya kitted with Res and Ruin can perform Slag duties even more effectively, but that requires a much higher level than simply capping Harmony).