
Borderlands 2 Game of the Year Guide Bestiary
Nomads
Nomads are intimidating freelancers that the rest of the bandits look up to for some reason; it’s not like banditry is a democracy with elected officials who happen to be called nomads, after all. But they’re big, and imposing, and they can assemble sentences one after another much more successfully than goliaths, who mostly struggle just to walk around daintily without losing their minds. Nomads themselves are hateful and reclusive, and end up disdainful of their de facto authority. They’d rather not be bandits, truth be told, but all the other bandits follow them around and obey their orders. So what’s a nomad to do?
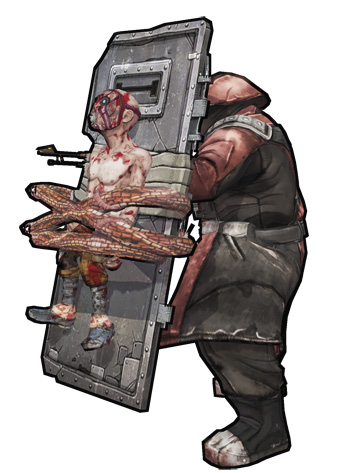
To alleviate the pressure of having to order around all the other idiot bandits, nomads do two things: the first is that they drape themselves head to toe in heavy clothing and coverings, and sometimes go the extra mile with armor plating and actual physical shields; the second is that, when they’re sporting metal shields, they’ll sometimes secure a live Psycho Midget to the front of the shield. Now, is a raving and restrained Psycho Midget going to deter someone from shooting at the armored, violent nomad? Or is the Psycho Midget going to somehow, by imposition of its flesh, add to the bullet sponging power of the much, much harder and sturdier surface upon which it is unfortunately attached? The answer to both of these is “no.” But they make the nomad feel a little better.
In the presence of other bandits, nomads can issue commands that lesser bandits will follow. It’s hard enough getting a psycho to sit still or pay attention, let alone process a sentence, and ditto Raging Goliaths, who have lost all sense of anything except the sense of smashing. But other bandits will listen up when nomads speak.
Their heavy duty outfits weigh nomads down, making them slower than other enemies. Their movement is also restricted, so they don’t take cover. Their weaponry is varied; their arsenal ranges from conventional firearms just like bandits and Vault Hunters, to special shock or fire throwing gear.
Nomad
TVHM name: Nomad Raider
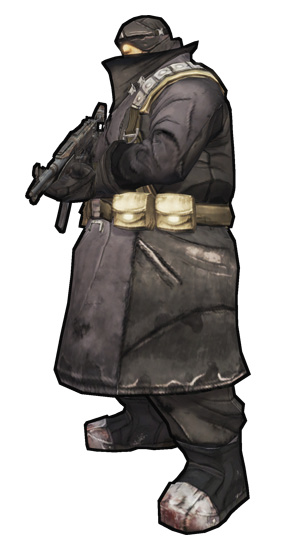
The most basic of the plodding nomads, the regular Nomad attacks with an assault rifle and periodically tosses grenades. Nomads are very heavily clothed, but they’re not actually armored. Other nomad types rely on metal shields to help block damage, but the regular Nomad just relies on its bulk to soak up damage. Fire rounds provide a bonus to impact damage and status effect damage over time.
| Health Multiplier | Shield Level | DMG. Multiplier | XP Value | Crit. Areas | Weak./Res. |
|---|---|---|---|---|---|
| 3 | 0.5 | 4 | Normal | Head |  / — / — |
Location: Three Horns, Frostburn Canyon, Bloodshot Ramparts, Tundra Express, Sawtooth Cauldron
Nomad Taskmaster
TVHM name: Nomad Overlord
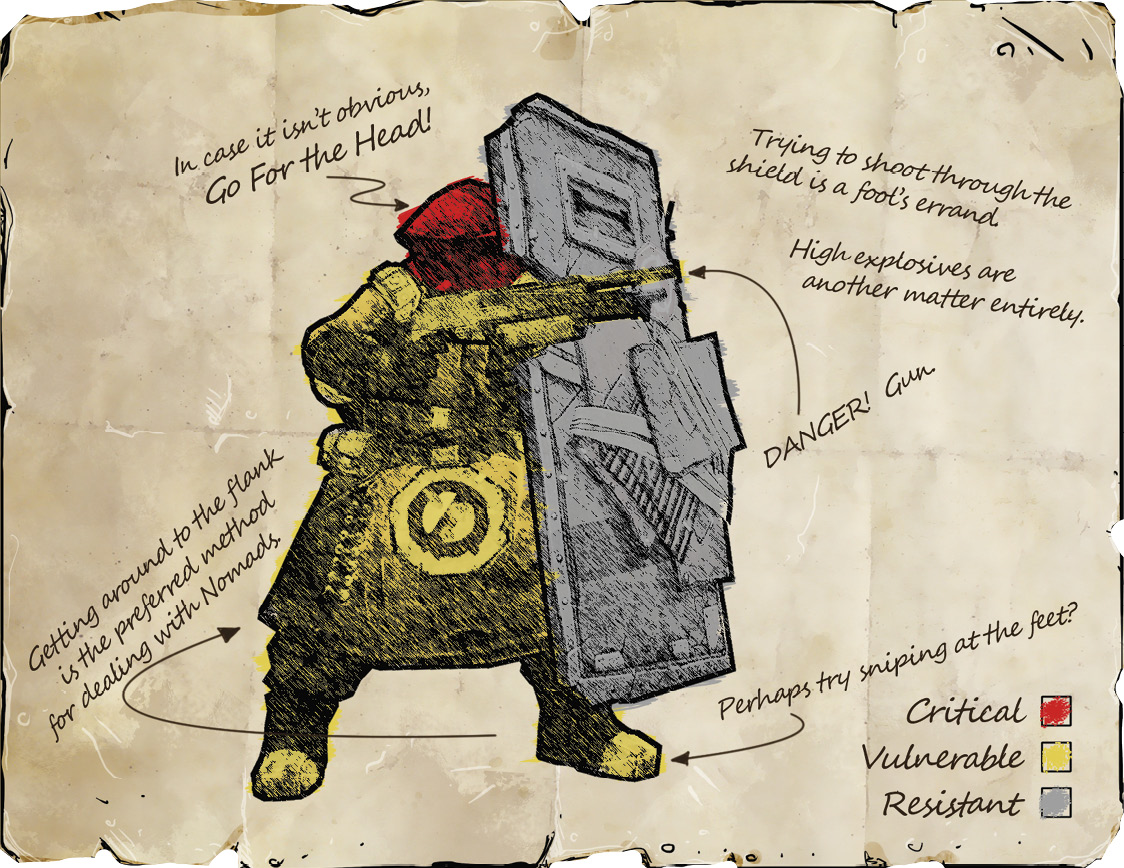
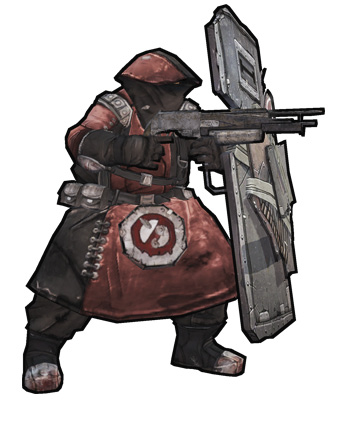
Taskmasters carry metal shields that block and even reflect gunfire back at you. It’s not a matter of damage reduction, like shooting a flesh creature with corrosive rounds, or an armored enemy with fire rounds. Damage simply won’t penetrate. The exception is explosive damage—grenades, rockets, and Torgue gyrojets will deal their damage through nomad shields, thanks to the blast radius of explosions.
Nomad Taskmasters can issue commands to lesser bandits. When he’s not busy drawling commands to all around him, he’ll attack with an assault rifle and grenades. Nomad Taskmasters aren’t quite so deranged yet to outfit their shields with living ornaments, so there are no psychos to free here.
| Health Multiplier | Shield Level | DMG. Multiplier | XP Value | Crit. Areas | Weak./Res. |
|---|---|---|---|---|---|
| 5 | — | 5 | Tough | Head |  / — / — |
Location: Three Horns, Frostburn Canyon, Bloodshot Ramparts, Tundra Express, Sawtooth Cauldron
Nomad Torturer
TVHM name: Nomad Brutalizer
The appropriately-named Nomad Torturer does things just like a Nomad Taskmaster does, with one exception—the Torturer ties psycho midgets to his shield. This is for no real reason except that nomads hate other bandits generally, and psycho midgets in particular. Like the Taskmaster, the Nomad Torturer will issue commands to nearby bandits. Shoot the ropes that bind a psycho midget to the nomad’s shield, and you’ll gain an unlikely ally against the nomad, one who will definitely not be listening to the Nomad Torturer’s orders. This isn’t guaranteed, however—if you’re nearby when you free the midget, they might come after you right away, forgetting about the nomad somehow. This may be like how you’re not supposed to be the first thing a baby rakk sees, or it will think it’s a person.
| Health Multiplier | Shield Level | DMG. Multiplier | XP Value | Crit. Areas | Weak./Res. |
|---|---|---|---|---|---|
| 5 | — | 5 | Tough | Head |  / — / — |
Location:Three Horns, Frostburn Canyon, Bloodshot Ramparts, Tundra Express, Sawtooth Cauldron
Shock-Nomadic
TVHM name: Nomad Storm Master
Some nomads, variations on the regular Nomad trooper, are packing special weapons. The Shock-Nomadic is wielding an assault rifle, but beyond that he’s wearing a wicked arc projector pack! This piece of high tech zaps the shields of enemies that approach the Shock-Nomadic. This nomad also backs this up by tossing Shock grenades, and sometimes using a Shock-capable assault rifle. Shoot the packs they wear to destabilize the arc projectors, causing them to target both friend and foe alike, close to the Shock-Madic. In effect you’ll create a living electrical barrel! Like standard Nomads, this unit won’t command other bandits—these nomad storm troopers leave that to their shield-wielding cousins.
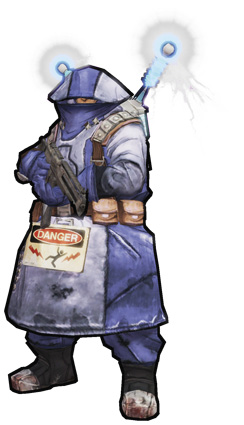
| Health Multiplier | Shield Level | DMG. Multiplier | XP Value | Crit. Areas | Weak./Res. |
|---|---|---|---|---|---|
| 4 | 0.5 | 1 | Normal+ | Head |  / /  |
Location: Three Horns, Frostburn Canyon, Bloodshot Ramparts, Tundra Express, Sawtooth Cauldron
Nomad Pyro
TVHM name: Nomad Immolator
The Nomad Pyro is armed with a flamethrower, which is powered by the fuel pack on his back. The functional range of the flamethrower is low, so outside close range the Nomad Pyro will switch to an assault rifle for distance work. Like the Shock-Madic and regular Nomad, the Nomad Pyro is in the killing business, rather than in the giving-orders business. Also like the Shock-Madic, the Nomad Pyro features a fatal design flaw: the fuel pods for their flamethrowers are basically just explosive gas canisters strapped right to the nomad. Focus your fire on these to detonate them, killing the Nomad Pyro and probably anything near him.
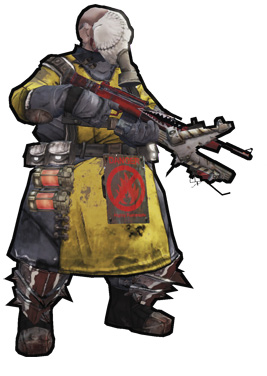
| Health Multiplier | Shield Level | DMG. Multiplier | XP Value | Crit. Areas | Weak./Res. |
|---|---|---|---|---|---|
| 5 | 0.25 | 1 | Normal+ | Head | — /  |
Location: Frostburn Canyon
Nomad Midget
(TVHM ONLY)
Like Midget Goliaths, Nomad Midgets don’t give up as much by being midgets as do psychos and marauders. The Nomad Midget has respectable enough health and damage to make you have to plan around it, at least much more than against Psycho Midgets and such. Nomad Midgets only show up during True Vault Hunter Mode.
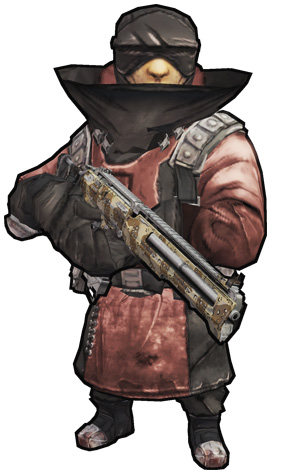
| Health Multiplier | Shield Level | DMG. Multiplier | XP Value | Crit. Areas | Weak./Res. |
|---|---|---|---|---|---|
| 2.5 | 1 | 1.5 | Normal+ | Head |  / — / — |
Location: Three Horns, Frostburn Canyon, Bloodshot Ramparts, Tundra Express, Sawtooth Cauldron
Heavy Nomad
(TVHM ONLY)
Heavy Nomads are found only during True Vault Hunter Mode, and you’ll be thankful for that. These guys are another shock trooper type, like Nomads and Shock-Madics—instead of ordering around bandits, Heavy Nomads simply attack. The scary thing is that they’re going to attack with rocket launchers. Yup, as if Goliath Blasters weren’t a dangerous enough rocket launcher-toting enemy to add in TVHM, here’s another one. Be very careful when a Heavy Nomad is on the scene, keeping cover between you and the nomad if you’re not ready to focus your attack on him yet.
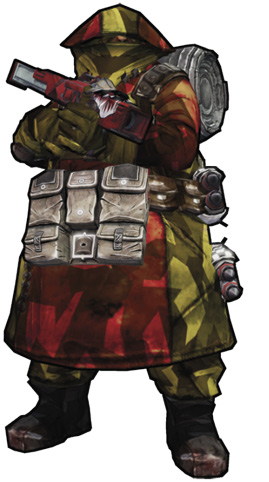
| Health Multiplier | Shield Level | DMG. Multiplier | XP Value | Crit. Areas | Weak./Res. |
|---|---|---|---|---|---|
| 8.5 | 1 | 6 | Normal+ | Head |  / /  |
Location: Three Horns, Frostburn Canyon, Bloodshot Ramparts, Tundra Express, Sawtooth Cauldron
Badass Nomad
TVHM name: Super Badass Nomad Brutalizer
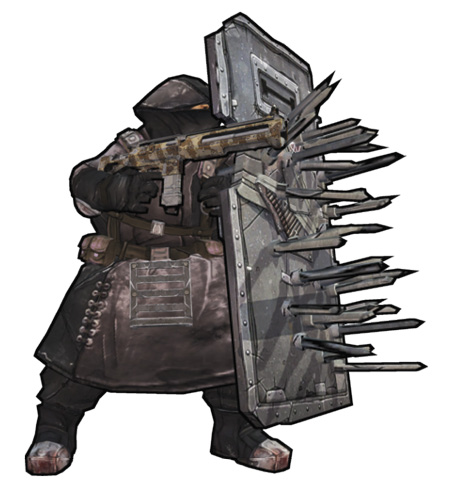
The Badass Nomad decks his shield out in a much more useful accoutrement than a Psycho Midget—this shield is covered in spikes! Badass Nomads are therefore the most aggressive of nomads, as they’ll edge toward their target to try to run them into the spikes. Needless to say, you don’t want to let these guys near you.
| Health Multiplier | Shield Level | DMG. Multiplier | XP Value | Crit. Areas | Weak./Res. |
|---|---|---|---|---|---|
| 10 | — | 6 | Badass | Head |  / — / — |
Location: Three Horns, Frostburn Canyon, Bloodshot Ramparts, Tundra Express, Sawtooth Cauldron
Loot Midget Nomad
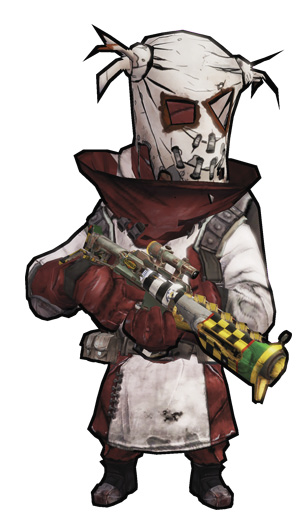
Like other loot midgets, Loot Midget Nomads wait, poised within some loot containers, ready to pop out and attack Vault Hunter passersby. These diminutive Badasses are not to be trifled with.
| Health Multiplier | Shield Level | DMG. Multiplier | XP Value | Crit. Areas | Weak./Res. |
|---|---|---|---|---|---|
| 12 | — | 4 | Tough+ | Head |  / — / — |
Location: Loot containers
Captain Flynt
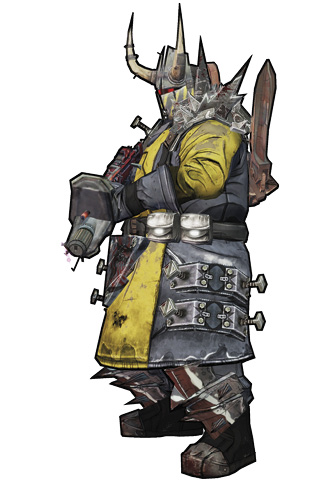
The game’s third boss, who lords over local bandits in the vicinity of Southern Shelf and Liar’s Burg. Your first major order of business, once you get Claptrap fixed up, is to depose his rule. The ship’s deck upon which you fight Captain Flynt is fretted with exhaust flaps that vent fire from within the ship, and Flynt himself is also capable of producing fiery attacks at close range. Stay away from these vents, and Flynt himself, to avoid getting burnt up by cumulative fire damage.
When Flynt dies, he always drops Flynt’s Tinderbox, a unique fire weapon and potentially your first elemental weapon of the game, unless you looted a Maliwan on the way to Flynt. And, like most named and unique enemies, he also has a chance to drop a very rare prize.
| Health Multiplier | Shield Level | DMG. Multiplier | XP Value | Crit. Areas | Weak./Res. |
|---|---|---|---|---|---|
| 18 | TVHM: 1 | 2.5 | Super Badass | Head | — /  |
Location: Southern Shelf
Doc Mercy
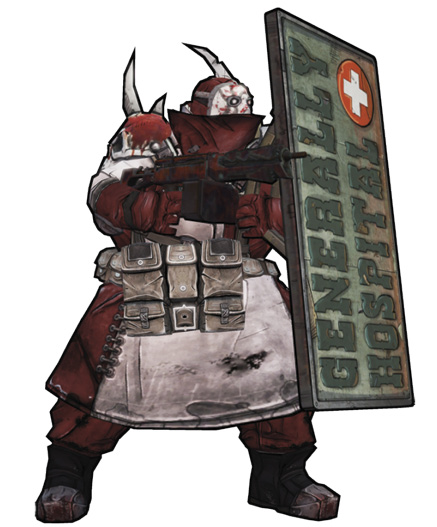
Almost certainly your first exposure to ancient Eridian tech will be during Zed’s optional mission “Medical Mystery.” It turns out the wounds Zed is so interested in are created by weapons outfitted with alien barrels… one of which Doc Mercy happens to carry. You’ll have to kill him to take it. Naturally, he’s using it, so watch out. The follow-up mission, “Medical Mystery: X-COM-municate” requires the use of this weapon for a bit of bandit killing.
| Health Multiplier | Shield Level | DMG. Multiplier | XP Value | Crit. Areas | Weak./Res. |
|---|---|---|---|---|---|
| 15 | 1 | 5 | Super Badass | Head |  / — / — |
Location: Three Horns - Valley, mission: “Medical Mystery”
Assassin Oney
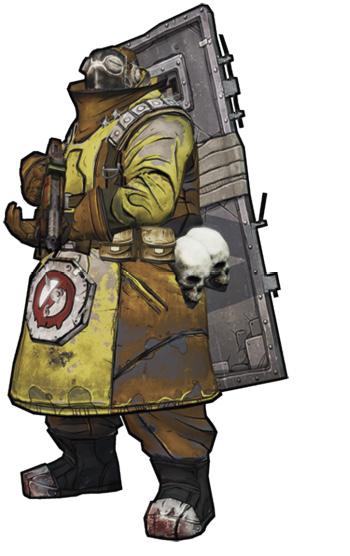
The third out of four hitmen you must eliminate during an optional mission. Like several nomads, Assassin Oney has an incredible health pool. When he dies, he has a good chance to drop a unique weapon.
| Health Multiplier | Shield Level | DMG. Multiplier | XP Value | Crit. Areas | Weak./Res. |
|---|---|---|---|---|---|
| 19 | 1 | 5 | Super Badass | Head |  / — / — |
Location: Southpaw Steam & Power, mission “Assassinate the Assassins”
Bad Maw
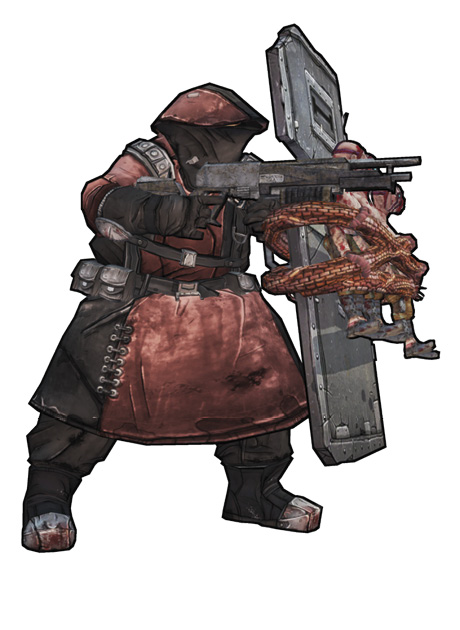
Bad Maw is a Nomad Torturer on steroids, a lunatic dead-set on proving his disdain for Psycho Midgets. To this end, he’s affixed to the front of his shield not one, not two, but three hapless Psycho Midgets. He and his three “friends” guard the entrance to Bloodshot Stronghold in Three Horns.
| Health Multiplier | Shield Level | DMG. Multiplier | XP Value | Crit. Areas | Weak./Res. |
|---|---|---|---|---|---|
| 18 | — | 4 | Super Badass | Head |  / — / — |
Location: Three Horns Valley
Mad Mike
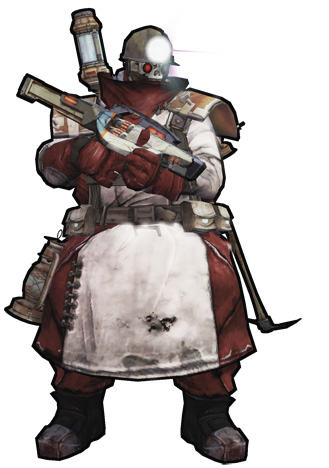
One of the main enforcers in Bloodshot Stronghold, Mad Mike is the Badass version of a Heavy Nomad. He’ll fire from afar with a rocket launcher, and if you’re not careful you’ll find yourself dead or dying very unexpectedly.
| Health Multiplier | Shield Level | DMG. Multiplier | XP Value | Crit. Areas | Weak./Res. |
|---|---|---|---|---|---|
| 16 | 1 | 6 | Super Badass | Head |  / — / — |
Location: Bloodshot Stronghold
Ambush Commander
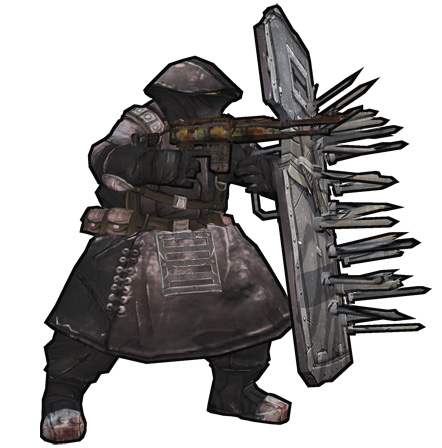
Mortar’s ambush staff inside Sawtooth Cauldron provides a fierce challenge, against one of the least friendly backdrops on all of Pandora. Like Badass Nomads, the Ambush Commander has spikes on the front of his shield, and he’ll approach foes with the intent of spearing them.
| Health Multiplier | Shield Level | DMG. Multiplier | XP Value | Crit. Areas | Weak./Res. |
|---|---|---|---|---|---|
| 10 | — | 6 | Badass | Head |  / — / — |
Location: Sawtooth Cauldron, mission: “Toil and Trouble”
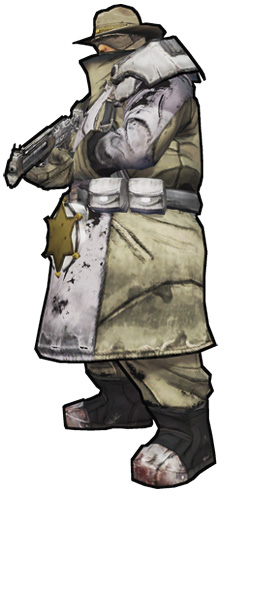
Deputy Winger
The loyal right hand of the Sheriff of Lynchwood. Your fight is not with this nomad, so if you can complete “Showdown” without shooting Deputy Winger you’ll complete an optional objective.
| Health Multiplier | Shield Level | DMG. Multiplier | XP Value | Crit. Areas | Weak./Res. |
|---|---|---|---|---|---|
| 2 | — | 1 | Badass | Head |  / — / — |
Location: Lynchwood, mission: “Showdown”
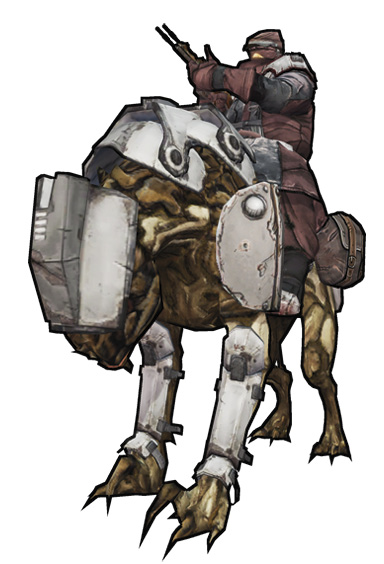
Sheriff’s Posse
This skag and its rider are quite a sci-fi reimagining of the wild west. The rider’s vulnerable point is the head, as is true of any humanoid. The skag’s weak point is inside its mouth, which is exposed mainly when the beast roars.
| Health Multiplier | Shield Level | DMG. Multiplier | XP Value | Crit. Areas | Weak./Res. |
|---|---|---|---|---|---|
| 5 | — | 2 | Badass | Mouth |  / — / — |
Location: Lynchwood
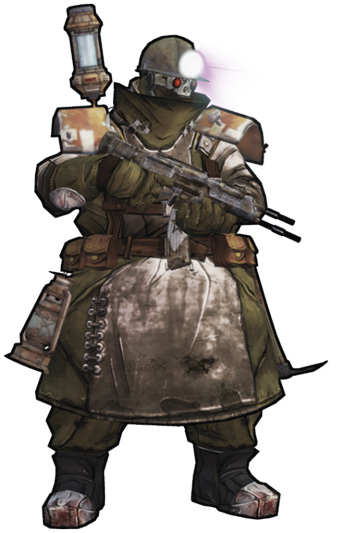
Prospector Zeke
This is the nomad running the Eridium mining operation in Tundra Express. During the mission “Mine, All Mine” you’ll have to go ask him some questions. Questions like, “Can you hold these bullets for me? I’m going to give them over by firing them into you.”
| Health Multiplier | Shield Level | DMG. Multiplier | XP Value | Crit. Areas | Weak./Res. |
|---|---|---|---|---|---|
| 16 | 1 | 6 | Super Badass | Head |  / — / — |
Location: Tundra Express, mission: “Mine, All Mine”