
Borderlands 2 Game of the Year Guide Bestiary
Bullymongs
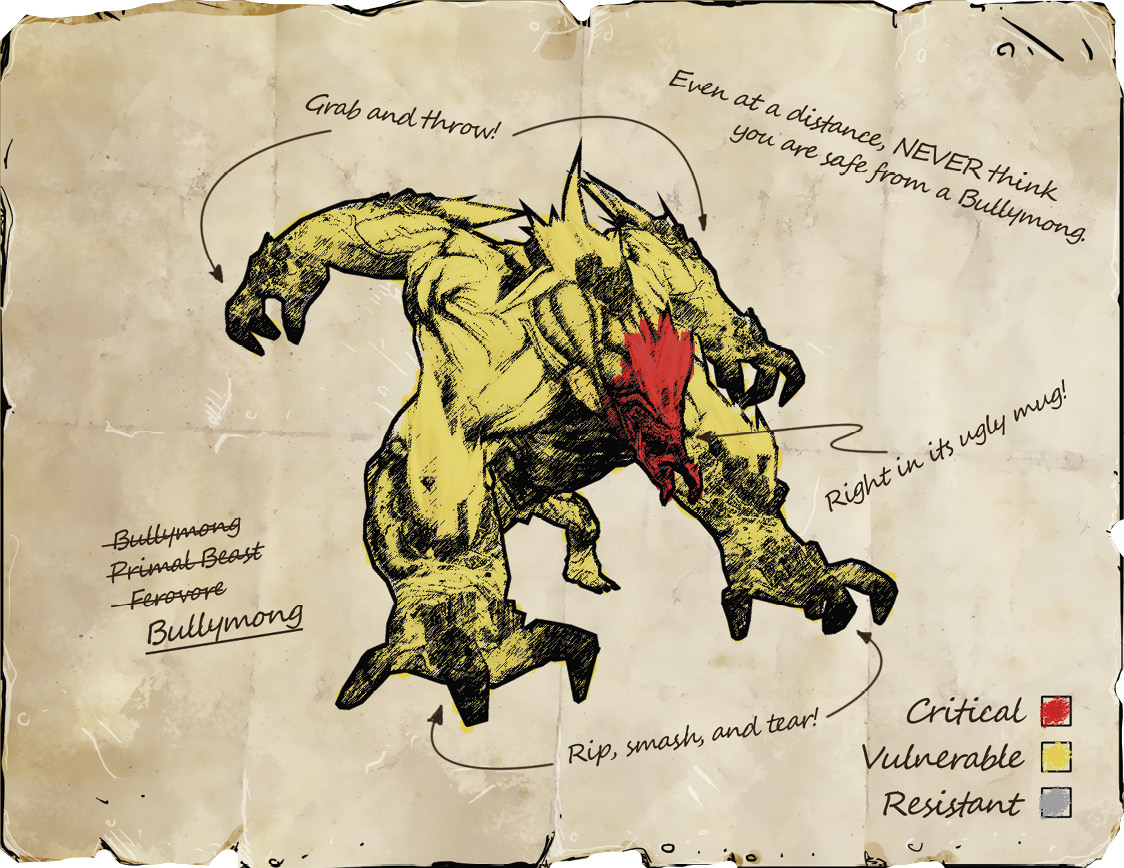
With opposable thumbs, possible bipedal movement, and a vibrant (if abusive) social structure, bullymongs represent one of the high points of Pandoran evolution. This still isn’t very encouraging. These somewhat intelligent, freakishly strong creatures have developed some higher cognitive function, but it isn’t enough for calculus more difficult than “Can I throw this thing at this other thing?” and “Can I dodge that thing being thrown at me?” Those are actually pretty advanced problems for a lifeform to solve, but a bullymong still isn’t going to be tutoring anyone through their trigonometry homework (even if they intuitively understand parabolas). And that’s just fine because you will be working out your difference with them via violence rather than rational conversation. These brutish four-armed arctic space gorillas chuck everything from rocks and barrels to cars; so of course it’s going to be violent.
Bullymongs can move by running, charging, and by propelling themselves in great parabolic leaps. Their leaping ability means you won’t find a spot that’s safe from them; if they’re aware of you, they’ll make it to you somehow. Bullymongs can leap and charge to attack up close, or they may hurl projectiles from far away. Smaller projectiles can be shot from the air, and doing so actually earns progress toward a Challenge. Large projectiles like cars and huge boulders cannot be destroyed, so get out of the way!
With one rare exception, all creatures in the bullymong family are vulnerable to fire. The head of a bullymong is the weak spot—yup, that tiny head. Bullymongs in general have large health pools, and require a lot of punishment to bring down. At low health bullymongs become severely injured, capable only of crawling and swiping with melee attacks.
You get a rapid introduction to bullymongs on Pandora—they tend to make their homes in colder climes, and your adventure starts out in the icy expanse of Windshear Waste. Bullymongs are the first wild beast you run into, and Knuckle Dragger, the local alpha among bullymongs, is the first boss you fight.
You might notice that, like goliaths, bullymongs have broad, spacious shoulders framing an extraordinarily tiny head. And, also like goliaths, bullymongs are pretty darn stupid. This might lead you to believe that, like goliaths, you may even see psycho bandits attempt to straddle a bullymong in order to control them through subtle yanks of their hair, like a Pandoran horse. Well, yeah. You might just see that.
Monglet
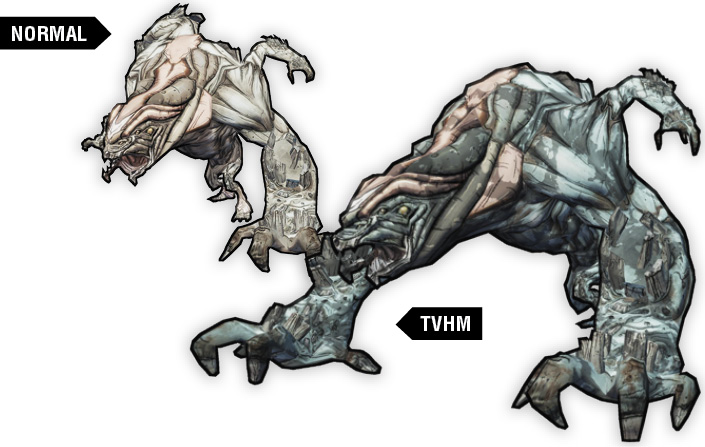
TVHM Name: Savage Monglet
Bullymong younglings don’t quite have the fearsome appearance of their full-grown relatives, nor do they pack the same punch, but they come after you just the same. Monglets are too small and weak to throw objects, so they simply charge. Monglets have low health and their heads are much larger in proportion to the rest of their bodies than on older bullymongs, so they’re much easier to kill. In a scrum with lots of bullymongs when you’re not sure you’ll survive, you might leave a monglet alive on purpose, so you can score an easy Second Wind if the stronger ones knock you down. What a surprise, it’s much easier to kill the babies. We sure hope you feel good about yourself.
| Health Multiplier | Shield Level | DMG. Multiplier | XP Value | CRIT. Areas | Weak./Res. |
|---|---|---|---|---|---|
| 0.5 | — | 0.75 | Chump | Head |  / — / — |
Location: Southern Shelf, Three Horns, Eridium Blight
Brat Bullymong
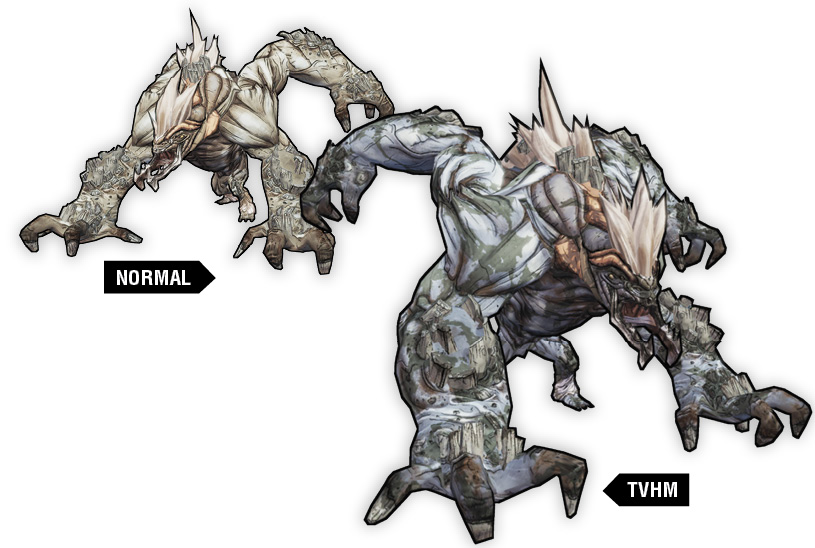
TVHM Name: Savage Bullymong Brat
Brats are a little bit older and more developed than their Monglet brethren. As a result, they’re four times sturdier and deal twice as much damage! That’s still not up to full-on Adult Bullymong levels, but it does mean that Brat Bullymongs are more dangerous than Monglets, especially in groups. Brats are also big and strong enough to heft and throw small rocks from the environment.
| Health Multiplier | Shield Level | DMG. Multiplier | XP Value | CRIT. Areas | Weak./Res. |
|---|---|---|---|---|---|
| 2 | — | 1.5 | Normal | Head |  / — / — |
Location: Southern Shelf, Three Horns, Eridium Blight
Bullymong Slinger
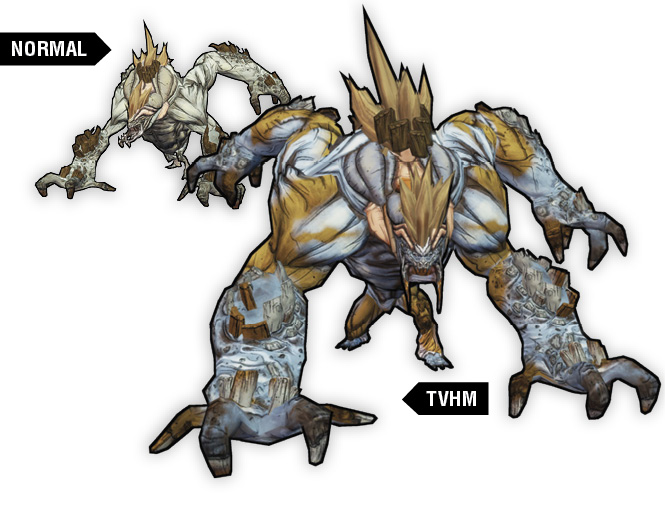
TVHM Name: Bullymong Highlander
Bullymongs that acquit themselves especially well throwing things at other things specialize and become slingers. Instead of charging and leaping right for you, Bullymong Slingers will try to find a good spot to set up camp and pelt you repeatedly with projectiles. If they can find a location above you, giving themselves the high ground, they’ll do it. Slingers resort to melee attacks only if you close distance with them and attack up close.
| Health Multiplier | Shield Level | DMG. Multiplier | XP Value | CRIT. Areas | Weak./Res. |
|---|---|---|---|---|---|
| 4 | — | 3 | Normal+ | Head |  / — / — |
Location: Southern Shelf, Three Horns, Eridium Blight
Adult Bullymong
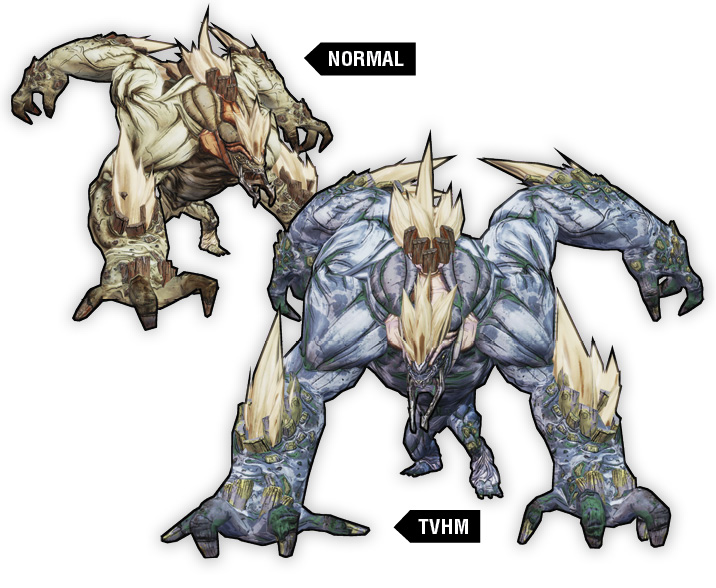
TVHM Name: Savage Bullymong
These fully-grown, heavily-muscled bullymongs can either attack up close or throw objects from afar. Adults may opt to leap in and charge, or fight from a distance. The Adult Bullymong’s health pool is notably larger than lesser bullymongs, so keep that in mind when prioritizing bullymong targets on the battlefield.
| Health Multiplier | Shield Level | DMG. Multiplier | XP Value | CRIT. Areas | Weak./Res. |
|---|---|---|---|---|---|
| 6 | — | 5 | Tough | Head |  / — / — |
Location: Southern Shelf, Three Horns, Eridium Blight
Bedrock Bullymong
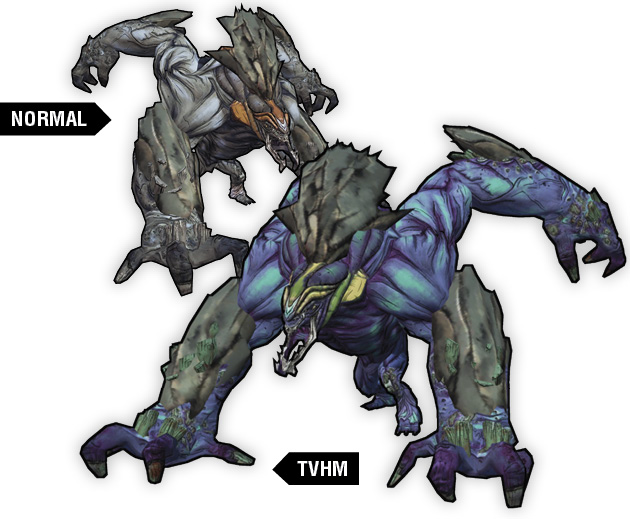
TVHM Name: Rockwall Bullymong
The Bedrock Bullymong grows up in an even less hospitable environment than the icy wastes around Southern Shelf, and is like a mix of a Bullymong Slinger and an Adult Bullymong. It’s tougher than both of those varieties, but not quite as tough as Badass Bullymongs, and will favor tossing objects from advantageous positions over closing in to duke it out.
| Health Multiplier | Shield Level | DMG. Multiplier | XP Value | CRIT. Areas | Weak./Res. |
|---|---|---|---|---|---|
| 8 | — | 5 | Tough+ | Head |  / — / — |
Location: Eridium Blight
Bullyrott
(TVHM ONLY)
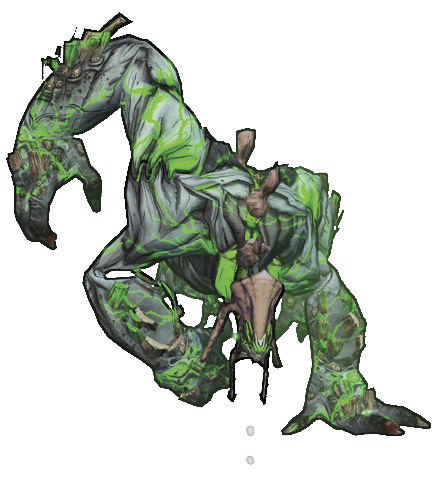
Bullyrotts are noxious, Corrosive bullymongs. They’re obviously distinguished from others in this family by their greenish tinge. They further set themselves apart the first time they barf smoking emerald puke all over you, dealing heavy damage and inflicting you with a Corrosive status effect. Yeah, the other ones don’t do that. These only show up during True Vault Hunter Mode. As they are basically made of Corrosive agents, they are themselves resistant to Corrosive damage. Stick to Fire, as with other bullymongs.
| Health Multiplier | Shield Level | DMG. Multiplier | XP Value | CRIT. Areas | Weak./Res. |
|---|---|---|---|---|---|
| 8 | — | 5 | Tough+ | Head |  / /  |
Location: Southern Shelf, Three Horns, Eridium Blight
Knuckle Dragger
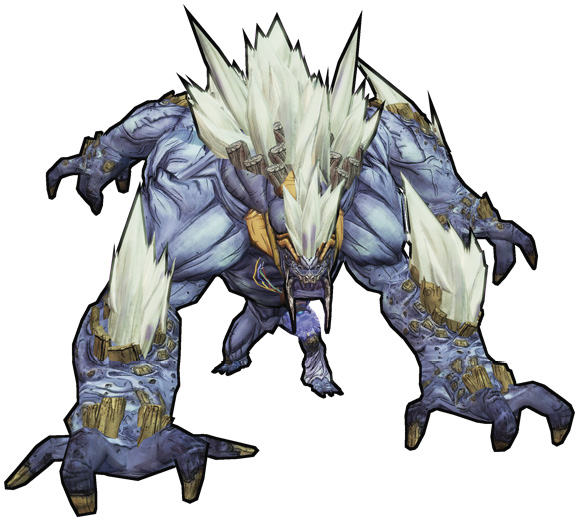
Knuckle Dragger is an early taste of the power of bullymongs. She can toss objects large and small from around the environment, charge and leap to attack, and pound the ground around her, dealing damage in all directions. At first, Knuckle Dragger will attack alone, but after she’s taken some damage she’ll retreat to higher ground for a breather while several other bullymongs show up to assist her.
Knuckle Dragger has a small chance of dropping a legendary weapon.
| Health Multiplier | Shield Level | DMG. Multiplier | XP Value | CRIT. Areas | Weak./Res. |
|---|---|---|---|---|---|
| 12 | — | 1.13 | Badass | Head |  / — / — |
Location: Windshear Waste
Midgemong
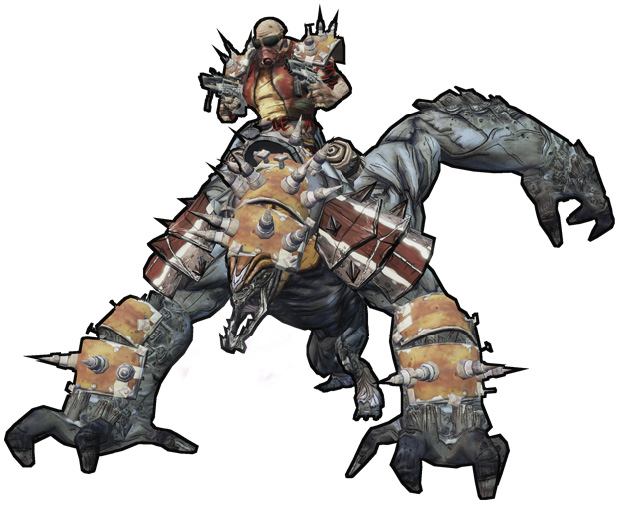
Midgemong isn’t so much one enemy as it is two: Warmong, a bullymong that has been somewhat domesticated, and Midge, a rather brave Psycho Midget who has trained Warmong to allow an inconspicuous handler. You’ll be tasked to hunt down this twosome during Sir Hammerlock’s “Symbiosis” optional mission, which you can begin in Liar’s Burg not far into the game.
Warmong itself will charge and attack, while Midge (atop the beast) directs movement. They fight and fall as a team, and upon dying Midgemong has a small chance to drop the legendary Torgue assault rifle, KerBlaster.
Perhaps scarier than Midgemong are the dual Badasses that show up in the room from which Midgemong appears. Battle through Midgemong and the Badasses for a loot chest behind the counter inside.
| Health Multiplier | Shield Level | DMG. Multiplier | XP Value | CRIT. Areas | Weak./Res. |
|---|---|---|---|---|---|
| 8 | — | 3 | Super Badass | Head |  / — / — |
Location: Southern Shelf – Bay (Mission: “Symbiosis”)
Badass Bullymong
TVHM Name: Super Badass Bullymong
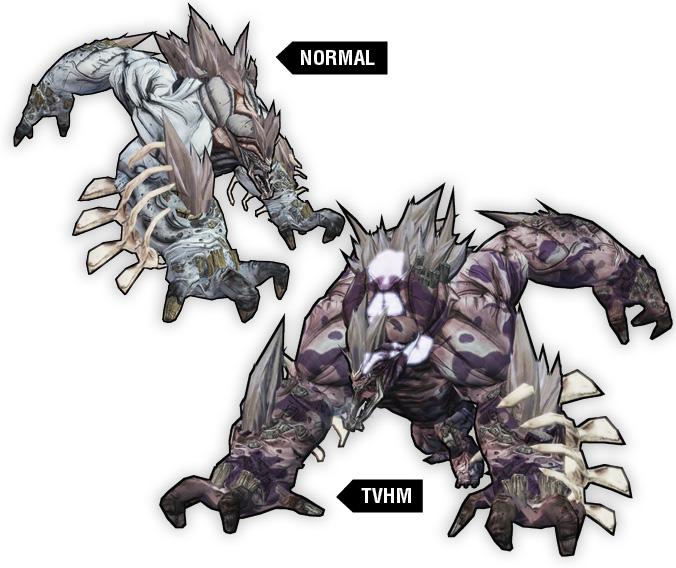
The main difference between a Badass Bullymong and a normal adult is that the Badass takes twice as much punishment to bring down. Badass Bullymongs are also capable of a gnarly area-of-effect ground pound attack that can hit a foolish Vault Hunter anywhere near the Badass. Consider using crowd control-type abilities like Singularity grenades or Phaselock, or a distraction tool like Axton’s Sabre Turret or Zero’s Deception, to take the attention of a Badass Bullymong off of you and any Vault Hunter friends you’ve brought along.
| Health Multiplier | Shield Level | DMG. Multiplier | XP Value | CRIT. Areas | Weak./Res. |
|---|---|---|---|---|---|
| 12 | — | 9 | Badass | Head |  / — / — |
Location: Southern Shelf, Three Horns, Eridium Blight
Badass Bedrock Bullymong
TVHM Name: Super Badass Rockwall Bullymong
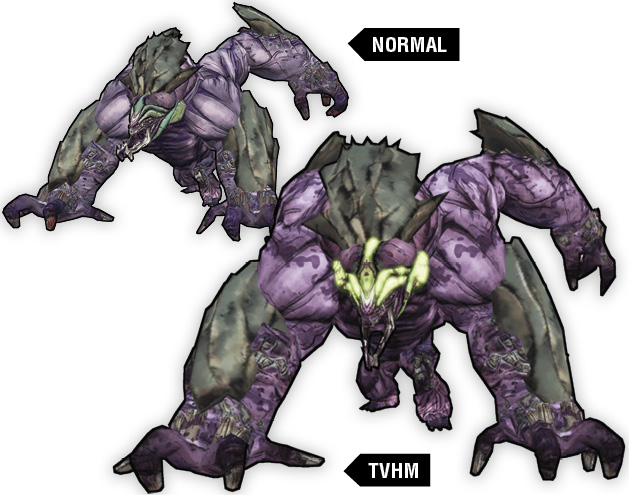
This amped-up version of a Bedrock Bullymong deals enormous damage with its ranged volleys. It also has the ability to do the same AOE ground pound performed by Badass Bullymongs if you get too close for comfort.
| Health Multiplier | Shield Level | DMG. Multiplier | XP Value | CRIT. Areas | Weak./Res. |
|---|---|---|---|---|---|
| 15 | — | 10 | Badass | Head |  / — / — |
Location: Eridium Blight
Donkey Mong
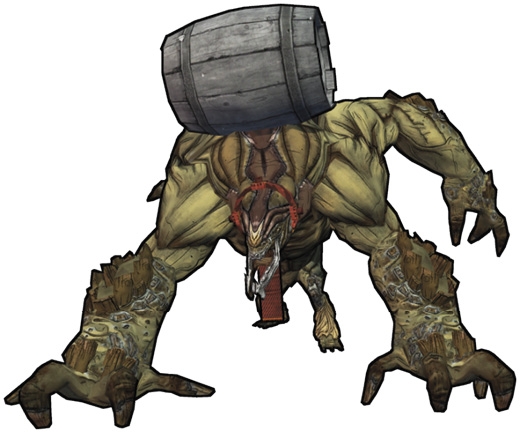
Donkey Mong is a rare bullymong that occasionally roams the slope leading up to Hero’s Pass. He has explosive barrels strapped to his back, which he can and will hurl at any Vault Hunter he sees. To complete an area Challenge for the Eridium Blight, zig-zag in next to Donkey Mong without getting hit by a barrel, then click the “use” button/key to clip his tie!
…then kill him, which also unlocks an Achievement or Trophy.
Be careful, though, as the area Donkey Mong can usually be found in is right around where you’ll find the next fella…
| Health Multiplier | Shield Level | DMG. Multiplier | XP Value | CRIT. Areas | Weak./Res. |
|---|---|---|---|---|---|
| 18 | — | 12 | Super Badass | Head |  / — / — |
Location: Eridium Blight
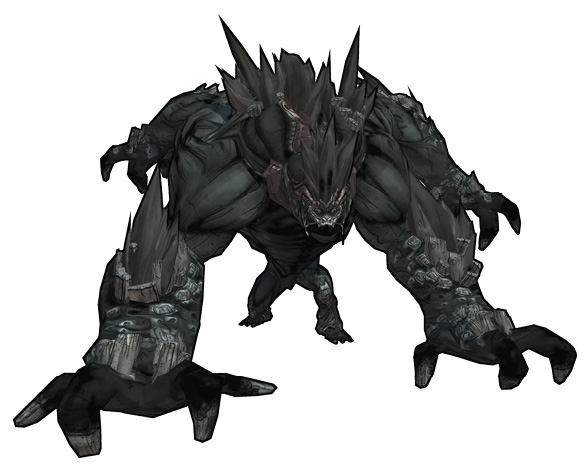
King Mong
The towering king of bullymongs wanders the Eridium Blight on the slope that leads to Hero’s Pass. He’ll sometimes need to be coaxed out, which you can accomplish by killing other bullymongs in the area. He’s huge, he’s fast, and he can leap and ground pound like other bullymongs, only with increased heft. King Mong is also the sturdiest bullymong by far, so Slag him and open up with the Fire weapons. You’ll complete an area Challenge for Eridium Blight by killing King Mong while he’s Slagged.
King Mong has a small chance of dropping a legendary weapon.
| Health Multiplier | Shield Level | DMG. Multiplier | XP Value | CRIT. Areas | Weak./Res. |
|---|---|---|---|---|---|
| 35 | — | 7 | Ultimate Badass | Head |  / — / — |
Location: Eridium Blight
Demong
( TVHM ONLY)
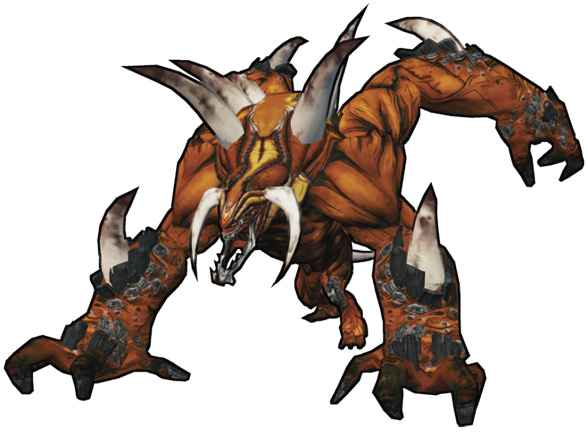
Like Bullyrotts, Demongs are an elemental variant of bullymongs that only show up during True Vault Hunter Mode. These fire-infused creatures can toss fireballs and spit fire from their mouths, in addition to the usual leaping and charging bullymong antics. Since Demongs are infused with flame themselves, they do not have the characteristic vulnerability to fire that other bullymongs do, and instead they’re resistant to it. This may force you to switch weapons or deal with other bullymongs on the scene first, if you’re packing a Fire gun to exploit the weakness of most of the pack.
Like King Mong and Donkey Mong, Demong is considered a Badass although that’s not a part of its name.
| Health Multiplier | Shield Level | DMG. Multiplier | XP Value | CRIT. Areas | Weak./Res. |
|---|---|---|---|---|---|
| 10 | — | 5 | Tough+ | Head | — /  |
Location: Eridium Blight
Savage Lee
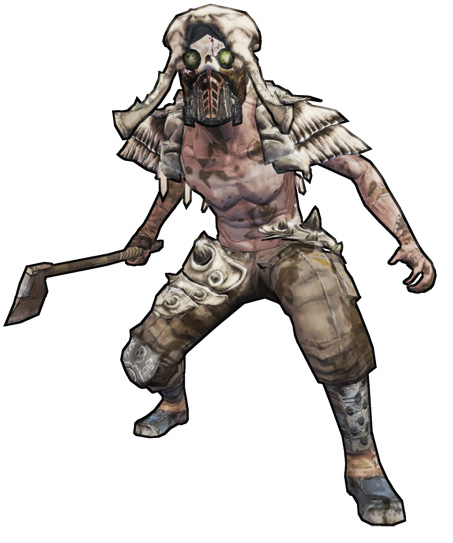
This psycho does Sir Hammerlock proud; he’s shunned the brutish ways of his comrades and chosen to immerse himself in bullymong culture, a true Pandoran primatologist. He’ll still try to kill you, unfortunately. Savage Lee has a small chance of dropping a legendary weapon.
| Health Multiplier | Shield Level | DMG. Multiplier | XP Value | Crit. Areas | Weak./Res. |
|---|---|---|---|---|---|
| 10 | — | 2 | Super Badass | Head |  / — / — |
Location: Three Horns