
Borderlands 2 Game of the Year Guide DLC Enemies
Sir Hammerlock's Big Game Hunt
Drifters
The tall, lanky Drifters from the original Borderlands make a return in Hunter’s Grotto. These towering swamp dwellers roam the areas near the hunting lodge in search of prey. Immune to vehicular collisions, Drifters possess massive health and are capable of devastating stomp attacks. Drifters can also attack with a corrosive ranged attack that is, fortunately, relatively easy to avoid. The best attack is to continuously backpedal to keep out of its reach (or lure it to the suspended lodge, which it can’t get under), and fire at the three glowing sacs around the center of its body. You can encounter Arizona during the “Egg on Your Face” mission, but you’ll need a bit more ingenuity to encounter Dexiduous the Invincible. Make an offering of nearly 100 Eridium to the four totems scattered throughout Hunter’s Grotto, then pull the lever in the center of the region to draw this raid boss out of hiding.
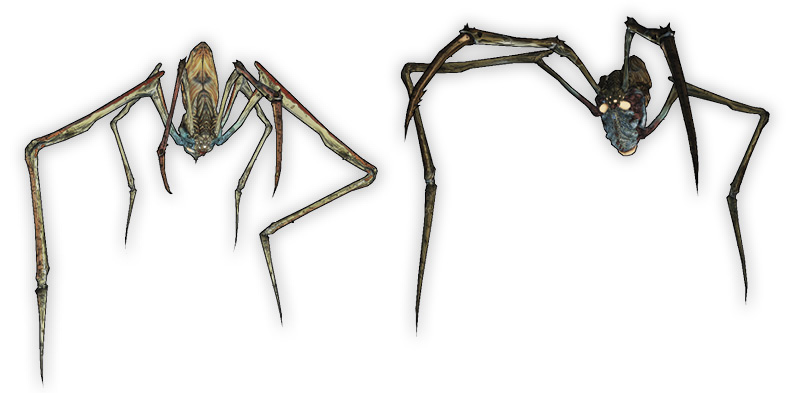
| Varieties | TVHM Name | UVHM Name | Health Multiplier | Shield Level | DMG. Multiplier | XP Value | Crit. Areas | Weak/Res. |
|---|---|---|---|---|---|---|---|---|
| Wetland Drifter | Marsh Drifter | Swamp Drifter | 20 | 1 | 4 | Badass | Sacs |  /— /— |
| Two-Legged Drifter | — | — | 100 | 1 | 3 | Badass | Sacs |  /— /— |
| Arizona* | — | — | 200 | 1 | 5 | Super Badass | Sacs | —/ |
| Dexiduous the Invincible* | — | — | 100,000 | 1 | 6 | Badass | Sacs | —/ , ,  , ,  , ,  |
*Denotes unique enemy or raid boss.
Locations: Hunter’s Grotto
Boroks
The strange borok species resembles no other creature on Pandora. These four-legged, armor-plated beasts have massive forelegs, multiple pairs of eyes, and a devastating underbite. Boroks periodically rise up tall on their hind legs, presenting you with a clean shot at their necks. Take it! Most boroks are vulnerable to fire attacks. Consider an incendiary grenade if you encounter multiple Armored Boroks simultaneously, as it could be difficult to get a clean shot on their necks. Boroks are typically not as aggressive as some of the other species, but they defend their territory with vigor.
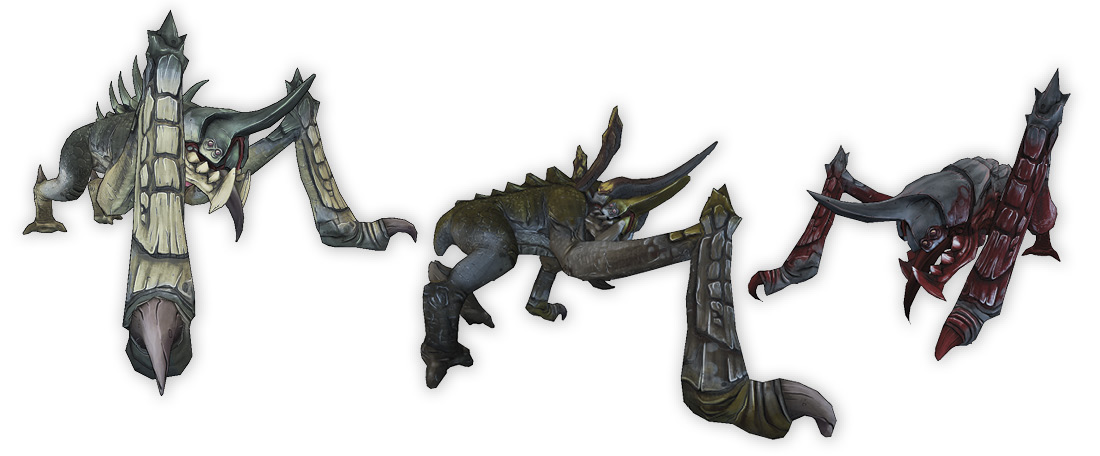
| Varieties | TVHM Name | UVHM Name | Health Multiplier | Shield Level | DMG. Multiplier | XP Value | Crit. Areas | Weak/Res. |
|---|---|---|---|---|---|---|---|---|
| Borok | Feral Borok | Foul Borok | 3 | 1 | 1 | Normal+ | Neck |  /— /— |
| Borokling | Borok Pygmy | Foul Borok Pygmy | 1.5 | 1 | 1 | Normal+ | Neck |  /— /— |
| Armored Borok | Plated Borok | Ironclad Borok | 5 | 1 | 1.5 | Normal+ | Neck |  /— /— |
| Badass Slag Borok | Super Badass Slag Borok | Ultimate Badass Slag Borok | 9 | 1 | 3 | Normal+ | Neck |  / / |
| Badass Shock Borok | Super Badass Shock Borok | Ultimate Badass Shock Borok | 9 | 1 | 4 | Normal+ | Neck |  / / |
| Badass Fire Borok | Super Badass Fire Borok | Ultimate Badass Fire Borok | 7 | 1 | 9 | Normal+ | Neck | —/ |
| Badass Corrosive Borok | Super Badass Corrosive Borok | Ultimate Badass Corrosive Borok | 16 | 1 | 6 | Normal+ | Neck |  / / |
| Pink Borok* | — | — | 3 | 1 | 1 | Normal+ | Neck |  /— /— |
| Woundspike* | — | — | 12 | 1 | 1.6 | Badass |  /— /— |
|
| Bulstoss* | — | — | 25 | 1 | 3 | Normal+ |  /— /— |
|
| Der Monstrositat* | — | — | 3 | 1 | 1 | Normal+ | Neck |  /— /— |
*Denotes unique enemy or raid boss.
Locations: Hunter’s Grotto, Ardorton Station
Scaylions
The scorpion-like scaylion species attacks with their tails and claws and, at first glance, resembles larger, slower-moving stalkers. What really sets the scaylions apart is their ability to turn upside down and rely on their heavily armored underbellies for protection. Scaylions that turn upside down become resistant to all types of damage, including non-elemental attacks. The key to defeating them quickly is to target the small glowing target on their tail stingers. This can be a difficult shot if the scaylion is on the move, so consider an SMG or explosive assault rifle for best results. It also pays to set the scaylion on fire before it turns upside down so that it can continue to take damage after it turns turtle.
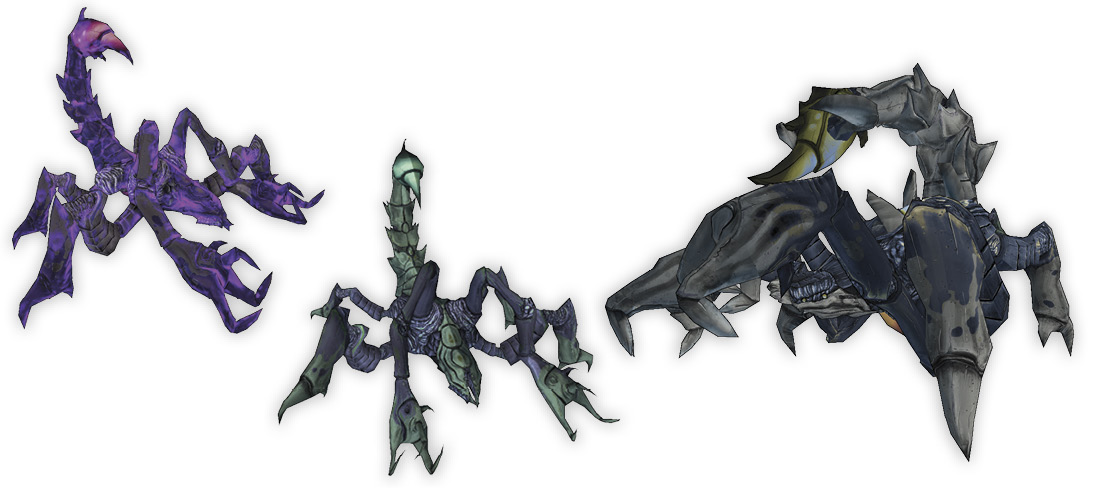
| Varieties | TVHM Name | UVHM Name | Health Multiplier | Shield Level | DMG. Multiplier | XP Value | Crit. Areas | Weak/Res. |
|---|---|---|---|---|---|---|---|---|
| Scaylion Worker | Scaylion Webber | Scaylion Weaver | 3.5 | 1 | 0.6 | Normal | Tail |  /— /— |
| Scaylion Warrior | Scaylion Knight | Gallant Scaylion | 4 | 1 | 0.6 | Normal | Tail |  /— /— |
| Slagged Scaylion | Elite Slagged Scaylion | Super Slagged Scaylion | 10 | 1 | 2 | Normal | Tail |  / / |
| Scaylion Queen | Scaylion Broodmother | Scaylion Empress | 7 | 1 | 1.5 | Normal | Tail |  /— /— |
| Scaylion Bug | Scaylion Minion | Scaylion Slave | 1.25 | 1 | 0.6 | Normal | Tail & Flesh |  /— /— |
| Scaylion Berserker | Scaylion Reaver | Scaylion Mutilator | 20 | 1 | 2 | Normal | Tail |  /— /— |
| Diseased Scaylion | Venomous Scaylion | Infected Scaylion | 4.5 | 1 | 1.2 | Normal | Tail & Flesh |  /— /— |
| Tailless Scaylion | — | — | 4 | 1 | 0.6 | Normal | — |  /— /— |
| Thermitage* | — | — | 10 | 1 | 3 | Normal | Tail |  /— /— |
*Denotes unique enemy or raid boss.
Locations: Candlerakk’s Crag, Ardorton Station, Scylla’s Grove
Swamp Skags
Skags are the most ubiquitous of Pandora’s indigenous creatures, and the swamp skag variants found in Ardorton Station and Scylla’s Grove are not much different. Swamp skags are toxic by nature and inflict a dose of corrosion with most of their attacks. This is especially true of the Spitter Swamp Skag, Barf Swamp Skag, and (of course) the Badass Corrosive Swamp Skag. As with all other skags, stand tall and wait for them to open their mouths. Inflict critical damage on these aggressive, spitting, biting, and lurching swamp skags with well-aimed shots through their mouths.
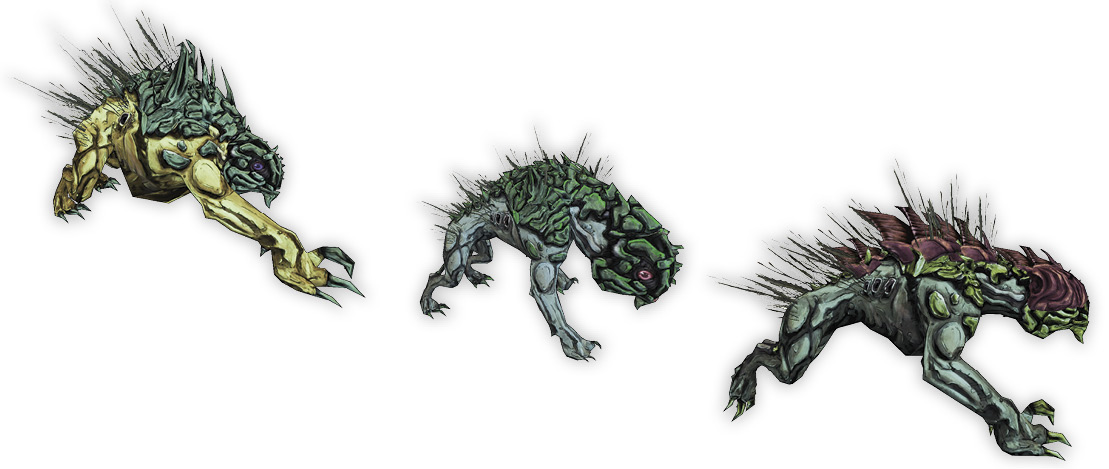
| Varieties | TVHM Name | UVHM Name | Health Multiplier | Shield Level | DMG. Multiplier | XP Value | Crit. Areas | Weak/Res. |
|---|---|---|---|---|---|---|---|---|
| Spitter Swamp Skag | Hawking Swamp Skag | — | 1.5 | 1 | 1.25 | Normal | Mouth |  /— /— |
| Pup Swamp Skag | Horned Pup Swamp Skag | — | 0.35 | 1 | 0.35 | Chump | Mouth |  /— /— |
| Barf Swamp Skag | Vomitous Swamp Skag | — | 3 | 1 | 3 | Normal+ | Mouth |  /— /— |
| Badass Corrosive Swamp Skag | Super Badass Corrosive Swamp Skag | — | 16 | 1 | 6 | Badass | Mouth |  / / |
| Alpha Swamp Skag | Elder Alpha Swamp Skag | — | 5 | 1 | 5 | Tough | Mouth |  /— /— |
| Adult Swamp Skag | Horned Swamp Skag | — | 1 | 1 | 1 | Normal | Mouth |  /— /— |
| Albino Skag* | — | — | 3 | 1 | 3 | Normal+ | Mouth |  /— /— |
| Dribbles* | — | — | 9 | 1 | 3 | Badass | Mouth |  / / |
*Denotes unique enemy or raid boss.
Locations: Ardorton Station, Scylla’s Grove
Giant Spores
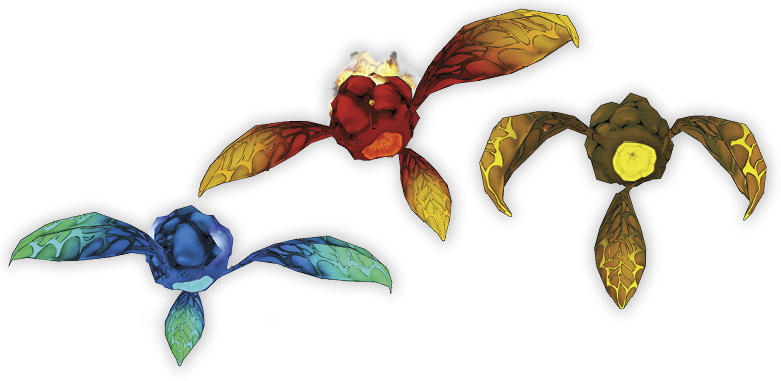
Giant Spores are the gentlest, most benign killers of Aegrus. These floating plants drift across the skies and generally mind their own business unless you (or a savage) happens to damage them. When that happens, watch out! Giant Spores immediately attack whoever harms them by releasing numerous smaller spores that serve as homing bombs. These smaller bombs explode on contact (or when shot) and erupt in a wash of the Giant Spore’s corresponding element. Most Giant Spores are vulnerable to fire damage, so if you are going to fight one, focus on keeping the Giant Spore alight while you dodge the smaller spores it emits. Giant Incendiary Spores are naturally resistant to fire, but non-elemental and explosive rounds work well against them. Giant Spores, regardless of their elements, release a final barrage of four smaller spores upon death. You need not kill the smaller spores, as they’ll simply detonate on their own.
| Varieties | TVHM Name | UVHM Name | Health Multiplier | Shield Level | DMG. Multiplier | XP Value | Crit. Areas | Weak/Res. |
|---|---|---|---|---|---|---|---|---|
| Giant Shock Spore | — | — | 22 | 1 | 1.2 | Tough | — |  / / |
| Giant Incendiary Spore | — | — | 22 | 1 | 1.2 | Tough | — | —/ |
| Giant Explosive Spore | — | — | 22 | 1 | 1.2 | Tough | — |  /— /— |
| Giant Corrosive Spore | — | — | 22 | 1 | 1.2 | Tough+ | — |  / / |
| Slagged Spore | — | — | 22 | 1 | 1.2 | Tough+ | — |  / / |
Locations: Hunter’s Grotto, Candlerakk’s Crag, Ardorton Station
Witch Doctors
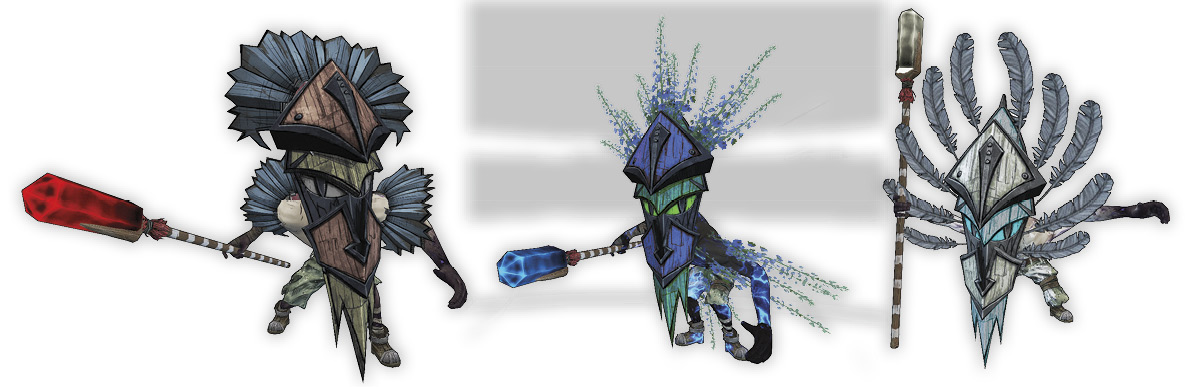
Witch Doctors represent the top threat of all non-boss enemies you’ll encounter on Aegrus. Witch Doctors are shorter in stature than standard savages, wear a large mask and carry a staff, and can be heard chanting magical incantations. Witch Doctors have an abundance of health, are capable of various debilitating attacks (corresponding to their name), and even support other savages by promoting them (not unlike a Goliath). Witch Doctors can also transform into a tornado that rampages across the area in an attempt to inflict heavy damage through direct contact. Furthermore, Witch Doctors may use their staffs to launch rapid-fire elemental projectile attacks. Shock Witch Doctors can also use their staffs to fire a shock-based spark that deals continuous damage to multiple targets in the area. In short, it pays to take them out immediately! Of the four varieties, the Vampire Witch Doctor is the most severe threat, given its ability to steal health from the Vault Hunter and use it to heal itself. Witch Doctors are susceptible to fire attacks and can be critically hit in the head.
| Varieties | TVHM Name | UVHM Name | Health Multiplier | Shield Level | DMG. Multiplier | XP Value | Crit. Areas | Weak/Res. |
|---|---|---|---|---|---|---|---|---|
| Vampire Witch Doctor | Chupacabra Witch Doctor | Blood Witch Doctor | 12 | 1 | 1 | Badass | Head |  /— /— |
| Crippling Witch Doctor | Paralyzing Witch Doctor | Neutralizing Witch Doctor | 14 | 1 | 1 | Badass | Head |  /— /— |
| Slag Witch Doctor | Infected Witch Doctor | Diseased Witch Doctor | 11 | 1 | 1 | Badass | Head |  / / |
| Shock Witch Doctor | Lightning Witch Doctor | Electrified Witch Doctor | 13 | 1 | 2 | Badass | Head |  / / |
Locations: Hunter’s Grotto, Candlerakk’s Crag, Ardorton Station, Scylla’s Grove
Savages
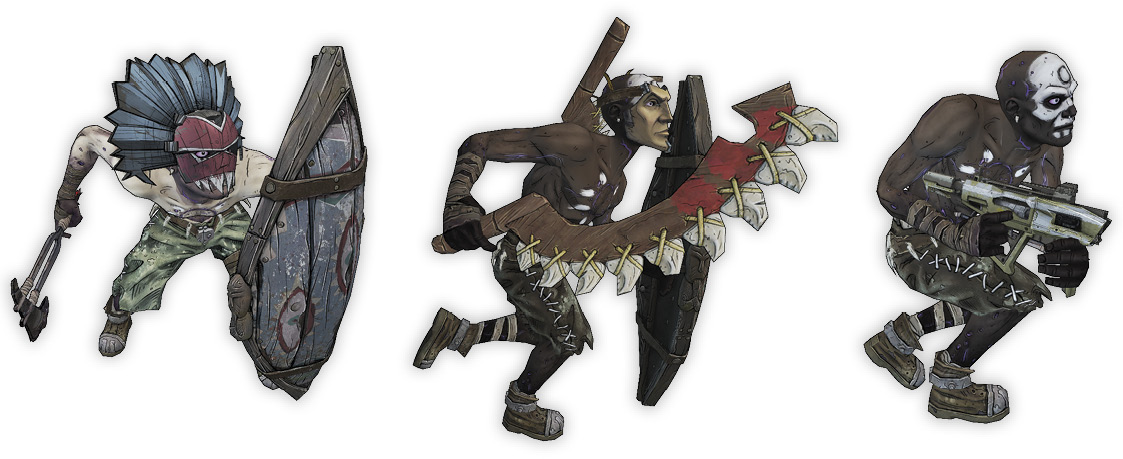
Savages come in all styles but are essentially the same. These various tribesman either attack with melee (Savage Warrior) or ranged (Savage Triggerman) attacks based on their corresponding weapon. Though Elite and Badass Savages (and the fully promoted Omnd-Omnd-Ohk) can be quite a handful in large numbers, most savages pose little specific threat unless accompanied by several Witch Doctors. As when dealing with most standard bandits elsewhere on Pandora, equip a fire weapon, aim for the head, and watch the loot pile up.
| Varieties | TVHM Name | UVHM Name | Health Multiplier | Shield Level | DMG. Multiplier | XP Value | Crit. Areas | Weak/Res. |
|---|---|---|---|---|---|---|---|---|
| Savage Warrior | — | — | 3 | 1 | 2 | Normal+ | Head |  /— /— |
| Savage Murderer | — | — | 1.95 | 1 | 1 | Chump | Head |  /— /— |
| Savage Triggerman | — | — | 1.5 | 1 | 1 | Normal | Head |  /— /— |
| Savage Hunter | — | — | 2 | 1 | 2 | Normal | Head |  /— /— |
| Elite Savage | — | — | 10 | 1 | 3 | Badass | Head |  /— /— |
| Badass Savage | — | — | 10 | 1 | 3 | Badass | Head |  /— /— |
| Omnd-Omnd-Ohk* | — | — | 10 | 1 | 3 | Badass | Head |  /— /— |
| Chief Ngwatu* | — | — | 3.9 | 1 | 1 | Normal | Head | —/ , ,  , ,  , ,  |
| Partially Digested Head Hunter* | — | — | 1 | 1 | 2 | Normal | Head |  /— /— |
*Denotes unique enemy or raid boss.
Locations: Hunter’s Grotto, Candlerakk’s Crag, Ardorton Station, Scylla’s Grove
Bullymongs
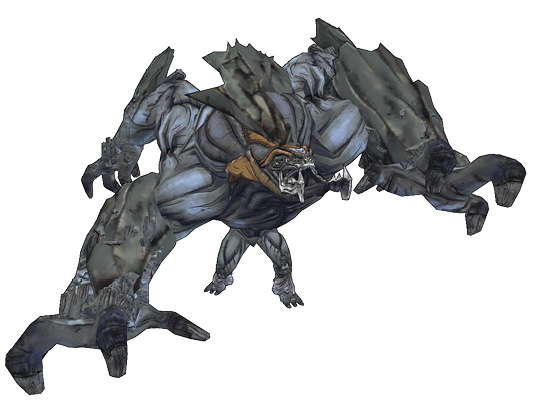
The bullymongs of Hunter’s Grotto are relatively rare—they reside in a small cliff-lined canyon to the southeast—but they are more dangerous than your typical Bullymong Slinger or Adult Bullymong. Bedrock Bullymongs boast increased health and a tendency to throw anything they can get their hands on. Bulwark, a unique bullymong first encountered during the “Palling Around” mission, is capable of curling up into a bulletproof ball that resembles a boulder. There’s no sense in firing at it when it does; just reload your weapons, step back to let it feel safe, and open fire once it unravels itself.
| Varieties | TVHM Name | UVHM Name | Health Multiplier | Shield Level | DMG. Multiplier | XP Value | Crit. Areas | Weak/Res. |
|---|---|---|---|---|---|---|---|---|
| Bedrock Bullymong | Rockwall Bullymong | — | 8 | 1 | 5 | Tough+ | Head |  /— /— |
| Bedrock Monglet | Savage Monglet | — | 0.5 | — | 0.75 | Chump | Head |  /— /— |
| The Bulwark* | — | — | 15 | — | 4 | Normal+ | Head |  /— /— |
*Denotes unique enemy or raid boss.
Locations: Hunter’s Grotto
Rouge
Rouge is a unique crystalisk first encountered during the “Big Feet” mission. Consult the walkthrough for additional details.
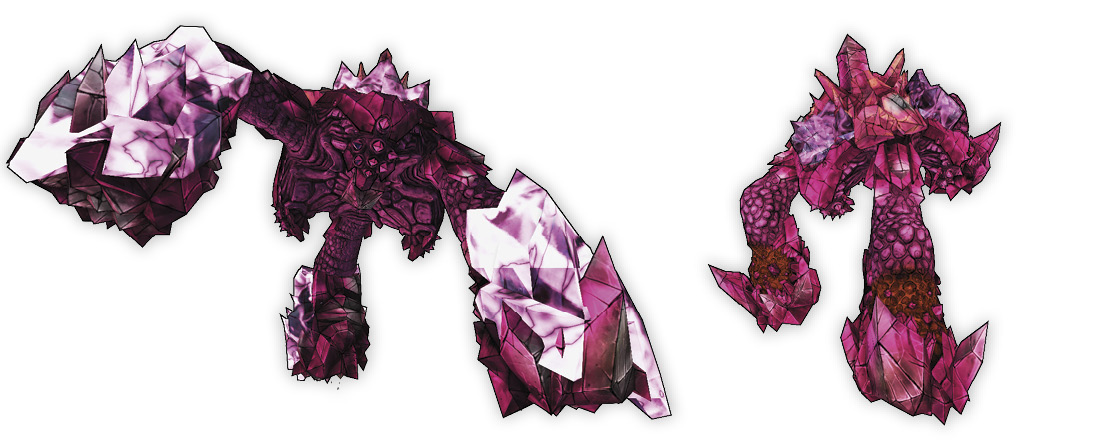
| Varieties | TVHM Name | UVHM Name | Health Multiplier | Shield Level | DMG. Multiplier | XP Value | Crit. Areas | Weak/Res. |
|---|---|---|---|---|---|---|---|---|
| Rouge* | — | — | 50 | — | 1.5 | Super Badass | Crystals |  /— /— |
| Mini Rouge Crystalisk* | — | — | 1 | — | 1 | Tough | Crystals | —/— |
*Denotes unique enemy or raid boss.
Locations: Candlerakk’s Crag
Bloodtail
Bloodtail is a unique stalker first encountered during the “Now You See It” mission. Consult the walkthrough for additional details.
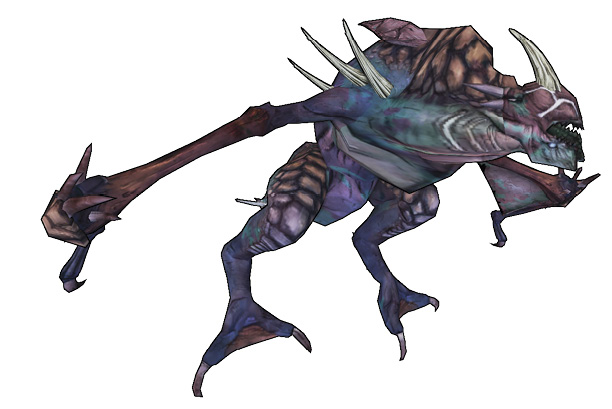
| Varieties | TVHM Name | UVHM Name | Health Multiplier | Shield Level | DMG. Multiplier | XP Value | Crit. Areas | Weak/Res. |
|---|---|---|---|---|---|---|---|---|
| Bloodtail* | — | — | 5 | 35 | 2 | Badass | Head |  /— /— |
*Denotes unique enemy or raid boss.
Locations: Candlerakk’s Crag
Rakkanoth
Rakkanoth is a unique rakk encountered during the “The Rakk Dahlia Murder” mission. Consult the walkthrough for additional details.
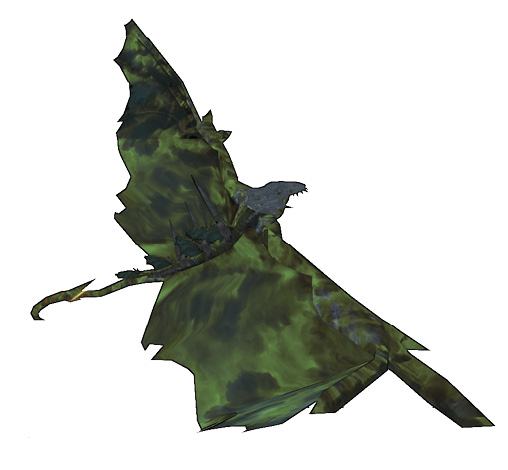
| Varieties | TVHM Name | UVHM Name | Health Multiplier | Shield Level | DMG. Multiplier | XP Value | Crit. Areas | Weak/Res. |
|---|---|---|---|---|---|---|---|---|
| Rakkanoth* | — | — | 25 | 1 | 6 | Super Badass | Head |  / / |
*Denotes unique enemy or raid boss.
Locations: Candlerakk’s Crag
Jackenstein
You could read about what the Jackenstein is, but that would ruin the surprise. You’ll encounter this monstrosity—and its inventor—during the “The End” mission. Consult the walkthrough for additional details.
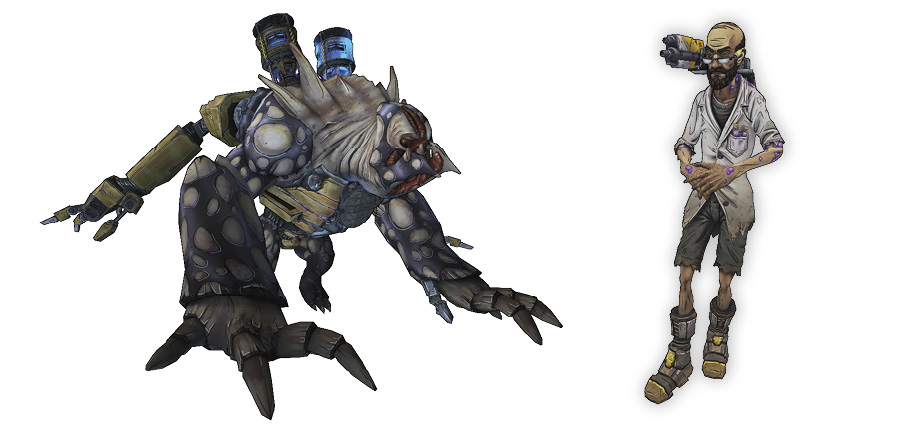
| Varieties | TVHM Name | UVHM Name | Health Multiplier | Shield Level | DMG. Multiplier | XP Value | Crit. Areas | Weak/Res. |
|---|---|---|---|---|---|---|---|---|
| Jackenstein* | — | — | 700 | 30 | 1 | Boss | — | —/ , ,  , ,  |
| Professor Nakayama* | — | — | 20 | 1 | 1 | Normal | Head | Stairs/— |
*Denotes unique enemy or raid boss.
Locations: HSS Terminus