
Borderlands 2 Game of the Year Guide Hyperion's Most Wanted
Salvador
AS THE GUNZERKER
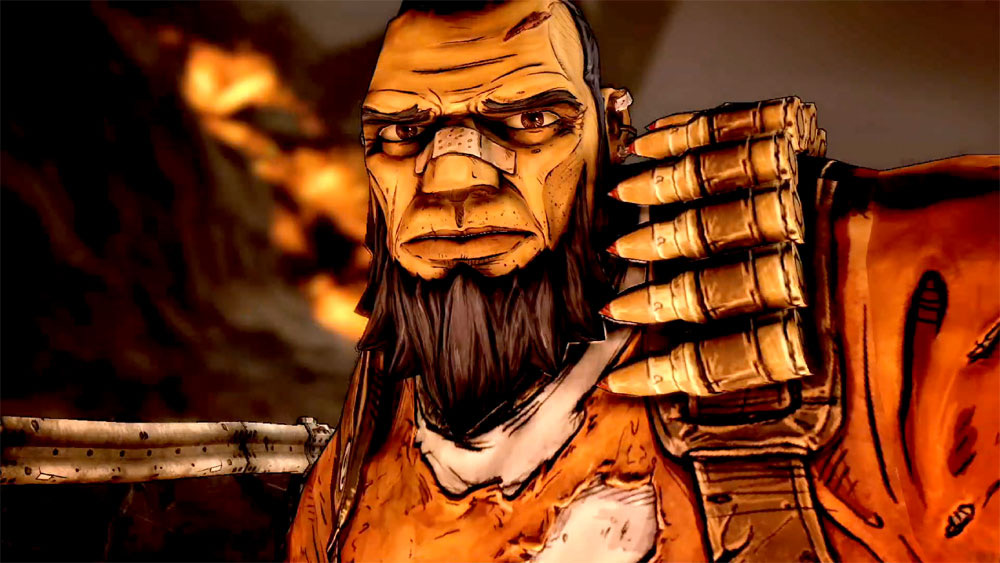
Salvador likes guns. Like, a lot. Imagine how much a regular person might like guns. Then, like, quadruple that, then double it, then quadruple it again just for the hell of it. That is how much Salvador likes guns. A native of Pandora, Salvador has his own reasons for finding the Vault—specifically, that he really likes loot and killing big-ass monsters. He may not be the classiest guy around, but you’ll undoubtedly want him on your team when things get messy.
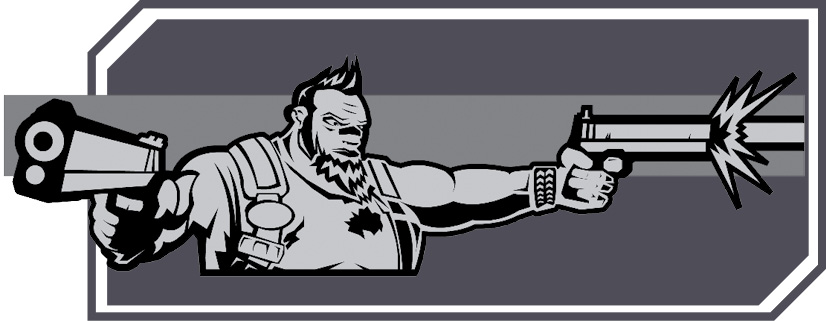 Action Skill: GUNZERKING
Salvador takes Brick’s lead berserking to a whole new level. Instead of coming in both fists flying, Salvador’s Gunzerking Action Skill has him haul out a second gun for some double-fisted bullet hell madness! Any two firearms can be used together, which leads to lots of interesting combinations. You could have one Slag weapon and one Fire or Corrosive weapon, depending on the main weakness of the enemies in your area. You might use Hyperion SMGs for their stabilization, or Bandit pistols for their bottomless magazines. You might use dual Torgue shotguns for maximum KABOOM! When swapping between weapons during Gunzerking, you’ll swap in pairs—the first pair, and the second pair. Though this won’t be exactly relevant until you’ve upgraded your Storage Deck to equip four weapons simultaneously.
Upon activation of Gunzerking, up to 50% of your Maximum Health is replenished, if any was missing. Salvador also gains moderate damage reduction and begins slowly regenerating ammunition. Gunzerking lasts a while, like Axton’s Sabre Turret, but it has the same lengthy 42-second cooldown to match. You can increase Gunzerking duration with the Last Longer and Yippee Ki Yay skills in the Rampage tree and decrease its cooldown with I’m Ready Already. With the right overlap of these and enough targets to keep scoring Yippee Ki Yay, you can end up Gunzerking constantly in some battles.
Most skills centered on altering Gunzerking do so by modifying the damage you’ll do somehow, or with certain weapons. But the Come At Me Bro capstone skill works differently, allowing you to use Salvador’s Gunzerking as an aggro and tanking centerpiece.
Gun Lust
This tree allows Salvador to constantly swap weapons, ditching empties for fully reloaded offhand weapons rather than bothering much with actually reloading. Pistol enthusiasts can stack I’m Your Huckleberry and Divergent Likeness while packing a Backpack full of small arms for huge stacking bonuses to pistol shots—don’t ever reload pistols; just score kills, then swap to a different pair of sidearms. The capstone skill No Kill Like Overkill also tends to work well with pistols and revolvers, as these weapons often have higher damage for individual shots than submachine guns, assault rifles, and shotguns, so they’re more likely to Overkill meaningfully. Down Not Out provides situational survivability, and there are general gunplay enhancements here you might be interested in even if the Gun Lust tree isn’t completely your bag.
TIER 1
 Locked and Loaded
Reloading your gun gives you a Fire Rate bonus for a short time.
|
Level 1 |
Fire Rate: +5% |
|
Level 2 |
Fire Rate: +10% |
|
Level 3 |
Fire Rate: +15% |
|
Level 4 |
Fire Rate: +20% |
|
Level 5 |
Fire Rate: +25% |
 Quick Draw
Increases Weapon Swap Speed and Critical Hit Damage with all gun types.
|
Level 1 |
Weapon Swap Speed: +7%, Critical Hit Damage: +2% |
|
Level 2 |
Weapon Swap Speed: +14%, Critical Hit Damage: +4% |
|
Level 3 |
Weapon Swap Speed: +21%, Critical Hit Damage: +6% |
|
Level 4 |
Weapon Swap Speed: +28%, Critical Hit Damage: +8% |
|
Level 5 |
Weapon Swap Speed: +35%, Critical Hit Damage: +10% |
TIER 2
 I’m your Huckleberry
Increases Damage and Reload Speed with pistols.
|
Level 1 |
Pistol Damage: +3%, Pistol Reload Speed: +3% |
|
Level 2 |
Pistol Damage: +6%, Pistol Reload Speed: +6% |
|
Level 3 |
Pistol Damage: +9%, Pistol Reload Speed: +9% |
|
Level 4 |
Pistol Damage: +12%, Pistol Reload Speed: +12% |
|
Level 5 |
Pistol Damage: +15%, Pistol Reload Speed: +15% |
 All I Need is One
Swapping weapons causes your next shot fired to deal Bonus Damage.
|
Level 1 |
Gun Damage: +8% |
|
Level 2 |
Gun Damage: +16% |
|
Level 3 |
Gun Damage: +24% |
|
Level 4 |
Gun Damage: +32% |
|
Level 5 |
Gun Damage: +40% |
TIER 3
 Divergent Likeness
When Gunzerking with two guns of the same type, you deal Bonus Damage. When Gunzerking with two different types of guns, you gain Bonus Accuracy.
|
Level 1 |
Gun Damage: +6%, Accuracy: +6% |
|
Level 2 |
Gun Damage: +12%, Accuracy: +12% |
|
Level 3 |
Gun Damage: +18%, Accuracy: +18% |
|
Level 4 |
Gun Damage: +24%, Accuracy: +24% |
|
Level 5 |
Gun Damage: +30%, Accuracy: +30% |
 Auto-Loader
Killing an enemy instantly reloads all of the guns that you have equipped that are not currently in your hands. Swapping guns after Auto-Loader has reloaded a gun triggers Locked & Loaded.
|
Level 1 |
Reloading is for chumps! |
 Money Shot
The last round fired from your magazine gains massive Bonus Damage. Guns with small magazines receive a smaller bonus. This skill works with all weapon types.
|
Level 1 |
Last round in your magazine deals up to +80% damage. Minimum Magazine Size for full bonus: 10 |
|
Level 2 |
Last round in your magazine deals up to +160% damage. Minimum Magazine Size for full bonus: 10 |
|
Level 3 |
Last round in your magazine deals up to +240% damage. Minimum Magazine Size for full bonus: 10 |
|
Level 4 |
Last round in your magazine deals up to +320% damage. Minimum Magazine Size for full bonus: 10 |
|
Level 5 |
Last round in your magazine deals up to +400% damage. Minimum Magazine Size for full bonus: 10 |
TIER 4
 Lay Waste
Kill skill. Killing an enemy gives you increased Fire Rate and Critical Hit Damage with all guns for a short while.
|
Level 1 |
Fire Rate: +8%, Gun Critical Hit Damage: +5% |
|
Level 2 |
Fire Rate: +16%, Gun Critical Hit Damage: +10% |
|
Level 3 |
Fire Rate: +24%, Gun Critical Hit Damage: +15% |
|
Level 4 |
Fire Rate: +32%, Gun Critical Hit Damage: +20% |
|
Level 5 |
Fire Rate: +40%, Gun Critical Hit Damage: +25% |
 Down Not Out
You can Gunzerk while in Fight For Your Life.
|
Level 1 |
“Dying is no excuse to stop fighting.” |
TIER 5
 Keep It Piping Hot
While Gunzerking is in the process of cooling down, you gain bonus Gun Damage, Melee Damage, and Grenade Damage.
|
Level 1 |
Gun Damage: +5%, Melee Damage: +6%, Grenade Damage: +5% |
|
Level 2 |
Gun Damage: +10%, Melee Damage: +12%, Grenade Damage: +10% |
|
Level 3 |
Gun Damage: +15%, Melee Damage: +18%, Grenade Damage: +15% |
|
Level 4 |
Gun Damage: +20%, Melee Damage: +24%, Grenade Damage: +20% |
|
Level 5 |
Gun Damage: +25%, Melee Damage: +30%, Grenade Damage: +25% |
TIER 6
 No Kill like Overkill
When you kill an enemy, you gain a bonus to Gun Damage equal to the amount of excess damage you dealt to the foe you just killed.
|
Level 1 |
“I’m looking for a really big gun that holds a lot of bullets.” |
Rampage
This tree exists to provide ammo replenishment and rate of fire bonuses to Gunzerking itself, the arms-akimbo Action Skill. This tree is about filling the air with nothing but lead. Several early skills here tip this off right away, this preciousness of ammo in a tree mostly constructed for non-stop firing. Last Longer, I’m Ready Already, Yippee Ki Yay, and Get Some all contribute to keep the downtime of Gunzerking low or non-existent. The capper, Keep Firing…, acquits itself well for delivering insane rate of fire performance for being a straightforward one-skill-wonder.
TIER 1
 Inconceivable
Your shots have a chance to not consume ammo. The lower your health and shields, the greater the chance of free ammo.
|
Level 1 |
Chance of Free Ammo: up to 10% |
|
Level 2 |
Chance of Free Ammo: up to 20% |
|
Level 3 |
Chance of Free Ammo: up to 30% |
|
Level 4 |
Chance of Free Ammo: up to 40% |
|
Level 5 |
Chance of Free Ammo: up to 50% |
 Filled to the Brim
Increases your Magazine Size with all weapon types. Also increases your Ammo Carrying Capacity with all ammo types.
|
Level 1 |
Magazine Size: +5%, Ammo Carrying Capacity: +3% |
|
Level 2 |
Magazine Size: +10%, Ammo Carrying Capacity: +6% |
|
Level 3 |
Magazine Size: +15%, Ammo Carrying Capacity: +9% |
|
Level 4 |
Magazine Size: +20%, Ammo Carrying Capacity: +12% |
|
Level 5 |
Magazine Size: +25%, Ammo Carrying Capacity: +15% |
TIER 2
 All in the Reflexes
Increases your Reload Speed and Melee Damage.
|
Level 1 |
Reload Speed: +5%, Melee Damage: +4% |
|
Level 2 |
Reload Speed: +10%, Melee Damage: +8% |
|
Level 3 |
Reload Speed: +15%, Melee Damage: +12% |
|
Level 4 |
Reload Speed: +20%, Melee Damage: +16% |
|
Level 5 |
Reload Speed: +25%, Melee Damage: +20% |
 Last Longer
Increases Gunzerking Duration.
|
Level 1 |
Gunzerking Duration: +3 seconds |
|
Level 2 |
Gunzerking Duration: +6 seconds |
|
Level 3 |
Gunzerking Duration: +9 seconds |
|
Level 4 |
Gunzerking Duration: +12 seconds |
|
Level 5 |
Gunzerking Duration: +15 seconds |
TIER 3
 I’m Ready Already
Increases the Cooldown Rate of your Gunzerking ability.
|
Level 1 |
Gunzerking Cooldown Rate: +5% |
|
Level 2 |
Gunzerking Cooldown Rate: +10% |
|
Level 3 |
Gunzerking Cooldown Rate: +15% |
|
Level 4 |
Gunzerking Cooldown Rate: +20% |
|
Level 5 |
Gunzerking Cooldown Rate: +25% |
 Steady as She Goes
Reduces Recoil with both guns while Gunzerking. Additionally, each shot that hits an enemy has a chance to improve your Accuracy with both guns.
|
Level 1 |
Recoil Reduction: +80%, Chance to improve Accuracy: 30% |
 5 Shots or 6
Kill skill. Killing an enemy causes every shot fired to have a chance to add ammunition into the magazine instead of expending ammunition.
|
Level 1 |
Chance to add bullets: +5% |
|
Level 2 |
Chance to add bullets: +10% |
|
Level 3 |
Chance to add bullets: +15% |
|
Level 4 |
Chance to add bullets: +20% |
|
Level 5 |
Chance to add bullets: +25% |
TIER 4
 Yippee Ki Yay
Killing an enemy while Gunzerking increases the amount of time you can Gunzerk.
|
Level 1 |
Gunzerking duration per kill: +0.6 seconds |
|
Level 2 |
Gunzerking duration per kill: +1.2 seconds |
|
Level 3 |
Gunzerking duration per kill: +1.8 seconds |
|
Level 4 |
Gunzerking duration per kill: +2.4 seconds |
|
Level 5 |
Gunzerking duration per kill: +3.0 seconds |
 Double Your Fun
Throwing a grenade while Gunzerking causes you to throw two grenades. The second grenade does not cost ammo.
|
Level 1 |
Throw two grenades while Gunzerking. |
TIER 5
 Get Some
Shooting an enemy decreases the Cooldown on Gunzerking. This effect can only occur once every three seconds.
|
Level 1 |
Gunzerking Cooldown: -0.6 seconds per shot |
|
Level 2 |
Gunzerking Cooldown: -1.2 seconds per shot |
|
Level 3 |
Gunzerking Cooldown: -1.8 seconds per shot |
|
Level 4 |
Gunzerking Cooldown: -2.4 seconds per shot |
|
Level 5 |
Gunzerking Cooldown: -3.0 seconds per shot |
TIER 6
 Keep Firing…
While Gunzerking, the longer you hold down the trigger, the faster your guns fire and the faster you reload.
|
Level 1 |
Fire Rate: up to +88%, Reload Speed: up to +25% |
Brawn
The Brawn tree is differentiated by having a lot more to do with staying alive and directly helping out teammates. Right off the bat, one of the first skills in the tree, Hard to Kill, grants health regen, and two more skills in this tree do the same thing under different circumstances. The mid-tier gamechanger in this tree, Fistful of Hurt, is a melee-modifying special attack that encourages getting into the thick of things just as much as health regen does. And, at the end of the tree, there’s a skill that allows you to double down on Gunzerking, intentionally aggravating and attracting enemies and making Salvador even harder to kill.
TIER 1
 Hard to Kill
Increases your Maximum Health and gives you a small amount of health regeneration.
|
Level 1 |
Maximum Health: +4%, Regenerate 0.1% of your Maximum Health per second |
|
Level 2 |
Maximum Health: +8%, Regenerate 0.2% of your Maximum Health per second |
|
Level 3 |
Maximum Health: +12%, Regenerate 0.3% of your Maximum Health per second |
|
Level 4 |
Maximum Health: +16%, Regenerate 0.4% of your Maximum Health per second |
|
Level 5 |
Maximum Health: +20%, Regenerate 0.5% of your Maximum Health per second |
 Incite
Taking damage from enemies increases your Movement Speed and Reload Speed for a few seconds.
|
Level 1 |
Movement Speed: +6%, Reload Speed: +5% |
|
Level 2 |
Movement Speed: +12%, Reload Speed: +10% |
|
Level 3 |
Movement Speed: +18%, Reload Speed: +15% |
|
Level 4 |
Movement Speed: +24%, Reload Speed: +20% |
|
Level 5 |
Movement Speed: +30%, Reload Speed: +25% |
TIER 2
 Ain’t Got Time to Bleed
While Gunzerking, you regenerate health. The lower your current health, the more powerful the regeneration.
|
Level 1 |
Regenerates up to 0.8% of your Maximum Health per second |
|
Level 2 |
Regenerates up to 1.6% of your Maximum Health per second |
|
Level 3 |
Regenerates up to 2.4% of your Maximum Health per second |
|
Level 4 |
Regenerates up to 3.2% of your Maximum Health per second |
|
Level 5 |
Regenerates up to 4.0% of your Maximum Health per second |
 I’m the Juggernaut
Kill skill. Killing an enemy reduces all damage you take for a few seconds.
|
Level 1 |
Damage Reduction: +4% |
|
Level 2 |
Damage Reduction: +8% |
|
Level 3 |
Damage Reduction: +12% |
|
Level 4 |
Damage Reduction: +16% |
|
Level 5 |
Damage Reduction: +20% |
TIER 3
 Asbestos
Reduces the duration of status effects on you (such as being on Fire, Corroded, Electrocuted, or Slagged).
|
Level 1 |
Negative Status Effect Duration: -8% |
|
Level 2 |
Negative Status Effect Duration: -16% |
|
Level 3 |
Negative Status Effect Duration: -24% |
|
Level 4 |
Negative Status Effect Duration: -32% |
|
Level 5 |
Negative Status Effect Duration: -40% |
 Fistful of Hurt
Melee override. Press (Melee Button) to throw all your weight into a punch, causing massive damage and knocking back the enemy. Fistful of Hurt has a cooldown. While Fistful of Hurt is on cooldown, (Melee Button) will perform a regular melee attack.
|
Level 1 |
Cooldown: 15 seconds |
 Out of Bubblegum
Increases your Fire Rate with all gun types while your shields are depleted.
|
Level 1 |
Fire Rate: 7% |
|
Level 2 |
Fire Rate: 14% |
|
Level 3 |
Fire Rate: 21% |
|
Level 4 |
Fire Rate: 28% |
|
Level 5 |
Fire Rate: 35% |
TIER 4
 Bus That Can’t Slow Down
Increases your Movement Speed while Gunzerking.
|
Level 1 |
Movement Speed: +10% |
|
Level 2 |
Movement Speed: +20% |
|
Level 3 |
Movement Speed: +30% |
|
Level 4 |
Movement Speed: +40% |
|
Level 5 |
Movement Speed: +50% |
 Just Got Real
Increases the Damage you deal with all gun types. The lower your health, the greater the Damage bonus.
|
Level 1 |
Up to +8% Gun Damage |
|
Level 2 |
Up to +16% Gun Damage |
|
Level 3 |
Up to +24% Gun Damage |
|
Level 4 |
Up to +32% Gun Damage |
|
Level 5 |
Up to +40% Gun Damage |
TIER 5
 Sexual Tyrannosaurus
Taking damage gives you health regeneration for five seconds. This effect does not stack multiple times.
|
Level 1 |
Regenerates 0.4% of your Maximum Health per second |
|
Level 2 |
Regenerates 0.8% of your Maximum Health per second |
|
Level 3 |
Regenerates 1.2% of your Maximum Health per second |
|
Level 4 |
Regenerates 1.6% of your Maximum Health per second |
|
Level 5 |
Regenerates 2.0% of your Maximum Health per second |
TIER 6
 Come At Me Bro
Action Skill augmentation. While Gunzerking, press the Action Skill button to taunt your enemies and instantly gain full health. Taunted foes are more likely to attack you, but for the next few seconds, you gain massive damage reduction.
|
Level 1 |
Nigh invulnerability is a hell of a drug. |
Solo Play
When playing alone, it makes a lot of sense to bulk up skill points in the Brawn tree, at least initially. This keeps you from dying too often too early. Depending on what you like about Gunzerking, you might build several different ways to accomplish the same goal—like building Gunzerking around Jakobs revolvers and I’m Your Huckleberry, or using Vladof weapons and eagerly building toward Keep Firing… and with no one around to share kills with, you can sneak in as many kill skills into your build as you like.
The story of Salvador is the story of gun fire, or rather guns firing, so the biggest determining factor in how you play will be how you treat Gunzerking. Variability, nothing but quantity, or brazen survivability?
Co-operative Play
On a team, Salvador can readily serve as either an insane bullet-raining force or as a distracting tank, or as a little of both. The Brawn capstone reveals a way to attract all enemy attention while becoming nigh-invincible (although during True Vault Hunter Mode, Badasses and groups will be wicked enough to kill you before you can reach and even use up Come at Me Bro as a saving move). Salvador himself can essentially become something like Axton’s turret or Zero’s decoy: a locus of attention for enemy forces, which keeps pressure off of other friendlies. This lets them go about their business most efficiently, as you continue to be the belle of the ball for encroaching hoards of foes. And hopefully, there’s much understanding that since you’re wearing the pants in the family and striding on in and saying, “Yes, creatures of Pandora, I am here to draw your attention with my very face,” your friends will dutifully revive you when it inevitably occasionally goes awry.