
Watch Dogs 2 Guide Online Operations San Francisco
Restricted Area 14. Pier 13 Warehouses
Available Operations
| Operation Type | No. of Objectives | Variations |
|---|---|---|
| Data Breach | 1 | 2 |
| Deliver Vehicle | 1 | 1 |
| Destroy Shipments | 3 | 2 |
| Prisoner Release | 1 | 2 |
| Steal Encrypted Drives | 1 | 2 |
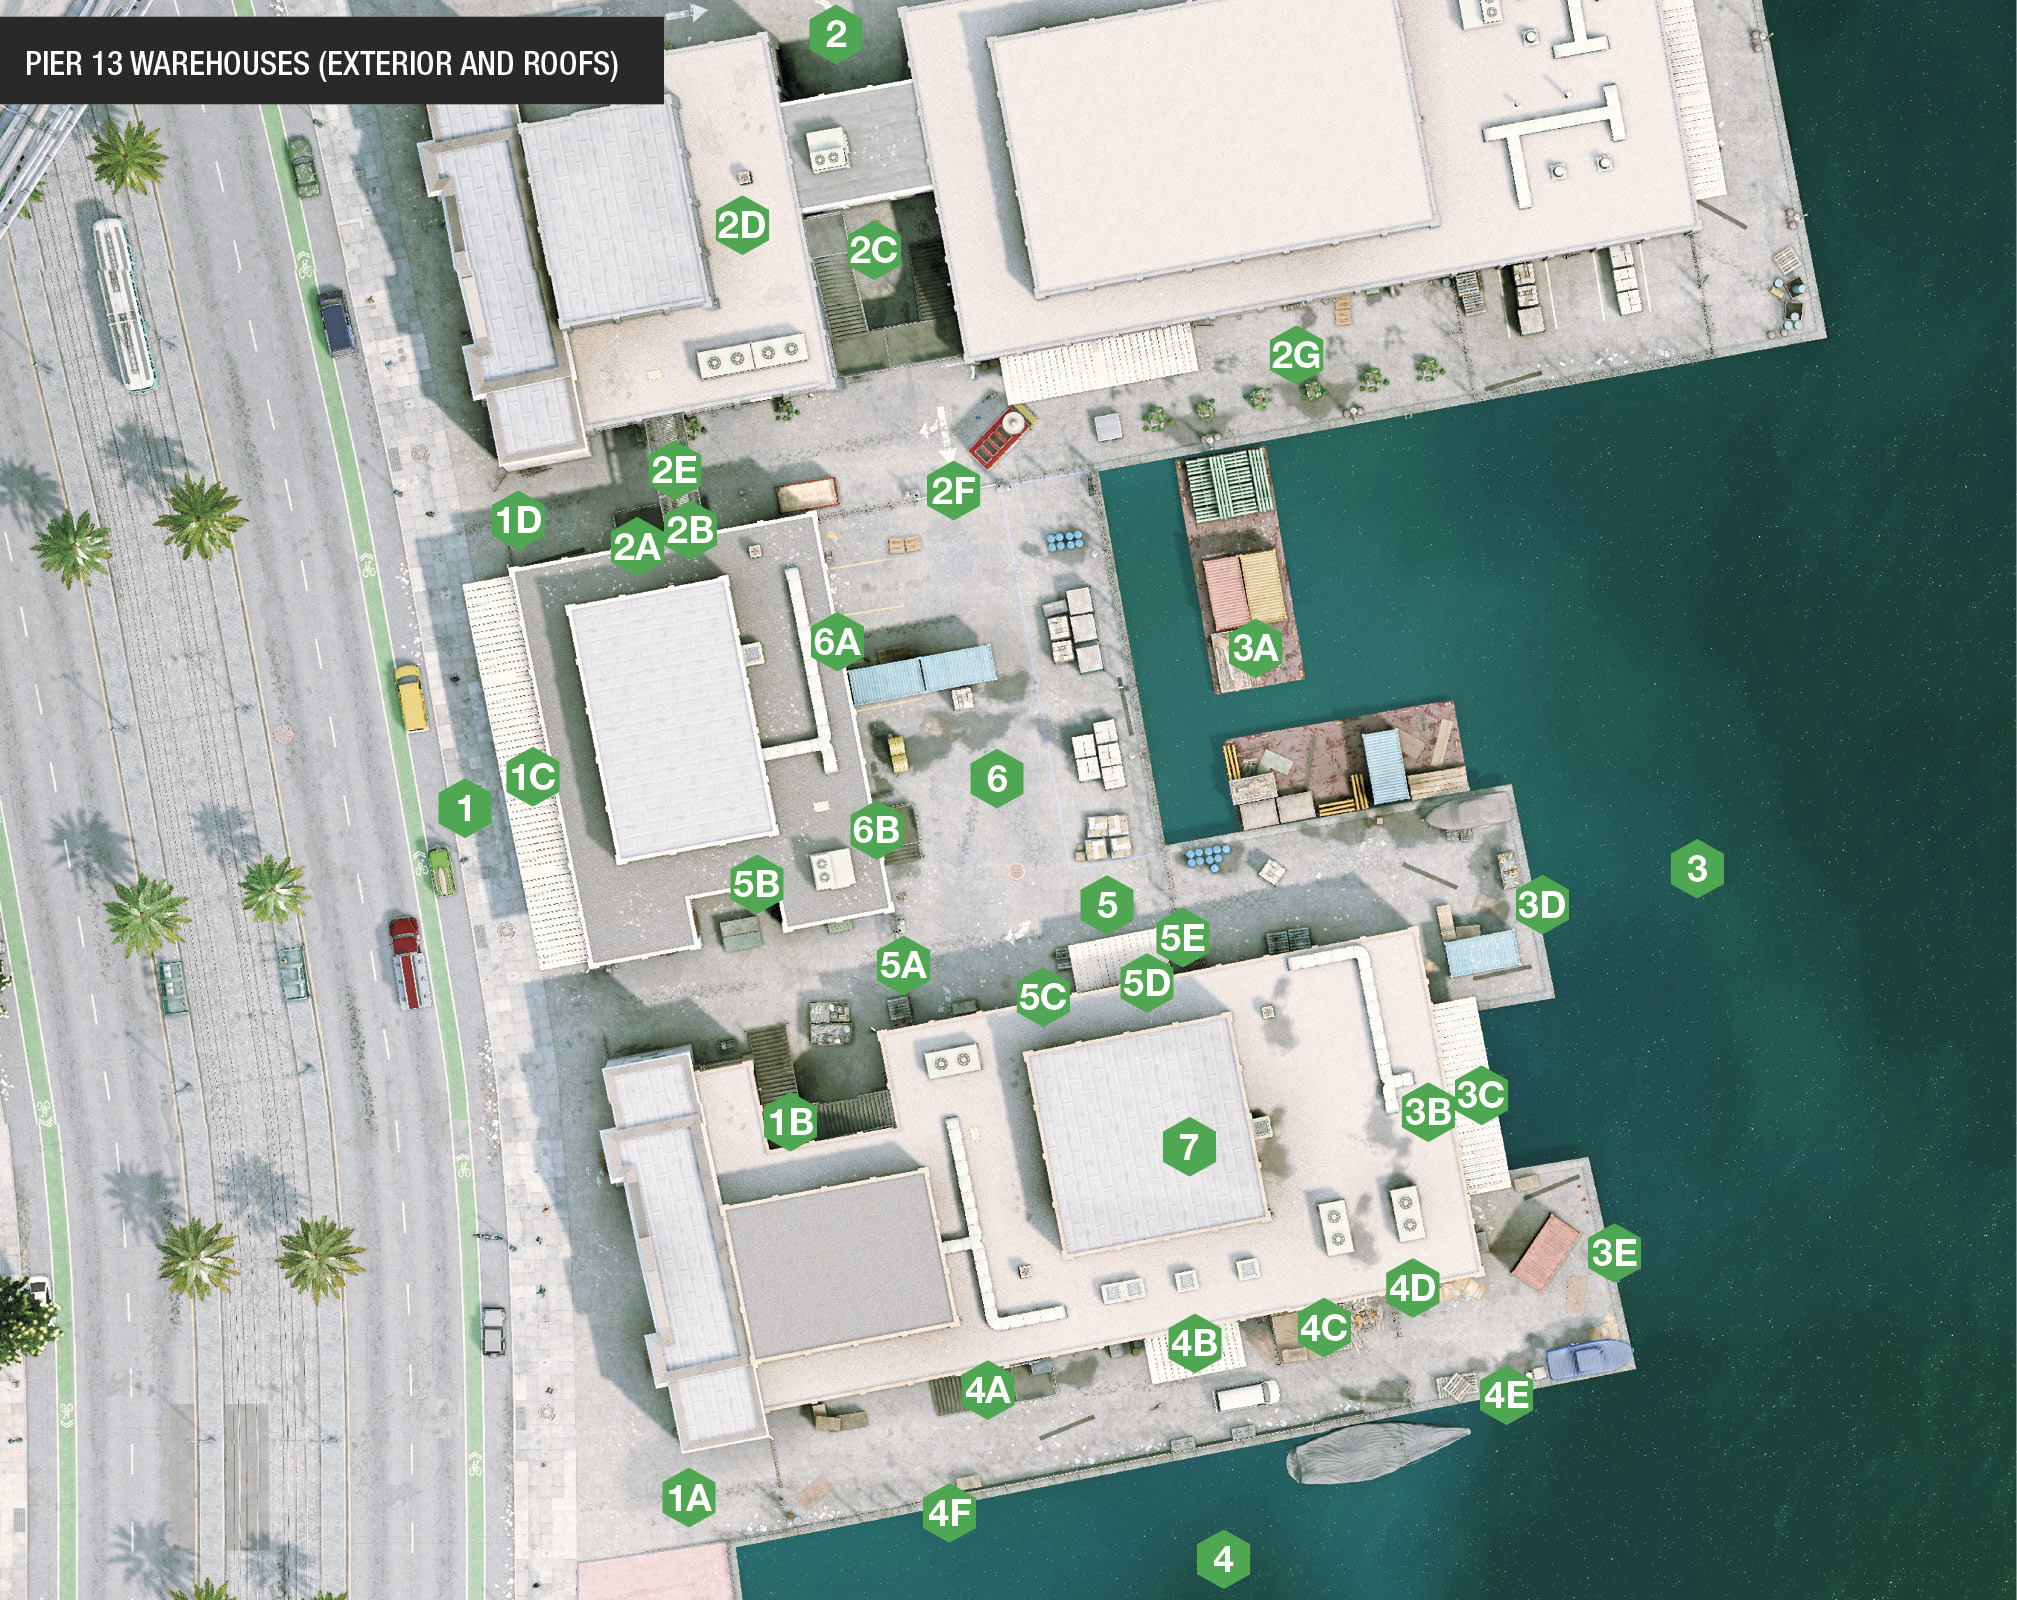
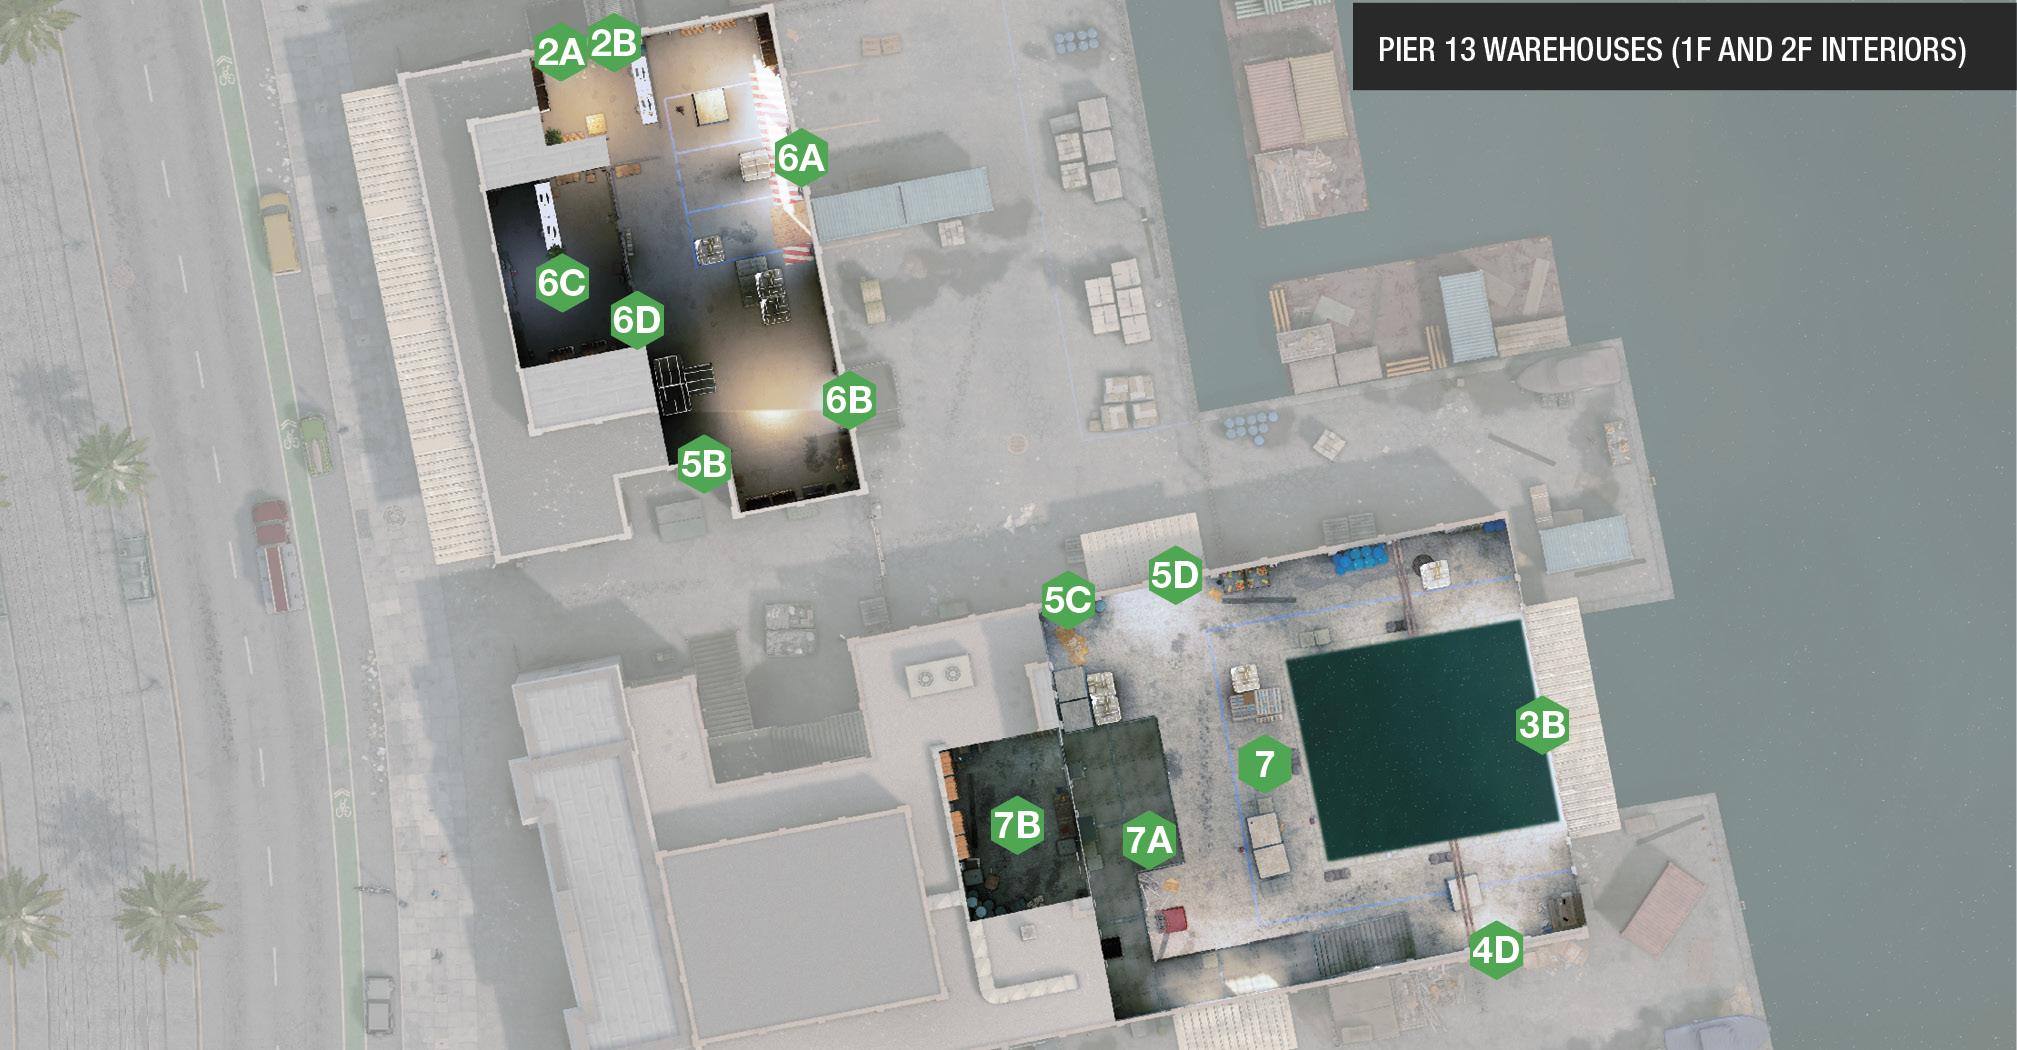
Structures and Infiltration PointsThough this large concrete pier area comprises an unloading building and a warehouse to the south, it’s important to know the layout of the warehouse roof to the north, which is outside the restricted area. Only then can you provide long-range sniper fire to a friend, as well as learning the infiltration points of the restricted area itself.
The ornate concrete facades of the two warehouses, with a coffee shop (inaccessible) between them, offer the main infiltration points from the main road. There are road spikes and the pierside ledge to the south (1A), a southwest alley entrance (1B) featuring metal stairs up to the roof of the south warehouse, and the coffee shop awning (1C), which requires a nearby scissor lift to reach and allows access onto the unloading building’s roof. The northwest alley (1D) allows quick access along the northern perimeter of the restricted area, and a door into the unloading building. 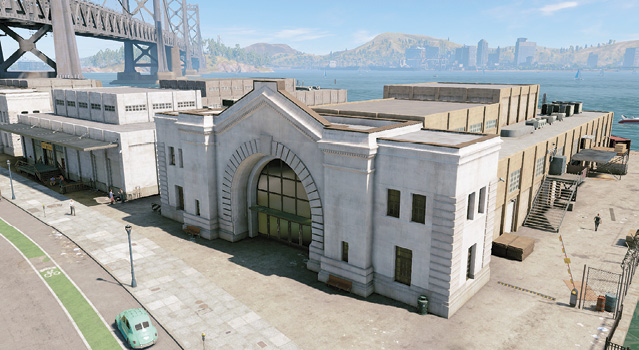
There are numerous access points along this pierside structure of (inaccessible) shops. From west to east, check the office structure for a door inside (2A), as well as a drone-sized ground vent (2B). Close by is a scissor lift for a slow route to a rooftop or over the yard fence. Along the pier is a north alley (2C) with metal stairs. This leads to the north pier rooftops (2D) out of the restricted area, but great for launching drones or sniping from. The alley itself is great for moving in from, during initial infiltrations, if you start north of the objective. Note the duct gantry (2E) in the northwest corner, allowing direct access to the unloading building’s roof. The pier yard has a barbed-wire fence, meaning the only infiltration point to the south is the gate (2F). The rest of the north pier features large potted trees and access to and from the water (2G). 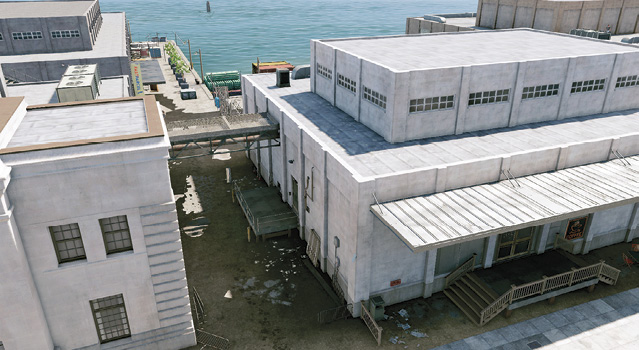
The northeast perimeter is made up of the pier water and two parked barges you can clamber across, using the containers and scenery as cover (3A) while moving between the north and south pier structures. The southeast perimeter features a double-door boat garage (3B), and an awning you can cross via a container climb (3C) from north to south, but not back again. Note a possible getaway boat parked in this vicinity, as well as two ladders either side of the garage doors on the pier (2D, 3E), if you’re approaching from the water. 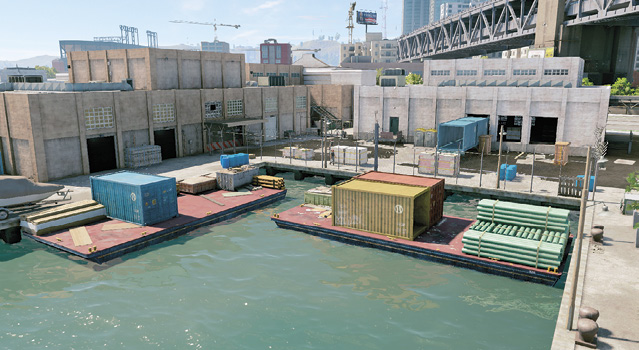
The southern pier side offers good infiltration points into the main interior warehouse, and usually a cluster of guards as you go. From the road spikes at the street entrance, metal steps (4A) lead to an electrical box, which you can climb on to reach the roof. It’s also useful to reach the open window (4B) above the main garage entrance, allowing a different method of entering the warehouse—helpful if the garage doors are locked. The southeast area of this perimeter has some debris and wood to climb up (4C) so you can reach the open window above the garage door awning—another way into and out of the warehouse, and onto the roof. Finally, there’s a security door (4D) enabling access in and out of the warehouse boat garage. Needing to escape? Flee to the end of the waterside fence (4E), or the ladder and gap in the fence (4F). 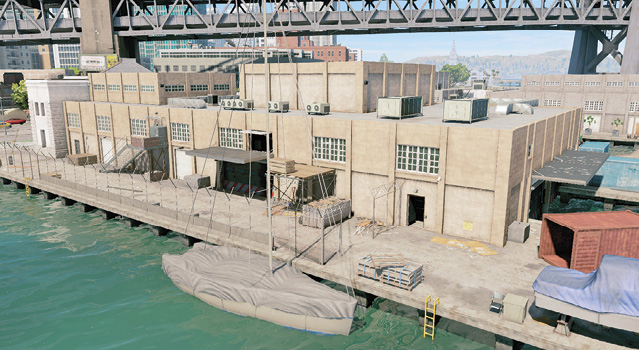
Running along the north side of the main warehouse, in the middle of the restricted area, is a pierside area to be aware of. Check the metal stairs by a security gate (5A), allowing roof access. Also don’t overlook the RC Jumper vent to the unloading building (5B). Through the gates into the main yard, check the warehouse wall for a ground vent (5C), garage door, and awning to a small open window you can fly your Quadcopter through (5D). You can’t reach the roof from this awning, but you can cross over the barbed-wire fence, though there’s an opening on the ground too (5E).
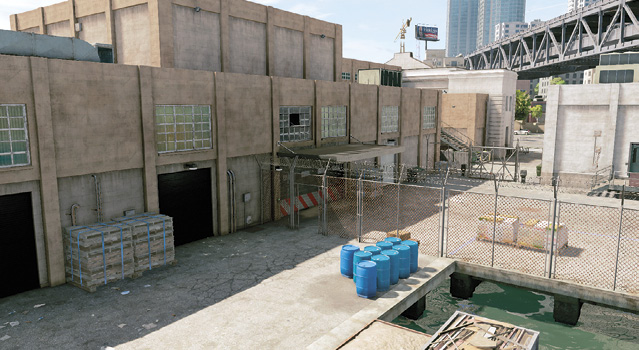
The main yard has a barbed-wire fence running north to south, but a grenade can blow bits of this apart, allowing access to the barges on the water. The yard itself features a container and unloading hatches into a bay (6A), along with a security door (6B). Note the RC Jumper vents on the north and south walls inside the bay. At the back of the bay is an office (6C), only accessible via a security door (6D). 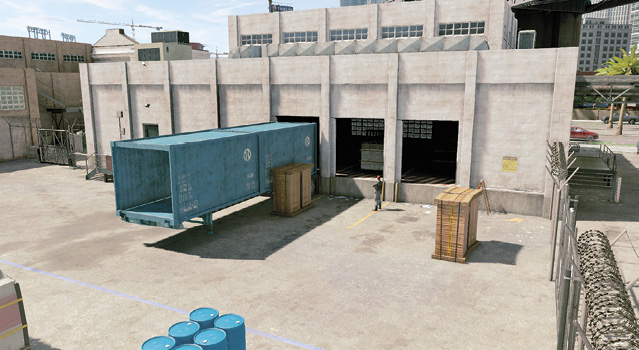
The main interior of the warehouse features an L-shaped gantry platform (7A) accessible via stairs or climbing crates. This is usually used to reach the open window during escapes. The boat garage may contain an escape vessel or one you need to deliver. Note the two garage doors opposite each other, as well the ground vents and the small Quadcopter open window. On the west wall is a security door leading to a small storage room (7B). 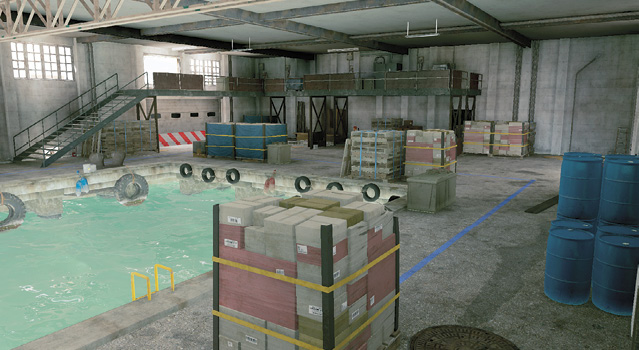
|
 West Perimeter
 North Perimeter
 East Perimeter
 South Perimeter
 Main Warehouse Inner Perimeter
 Yard and Unloading Building
 Main Warehouse Interior
Operation Examples
Data Storage (Data Breach Operations): If the data is located in the main yard, you can use the interior of the unloading building, inside the unloading container, or the barge containers to hide behind. The unloading building’s roof is too far away, unfortunately. One other cunning place to hide? Under the objective, in the water below the yard itself, though you need help as you’re swimming and pretty defenseless. However, foes can only attack from the barge.
If the data is located inside the main warehouse (south), use the metal steps on the south pier to reach the roof, then crouch by the open window on the awning above the garage, and send in the Quadcopter to hack the data. You don’t have to be inside the warehouse to download the data; remain on the awning, the top of the stairs, or on the awning above the north garage doors.
Vehicle (Deliver Vehicle Operations): Is the vehicle in the boat garage? Then send the RC Jumper into the main warehouse to unlock the CCT on the northeast corner of the warehouse, by both garage doors. Remotely drive the boat out, or head in from your preferred infiltration point and maneuver the boat to the drop-off point.
Shipments (Destroy Shipments Operations): There’s usually a shipment in the warehouse, one in the unloading building, and a vehicle in the yard. A Quadcopter, flown through the open upper windows with bombs to destroy the shipments, makes short work of the warehouse objective. The unloading building shipment is easily detonated by flying in and out of the open hatch doors. Finally, destroy the vehicle with a bomb, or remotely drive it through the fence into the water.
Prisoner (Prisoner Release Operations): If the prisoner is in the office inside the unloading building, send up a Quadcopter to hack the access key, then approach from the northwest, climbing the metal stairs outside the restricted area, and across to the CCT on the unloading building’s roof. This unlocks the door below. Drop down and enter the building, removing threats and unlocking the office door (using the access key) to reach the prisoner.
If the prisoner is in the storage room at the back of the south warehouse, access the metal stairs on the south pier side, drop down to the open window above the south garage door, and enter the warehouse via the window, close to the CCT on the gantry. This unlocks the storage door. Then drop down, neutralize foes, and rescue the prisoner. Leave via the boat garage or the way you came.