
Watch Dogs 2 Guide Online Operations Oakland
Restricted Area 04. Prescott Scrapyard
Three of the 20 available restricted areas for Online Operations are located in Marin. The following details the main methods of infiltrating each area, and some locations to study when engaged in the different online missions.
Vailable Operations
| Operation Type | No. of Objectives | Variations |
|---|---|---|
| Data Breach | 1 | 1 |
| Deliver Vehicle | 1 | 2 |
| Destroy Shipments | 3 | 2 |
| Prisoner Release | 1 | 3 |
| Steal Encrypted Drives | 1 | 3 |
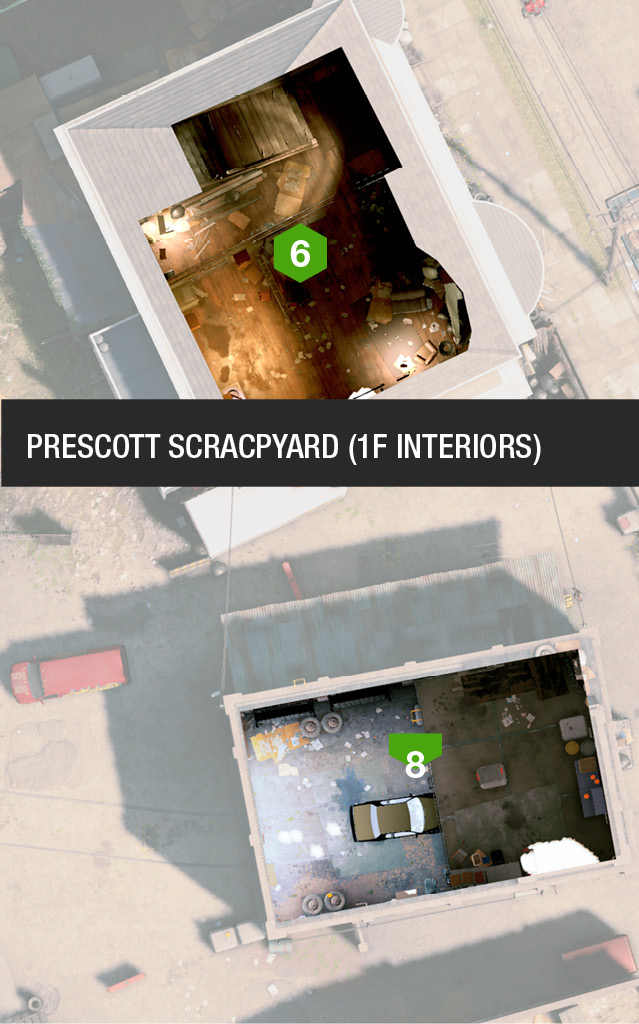
Structures and Infiltration PointsThis large scrapyard with a central garage, den house to the northeast, and a more fortified southern perimeter can be a tricky restricted area to conquer. Make sure you’re flying your Quadcopter over the area to tag the numerous foes both inside and outside the many structures, before you assault the place. 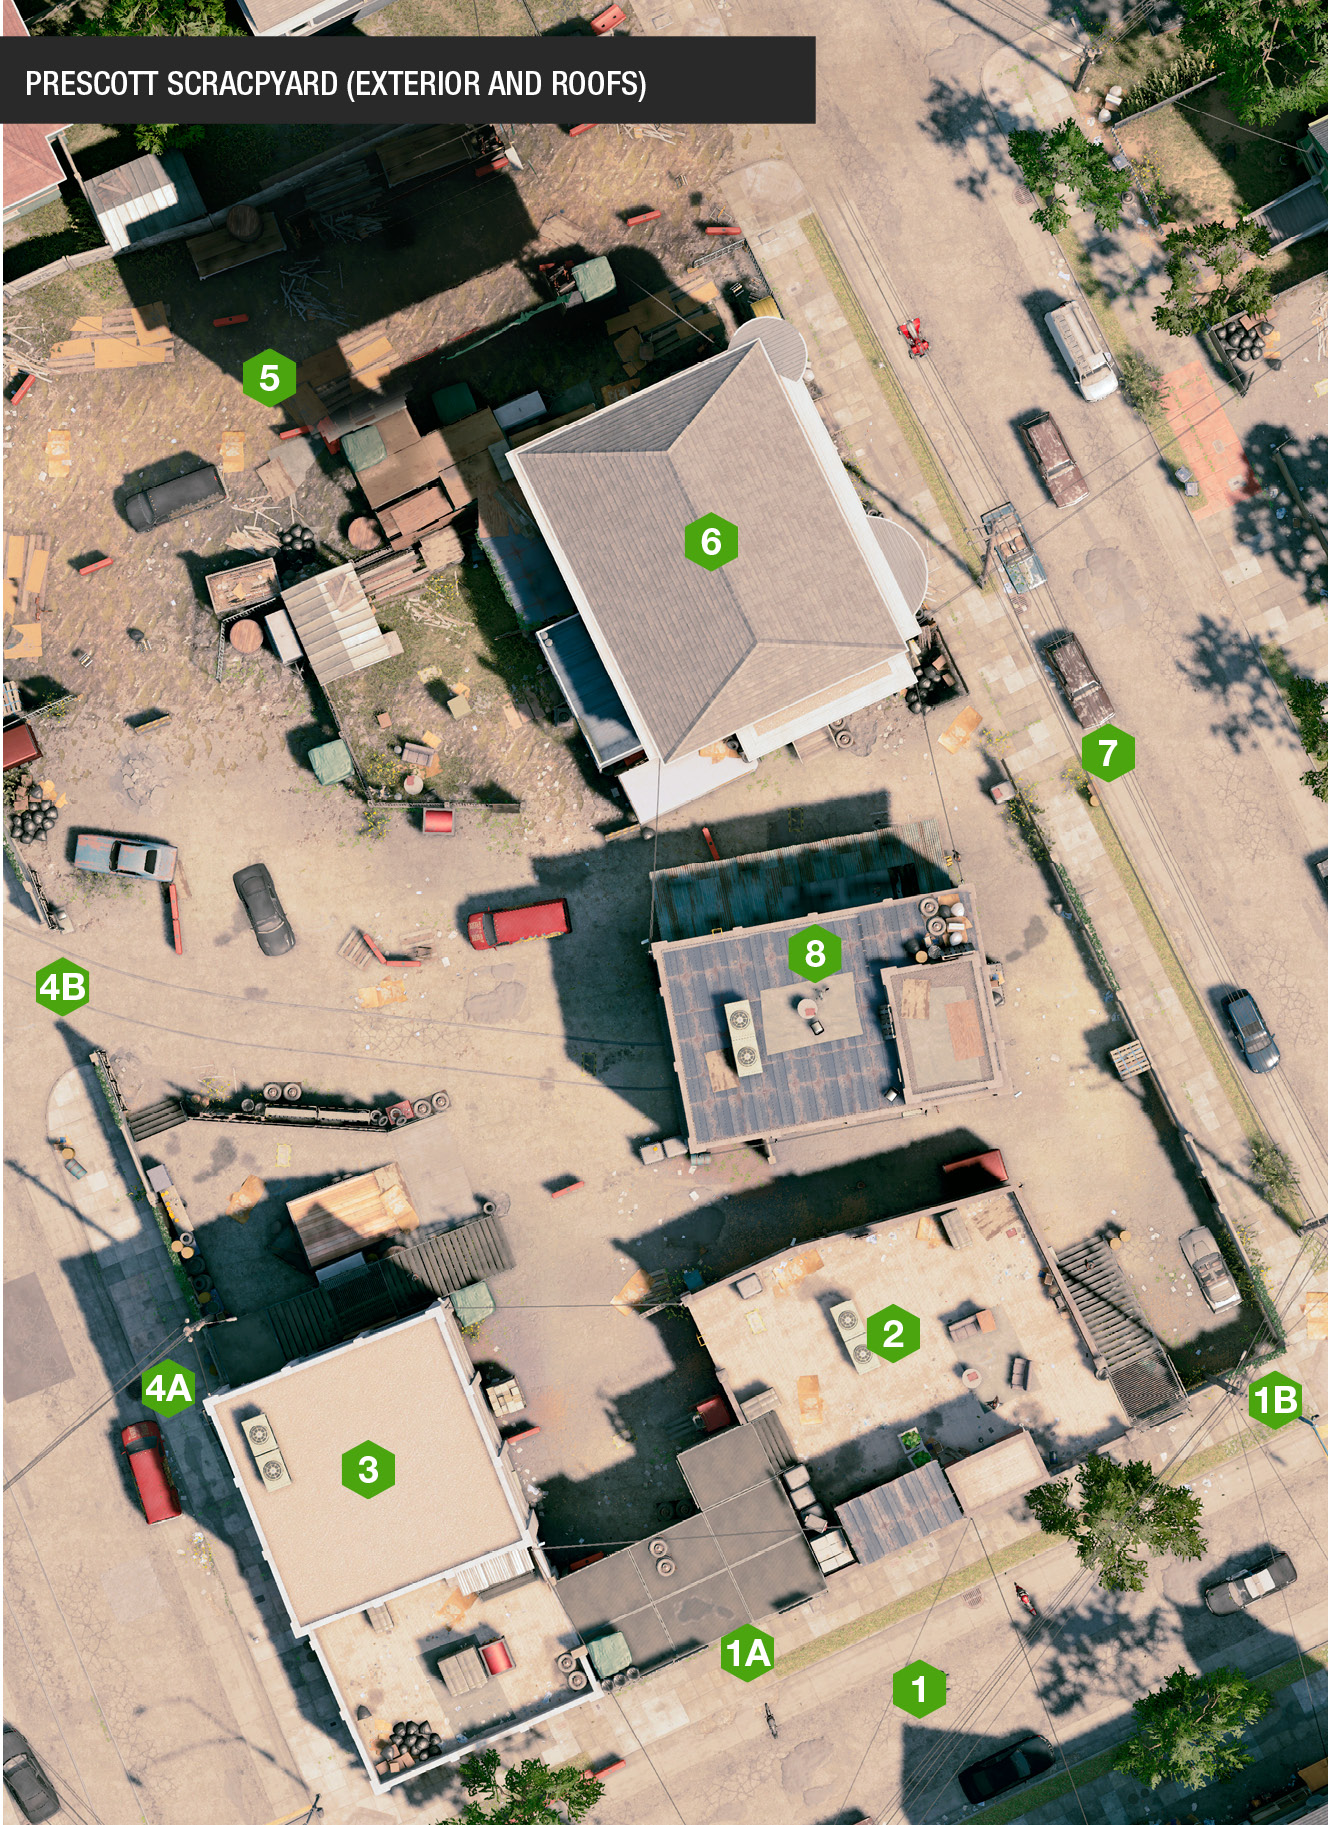
The entire south perimeter only has two possible infiltration spots. The first is the obvious (but well-guarded) entrance under the metal platforms above. The second is the concrete block wall in the southeast corner. The main entrance (1A) offers easy access to and from the interior, reasonably rapid access up the ladder (to the right) onto the top of the brick warehouse roof, and to the steps up to the concrete warehouse. The only problem is the sheer number of foes who can see you enter from here. This gap is also wide enough for a vehicle to maneuver in and out (driving or remotely controlled). There’s a gap in the corner of the southeast concrete block wall (1B) that’s big enough for an RC Jumper to head through—most helpful for more clandestine operations. Otherwise, leap to or from this wall as required. 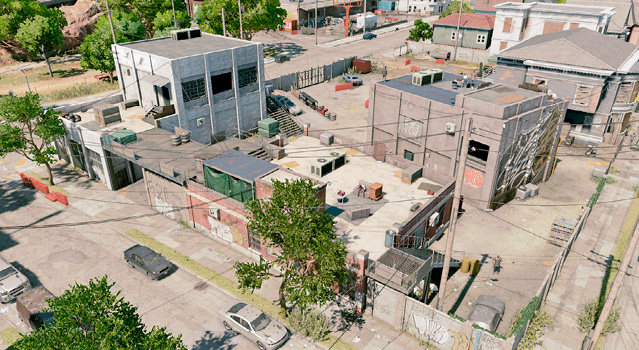
Even though there may be two or more enemies patrolling the roof of the brick warehouse, this is a great spot to camp at, dropping bombs at the stairwell to the east and watching for foes using the ladder near the start of the metal gantry platform, which links the brick warehouse to the concrete one. Only the roof of the brick warehouse is accessible (not inside), but maintain a sniping position or cover from here if things get a bit hectic. 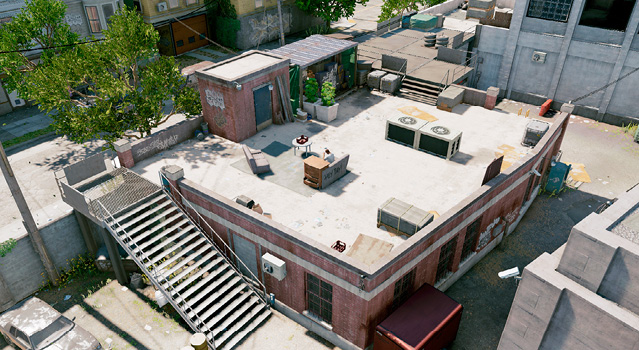
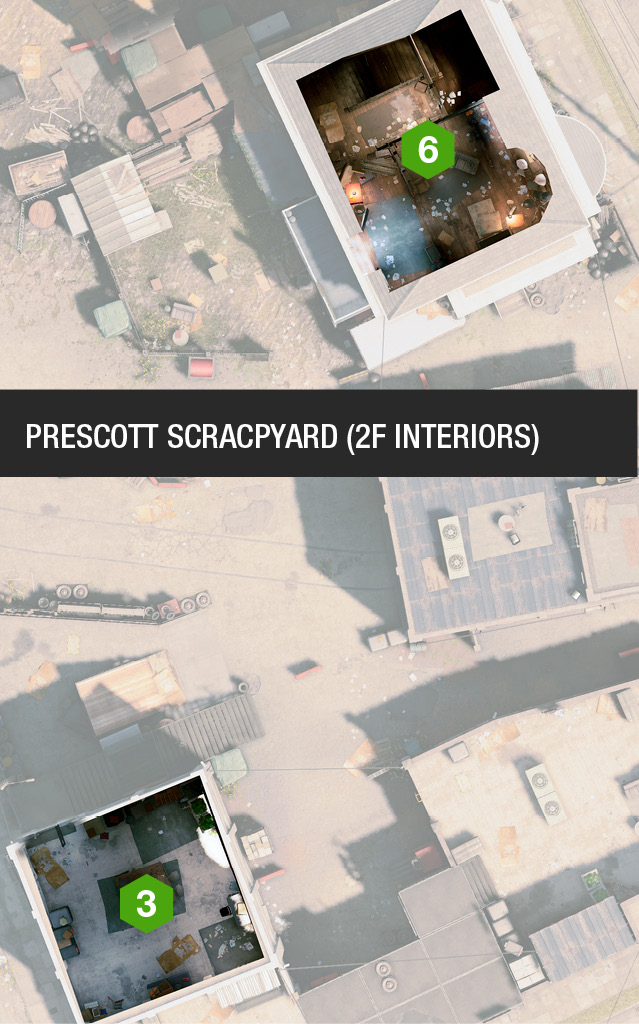
Objectives are usually around or inside this structure, which offers two entrances (usually locked), one accessed via the gantry platform and the other the metal steps attached to the north side of the building. This is a great defensive building, once you battle your way in and unlock it. You can fire out of the windows (or fly your Quadcopter to look around, or flee out of them), and use this as a sniping spot. 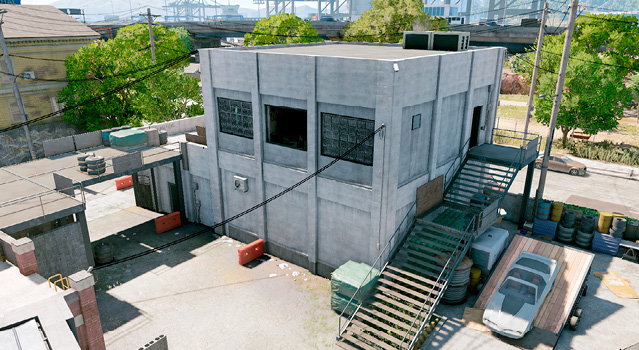
Aside from the concrete warehouse window (which you need a scissor lift to enter from the street), the concrete-block wall is easily climbed over. Beyond the gates in the northwest corner, there are few obstacles, and you can move into the restricted area freely. Also notice a hole in the wall by the barrels (4A)—a good RC Jumper spot close to warehouse. On the inside of the wall are the stairs up to the concrete warehouse. But don’t overlook the ramp trailer; it’s a spectacular way to drive a vehicle out of here, especially from the garage. The double gates (4B) are where reinforcements tend to linger, and where vehicles are usually driven out from. North of the gate, inside the walls, are rusting cars and barriers that can act as cover if necessary, though you’re quite exposed. 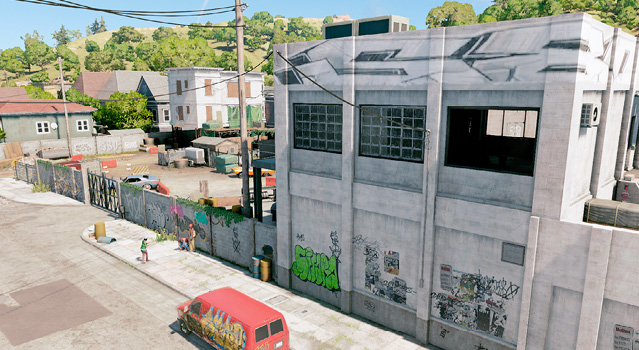
Completely devoid of fencing for much of the area, this is a yard of trash, with a house on stilts to the north (out of the restricted area), and the edge of the Victorian den house to maneuver around or through. Hiding by the stacks of wood and deck linking the den house is only feasible prior to the alarm being raised, due to the reinforcements arriving at the street to the east. Otherwise, you can usually use the RC Jumper to unlock the CCT (for some operations) from here. This is also a good way to infiltrate the den house from the top floor. 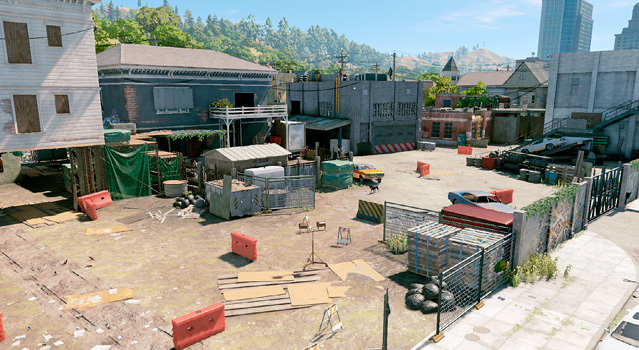
This dilapidated Victorian house has two ground entrances (west and south), and an upper deck (west). Stealthily heading in here, removing threats, and using the home as a defensive location is a good idea. Using the RC Jumper to hack the CCT if it’s on the west deck wall is worthwhile. Also use it to stealthily take down foes milling about the main yard. Just watch for enemies coming up the stairs. 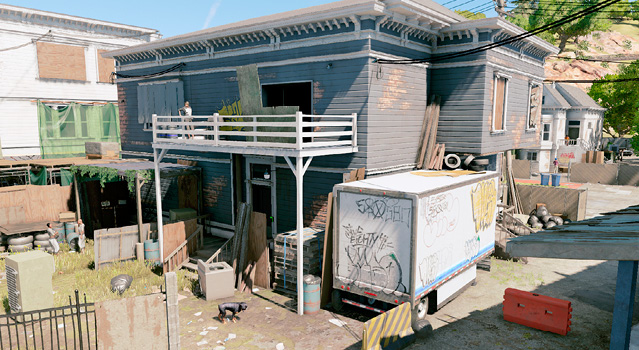
The entirety of this perimeter is permeable; you can climb over any of the walls south of the Victorian den house, and the alley behind the buildings is a good infiltration point to reach the brick warehouse roof or garage ladder. You can drive a vehicle out of the gap in the mesh fencing by the den house, too. 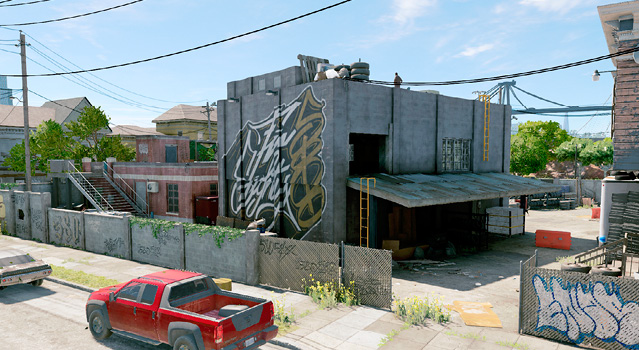
Don’t forget there are three levels to the garage—the ground floor features the garage door (west wall) itself, and a side door on the south wall. Inside, there’s a ladder to an interior balcony. The upper floor is accessed via the ladder (northeast) or jumping from the brick warehouse through the open window (southeast). This level is great for hiding and using drones, or for sniping from. Then there’s the roof, accessed via a ladder (northwest upper-level exterior), which is a great place for silently taking foes down, or raining death during more violent confrontations. You can easily flee from the roof, but foes can’t get to you (especially if you lay proximity traps at the ladder!). 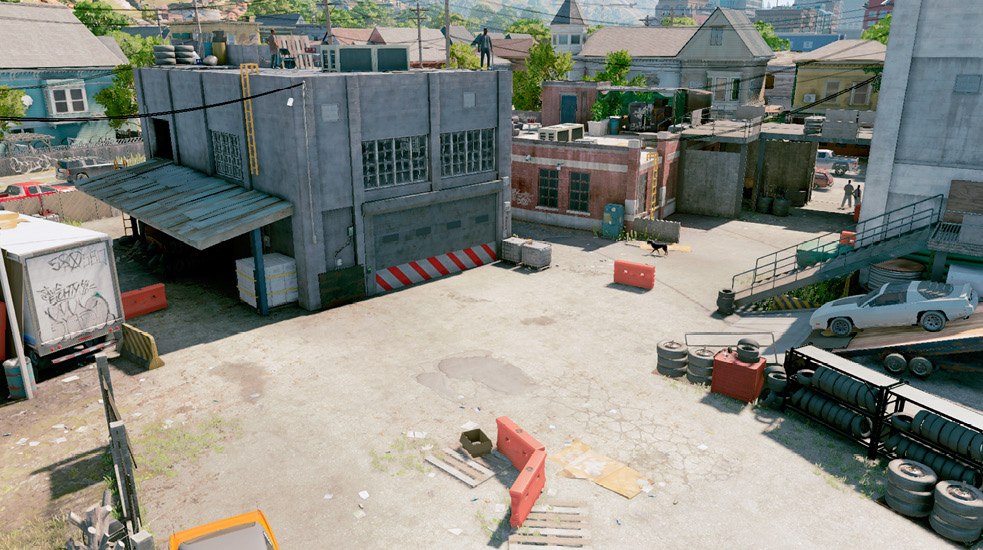
|
 South Perimeter
 South Brick Warehouse and Metal Platform
 Concrete Warehouse (Southwest)
 West Perimeter
 North Perimeter
 Victorian Den House (Northeast)
 East Perimeter
 Scrapyard Garage and Courtyard
Operation Examples
Data Storage (Data Breach Operations): The files are always on the roof of the scrapyard garage. This makes hacking them extremely easy (use the Quadcopter). However, you need to be on the roof to gather the intel, so head up there while your partner hacks the data. Then remain on the roof and fend off foes until it’s time to flee, usually out of the east perimeter.
Vehicle (Deliver Vehicle Operations): Usually, the vehicle is parked inside the scrapyard garage. But the garage door is locked by a CCT inside the concrete warehouse (southwest). The best plan is to send an RC Jumper in to unlock it. Once the garage door is open, drive up the ramp ahead of you for a quicker and more spectacular exit!
Shipments (Destroy Shipments Operations): If the three shipments are in the garage (vehicle), in the northern trash yard, and inside the concrete warehouse (southwest), then try the following: All shipments can be easily bombed using a Quadcopter (fly it through the windows of the buildings), or by the use of RC Jumper-maneuvering and bomb-laying.
Prisoner (Prisoner Release Operations): Is the prisoner locked upstairs in the southwest concrete warehouse? Then take note—both doors to the prisoner require the same CCT to be unlocked—over on the outside balcony of the northeast Victorian den house. Access the CCT by leaping from the north scaffold platform. Leave after freeing the prisoner by jumping out of the window to the southwest street corner.