
Watch Dogs 2 Guide Main Operations Hacker War
4. Operation—Bunker Bust
Objectives
Difficulty
RewardsDedSec Followers: +233,000 BriefDedSec’s proved its point. The ransomware decryption key has to be on a computer inside Prime_Eight’s bunker. Time to get the location of that bunker. HostilesPrime_Eight Hacker Collective Location
|
 Obtain bunker location from Lenni.

Drive back to Lucky Pierre’s bar, where a visibly angry Lenni lets you know she’s not pleased with your recent actions. However, she does give away the position of her bunker, up in Marin. Leave the Castro District, and head to the bunker, pronto.

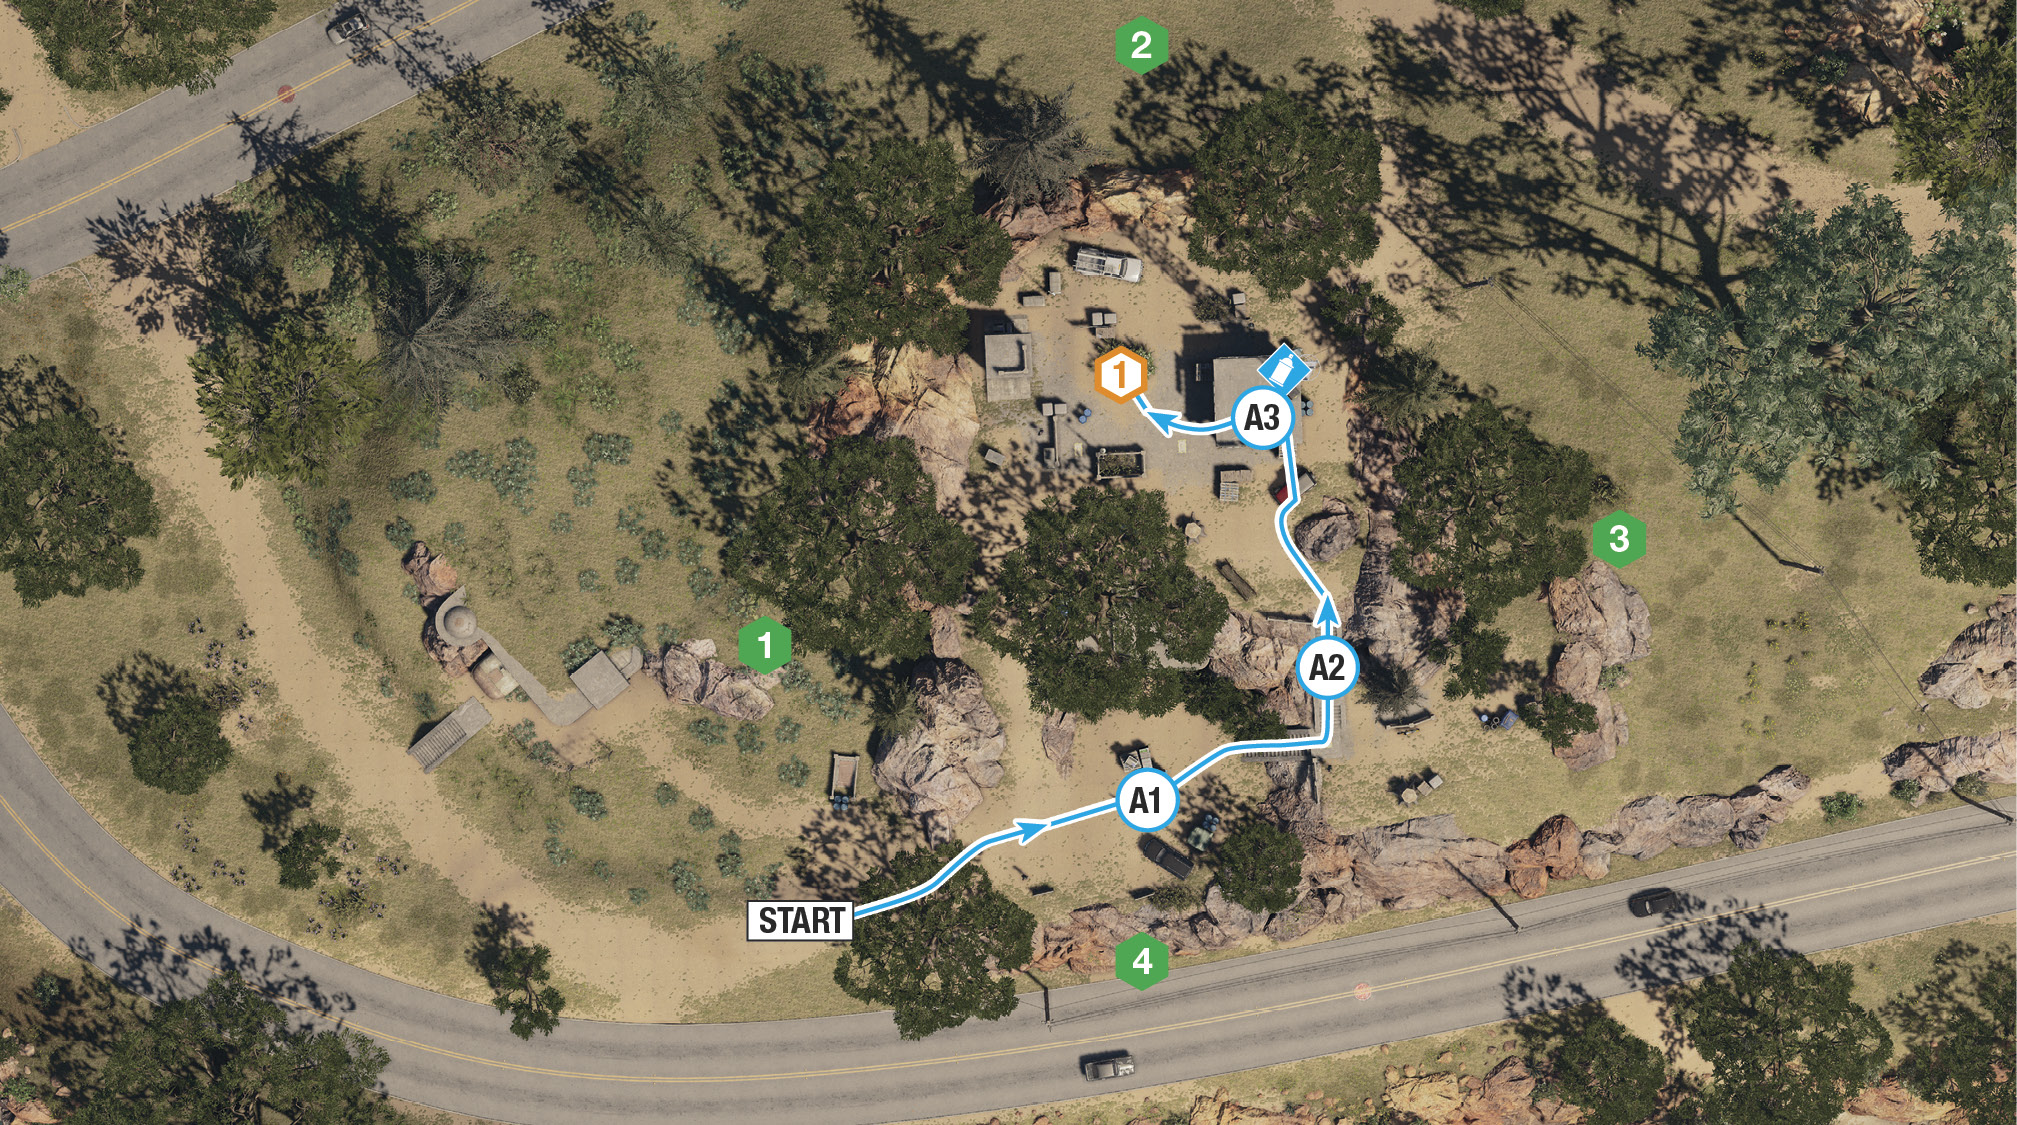
Infiltration PointsThe bunker is atop a hill, and the area is completely porous, meaning there are few obstacles on the hillside preventing you from reaching the objective point. The direction from which you approach is of note, however:
The slope to the west has large rocky outcrops and a couple of places to climb up between the boulders. In the southwest is a dirt road to the lower parking area and first cluster of three foes. 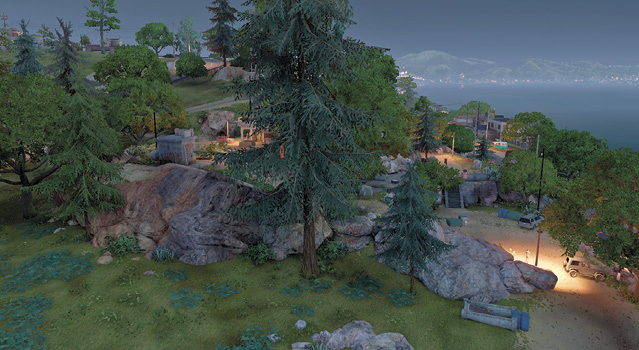
You’re on higher ground (which is advantageous during a firefight), and the hillside road northeast of the restricted area is a good spot from which to mount a violent attack. The three foes at the summit of the restricted area, where the bunker objective entrance is, are easily dealt with from this direction. 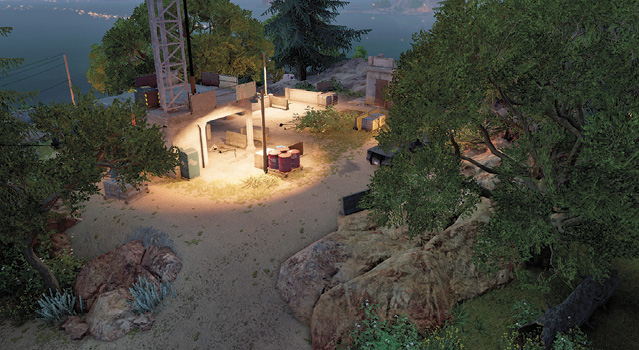
The path along the eastern perimeter (running north to south) makes sneaking around between the two enemy clusters simple. The southeast area has a bike and concrete steps and is the preferred route during infiltration. 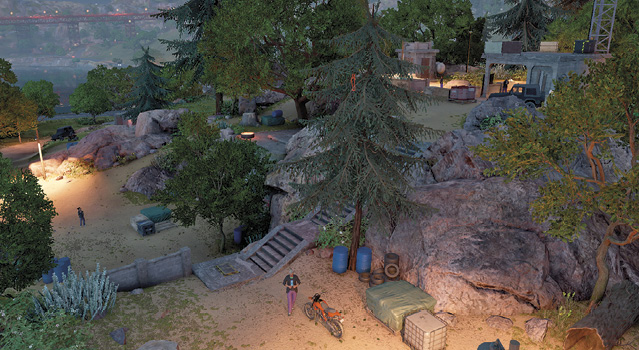
Follow the road and climb the rocks to an open dirt parking lot with three foes. This is where the “normal” bunker entrance is (after you liberate it from Prime_Eight’s goons). While accessing the area to the southeast or southwest is advisable, directly climbing the south rocks makes infiltration trickier. 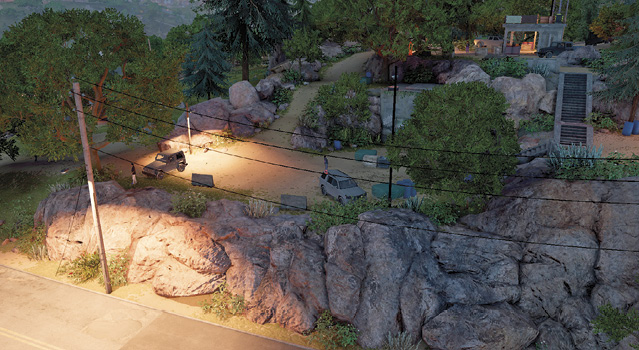
|
 From the West:
 From the North:
 From the East:
 From the South:
|
 POIs and Objective Points
 Collectible
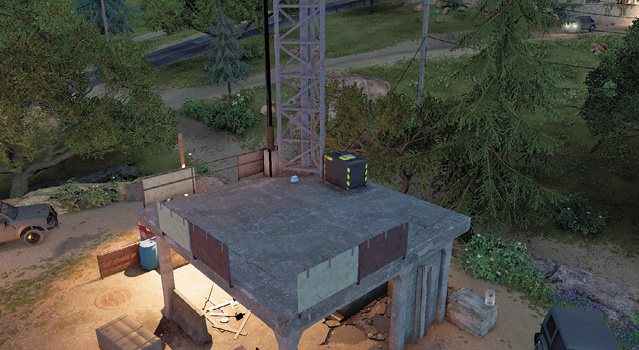
 Bunker Entrance
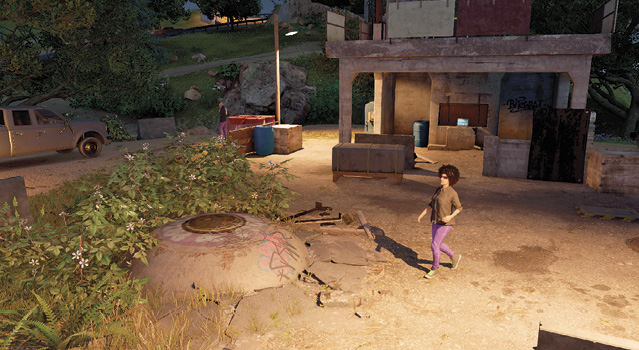
Paths to Completion
This infiltration is a little more straightforward than previous missions, though reinforcements are easily called and usually stream in from the north. It’s good to get on higher ground, but only after the lower parking lot is devoid of foes.
 Prime Time

The six guards here are on two different sections of hillside. From Infiltration Point 4 (southwest corner of the restricted area), head northeast. Crouch by the jutting rock across from the tree, and tase both guards in the plateau by the parked vehicle. Saunter over to the laptop (A.1). Find the enemy on the concrete steps ahead (east) and tase him.
Climb the steps (A.2), maneuvering counterclockwise to the right in a curved path behind the concrete antenna shed. Peek out either side of the shed to tase the two nearest guards, then the final one. Scramble up to claim the collectible atop the concrete antenna shed (A.3). Then enter the bunker.
Quick Climb

Any three of the guards on the upper hill (bunker entrance) and one of the guards on the concrete steps (between the two guard groups) can be zapped by coaxing them to a junction box or transformer vault before exploding them. Then you can quickly mop up the rest with small-arms fire.
Stay Out of the Grime

Both your RC Jumper and drone can be positioned to drop bombs, starting with the foes on the lower promontory; then finish up at the top of the hill.
Or, why not call an enemy gang on the foes protecting the parking lot entrance (while sneaking in from the north)?
Vehicular Crime

The parked Wildebeest vehicles have good off-road capabilities and have a secondary function: running over the six guards as you drive up and down the bunker hill. Not subtle, and reinforcements can ruin your ride.
INSIDE THE BUNKER
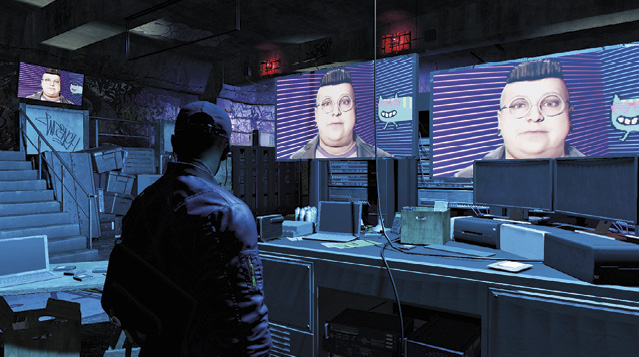
The inside of the bunker stinks of beer and cheesy feet. But once you unlock the data container, there’s more than the stench of unwashed hackers to worry about; Prime_Eight has triggered a bomb to go off in five minutes. Not good. Hack the server and start a Network Bypass that you must complete in time. Think of the crazy interlocking nodes as four separate puzzles to be finished one at a time. Naturally, each time you’re almost done with a section, Lenni resets the nodes, forcing you to realign the data streams again. Keep calm, and carry on with the following, which should be possible to complete with at least two minutes to spare:
Network Bypass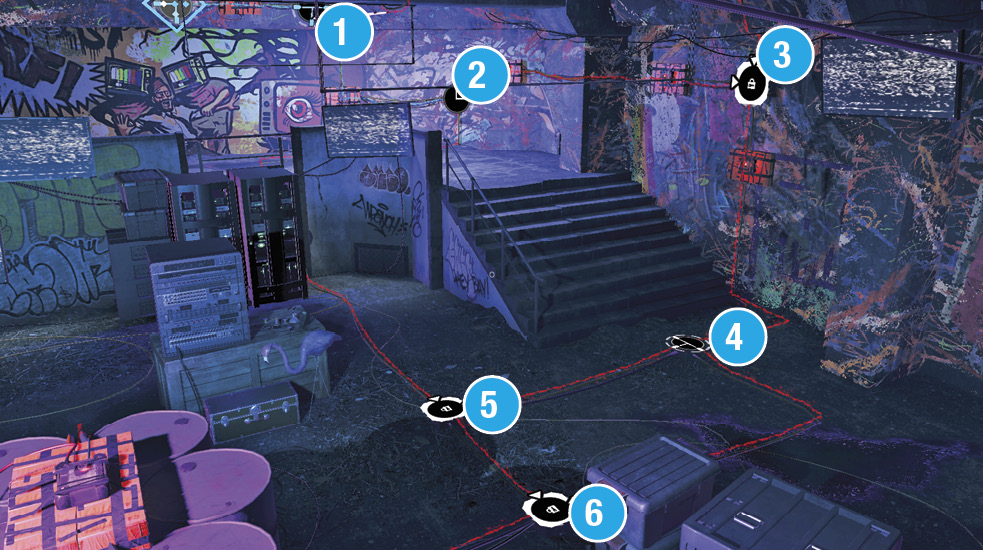
Puzzle A: 1: Turn x2. 2: Turn x3. 3: Unlock, turn x1. 4: Turn x3. 2: Turn x3. 5: Unlock. Puzzle resets. 1: Turn x3. 3: Turn x1. 4. Turn x3. 5: Turn x1. 6: Unlock. Turn x1. Puzzle section finished. |
Network Bypass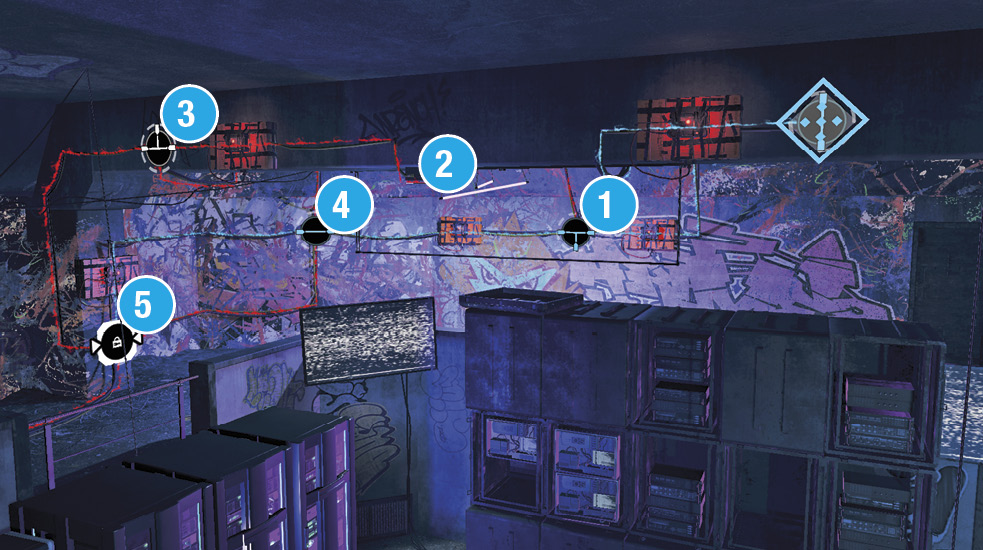
1: Turn x2. 2: Turn x1. 3: Turn x2. 4: Turn x1. 5: Unlock. Puzzle resets. 1: Turn x3. 2: Turn x1. 3: Turn x3. 5: Turn x1. Puzzle section finished. |
Network Bypass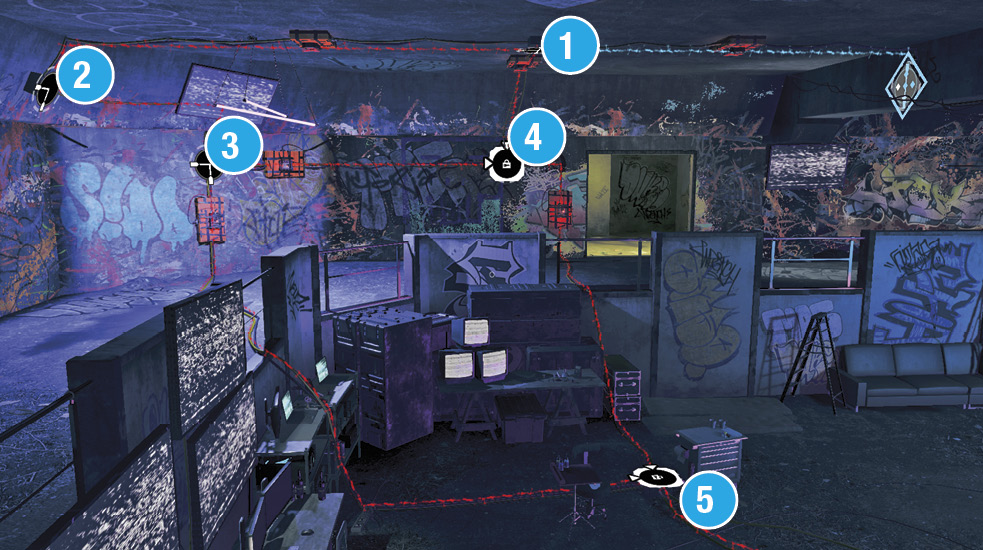
1: Turn x3. 2: Turn x2. 3: Turn x2. 4: Unlock. Puzzle resets. 3: Turn x1. 5: Unlock. Turn x1. Puzzle section finished. |
Network Bypass1: Turn x3. 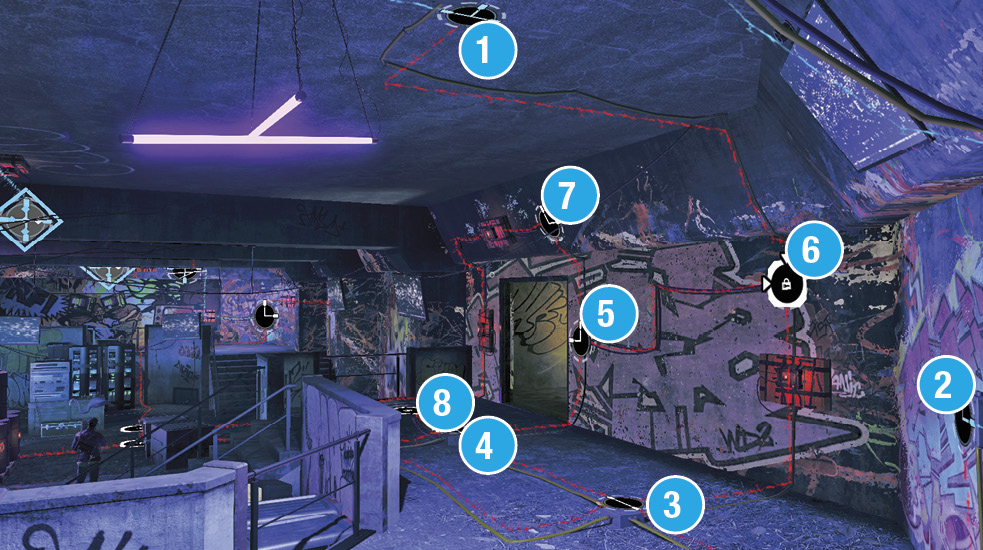
2: Turn x1. 4: Turn x3. 5: Turn x2. 6: Unlock. Puzzle resets. 2: Turn x2. 3. Turn x1. 5. Turn x2. 7. Turn x1. 8. Unlock. Turn x1. Unlock the central node. Puzzle complete. |
Seems like you handled the booms. DedSec claims this as the Marin Hackerspace (now open), and the operation concludes.