
Watch Dogs 2 Guide Online Operations San Francisco
Restricted Area 08. Alcatraz Warehouse
The bulk of the 20 available restricted areas for Online Operations are found in San Francisco. All 11 of the areas are detailed below, with infiltration and objective maps, along with plans for where to attack from, and general tactics depending on the Online Operation that’s in play.
Available Operations
| Operation Type | No. of Objectives | Variations |
|---|---|---|
| Data Breach | 1 | 1 |
| Deliver Vehicle | 1 | 1 |
| Destroy Shipments | 3 | 1 |
| Prisoner Release | 1 | 3 |
| Steal Encrypted Drives | Not Available | Not Available |
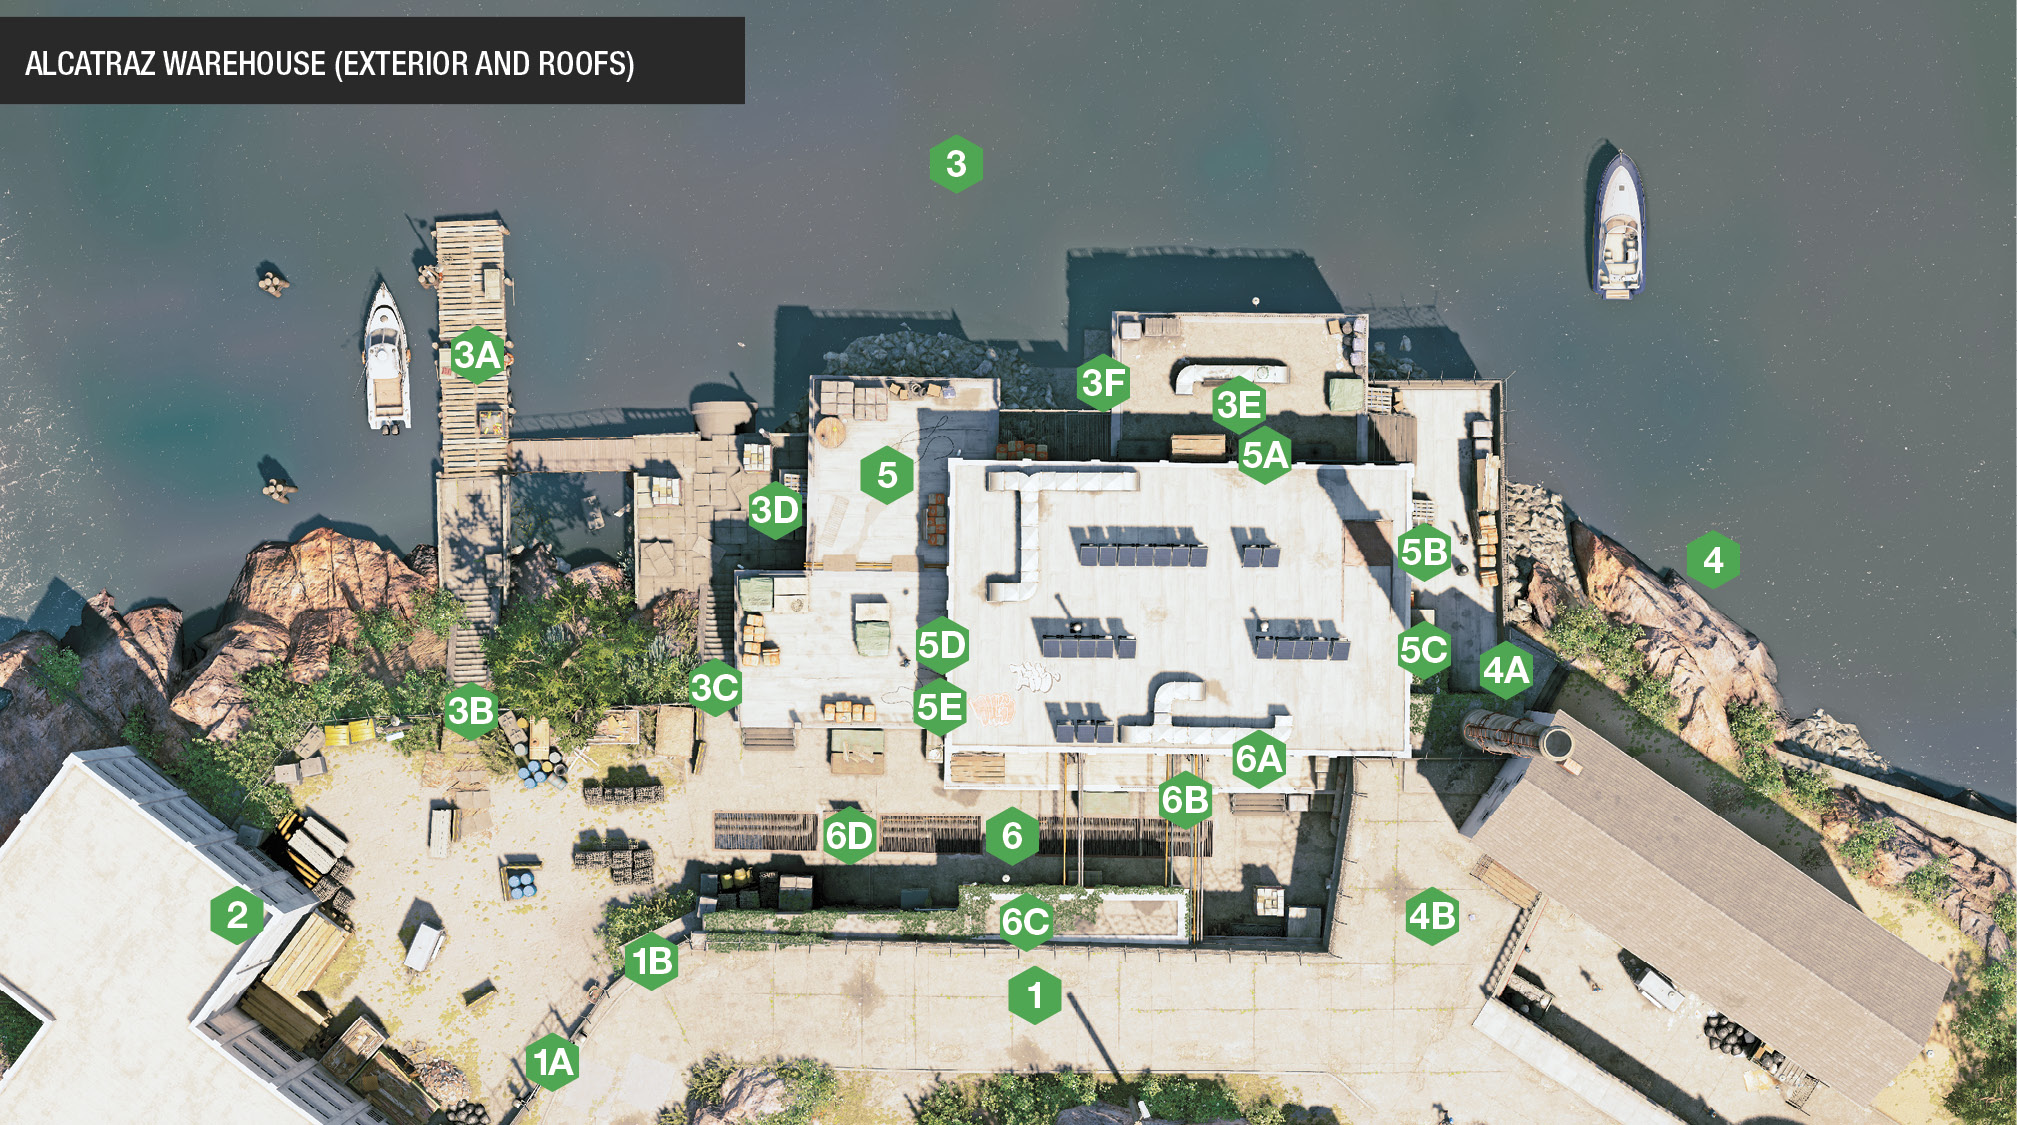
Structures and Infiltration PointsWelcome to the rock! This area is more secure than most, and the interior warehouse can be confusing when you’re learning the layout. There are few long-range sniping spots, which forces sneaking with Quadcopter shadowing for duos who work well together.
The concrete path to the south offers safety, but little accessibility into the compound, as a large barbed-wire fence prevents you from dropping down. This continues west and south, to a gate in the southwest corner (1A), close to a hole in the concrete barrier you can pass an RC Jumper through (1B). 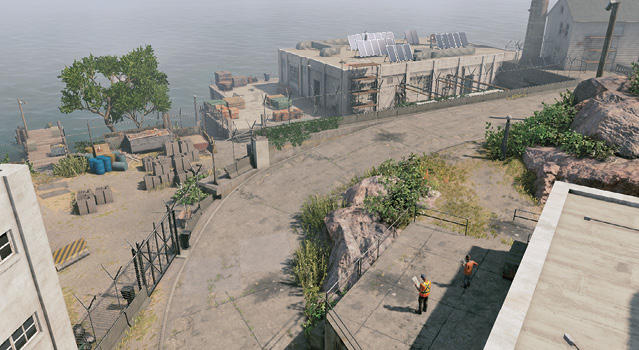
The west courtyard and rocks by the water are completely impenetrable from the west side. Use the gate (southwest corner), or the northern perimeter for infiltration plans. 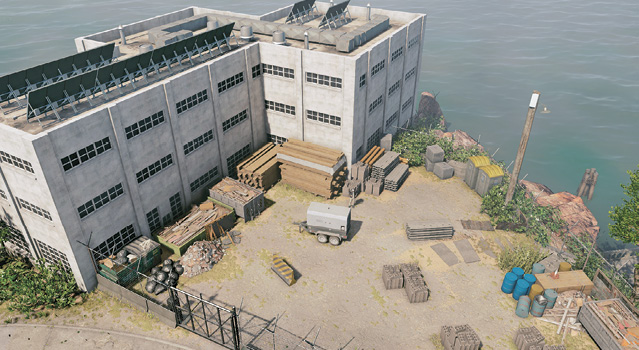
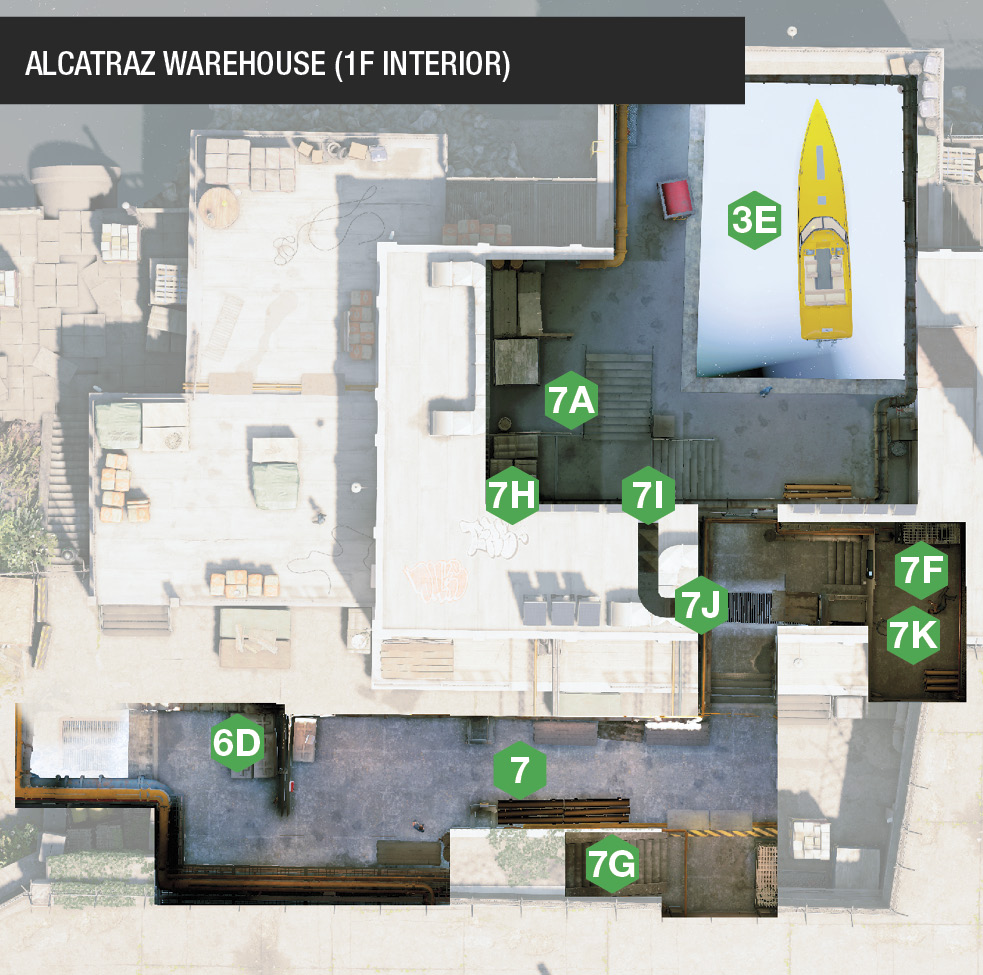
Despite being on the water, there are numerous methods to insert yourself or a drone along this set of docks and into the main warehouse building. Northwest is the wooden dock (3A) with low scenery to duck behind, and only one or two watching foes. Concrete steps (3B) lead up into the west yard, offering direct paths in and, more importantly, out, to a waiting escape boat. The concrete paving area also has a set of concrete steps (3C), as well as crates you can climb up onto (3D), accessing the concrete deck around the main structure. A more cunning method utilizes the large sewer pipe (3D) jutting out under the paved area. Wade in here, and move directly into the bowels of the warehouse, close to the boat garage—an excellent method of infiltration, although you need to be aware that the doors are likely to be locked and require a CCT. Watch for enemies spotting you from the ceiling grating in the south walkway. The boat garage (3E) may be locked, but it offers the best method of fleeing this area, as there’s usually a (fast) boat docked here. Otherwise, it’s usually the hub of activity with battles and objectives close by, in the interior of the warehouse. Don’t overlook the ladder (3F) on the exterior west wall, which allows access up and onto the roof of the garage. 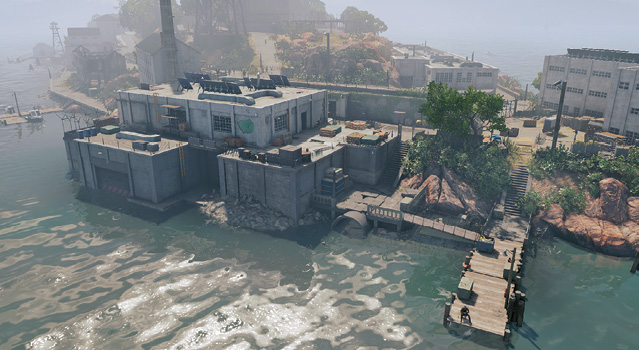
Though you can’t access the concrete deck by the warehouse easily, there’s an open gate in the fencing (4A), just next to the chimney of the white old factory to the east of the restricted area. Take the dirt path near the water to reach it. On the south side of the white factory building is a bridge (4B) under the south perimeter, allowing sneaky access into the south walkway area. There’s a guard, but this is a good way to quickly sneak in. Take care that you aren’t overwhelmed by foes, though. 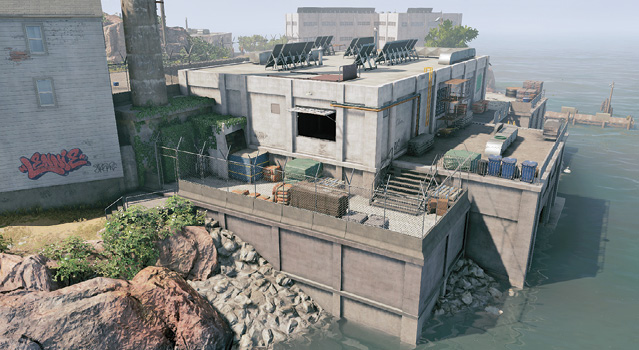
Surrounding the main warehouse is an exterior deck and gantry allowing access to pretty much every part of the outside warehouse. Assaulting the warehouse is easier if you spot the ladder on the north wall (5A), the open window (5B), and the crates up to the roof near the chimney (5C). Gaining access to the warehouse roof can be critical, as there are far better defensive positions up here, allowing you to rid yourself of foes more safely. The west concrete low roof deck is a hive of activity, and features a (usually locked) door (5D) as well as a ground vent (5E). 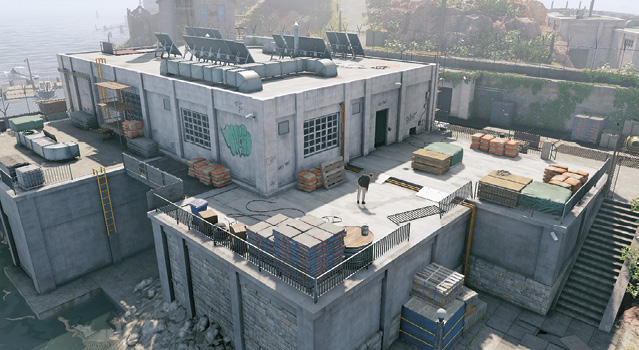
On the south walkway from the bridge (southeast) to the yard (southwest), there are numerous ways in. Aside from the (usually locked) warehouse door (6A), there’s a duct close by (6B), allowing your RC Jumper into the main interior stairwell. Note the grating under your feet—tag foes through it if you need to. South is a small storage room (6C), sometimes locked, which has stairs down to the warehouse interior. Finally, there’s a roof hatch (6D) on the ground, allowing you to drop into (or climb out of) the sewer pipe exit. Use this for a quicker escape. 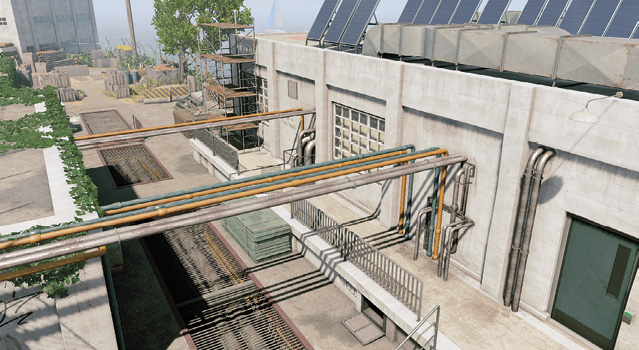
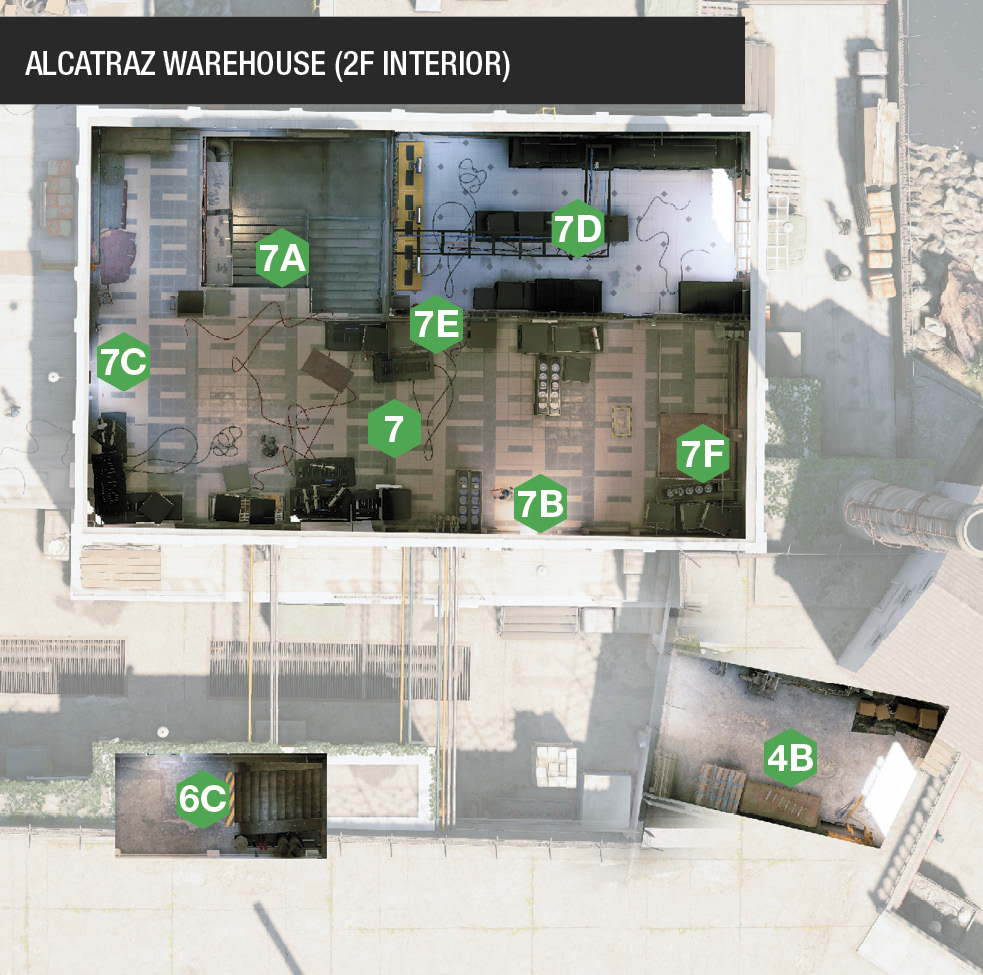
There are two interior floors, which are initially confusing and labyrinthian, but are more compact than you’d think; it pays to explore thoroughly before taking an operation here. The upper floor—accessed via the boat garage (7A), south walkway (7B), or west concrete deck (7C)—features server boxes. In the northeast corner is a server room (7D), which can be accessed via the door, a ground vent in the south interior wall of the server room (7E), or the open window from outside. There’s also an interior roof hatch in the upper floor (7F), close to the door to the server room, allowing you to drop down, or climb up from the lower-level storage room. The lower level has a corridor running directly below the south walkway (from the sewer pipe), and south concrete stairs (7G) to the storage hut in the south walkway area. The main metal stairwell from the upper level leads to the boat garage, and there’s a duct opening (7H) hidden by pipes halfway down the stairs, leading to and from the south walkway. Note the second duct under the base of the stairs (7I), which leads to a second opening (7J) and into the small storage room (7K), which usually has an objective, and is locked. Note the ceiling hatch in the storage room, allowing you to climb out to the upper-floor interior. 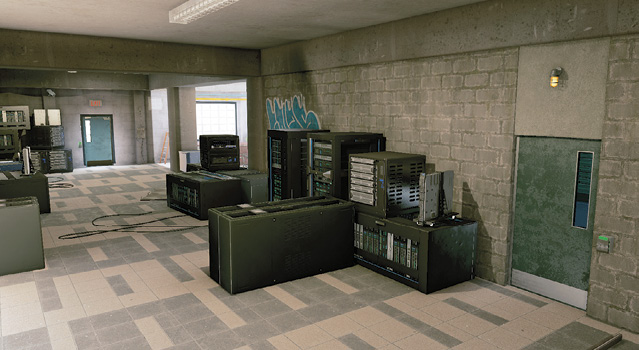 |
 South Perimeter
 West Perimeter
 North Perimeter
 East Perimeter
 West, North, and East Deck
 West Deck and South Walkway
 Warehouse Interior
Operation Examples
Data Storage (Data Breach Operations): Despite the security during this operation, if the server tower to hack is inside the server room, or in the main upper area close to the main metal stairwell, use the Quadcopter to fly through the open (northeast) window, and optionally through the ground duct, to hack the server. A second player needs to scale the ladders on the north side of the deck to reach the roof, and sit there as the download commences (laying a proximity trap at the top and bottom of the roof ladder). A quick drop down to the docks allows a relatively easy getaway.
Vehicle (Deliver Vehicle Operations): Stealing a vehicle on an island? Tricky, until you realize it’s the boat in the boat garage. This is much easier if you use the Quadcopter to open the garage door and remotely steer the speedboat out and around to your position, before fleeing.
Shipments (Destroy Shipments Operations): The three shipments are within the warehouse interior, and both access keys and CCTs need to be hacked to reach them. Or, you can open the boat garage door using a Quadcopter, destroy the shipment in there, and wait for foes to open previously locked doors, then scoot through to the remaining shipments. Or, maneuver the Quadcopter up the metal stairwell, to the roof hatch near the server room, drop down into the tiny storage room, and prep a proximity mine by the second shipment. The door here is usually open (by the enemy), allowing you into the corridor near the sewer pipe where the third shipment can be destroyed. Destroy this second (from behind the wall), so you can detonate the shipment in the storage room last (and leave the Quadcopter in the explosion while you flee).
Prisoner (Prisoner Release Operations): A trapped foe in the tiny storage room underground? This one’s tricky! Send in the RC Jumper via the duct in the south walkway to reach the CCT in the boat garage. Then head through the west gate to the roof ladder. Hack the roof hatch, deactivate the motion detector, and drop into the server room. Head out and hack another motion detector above the roof hatch leading down to the storage room. Hack the hatch, drop down and rescue the foe, and escape via the boat garage or back the way you came. If you have the access key (take it from a guard using the Quadcopter), enter via the warehouse door in the south walkway area if you wish.