
Watch Dogs 2 Guide Online Operations Oakland
Restricted Area 05. Sweet Maria Warehouse
Available Operations
| Operation Type | No. of Objectives | Variations |
|---|---|---|
| Data Breach | 1 | 2 |
| Deliver Vehicle | 1 | 2 |
| Destroy Shipments | 3 | 2 |
| Prisoner Release | 1 | 3 |
| Steal Encrypted Drives | 1 | 2 |
Structures and Infiltration PointsThis cluster of industrial garages and warehouses offers a good amount of hiding spots, and some interesting vantage points both inside the restricted area and outside the perimeter, making it a good place for snipers to back up their partners. Open windows make drone infiltration more useful than usual, though foes tend to lurk both inside and outside the interiors of this maze of concrete and metal. 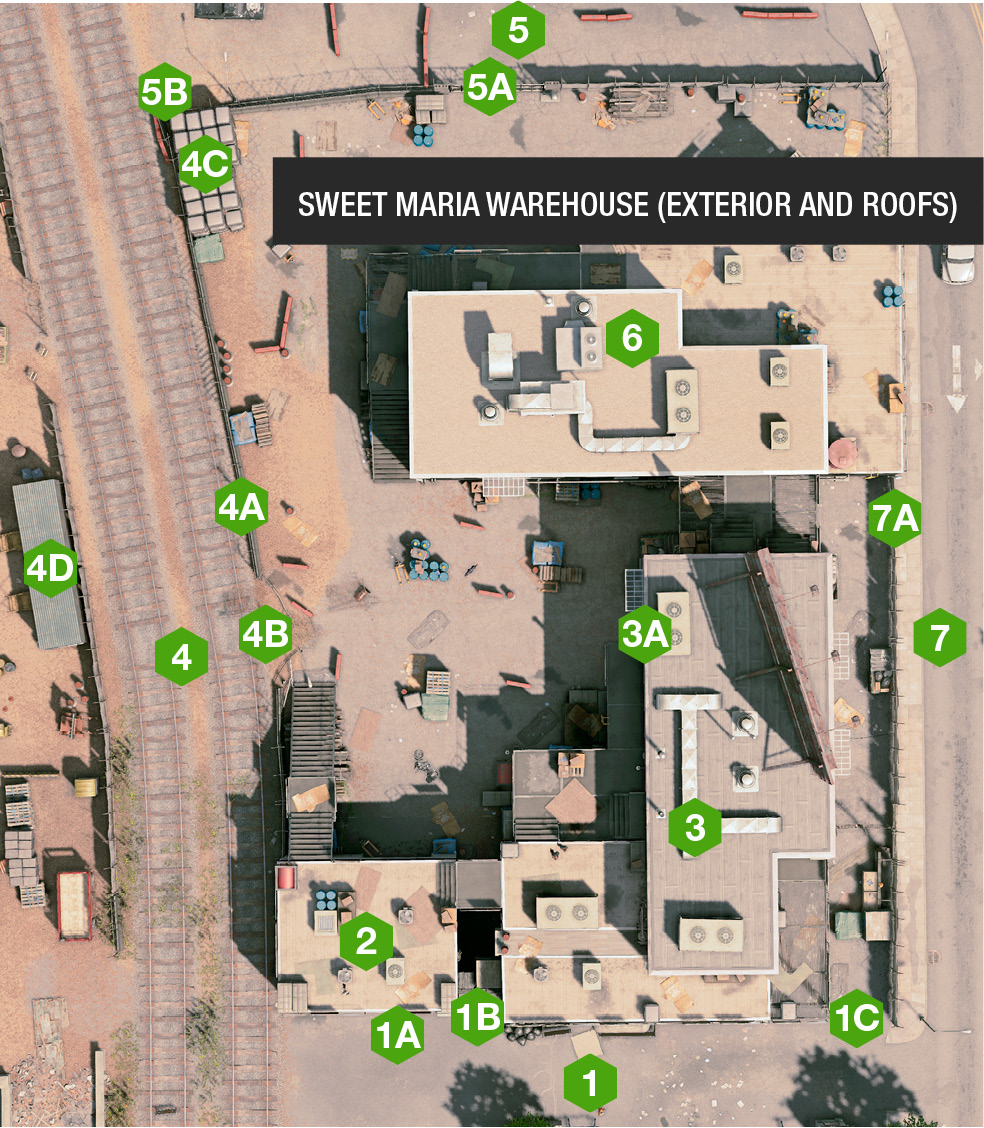
Adjacent to the Oakland PD building, there’s sometimes a truck with a tall cargo container you can drive to use and climb up onto the rooftops of the southern buildings in this compound. Otherwise, your access is limited to the door in the southwest corner building, or the southeast alley. The southwest door (1A) offers ground-level advancement into the restricted area and “woodshed” garage, and there are hiding spots and a side door to the tiny alley between the two southern buildings. The south alley (1B) is inaccessible from the outside (and watch the nearby propane tank on the perimeter wall if you’re driving a vehicle in or out of here), but once you’re inside the fence, you can use the crates at the fence threshold to climb up and onto the roof of the two southern buildings—a great and stealthy way to insert yourself into this area. The fencing in the southeast alley (1C) can be driven through (as there’s no concrete barrier at the base), and the alley running along the eastern side of the restricted area navigated, through a mesh gate. Note the RC Jumper vent to the left of the gate, offering a path into the southwest warehouse interior (ground floor). 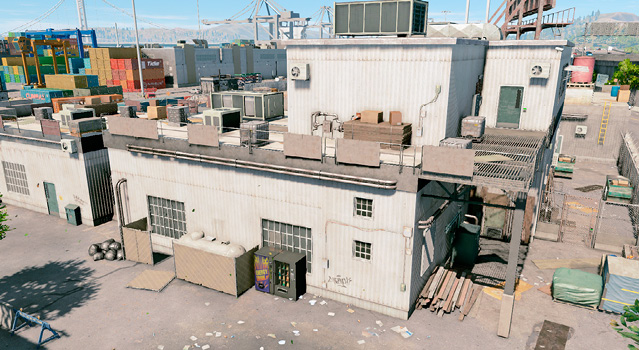
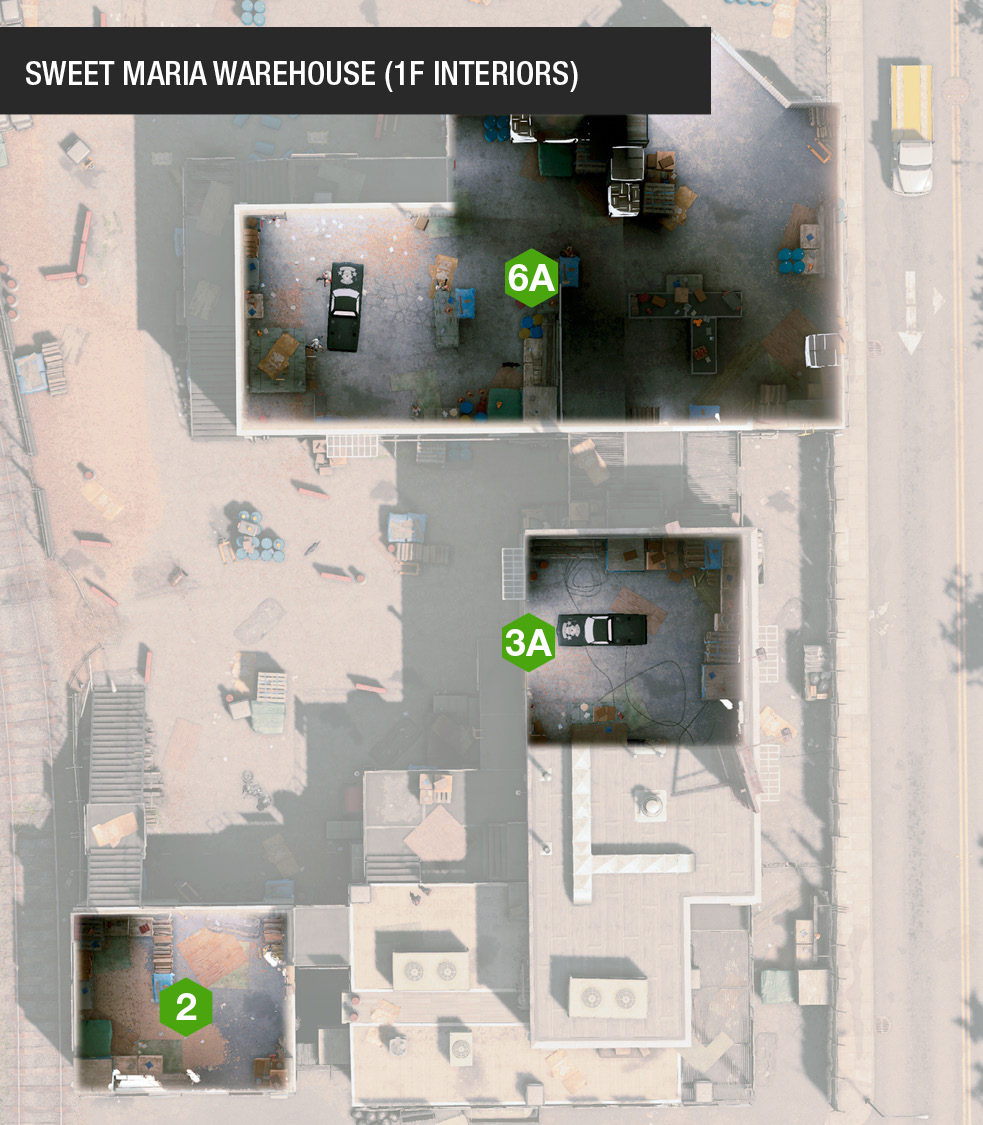
This is the smallest of the buildings, with access from the metal stairs along the west perimeter (inside the fence), or the south door (southern perimeter). The ground floor offers cover opportunities as you stealth in or out, and the roof offers access in a counter-clockwise direction around to the large southeast garage and office building. 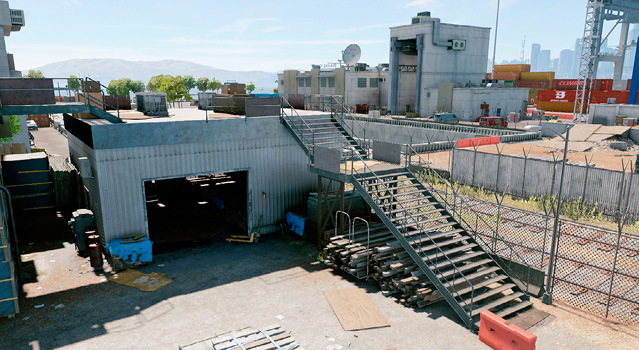
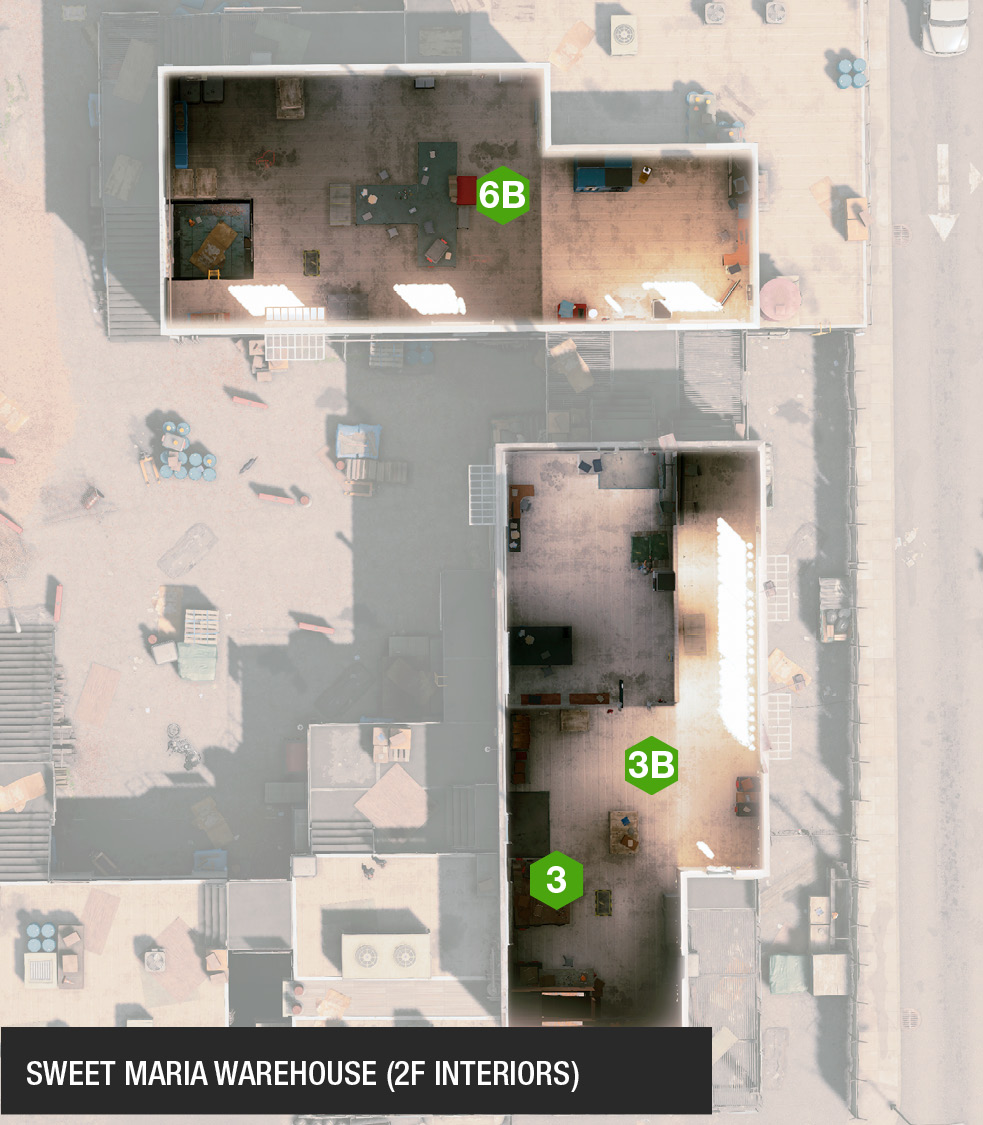
This L-shaped building takes up most of the southeast footprint of the map. The ground floor consists of a garage (east). To the southeast is a huge stack of pallets and crates, and a ladder up to the roof where multiple foes are likely to be patrolling. Access the roof from here, or the south alley crates. The upper level has a roof to navigate in the south area, and a two-room interior office space, with gantry access to the north garages (east side). The garage entrance (3A; ground floor east) is the only human-sized entrance in and out of here, but don’t overlook the ground vent (south wall), which is accessed in the east or southeast alley; the RC Jumper can enter and exit from here, completing objectives remotely. The upper-floor offices above the garage (3B) feature a tool shop (south) and corridor (east) to a gantry and access to the north garages, as well as an office above the garage. Note the hackable doors, and the two open windows (one on the west, one on the east) for Quadcopter infiltration, or a leaping escape. 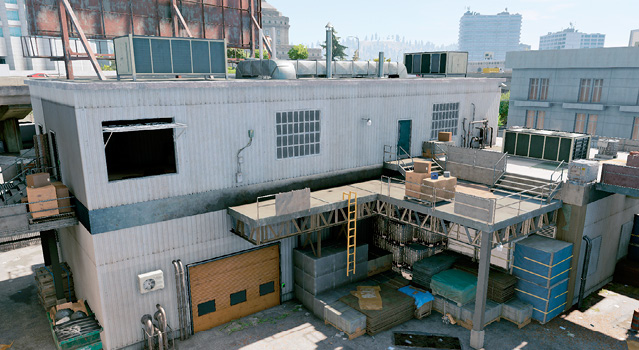
The length of the western perimeter is impenetrable barbed-wire fencing, with a section of fence you can blow up or drive through (the fence without the concrete base), and there’s a mesh gate you can push open. However, the enemy can easily see you, so ensure you have a plan to take cover if you’re heading here on foot. Push the mesh gate (4A) open, or insert an RC Jumper from here, but don’t stand around; you’re easily spotted. Unless you want every foe to know where you are (or you’re causing a distraction from this direction), this weakened part of the fence (4B) is usually only destroyed if you’re driving a vehicle out of here, as it’s a good place to crash out of the restricted area on this side. A selection of concrete rebar blocks (4C) is stacked at the northwest end of the fence, and can be accessed from the outside or in—a good way to get yourself or your RC Jumper in or out of here. A metal trailer office and multiple stacks of crates and pallets outside the restricted area in the train yard (4D) make good hiding and viewing spots if you’re using drones or sniping. 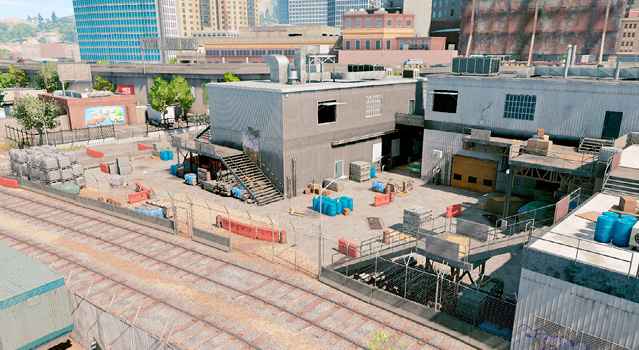
Arguably the strongest fencing of the four perimeter walls, there are no weakened areas, aside from the gate and the hole. When extricating a vehicle from the northern warehouse building (either garage), the main gate (5A) is the place to drive the vehicle through. It may be locked, so send up a Quadcopter to trace where the CCT is, if applicable. Note that when escaping from the interior, you can use the pallets and concrete gate pillar (west side of the gate) to climb over, instead of opening the gate (if it’s locked and you can’t hack it, for example). There’s also a corner area with concrete blocks which is a great way to exit this area (5B). 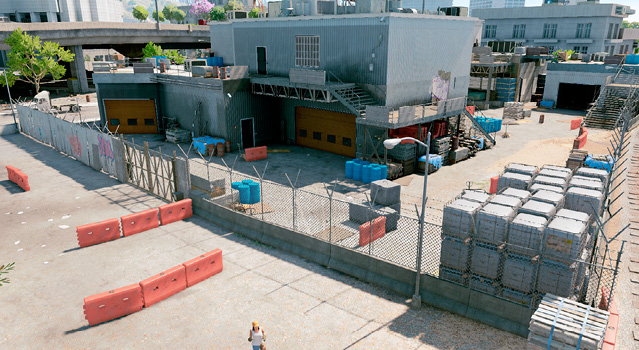
This large structure—with two garage doors on its north side, metal steps from the ground on the west side, and multiple doors and ladders around its base—is where many of the objectives lie. Inside on the ground floor is one huge garage and storage area. Upstairs is an almost-as-big open construction office. Inspect the ground garages (interior) closely (6A): Aside from the garage doors and door on the north side, there are two doors on the south side, as well as a ground vent for your RC Jumper. Don’t overlook the interior ladder (southwest corner) allowing you to ascend upstairs without having to go outside. Once you memorize the three entrances (north door, southeast door, and ladder from the ground garages), you can use the construction office (6B) as a defensive area. Note the open window (southwest corner) to fly your Quadcopter in or hack from a distance, or to use as an escape route. Outside along the north of the office are a low roof and ladder access. 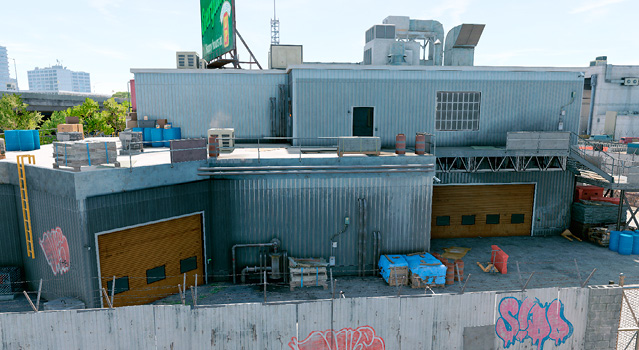
Though there’s fencing here, most of it is weakened and easily driven through, especially the alley between the north and south warehouses, offering a spectacular vehicular escape! Northeast is access to the ladder and northern garages, and to the south is the alley you can enter from the south, or just barge through with a vehicle and circumvent the hackable gate at the expense of stealth. Smash the northeast fence (7A) to gain access to the northern garages, or keep it intact and step on the pipes from the interior if you need to escape. Though it takes time to reach this vantage point, the freeway (7B) can be a place you snipe from without worrying about enemy retaliation. Note the parking spaces along the street area under the freeway too—a good place to grab a getaway car. 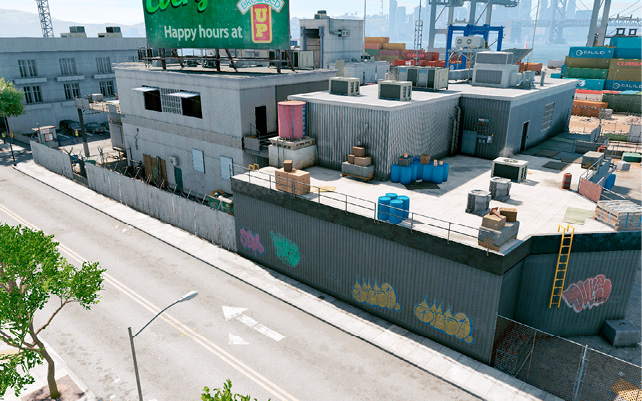
|
 South Perimeter
 Woodshed Garage
 Southeast Garage and Office
 West Perimeter
 North Perimeter
 North Garages
 East Perimeter
Operation Examples
Data Storage (Data Breach Operations): The server unit can be found inside the northeast warehouse upper-floor interior. It’s well-guarded, but you can complete this objective easily by quickly flying in using your Quadcopter, and then standing on a vehicle roof outside the restricted area at the street to the east (near the freeway) within the download radius.
Vehicle (Deliver Vehicle Operations): This can be parked in the north garages building. The garage door the vehicle is parked behind requires a CCT to be unlocked, which is also inside the garage area. A safe and sneaky method is to send the RC Jumper through the door or vent in the south wall (or the Quadcopter to hack one of the access keys and unlock the northside door the CCT is right next to). Then remotely accelerate the vehicle out of the garage door and through the north gates, remembering to stop it (remotely reversing) before it crashes, or you’ll fail the objective.
Shipments (Destroy Shipments Operations): The three shipments may be found as follows: One in the upper office (southeast garage and office building) and and two in the northeast area of the north garages interior. Multiple paths can be attempted, but a single Quadcopter can destroy all three shipments easily; fly it through the upper-floor window on the east perimeter, hacking the access key from a guard if you wish. Then fly into the shipment office and drop a bomb, fly out of the west window, and detonate. Then fly down into the garage where the two remaining shipments are, and hack the vault transformer and the junction box to explode. Bombs work too, but are more fiddly to drop while distracting the foes inside.
Prisoner (Prisoner Release Operations): Is the prisoner sitting inside the upper office area of the southeast garage and office? This prompts you to work together as a team: Have an RC Jumper head up the metal steps (southwest), across the roof to the area above the ladder and crates, near the west door into the office area, and hack the CCT on the outside deck. At the same time, fly the Quadcopter to secure the access key from a guard (though it may not be needed).
For a good infiltration route, access the southwest woodshed garage from the perimeter south, move into the south alley from the woodshed garage, then climb up to the roof, distracting and strangling any guards, and hop over the railing to the door just right of the CCT, into the upper floor of the southeast garage and office. Hack the door into the upper office where the prisoner is. Then flee by jumping out of either east window to the east alley, hacking the gate to the south, or climbing the ladder to the north and dropping down to the street below.