
Watch Dogs 2 Guide Online Operations Oakland
Restricted Area 06. Woodland Apartments
This restricted area is composed of two linked O-shaped structures connected by a central bridge, with parking to the north and south, and an alley to the east. The place is compact, initially maze-like, and consists of a ground and upper level (with a roof you can reach if you really want to).
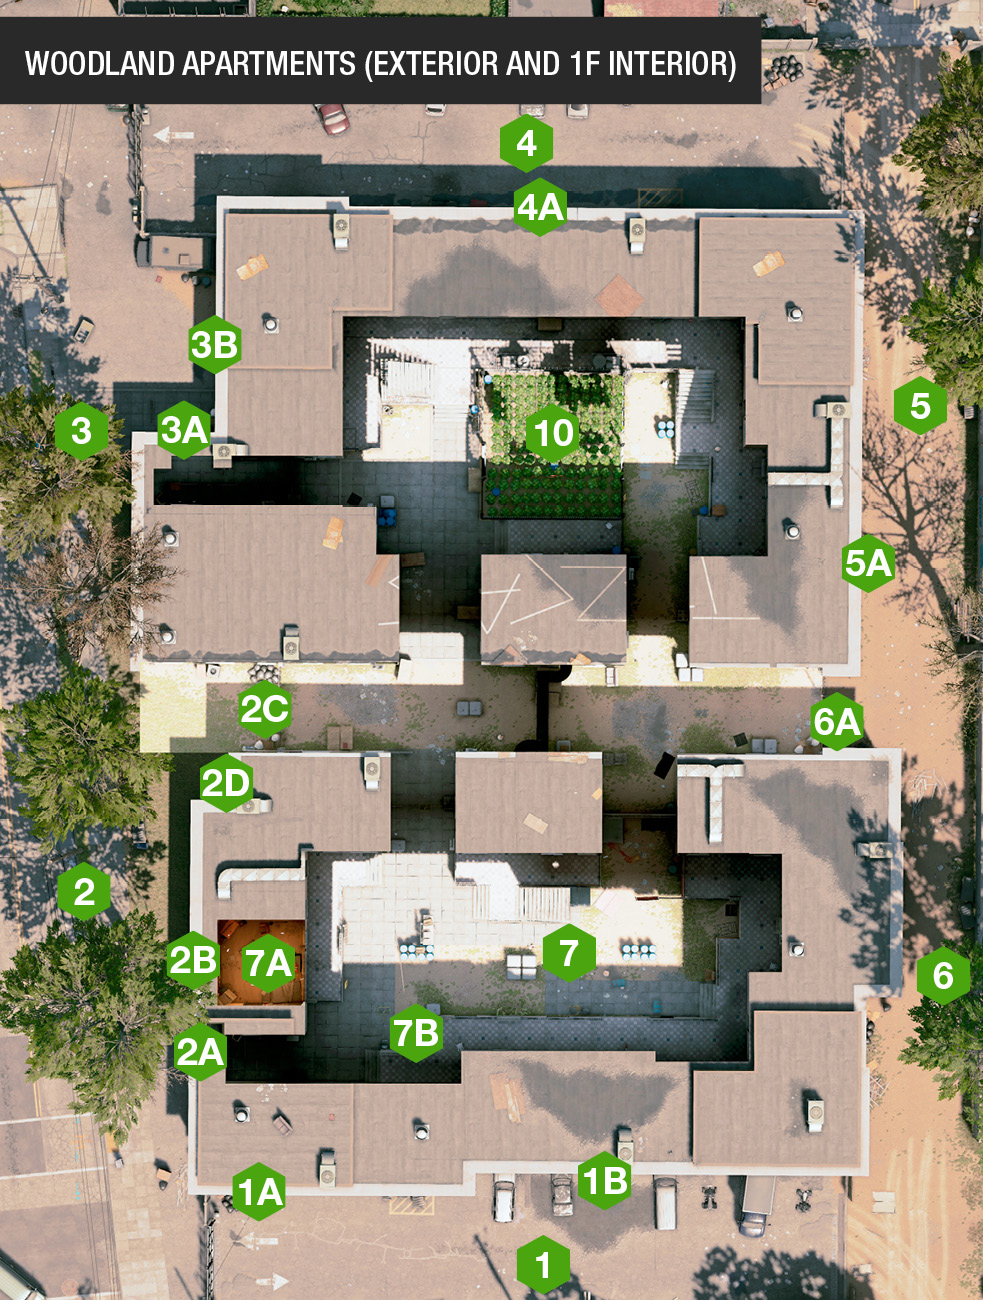
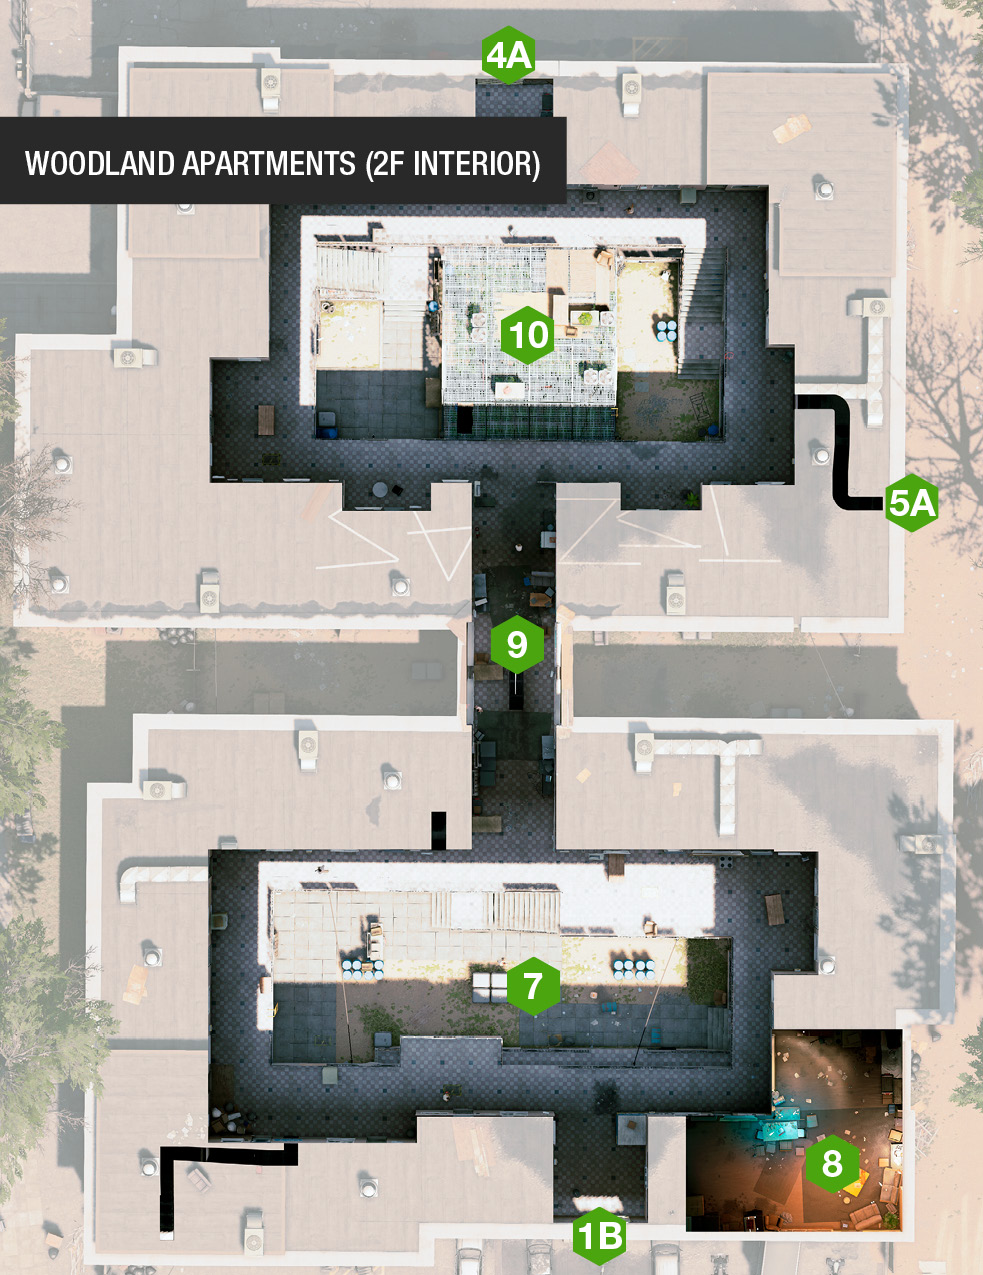
Available Operations
| Operation Type | No. of Objectives | Variations |
|---|---|---|
| Data Breach | 1 | 2 |
| Deliver Vehicle | Not Available | Not Available |
| Destroy Shipments | 2 | 2 |
| Prisoner Release | 1 | 2 |
| Steal Encrypted Drives | 1 | 2 |
Structures and Infiltration Points
The southern perimeter has gates to open in the southwest area, and a ground vent (1A) for a drone to pass through, once inside. Don’t overlook the shuttered second-floor window (1B). Hop on a van, hack the shutter to open, and infiltrate up to the second-floor alcove (and main balcony walkway) from here. 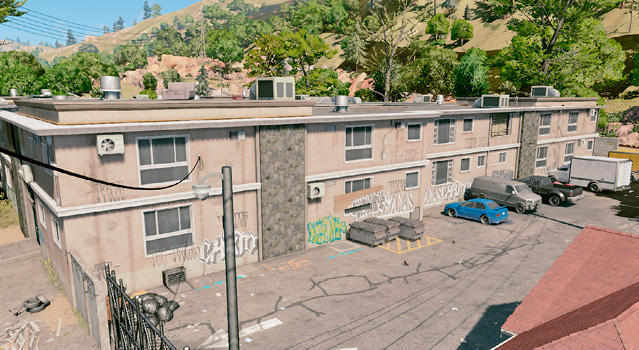
The sides of both buildings closest to the road offer numerous insertion points: In the southwest area are unlocked double doors with a drone-sized hole above (2A). Above the “welcome” graffiti is a window shutter you can hack and vault through (2B). Between both buildings is a mesh fence you can drive through (2C), and an adjacent ground vent you can drive an RC Jumper through (2D). 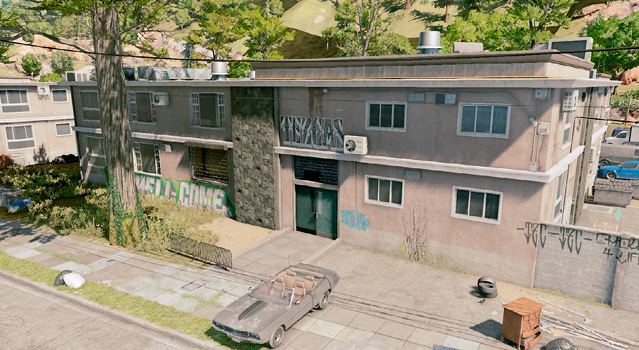
An open passage into the apartments is available for you to stroll into (3A), close to an open ground vent (3B), and there are gates to hack (for entering or exiting) in the northwest corner. 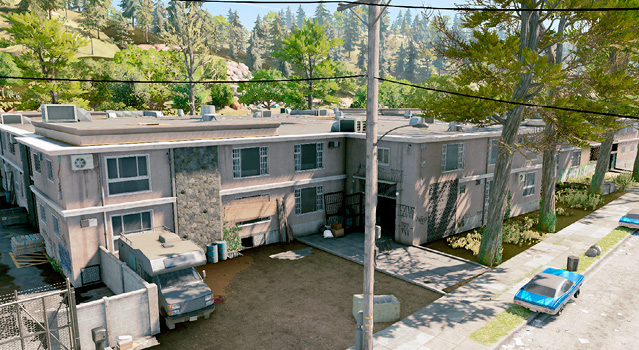
There’s only a single second-floor window shutter to hack and climb through (4A), providing you have the height (drive a tall truck here first) or use the stack of pallets to reach it. It leads to the northern balcony walkway, and is sometimes locked by a CCT. 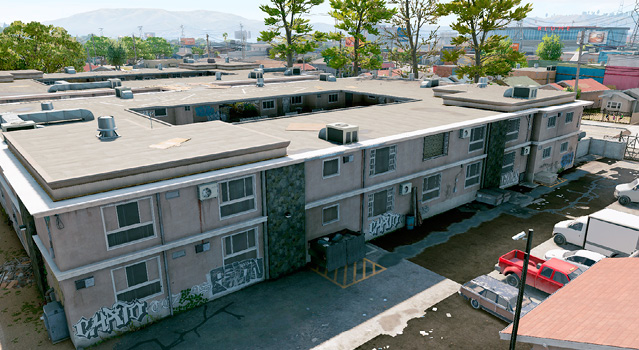
The stack of drywall here has a second-floor vent you can maneuver a drone into, once you unlock it (5A). This is a good spot for RC Jumper infiltration as you emerge on the upper balconies, reasonably close to the objective. Just drive a van and park it by the drywall so you can reach the vent. 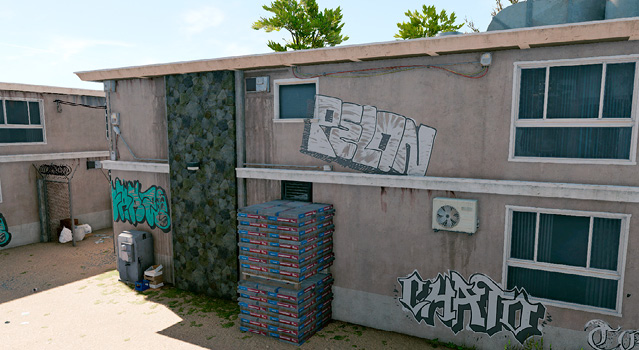
The main path between the buildings (6A) runs east-to-west here. Otherwise, the building on the alleyway side has no infiltration points. 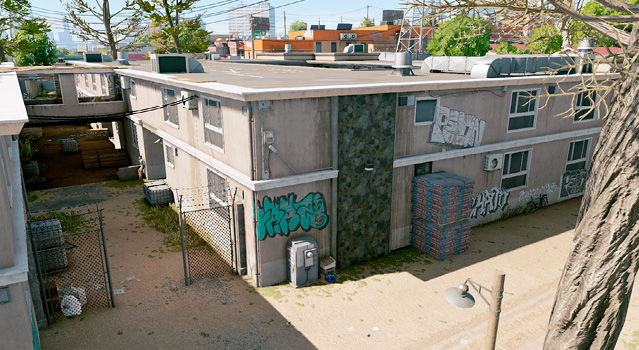
The main interior of the south building has an open apartment (7A) to the west (ground floor) with an RC Jumper vent. This is part of a ground-floor RC Jumper “roadway” that runs under most of the ground-floor tile walkways, so check for multiple entrances throughout both buildings. The main courtyard has RC Jumper entrances (7B), two ground-floor exits to the main alleyway between the buildings (to the north), and stairs as well as a ladder up to an upper-floor balcony, and access to the middle bridge (north wall). 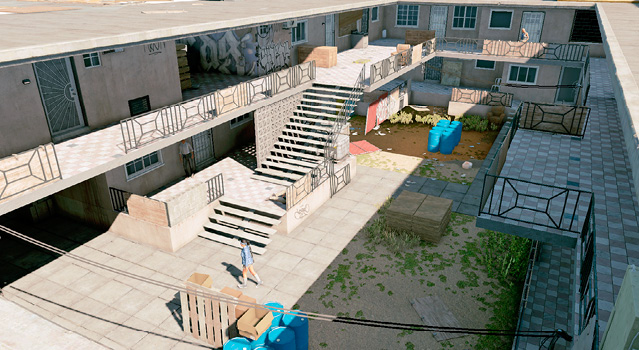
The upper floor of the southeast apartment has an interior you can use as a hiding spot, or when fighting enemies, as there’s a shuttered window you can open and close depending on how much enemy fire you’re receiving. 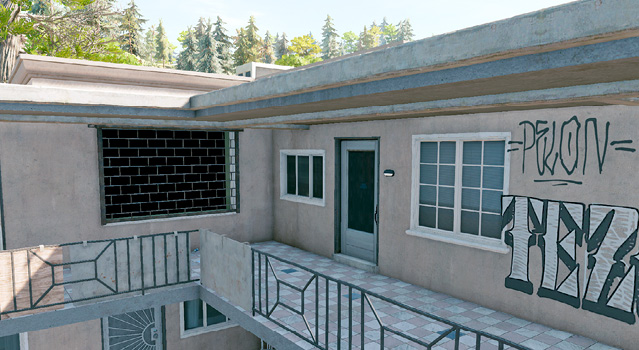
The connecting upper-floor bridge is a chokepoint where you can trap or fight foes. Don’t overlook the open windows—perfect for escaping from, or moving your Quadcopter in and out of. 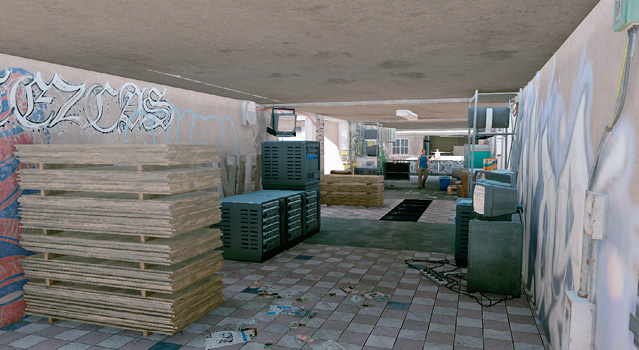
The main interior of the north building is similar in dimensions to the south building, except most of the courtyard is taken up by a large cage inside, which is a grow operation. The cage can be climbed on via a ladder on the west side, and the walkway (ground floor) runs all the way around. An upper balcony allows access to the north alcove and window shutter, as well as the bridge. 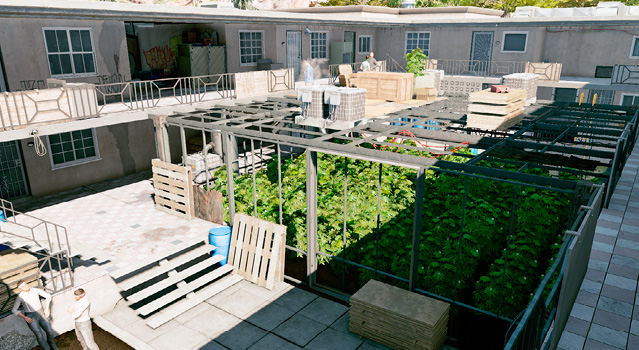
|
 Southside (South Building)
 Westside (South Building)
 Westside (North Building)
 Northside (North Building)
 Eastside (North Building)
 Eastside (South Building)
 South Building Courtyard
 Southeast Apartment (South Building)
 Middle Bridge
 North Building Courtyard
Operation Examples
Data Storage (Data Breach Operations): The data you need to download can be sitting on the mesh cage of the grow-op in the north apartments courtyard. It is easily hacked (from the air, using your Quadcopter). Meanwhile, your partner should be using the RC Jumper (via the vent in the east wall above the pallets, or via the main ground entrance to the west) to reach the CCT in the north alcove by the shuttered window. Unlock the CCT, unlock the window, then climb up into the north alcove and hide by the metal fence within the download area. Another area is directly below, but the upper north alcove offers a good escape route and is difficult to overrun.
Shipments (Destroy Shipments Operations): There are always two shipments, and they aren’t that close to each other, so have each player tackle one. Here’s one example: The shipment in the north building is in the northwest corner of the upper balcony. Scoot in and drop a bomb, or hack the gas pipe right next to it from your Quadcopter. The second shipment is in the eastside connecting area, in the northeast part of the south building, close to the east-west alley. Enter from the southwest, and you can shoot the explosive barrels next to the shipment from a distance. Or simply bomb it. Or drive an RC Jumper to light the shipment on fire from the eastern alley area.
Prisoner (Prisoner Release Operations): If the prisoner is held in the upper southwest apartment in the south building, this guy is very well-guarded, with a motion detector above the (unlocked) door, and a shutter requiring a CCT (on the wall of the middle bridge) to access. Split up the team so one player uses the RC Jumper to reach the CCT, while the other enters from the shuttered window on the south perimeter, tases the motion detector (or hacks it), and gets to the prisoner without being seen. Note the shuttered window isn’t a mandatory hack. When you free the prisoner, get out before the motion detector reactivates, and leave the way you came.