
Watch Dogs 2 Guide Online Operations Oakland
Restricted Area 07. Starter Oil Factory
Available Operations
| Operation Type | No. of Objectives | Variations |
|---|---|---|
| Data Breach | 1 | 2 |
| Deliver Vehicle | 1 | 2 |
| Destroy Shipments | 3 | 2 |
| Prisoner Release | 1 | 2 |
| Steal Encrypted Drives | 1 | 2 |
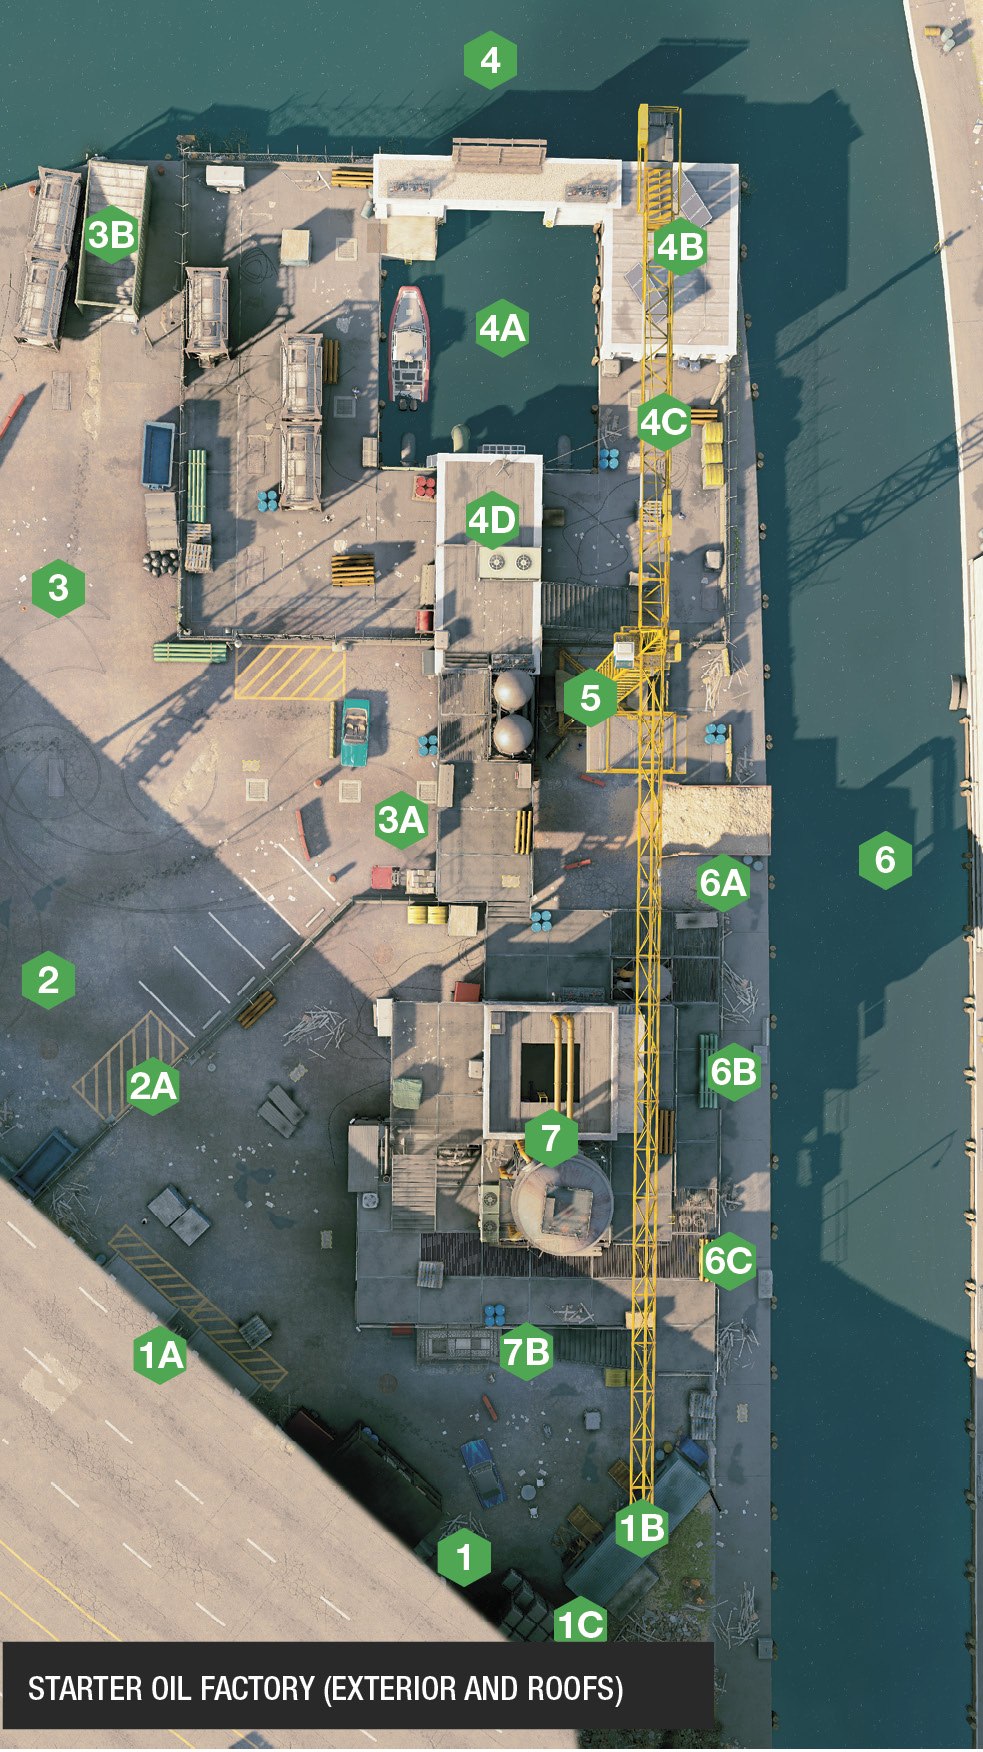
Structures and Infiltration PointsThis area is bisected by the freeway to the south and the canal to the east and north. Be careful when planning to both infiltrate and extract yourself from this peninsula of oil platforms, gantry platforms, and small interior spaces surrounded by scenery. There are few restricted areas where the scenery takes more of a role in a successful operation than this location.
The entire southern perimeter is under the freeway, allowing more cunning players to drive or run up the offramp to the east and take up sniping position overlooking the entire area (1A). The concrete barrier at the edge of the freeway offers good protection too, and you can even leap off the freeway, into the restricted area; you’ll be wounded, but still alive. Inside the restricted area along the southern edge are stacked shelves and scenery, and a trailer cabin (1B) offering access to and from the canal when you climb on the roof. There’s a hole in the stone wall too (1C)—perfect for inserting an RC Jumper. 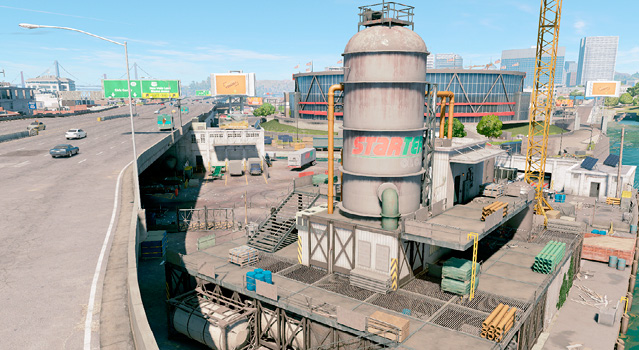
Though the restricted area is quite narrow and follows the fence line to the edge of the canal, foes usually head out into the parking lot during firefights, so watch for them using more than the restricted area to hunt you down. Running northeast from the southwest corner is a sturdy fence with a double gate (2A); this is inaccessible from either side until the gate is opened. Remember you can retreat under the freeway to some containers if the battle isn’t going your way, or hide the Quadcopter above the freeway so you’re not spotted during recon. 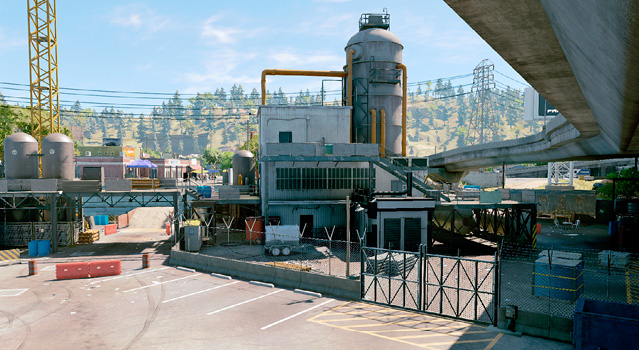
Aside from the central east-west alley (3A) that bisects the buildings (which has a gantry platform above, and a Dumpster ramp over the canal to the east), the northwest fence is sturdy, and the barbed wire ensures you can’t enter or exit; so don’t become trapped trying to vault over the fence from the inside! Also note the container ramp (3B) outside the restricted area to the northwest, offering an escape across the canal, though fleeing in a vehicle and using this is difficult, as you don’t usually have enough speed, and the ramp is tight. 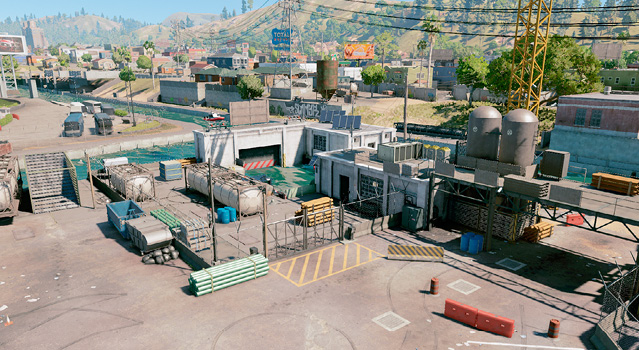
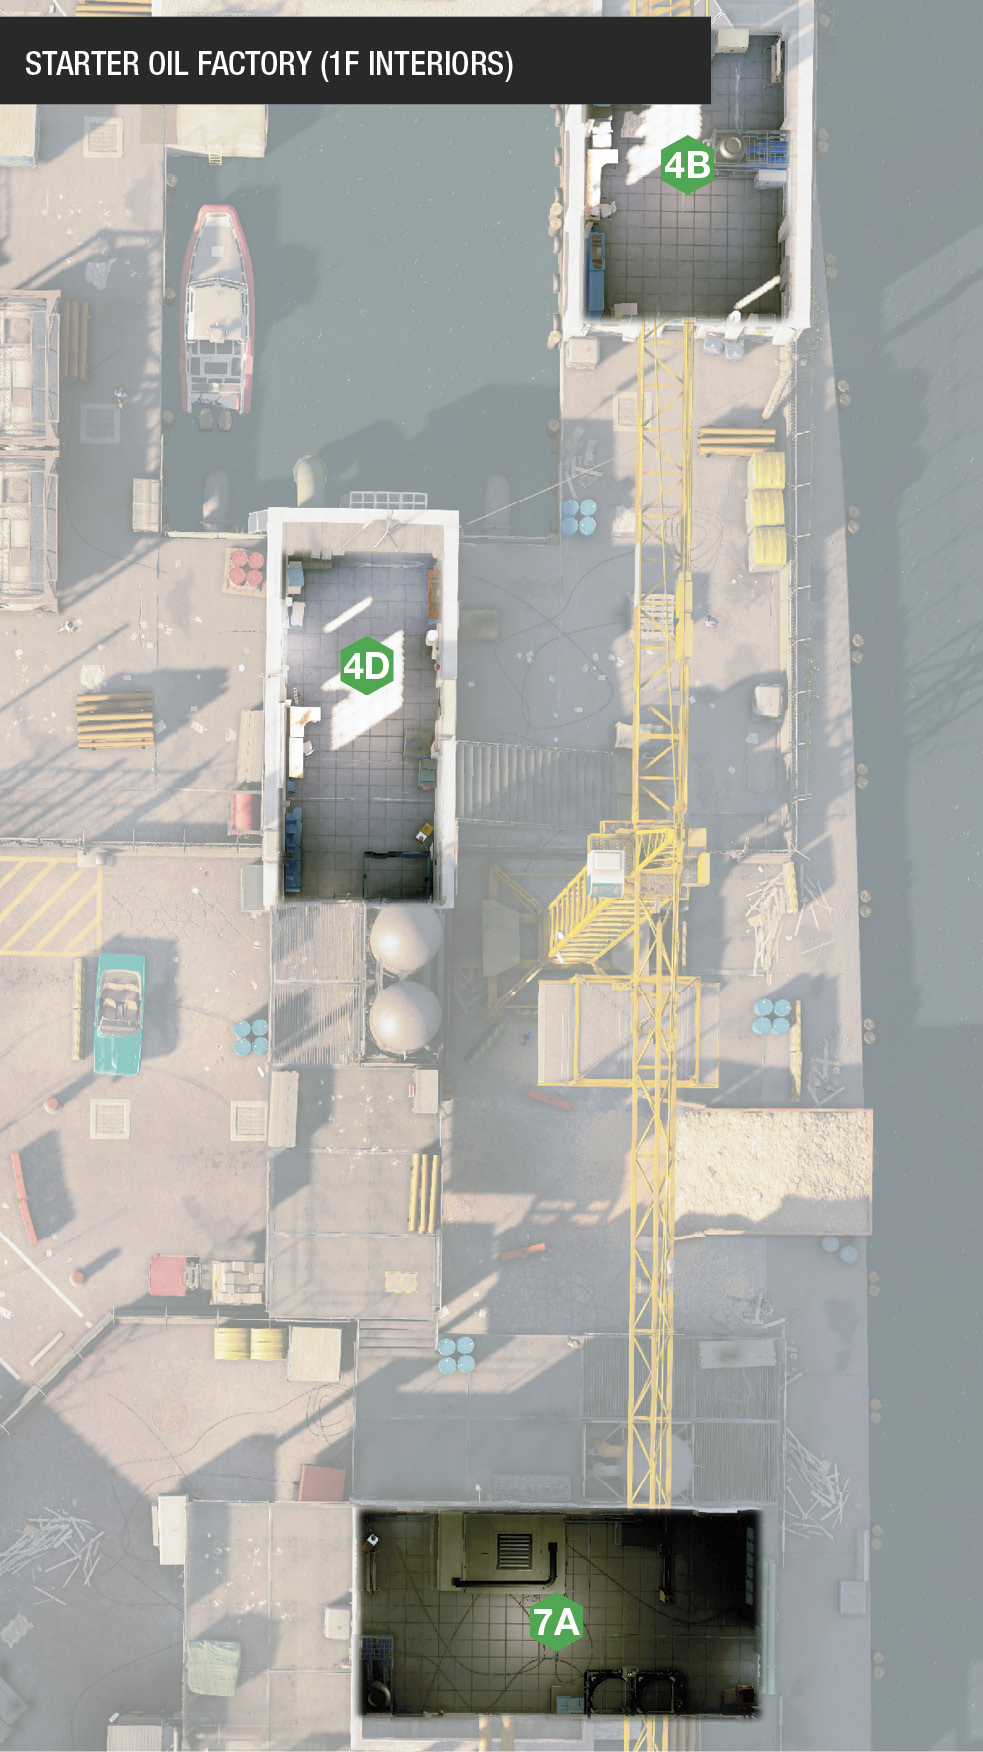
This area is only accessible by swimming or boat. Hack the garage door to reach a dock (4A) and a ladder up to the northwest concrete pier. Access a dead-end machine room (4B) and the northeast concrete pier area (4C) by climbing on a boat and over some scenery. Note the locked doors into the server room office (4D), which also has an open window (north wall), and metal exterior stairs up to the roof and gantry over the east-west alley. 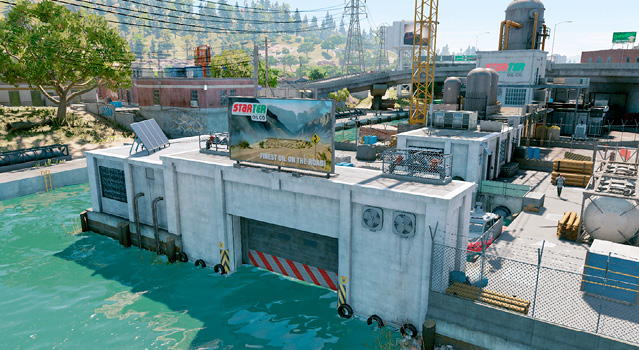
Close to the server room office is a gigantic crane, and a platform you can maneuver, though this requires patience if you’re trying to move from the platform and into the restricted area (though you can use the platform as a sniping spot after boarding the platform on the east side of the canal). You could control the platform and have a teammate stand on it while you control it so your friend drops down onto the “tower” building, but it’s usually too slow and dangerous to be effective. 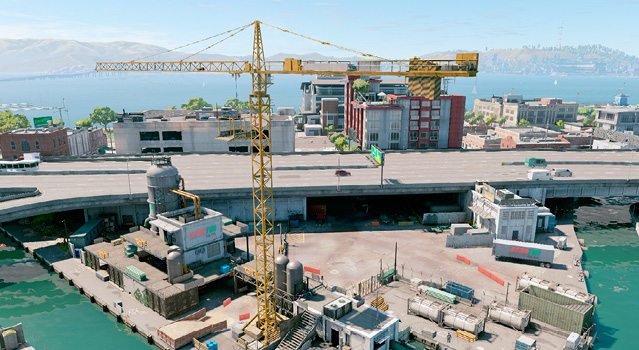
The northeast lip of the canal offers little infiltration access. It’s only when you reach the east-west alley and Dumpster ramp that there’s access under the tower building (6A). Farther along the canal side is a ground vent opening (6B), allowing a drone to enter the ground-floor interior of the tower. To the southeast there are gaps in the concrete wall (6C), allowing infiltration to the gantries of the tower. Across the canal (to the east) is a convenience store, with a low roof you could snipe from, though you’re a little too far from the action to help a friend in distress. 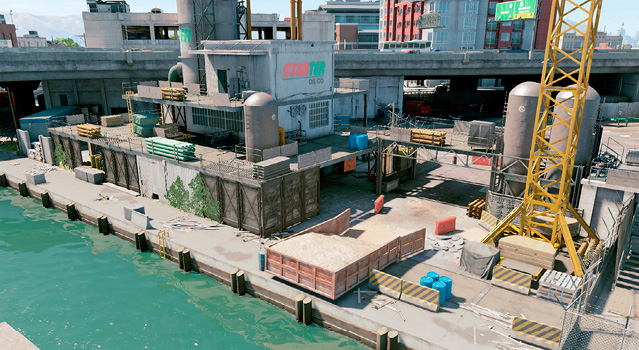
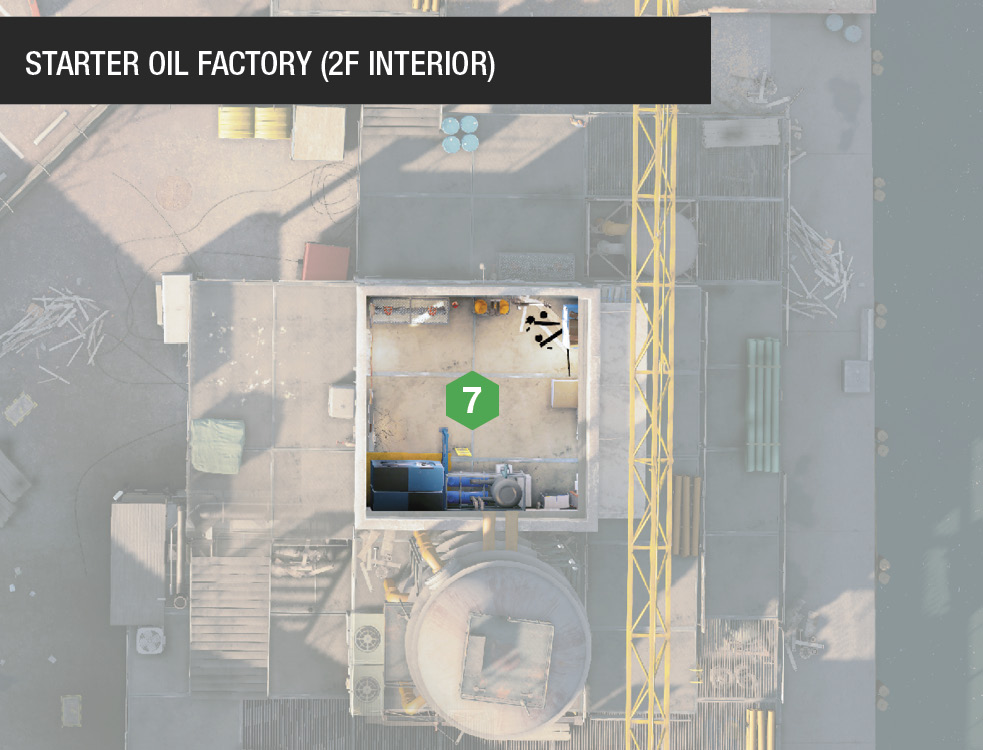
The main building in the central-south part of this restricted area is a four-floor tower, with multiple ladders and platforms to scale. The ground floor (7A) features a gantry platform you can sneak under, leading to a machine room with a door, open window, ladder, and ground vent on the south wall, and doors on the west and north walls. One floor up are the main gantry platforms. They wrap around the entire building, and are best accessed from the large cylinder container to the south (7B), or the nearby stairs or ladder (south side). The bridge to the north area is here, too. Above that is a smaller platform accessed via metal stairs (southwest) or a ladder (southeast), leading to a small upper machine room with doors east and west, and a ladder to a small parapet balcony atop that, which is great for defending from. 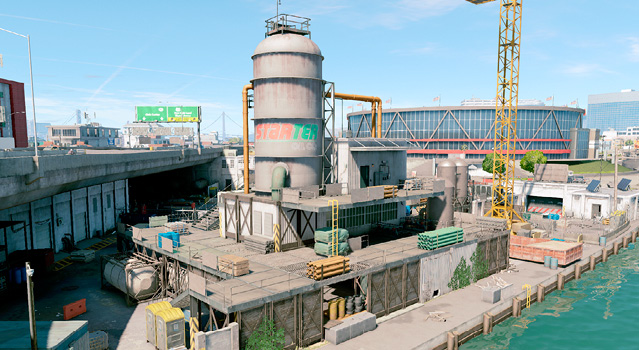 |
 South Freeway Overpass
 Parking Lot and Perimeter Fence (Southwest)
 Perimeter Fence (Northwest)
 Canal, Boat Dock, and North Buildings (North)
 Crane
Crane Perimeter Fence (East)
 Petroleum Tower
Operation Examples
Data Storage (Data Breach Operations): The data to download can be on or under one of the gantries of the petroleum tower. You can hide one floor up or down, but not two floors away from the signal. The number of enemies means a second player making a disturbance elsewhere is a good way to get the download working after you hack it using the Quadcopter.
Vehicle (Deliver Vehicle Operations): The vehicle may be parked under the petroleum tower, near the gate locked with a CCT. Have one player infiltrate via the north canal boat garage door, to the metal steps by the crane, to reach the CCT on the gantry bridge. Or better yet, bounce an RC Jumper onto the crate stack at the alleyway (south side, near the gantry bridge), over the fence, landing on the porta-potties, then up onto the bridge and CCT. With the gate open, you can drive the vehicle south, under the freeway (open a second set of outer gates), or make a long U-turn and boost over the ramp Dumpster, over the canal to the east.
Shipments (Destroy Shipments Operations): One example of three shipments is having one inside the machine room (northeast), a vehicle under the petroleum tower, and a stack shipment near the southwest gate. Split up the destruction, or do it all with a Quadcopter. Fly into the open door of the northeast machine room, lay a bomb, back out, and detonate. As for the vehicle, you can drop a proximity trap to its hood, then remotely steer it out so it accelerates straight into the third shipment, destroying both at once! Nice!
Prisoner (Prisoner Release Operations): The prisoner may be on the third floor (machine room) in the petroleum tower, and there’s a door that needs an access key to unlock. While the first player hacks the guard with the key and distracts any near the second player, the second player assaults the tower, ideally from the southeast concrete wall gaps, to the ladders and into the prisoner room. After freeing the prisoner, escape along the canal heading south; jumping into the canal can cause pursuing foes to easily shoot you. This entire plan can be completed in under 30 seconds.