
Watch Dogs 2 Guide Online Operations San Francisco
Restricted Area 13. Bridge Maintenance Yard
Available Operations
| Operation Type | No. of Objectives | Variations |
|---|---|---|
| Data Breach | 1 | 1 |
| Deliver Vehicle | 1 | 1 |
| Destroy Shipments | 2 | 2 |
| Prisoner Release | 1 | 2 |
| Steal Encrypted Drives | 1 | 1 |
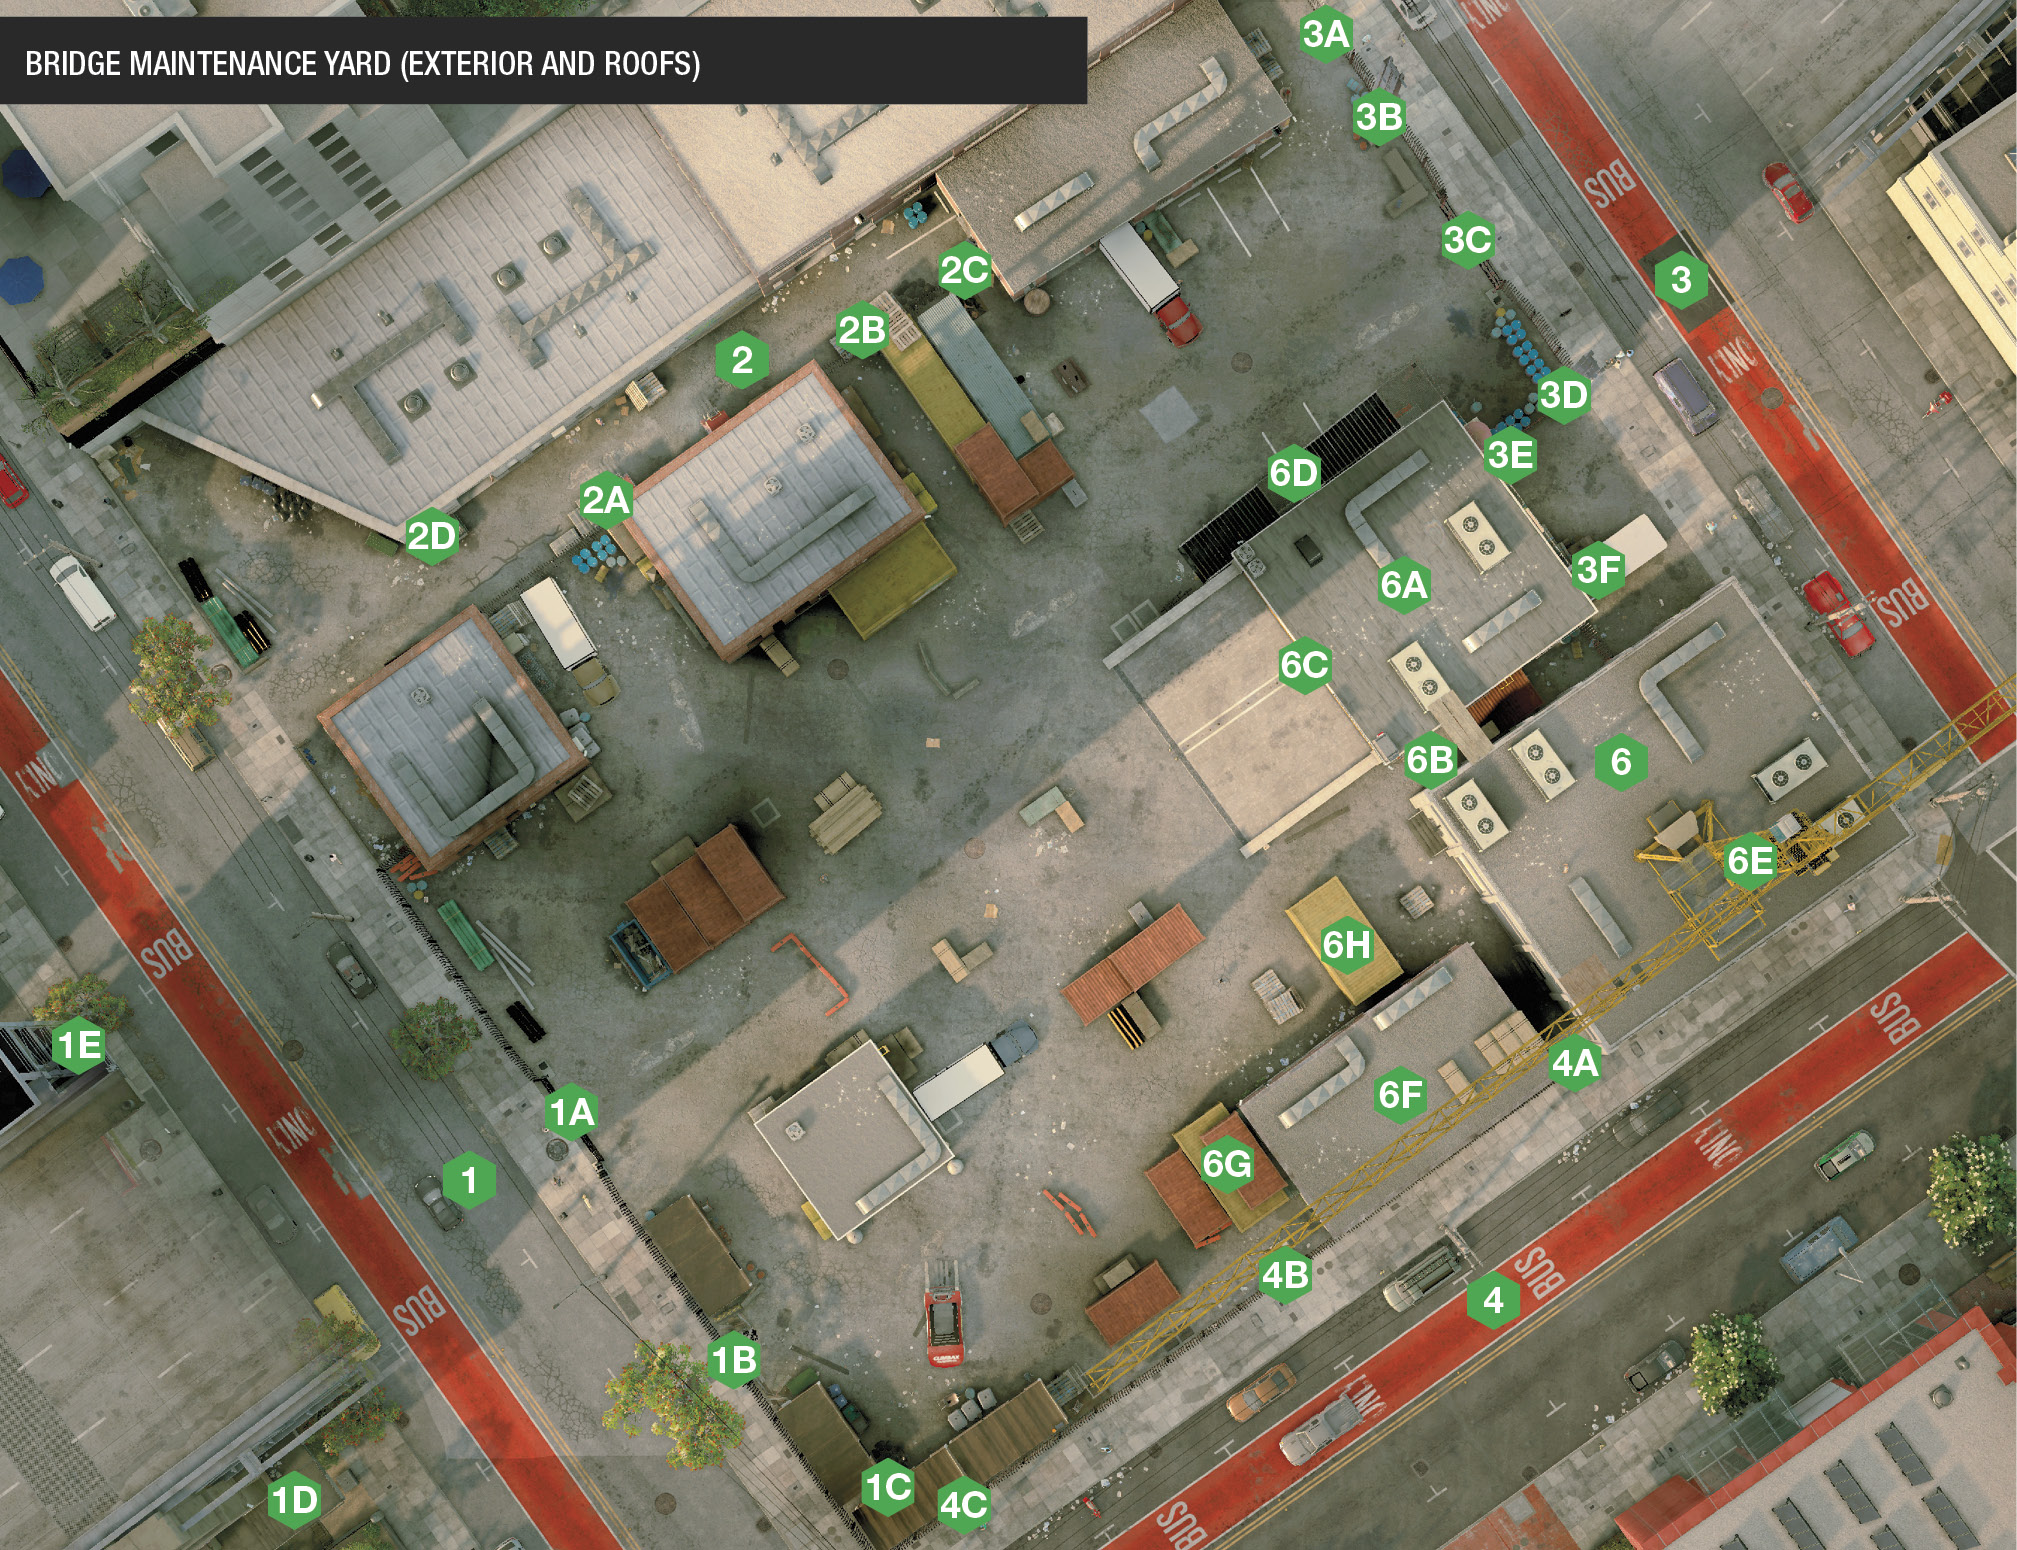
Structures and Infiltration PointsThis is a relatively compact yard, but the main area is open and difficult to maneuver across without being spotted. Fortunately, there are significant height advantages you can gain by using the freeway bridge above, and even the nearby crane, during infiltrations here.
The black iron fencing does its job to keep you out, unless you bring a high-container truck (or the scissor lift parked across the street) to jump over the top of this fence (but this isn’t necessary due to enemies spotting you easily). A subtler approach is to find a way to open the main gates (1A, if they’re locked), or use the hole in the fence to drop an RC Jumper through (1B). Or just infiltrate via the alley to the west. Trying to escape from inside the perimeter? Climb onto the small huts (1C) in the south part of the perimeter, as they allow you to cross the fence and down to the street. Don’t overlook the metal balcony across the street (to the southwest). Use the exterior metal stairs attached to the massive bridge footing (1D) to reach this sniping spot. Better yet, use the ladders (1E) to climb to the bridge freeway itself, cross and stand on the lip of the freeway bridge, and look down from high above to snipe or use your Quadcopter in relative safety. 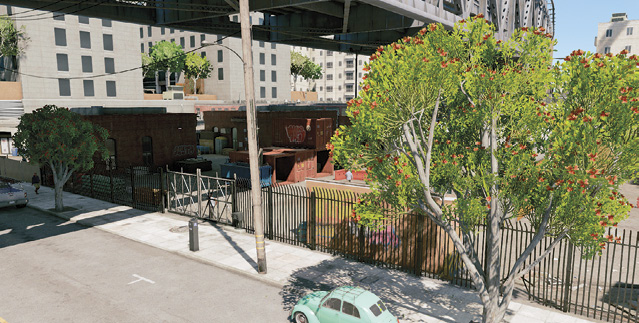
If a more clandestine approach is called for, there are some excellent choices while moving along the alley on the northwest side of the restricted area. Climb the crates near the low brick building (2A) by the forklifts and cross into the restricted area, or onto the roof of the building itself. Use the stack of pallets to climb up and over the metal railings just north of the brick building (2B), or drop in the RC Jumper at the gap in the railings fence (2C). Both infiltration points are good escape points, too. 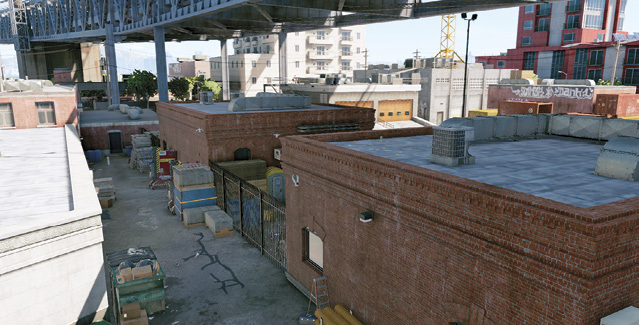
You can also access the Dumpster in the western end of the alley (2D), which allows you up onto the rooftops of the low buildings northwest of the perimeter area itself. Use these to hide and employ drones, or to snipe from. You can move northeast along these rooftops before dropping down into the unloading yard in the north part of the restricted area, too. Need to escape? Find the stack of pallets at the northern tip of the restricted area, so you can climb onto the roof of this building and flee north or northwestward.
This perimeter is much more porous than the southwest perimeter. There’s an RC Jumper-sized hole in the railing fence in the north area (3A). A few steps along is a concrete bridge support with railings on either side; climb and slip through here (3B). The gate (3C) is an obvious option, and one to keep open especially if you’re escaping in a vehicle. There’s another bridge support pillar at the corner of the railings (3D) you can infiltrate from, as well as the stack of wood near the rain barrel (3E). Then there’s the graffiti container (3F); climb onto the pallets, then onto the container, and you’re on the main garage roof, which offers great views and good hiding (and camping) potential. All points can be used to escape from, too, as appropriate. 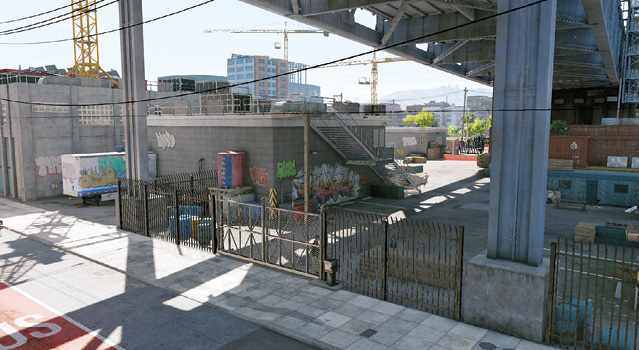
There are few infiltration points on this side of the restricted area; the security door (4A) is almost always locked, requiring a key or CCT access. There’s an RC Jumper-sized hole in the railing (4B), but otherwise, seek different infiltration plans (though you can use the scissor lift or a high-roofed vehicle to hop over the railings fence with fewer chances of discovery, thanks to the containers you can hide behind when you enter). Note the small huts in the south part of the perimeter (4C)—useful for climbing on to escape (but not infiltrate). 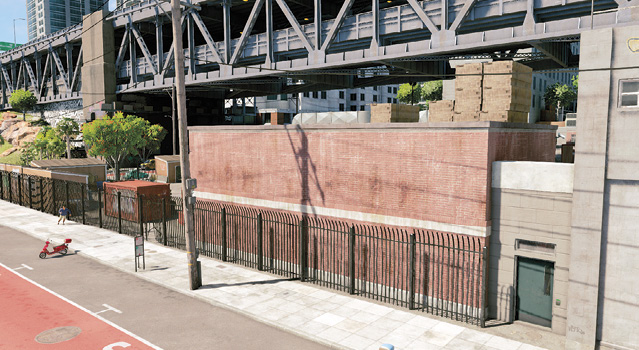
The garage usually has a CCT or access key inside or nearby, making it a place you need to reach. Note the ladder (5A) to the roof, providing reasonable cover. The yard is wide open, so make the most of the hiding opportunities behind the scenery, or inside the large open metal containers. Freak the enemy out by moving the forklift in this area, too. 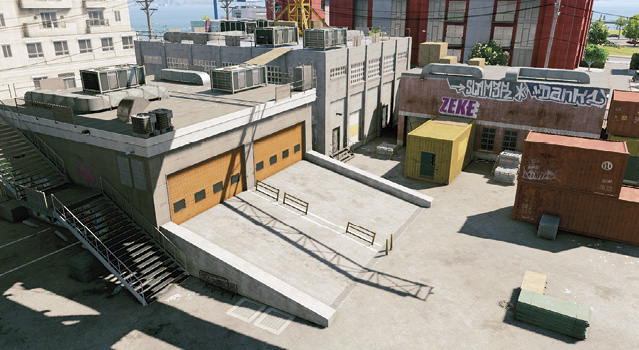
There are three structures of interest on the eastern side of this restricted area: The double garage (6A) can be entered, and usually has an objective or important unlocked device to reach. The inside of the garage has an opening from the alley (6B) between this building and the crane warehouse (southeast); use it if you don’t want to enter via the two garage doors (6C). The alley also has a ladder to the roof, though the main way up is to ascend the metal stairs on the northwest side of the structure (6D), or climb the graffiti container from the northeast perimeter. Note that you can even drop off the freeway bridge above the garage and land on the roof, though you’ll be badly damaged. The crane warehouse can’t be entered, and is a good thoroughfare and hiding spot between the rooftops. Cross via the planks or the gap over the southeast alley. The crane itself (6E) has a platform you can raise or lower, but the lack of speed and the fact that you’re an easy target before you’re raised out of range of enemy fire make standing on the platform a problem. Theoretically, you can move the crane platform out of the restricted area, stand on the platform, and maneuver yourself or your partner over the restricted area to provide fire support, or to allow them to drop down to an objective, but this usually takes too long. The roof of the southeast brick warehouse (6F) can be accessed from the crane warehouse or the warehouse stacks to the southwest. Note the two mustard-colored containers with security doors (6G, 6H); there’s usually something (or someone) important in at least one of them. 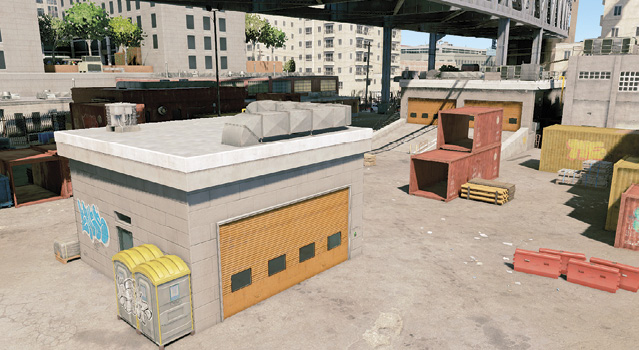
|
 Southwest Perimeter
 Northwest Alley Perimeter
 Northeast Perimeter
 Southeast Perimeter
 Small Garage and Main Yard
 Large Garages and Rooftops (East)
Operation Examples
Data Storage (Data Breach Operations): The data to download is inside the open container in the middle of the yard, so some cunning hiding positions to gather the data from are on the roof or inside the small garage, inside one of the security door containers, or the roof or edge of the southeast containers.
Vehicle (Deliver Vehicle Operations): The vehicle is always in the main double garage, which is locked by a CCT on the roof of the garage. Choose a favored infiltration point, reach the roof physically, drop down to the southeast alley, then into the garage, removing all guard threats and deactivating any motion detectors. Then get into the van while your partner opens the gate on the southwest perimeter; it’s farther away than the northeast gate, but it’s an easier straight shot. Then flee. Alternatively, you could employ a Quadcopter to remotely drive the vehicle out, but it’s likely to be damaged by the time you reach it.
Shipments (Destroy Shipments Operations): There are always only two shipments, but both are tricky to destroy. If one is in one of the security door containers, the door is usually unlocked via a CCT inside the small garage. Each player should be responsible for one shipment. Insert the RC Jumper after gathering the access key using the Quadcopter. Head the RC Jumper into the garage and to the CCT, then distract the guards, open the container, and burn the shipment.
Meanwhile, the other player can either scale the roof to the CCT and drop in an RC Jumper or Quadcopter to fly through the open garage, or nimbly fly the Quadcopter through the gap in the wall by the alley, directly into the garage to destroy the vehicle shipment.
Prisoner (Prisoner Release Operations): If the prisoner is in one of the mustard-colored containers with a locked door, use the Quadcopter to scope out where the CCT is, as well as quickly hacking any access keys. Then move to the infiltration point closest to the CCT, use the RC Jumper to reach the CCT, then free the prisoner once the door is opened remotely. Clandestine inflitrations are quicker and easier; you only need to sprint and cause a disturbance as you escape.