
Watch Dogs 2 Guide Main Operations Power To The Sheeple
5. Operation—Voting Machinations
Objectives
Difficulty
RewardsDedSec Followers: +402,800 T-Shirt: Thrussted !NViTE Swag BriefDedSec has to stop Truss’s last, desperate attempt to steal the election, and he needs to be taught a lesson in democracy. Hostiles
Location |
 Meet Josh near

 Umeni Security Corps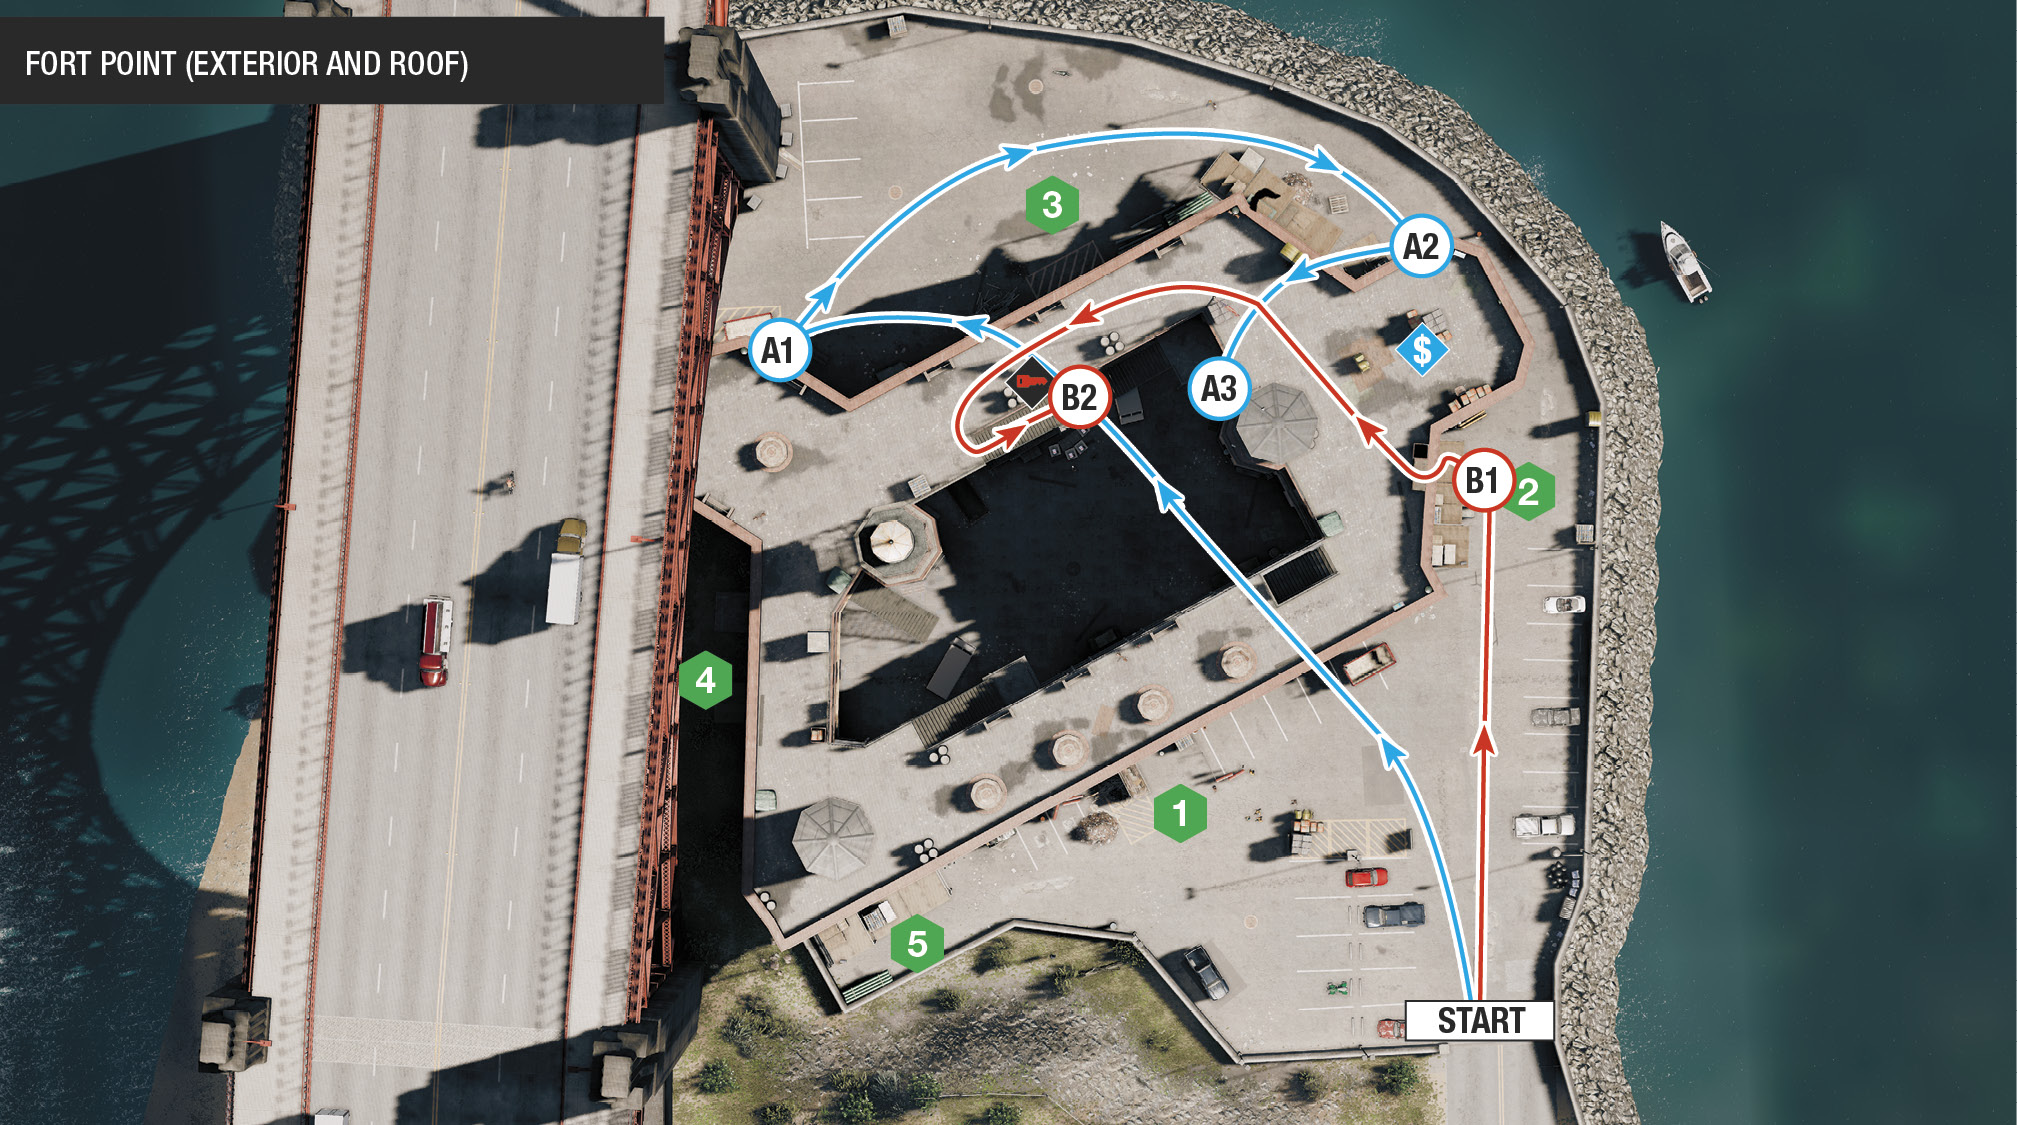
After you flee the apartment area, DedSec lets you know Josh is waiting to meet you to discuss the compromised voting machines, currently stored at Fort Point. Knock on the porta-potty he’s hiding in, near the Fort, and you agree there’s no time to hack these machines. Instead, a spot of explosive mayhem is necessary.
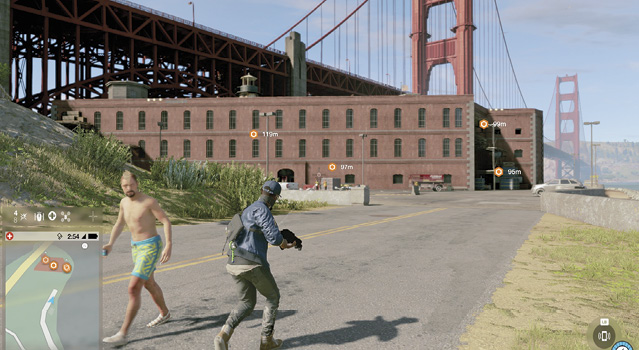
Infiltration PointsFort Point looks impenetrable, but it’s one of the most porous locations you can infiltrate, assuming you’re using the Quadcopter. Note the numerous open windows in the brick façade; use them to reach two of the objectives. Don’t forget you can fly up and over the roof ramparts too! Finally, the building is comprised of four floors: the ground, two balcony perimeters, and a roof perimeter, with metal stairs on each side of the interior courtyard.
Tourists might enter from here, but that doesn’t mean you have to! Though it’s relatively easy to make an infiltration from here, the foes on the upper levels can sometimes be missed. Worried about stealth? Then enter from elsewhere. 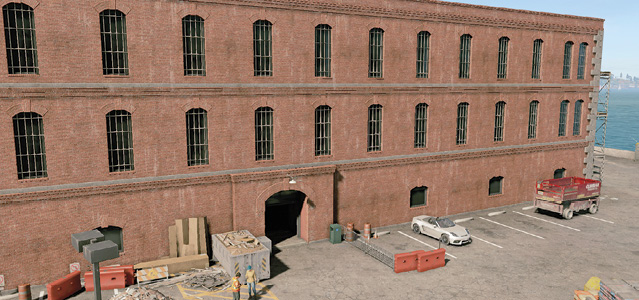
An excellent location to begin your infiltration from. Use either tower on each side of the brickwork. You can reach the roof from either scaffold tower, as well as peer into the brick tower area where two of the objectives are; you can access one via an open window (using a drone). 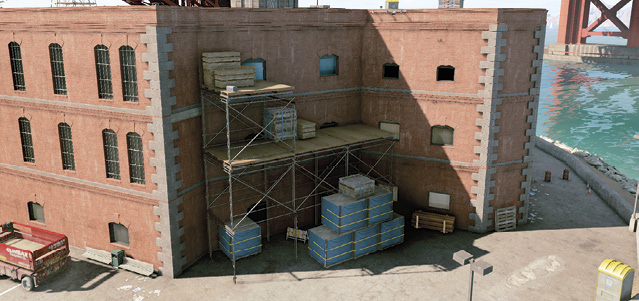
Watch for the motion sensor, which is triggered if you or the van moves. There’s a cluster of foes near the ground floor objective close to here, so this is a high-trafficked cluster. It’s better to escape from this location rather than infiltrate into it. 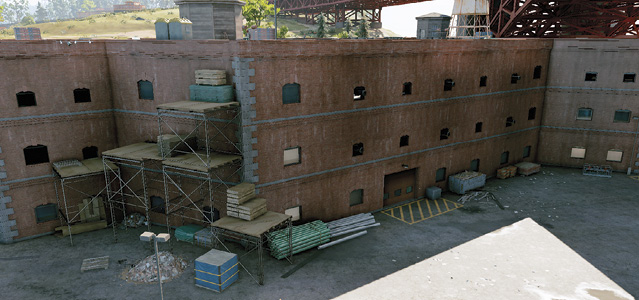
Almost never used, this is accessed via a scissor lift and provides a hole for your RC Jumper to head through. A better plan is to place the Jumper on the roof after climbing the east scaffold tower, or use the Quadcopter. 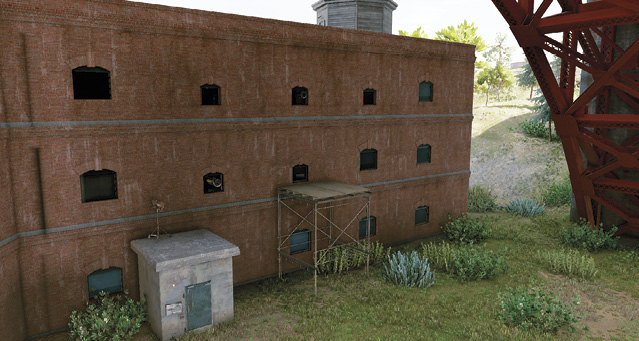
This is another scaffold tower that offers a possible entry and exit point. And if you’re stuck on the roof, use this for a quicker getaway. 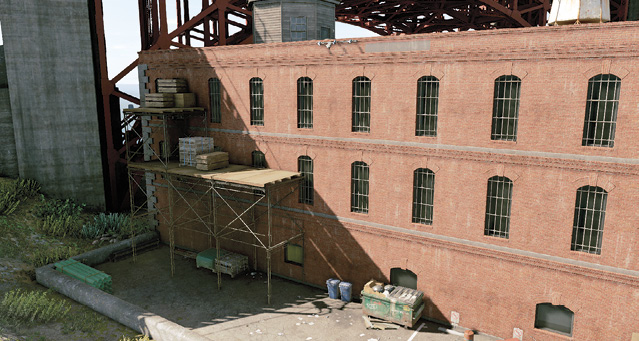
|
 Main Entrance (South):
 Scaffold Towers (East):
 Garage (North):
 Scaffold and Window Hole (West):
 Scaffold Tower (Southwest):
|
 POIs and Objective Points
 Access Key and Collectible
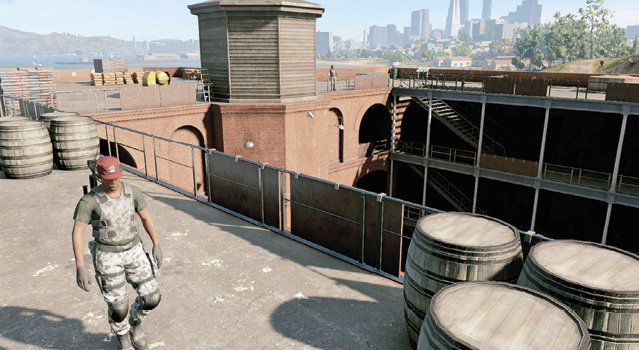
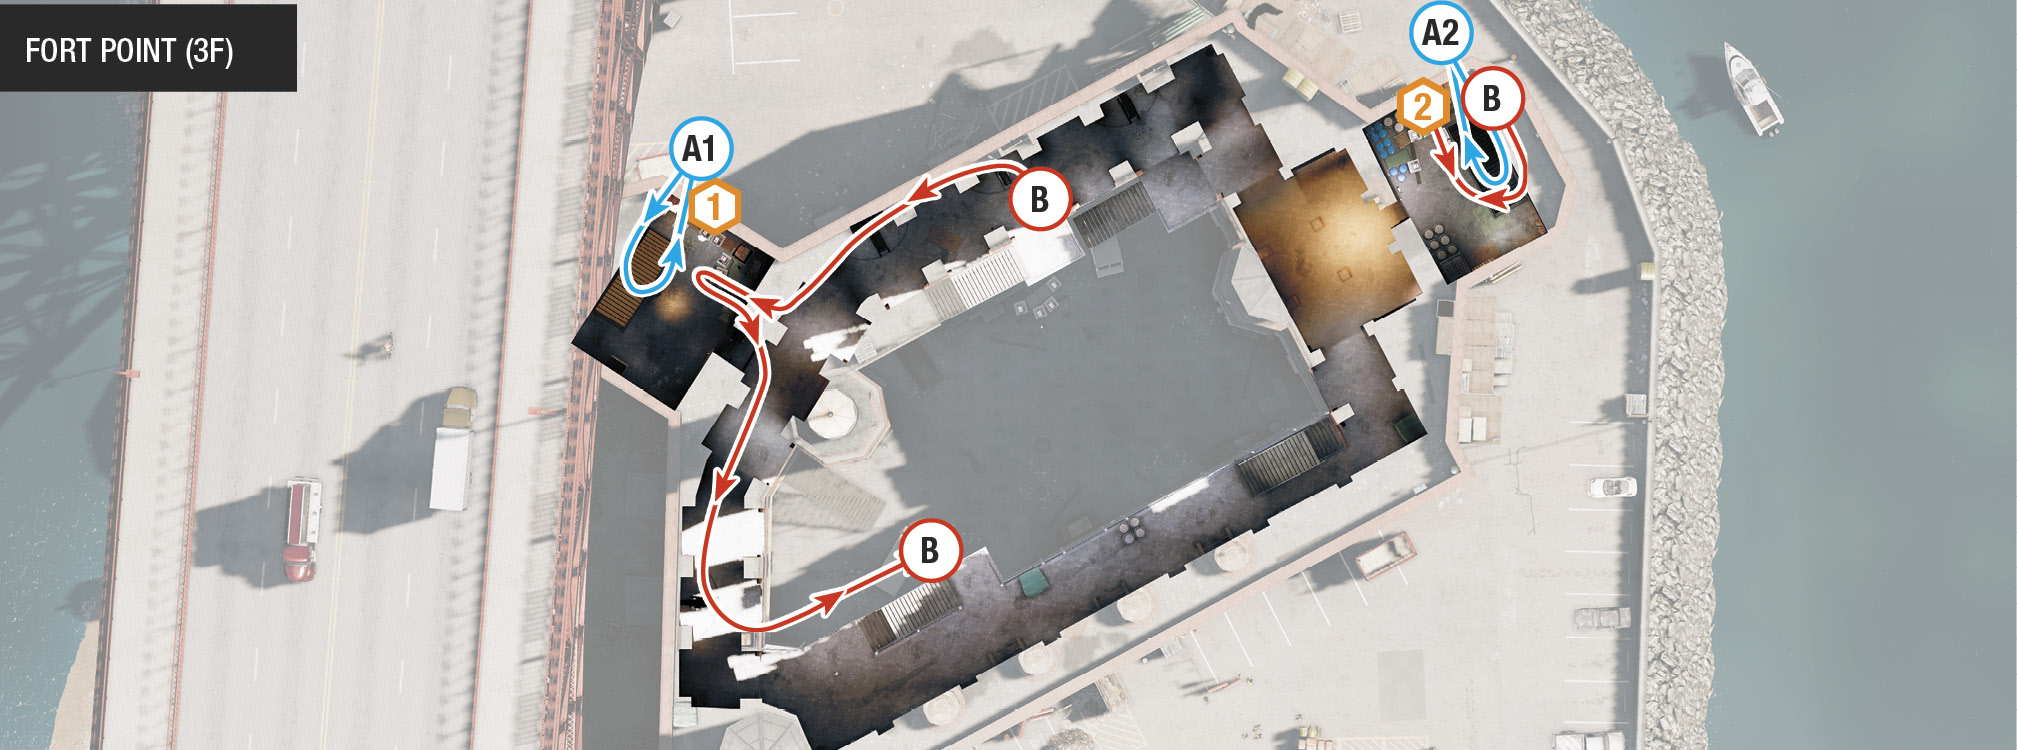
 Voting Machine Cluster #1 (Northwest Tower, Third Floor)
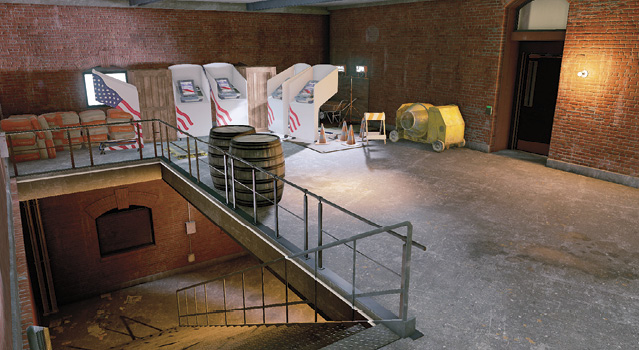
 Voting Machine Cluster #2 (East Tower, Third Floor)
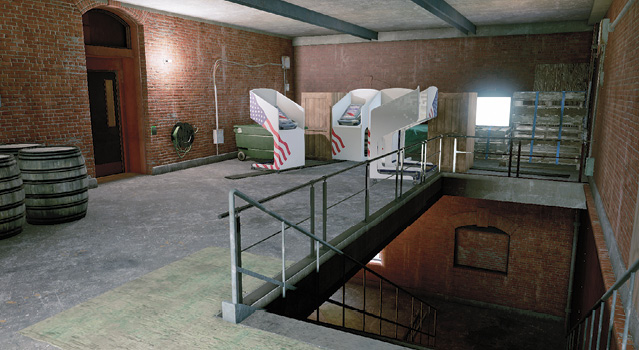
 Voting Machine Cluster #3 (East Tower, Ground Floor)
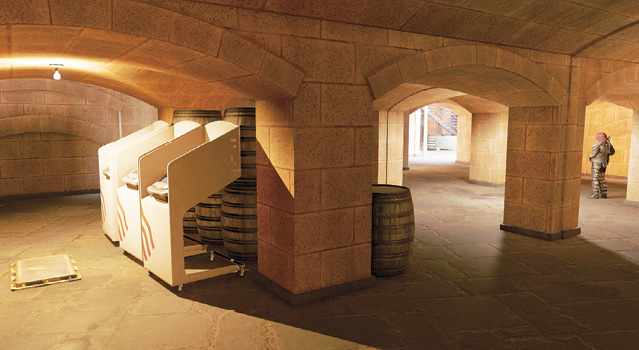
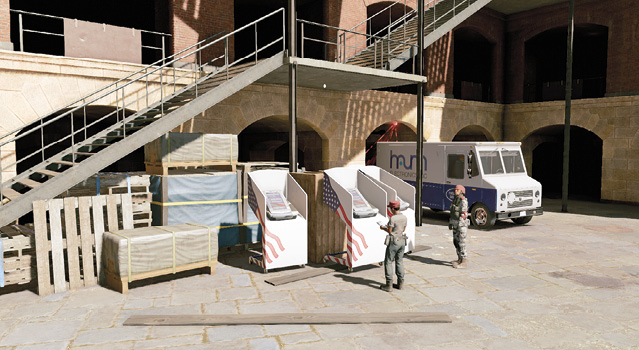
 Voting Machine Cluster #4 (North Courtyard, Ground Floor)
Paths To Completion
Feel free to enter via the parking lot entrance and start a firefight. But for more clandestine or cunning methods, check out the following:
 Infiltration Unseen

This allows complete destruction of the voting machines without having to physically step into the restricted area. Sit in your getaway vehicle, produce the Quadcopter, and fly it to the roof. Hack the guard with the access key. Then work your way down to each set of voting machines, starting with the highest. Fly over the head of the guard with the access key, so you’re outside the fort structure (A.1), near the Golden Gate Bridge (west side). Then fly in one of the open windows, bypassing the motion lasers. Hack and explode the transformer vault or drop an electroshock bomb (so you can explode it without damaging the Quadcopter).
Fly out the window, then to the structure’s east side (A.2). Fly into the open window at the same level as the higher of the two objectives on this side, and destroy another set of machines (preferably using an electroshock bomb). Then fly out the window, up and over the battlements, and into the interior of the fort. The foes shouldn’t have spotted you.
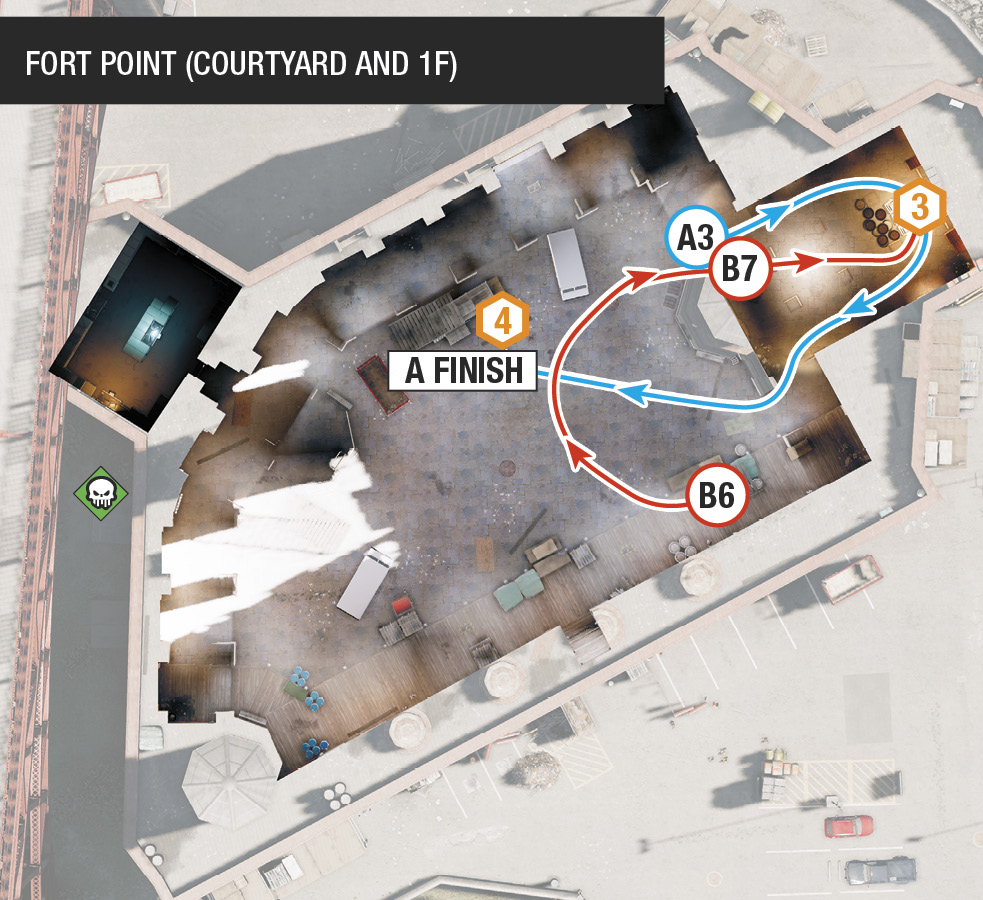
Fly down into either of the two ground arches on the east interior battlements (A.3). Weave through the arches, ignoring the foe guarding the voting machines behind the barrels. Destroy them with a transformer vault explosion or electroshock bomb. Now fly out and up, away from any enemy’s view of your drone. Hover over the last set of voting machines, in the main courtyard. Drop an electroshock bomb to finish the job. Then drive off, toot sweet!
Need more of a triumphant finish? Then drop an explosive bomb onto the front of the van parked inside the western part of the courtyard. Now remotely drive the van forward so it accelerates and explodes on contact with the last set of machines.
 Ghost in the Machine

Normally you’d use the ground entrance to explore Fort Point. Not this time; it’s much less dangerous to subdue all foes starting on the roof and working down. Head to the scaffold on the structure’s east side (B.1), and climb it to the roof. Look west, and tackle the foe walking the ramparts; then move behind the foe with the access key, hacking and distracting as you approach. Feel free to gather the collectible at this point. Then use the metal stairs on the north side of the ramparts (B.2) to head down one level.
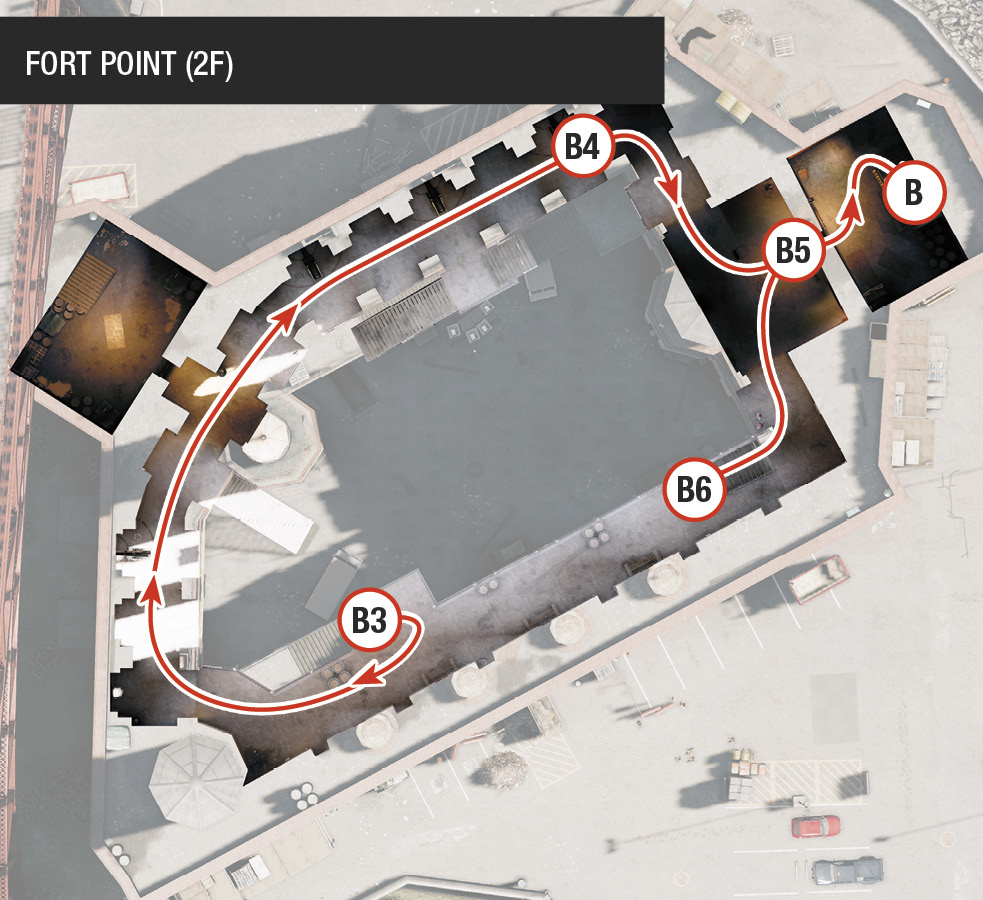
Head west to the first objective. Hack the door after removing the motion lasers, enter the room, and blow the machines apart using an electroshock bomb or vault transformer. Head back to the balcony, moving counterclockwise to the metal stairs on the south side of the interior (B.3). Descend, hugging the outer banister so you aren’t spotted, distracting foes if necessary.
Spin around and start working your way clockwise around the second floor. Pass the cannon and distract the two armored foes on the walkway. At the east end (B.4), find a third foe if your timing is quick enough. Then hack and open the door in the east tower (B.5). Climb the metal stairs in the tower (you’re directly underneath the objective) and detonate the voting machines with an electroshock bomb. Backtrack to the stairwell in the southeast corner (B.6).
Head to the ground floor, distracting and throttling the four foes still none the wiser in this area. Throttle them rather than tasering, as you don’t want them waking up. Destroy the courtyard machines, then enter the left (northeast) archway (B.7), to the final objective. Heading left ensures the waiting foe has his back to you (otherwise, distract him first). Throttle him, destroy the last set of voting machines, and leave.
Note that this is a great route for your RC Jumper to take, ignoring or distracting foes instead of neutralizing them.
Bridge Careen

Stand on the edge of the Golden Gate Bridge directly above Fort Point. Use the YourBoySerge rifle to snipe at all the foes you can see, and let your Quadcopter do the rest (Path A). This is possible, but you need to race a bike from your starting point, out of the mission area, and then back into it along the pedestrian path at the bridge’s edge. Use vehicle boost, or you don’t get there in time. This makes escaping much easier!
Once you destroy the voting machines and escape the area, this operation concludes.