
Watch Dogs 2 Guide Main Operations False Profits
2. Operation—Sunday Schooled
Objectives
Difficulty
RewardsDedSec Followers: +30,000 BriefDedSec’s going to dig for dirt at New Dawn’s recruitment center, starting with their celebrity shill, Jimmy Siska. Hostiles
Location
|
 Meet Sitara at New Dawn protest.
 Download New Dawn’s profile data
 Leave the educational center.
 Escape.

 Umeni Security Corps
 New Dawn Recruitment Center, north of Japantown,
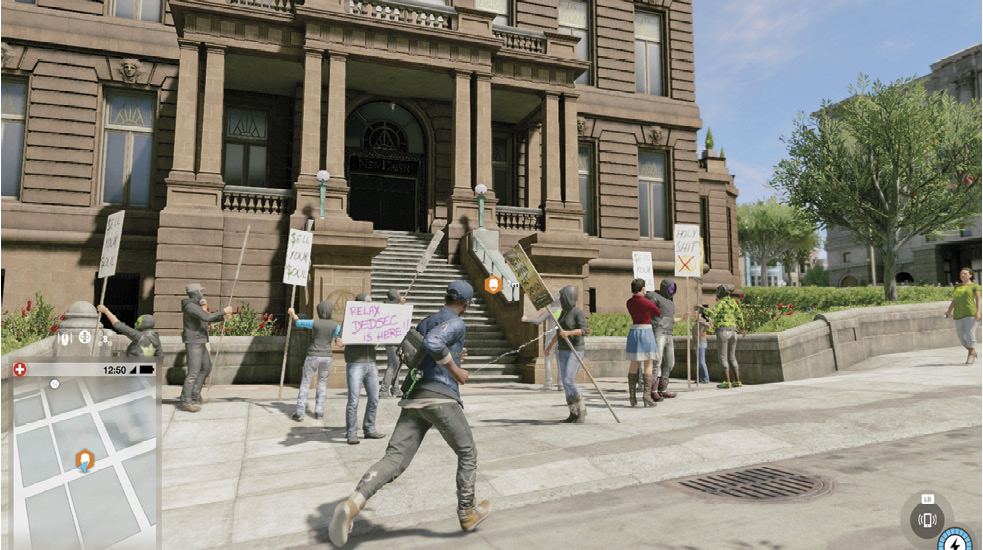
 Leave the Hackerspace, and drive north to the recruitment center where Sitara and a group of DedSec Followers are picketing. She’s causing the disturbance while you’re here to infiltrate the place.
Infiltration Points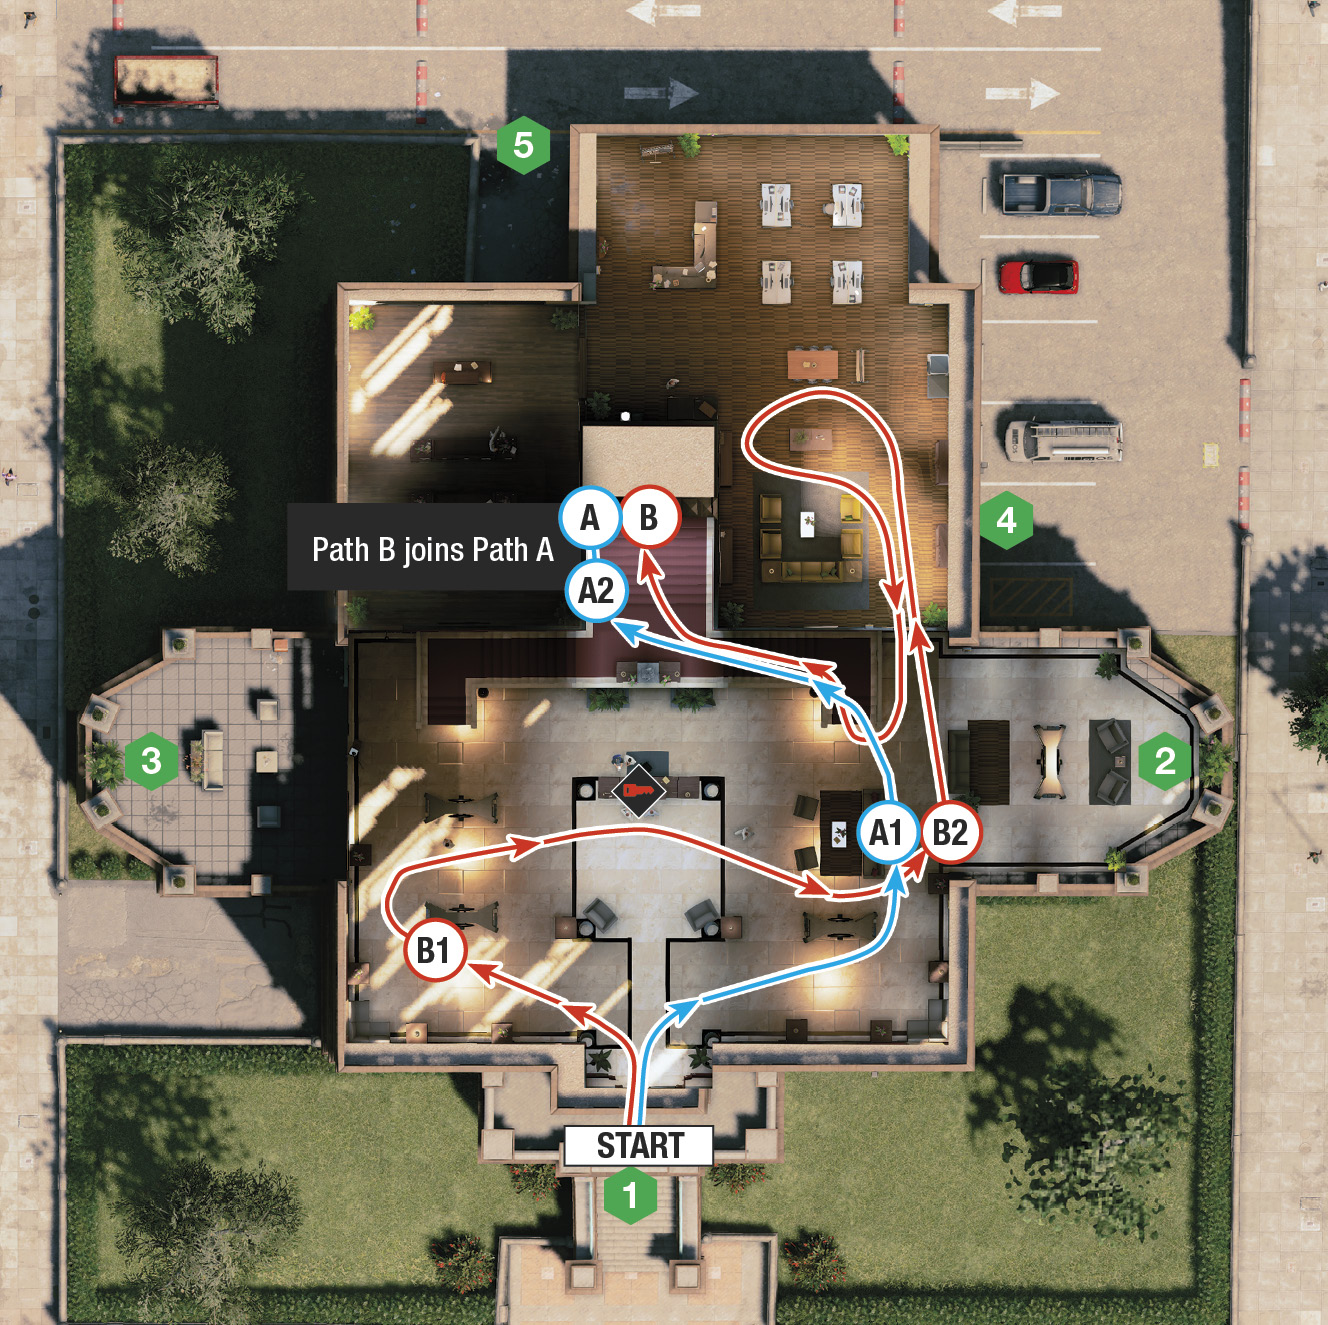
The usual spot for entering the building is also its most crowded. Though it’s important to obtain the access key from the front desk, using the Jumper. This is one of a few different infiltration points. During the download phase of this operation, you can wait here, as it’s within the radius of the download’s range and outside the restricted area, making it a much safer option. 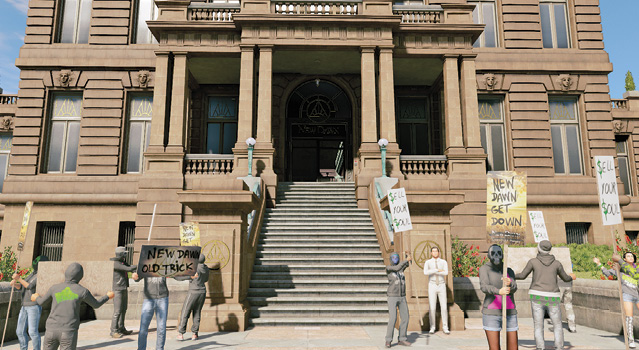
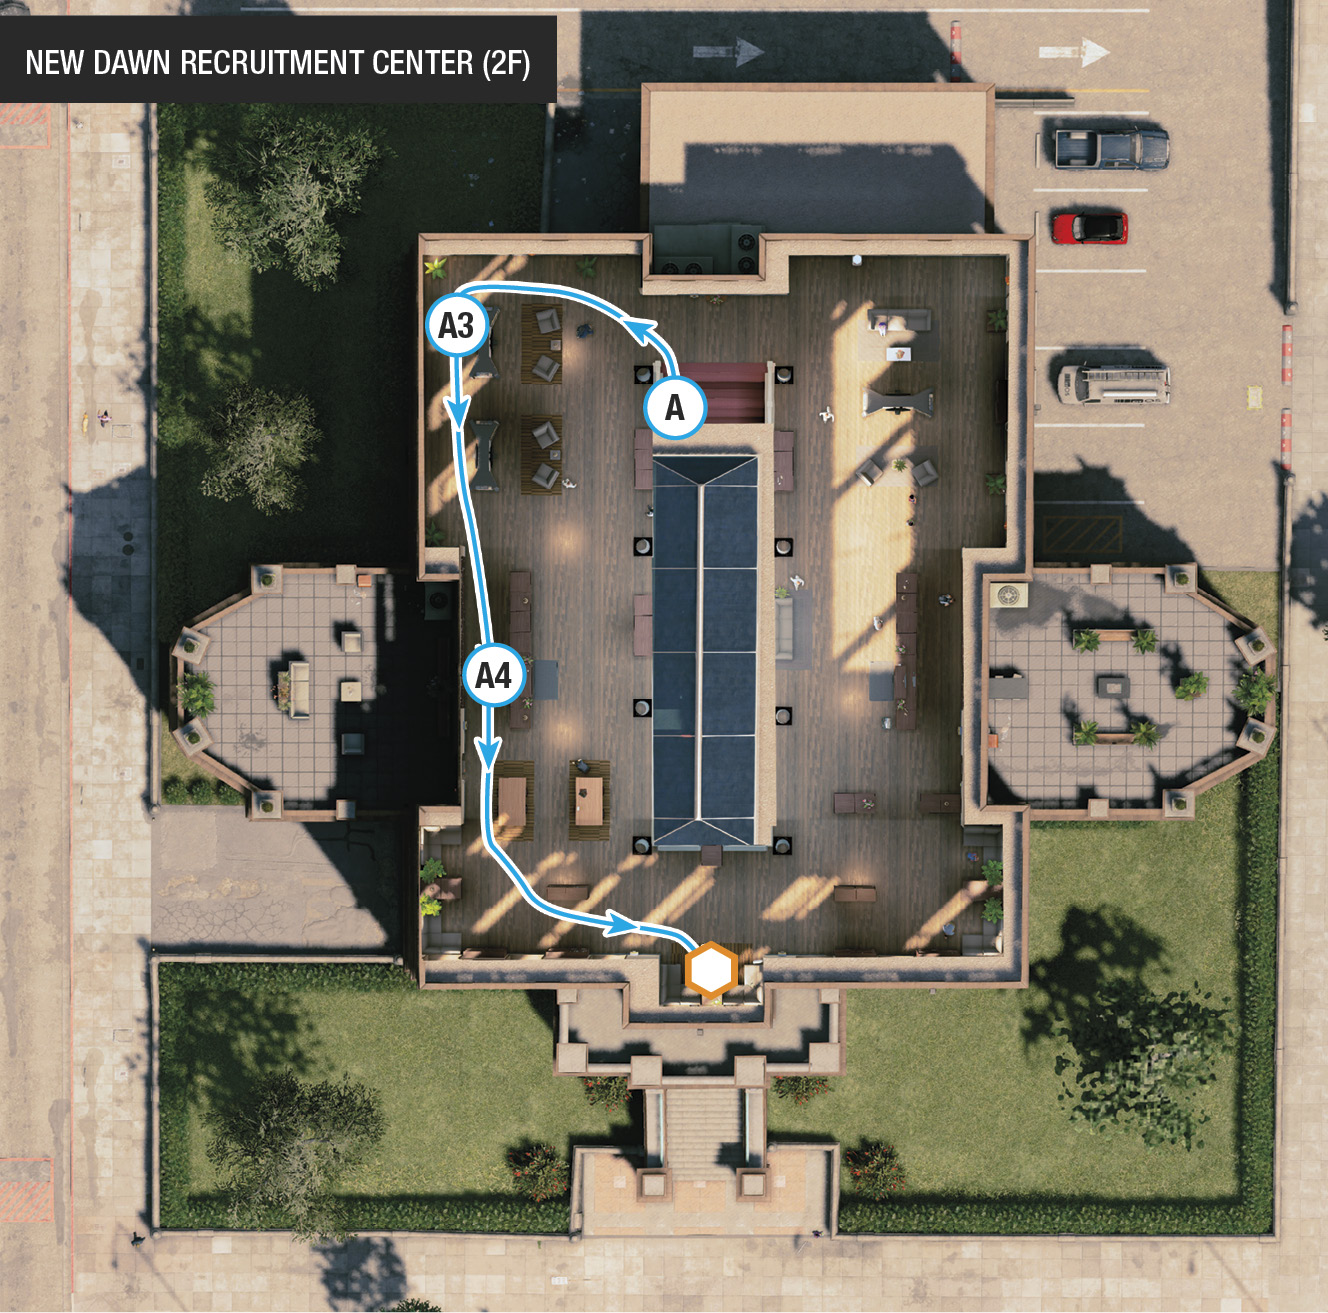
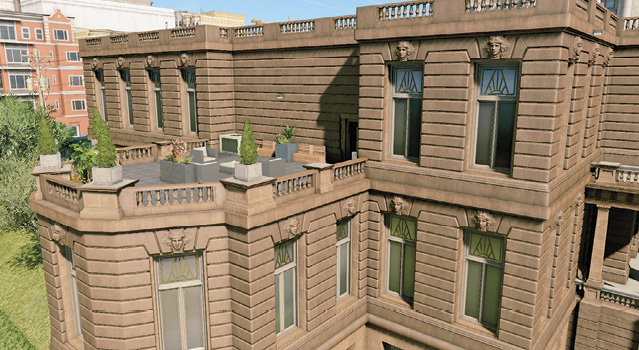
The jutting stone wings of the building each have a separate balcony above them, which you can access via the scissor lift. This is parked in the northwest corner of the New Dawn lot. Drive it to either location, and raise it up (with you standing on it) to the balcony. As long as you’ve hacked the access key, you can enter from here, accessing the upper floor first, much closer to the objective. Usually these are one of two possible exits, accessed once you hack the data container. 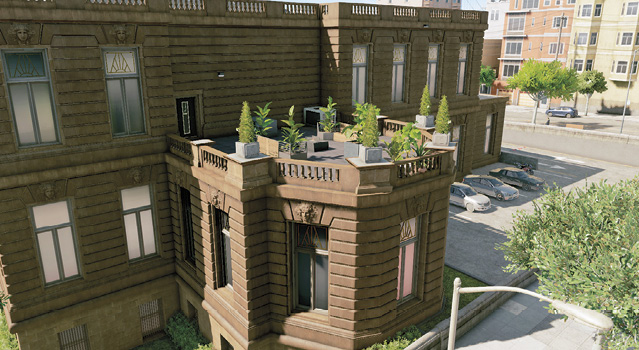
Notice the small vent in the parking lot, on the east and west sides of the building (east vent shown)? You can hack and open it, then send your RC Jumper (or Quadcopter) into the ground-floor office area of the building. Remotely sneaking around has its benefits (and drawbacks), but it’s much safer! It’s also the only way to reach the access key on the front desk. 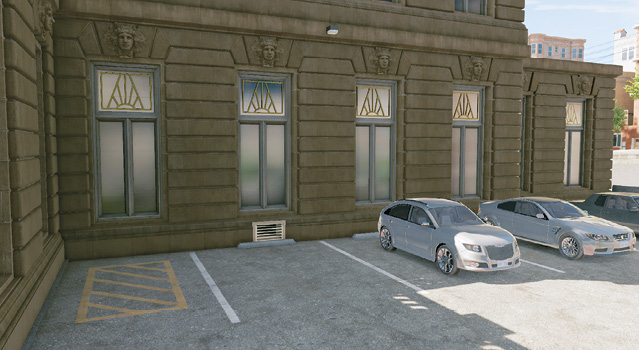
IThe only exterior door that doesn’t require the access key is on the north side of the building. It allows access into the rear office area. This is a great infiltration point if you don’t want to nab the access key or if you want another exit to choose from. Watch for foes looking your way when you enter here, though. 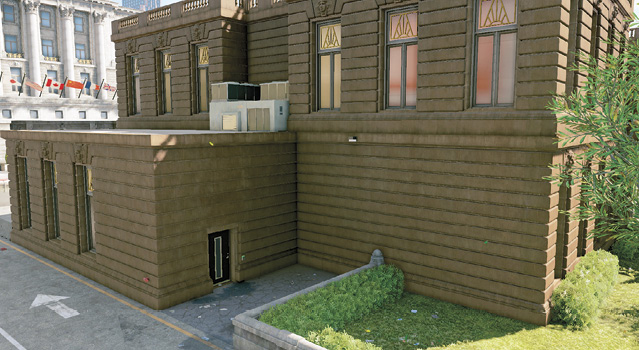
|
 The Front Door (South):

 Eastern and Western Balcony (Roof):
 Ground Vent (East):
 Office Access (North):
|
 POIs and Objective Points
 Access Key
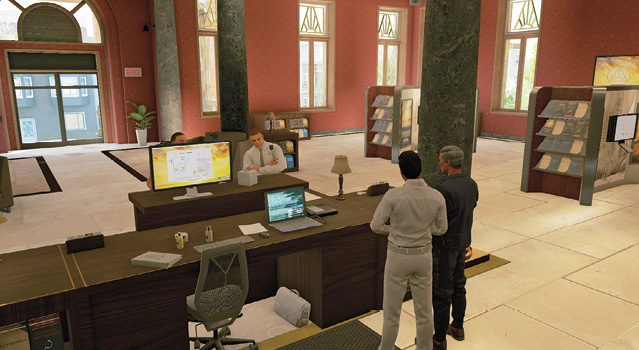
 Data Container
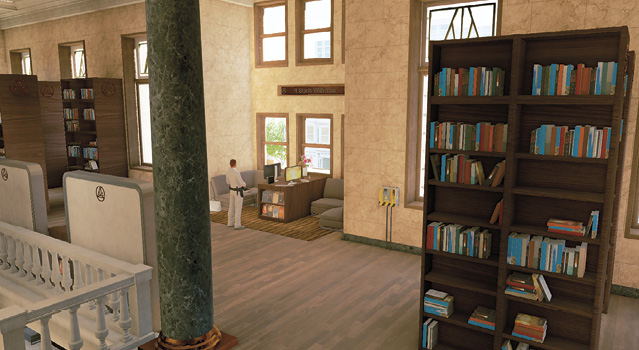
Paths to Completion
You’re in a relatively tight interior space here, with several New Dawn civilians milling about. If they start hassling you, distract or silently strangle them (assuming you want to keep gunfire as a last resort).
The Great Escape

It’s worth turning up here in a fast-moving vehicle (a motorcycle is ideal), and park it in a memorable location, like in front of the main steps, in case you need to make a quick getaway later.
 Time to Creep

After obtaining the access key using the Jumper, enter from Infiltration Point 1. Move to the right corner of the divider, then take cover behind the couches (A.1). Look at the marble stairs and transfer cover to the left bannister, then climb the stairs to the second floor. When you reach the central steps with the red walls, check for patrolling guards above. Stay on the left side (A.2) and keep moving, and the guards may temporarily start to see you but will never be alerted.
Begin stealthily scurrying counterclockwise, and maneuver to the northwest corner (A.3); crouch behind the metal TV divider. Work your way south, watching for two patrolling guards. Cross to the second TV divider. Then use cover behind the low bookcase and desk (A.4). Cross to the right of the two tables, and hide behind the tall bookcases in the southwest corner. Move to the objective and hack.
As soon as the hack begins, guards become suspicious. Hack either of the side (east or west) exit doors, and sprint there instead of remaining behind the tall bookcase or by the dividers, as you’re soon spotted. Dash onto the balcony, drop down, move to the front of the building (south; Infiltration Point 1), and gather the download data from this safe point. Then flee.
 Go to Sleep

Attempt to take out all the guards without causing them to fire at you or call for reinforcements. Do not delay the timing of these takedowns, as guards may be in different positions. As soon as you hack the laptop and access the locked door, switch to Marcus, and move to the reception area, make an immediate left, and hide behind the TV divider (B.1). Watch the guard head in from the chapel area (northwest). As soon as he turns right (east), step out and strangle him between the two information dividers.
Immediately step up behind and strangle the guard at the reception desk (middle of the room). Innocents scatter but won’t be a problem. Now head east, around the couch, and strangle the third guard in the “wing” of the building near the potted plant (B.2). Turn and head north, using the doorway to the right of the stairs to enter the office. Look for the last guard on this floor, usually standing by the bookcases on your left. You know the drill—choke him!
Now head back to the reception area and take the stairs. At this point, it’s worth arming yourself with the taser and stopping halfway up the stairs when the side steps merge (at the large stone bust). Access the camera above the stairwell, and scout the area, tagging all four guards. Remotely create a proximity trap, and coax a guard there. When he’s zapped, the other guards move away from the top of the stairs. Join Path A, using the dividers as cover. Peek out, tasing the guards from relative safety. Then download the data before anyone wakes up.
Not a Peep

There’s no need to set foot within the restricted area! Head to the top of the front steps, then stop. Don’t hack the access key. Instead, produce your RC Jumper, and drive it to the ground vent to the east (Infiltration Point 4). Open the vent and scoot inside to the sofa area. Turn left, enter the lobby, and immediately jump right, over the stair rail and onto the stairs (or scoot around and up the stairs). Follow Path A to the objective. Hack it, then ignore the RC Jumper. Stand under the download radius and simply wait for it to complete.
A Violent Reap

There are seven guards (four on the first floor, and three on the second). All can call for reinforcements. The church members may protest or occasionally push you, but they’re harmless (though they can be attacked). Simply tag with a headshot each guard and any reinforcements that rush the front door. Mayhem ensues, but use the violent tactics to ensure you aren’t outflanked. Rush to the top floor, so you have the height advantage.
You may also find it easier to quickly hack one of the side doors and head onto the balcony. Use that doorway as a choke point and to drop projectiles. Foes can only shoot at you through this doorway, and you can use the furniture on the roof deck as cover.
Another option is to coax a guard to one of the five junction boxes on the first floor (or two on the second) and then explode it when the guard is close. However, this alerts the remaining enemies and can cause panic.
After interacting with the hard drive and downloading New Dawn’s profile data, you let DedSec know Siska could be used as an ally, as he’s in big trouble with his church, which is auditing him. You reckon you could pretend to be his auditor.
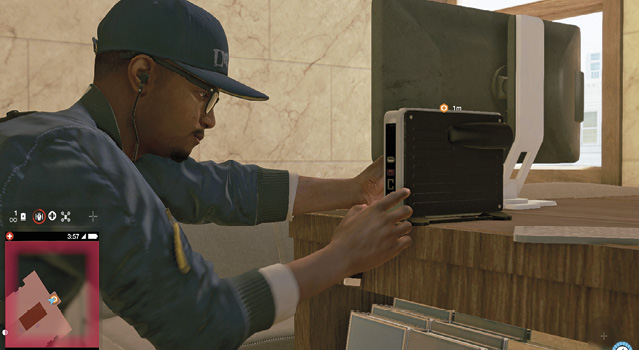
Once you’re outside the center, locate the nearest vehicle and drive it out of the circle perimeter (indicated on your minimap). If you’ve been spotted, you may receive an additional objective—“Escape”—which requires you to flee from Umeni Security forces (and possibly the police if you’ve turned the recruitment center into a bloodbath). Normal Escape rules apply. Once you’ve left the center, the mission concludes and the next part of the operation starts.