
Watch Dogs 2 Guide Main Operations Robot Wars
3. Operation—Man Vs. Machine
Objectives
• Detonate EMP in Server Room. • Download project files from server. • Explore Tidis prototype labs.
Difficulty
RewardsDedSec Followers: +464,000 BriefIt’s time for DedSec to crash Tidis’s beyond-the-state-of-the-art robotics building and uncover their abuse of taxpayer dollars to create weapons of war. Hostiles
Location
|
 Uncover the machinations at Tidis.

 Umeni Security Corps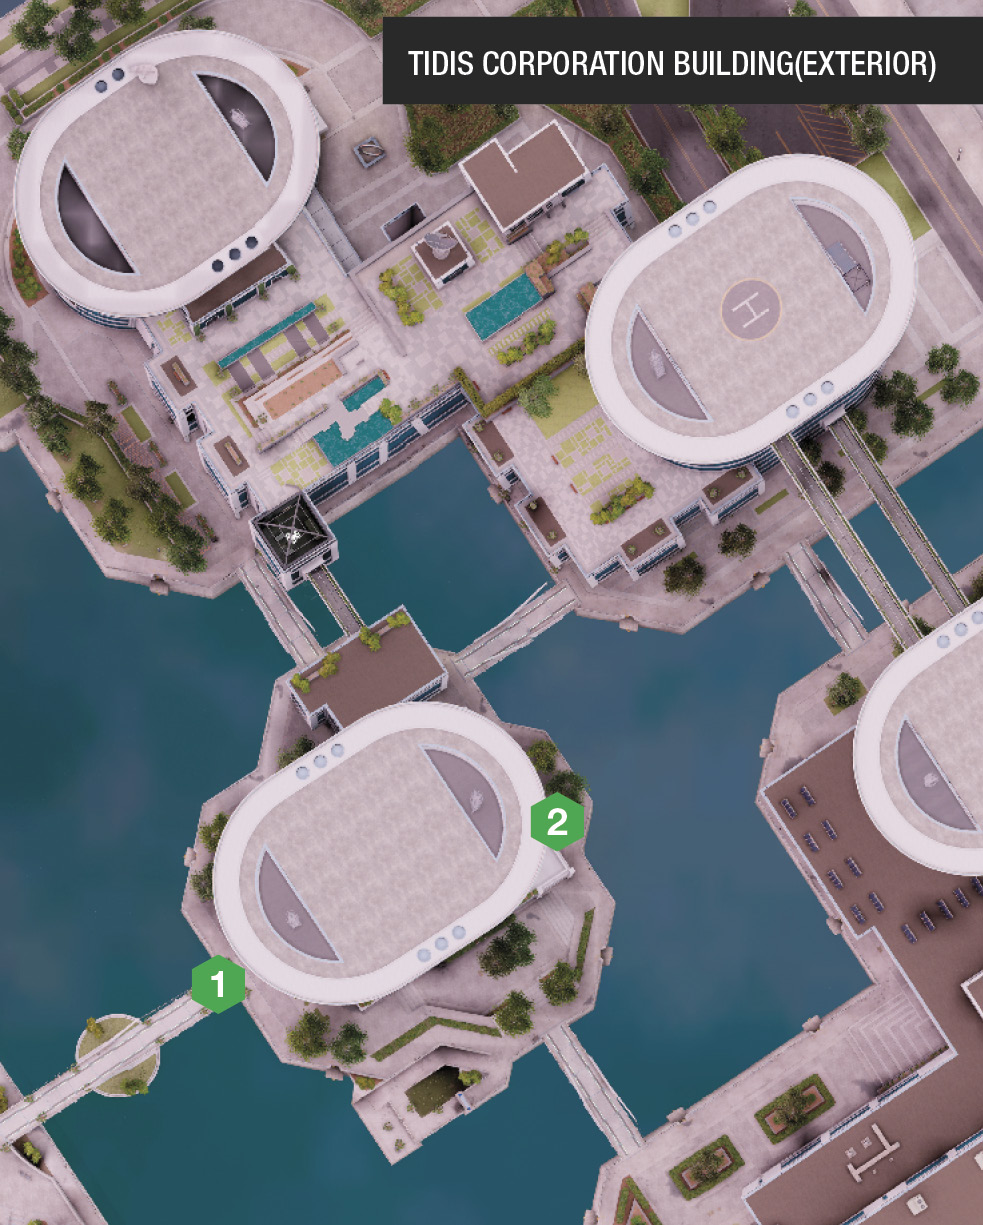
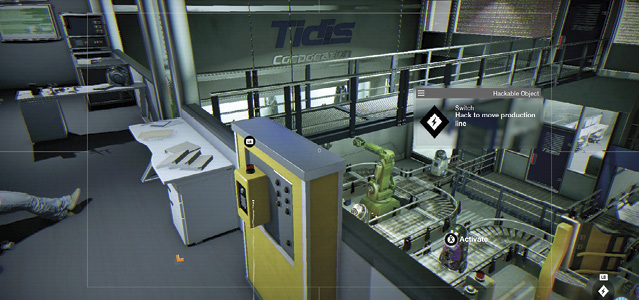
Raise the garage door and trundle Wrench Jr. (who controls like the world’s slowest RC Jumper) into a loading bay and onto the conveyor belt in front of you. Follow the belt left and into a machine room with robotic arms. Pass the first flap door. Hack the camera to locate a switch box. Flip the switch, moving both flap doors. This allows you to continue on the conveyor belt, past the second flap door, and into the next chamber.
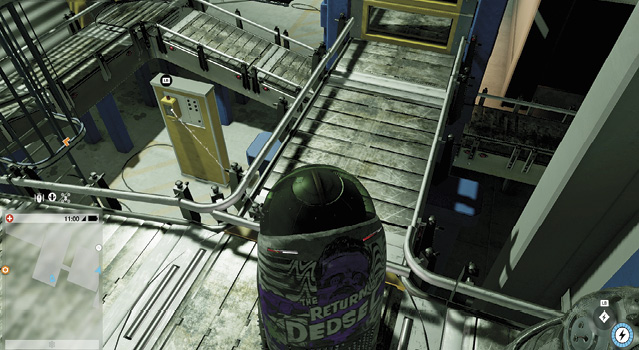
Climb the ramp to the upper conveyor belt you can’t drive onto. Then look down and left (or use the camera directly behind Wrench Jr.). This spins the conveyor pad, allowing you to drive onto it. Hack the switch again once you’re on the pad, so the pad spins again, enabling you to drive along the upper conveyor belt. Head through two yellow doors; if the conveyor platform is lowered, raise it via a camera and switch. Drive onto the platform, lower it via the switch, and head into the next chamber.
Drive into the final conveyor belt room. Move left, passing the flap door. At the conveyor pad you can’t drive onto, look for the wall switch on your left. Press it once, drive onto the pad, and drive Wrench Jr. to the queue of robots. Drive onto the conveyor platform, and locate a switch on your right. Press it to raise Wrench Jr. above the other robots, and drive off the end of the conveyor belt. Now turn left, hacking two sets of double doors to reach the server room. After positioning Wrench Jr. at the indicated server tower, release the EMP device. It works!
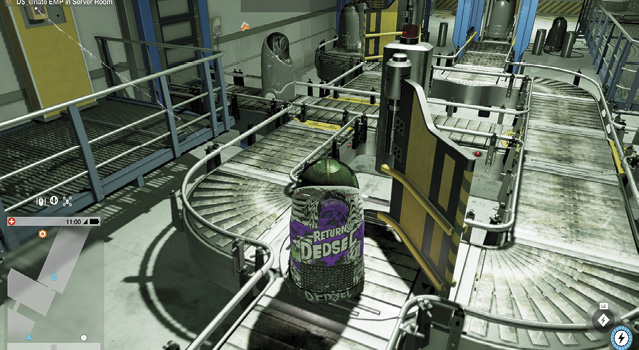
Now to infiltrate the building and secure the files from the server:
TIDIS INFILTRATION: LOBBY TO TECHNOLOGY WING
As you need to physically enter the facility to reach the technology wing, remote-controlled plans won’t work, though a drone check can help you see what’s ahead of you.
Infiltration Points
The large sweeping lobby features a single guard and a robot on the ground floor and two more guards on the upper mezzanine. Note the gap in the windows above this infiltration point; this is a great spot to fly in your drone to lay traps or check out the area. 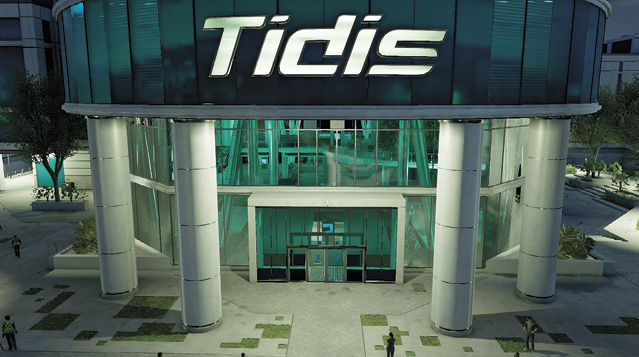
Run around to the rear of the front Tidis building. There is a robot patrol zone and back stairwell up to the mezzanine. This is another option, though neither offers a real advantage over the other. 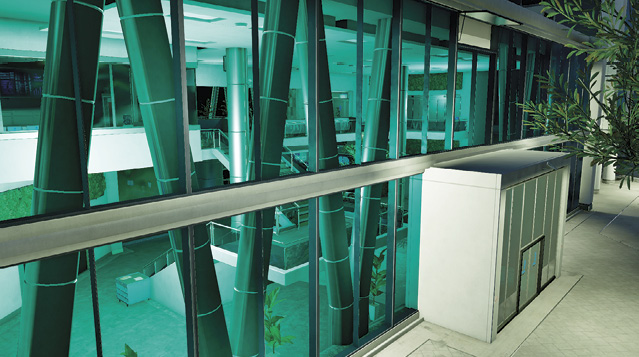 |
 Main Lobby Entrance (Southwest):
 Rear Entrance (Northeast):
|
 POIs and Objective Points
 Closed Circuit Terminal (Executive Office)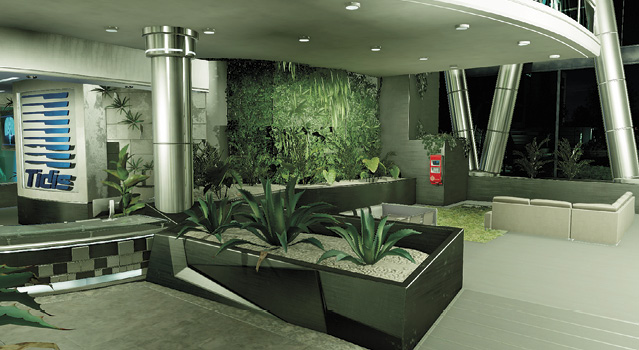
 Tech Wing Entrance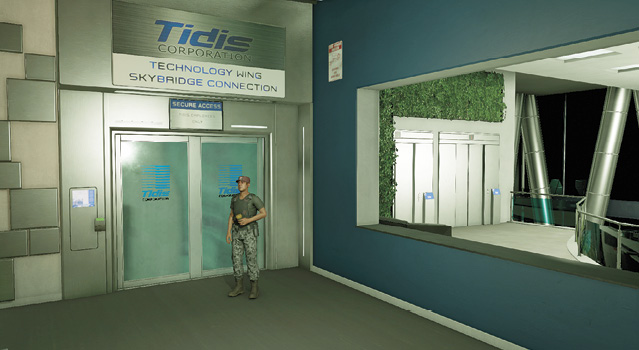
Paths To Completion
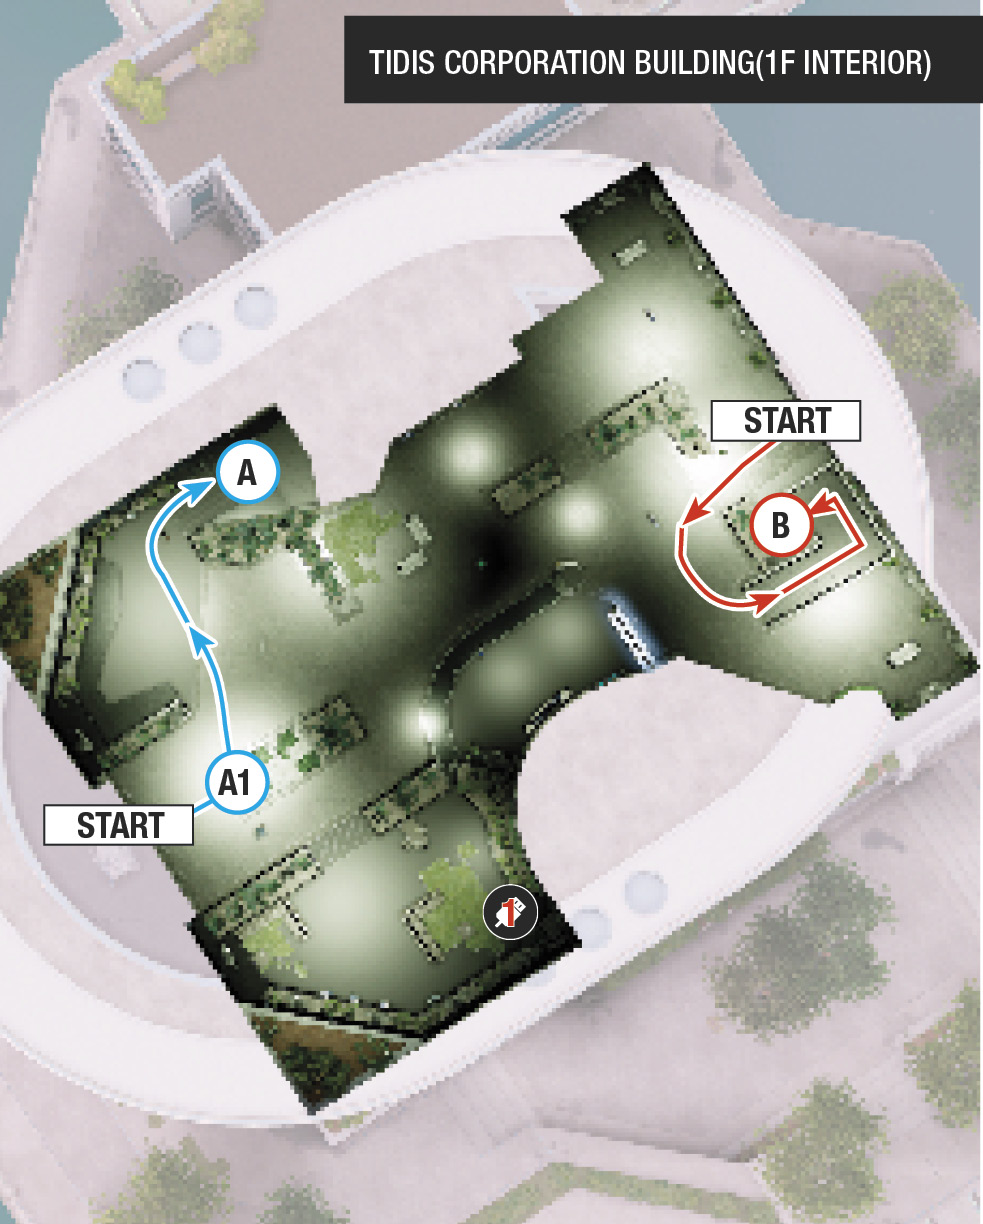
 Lobby Infiltration

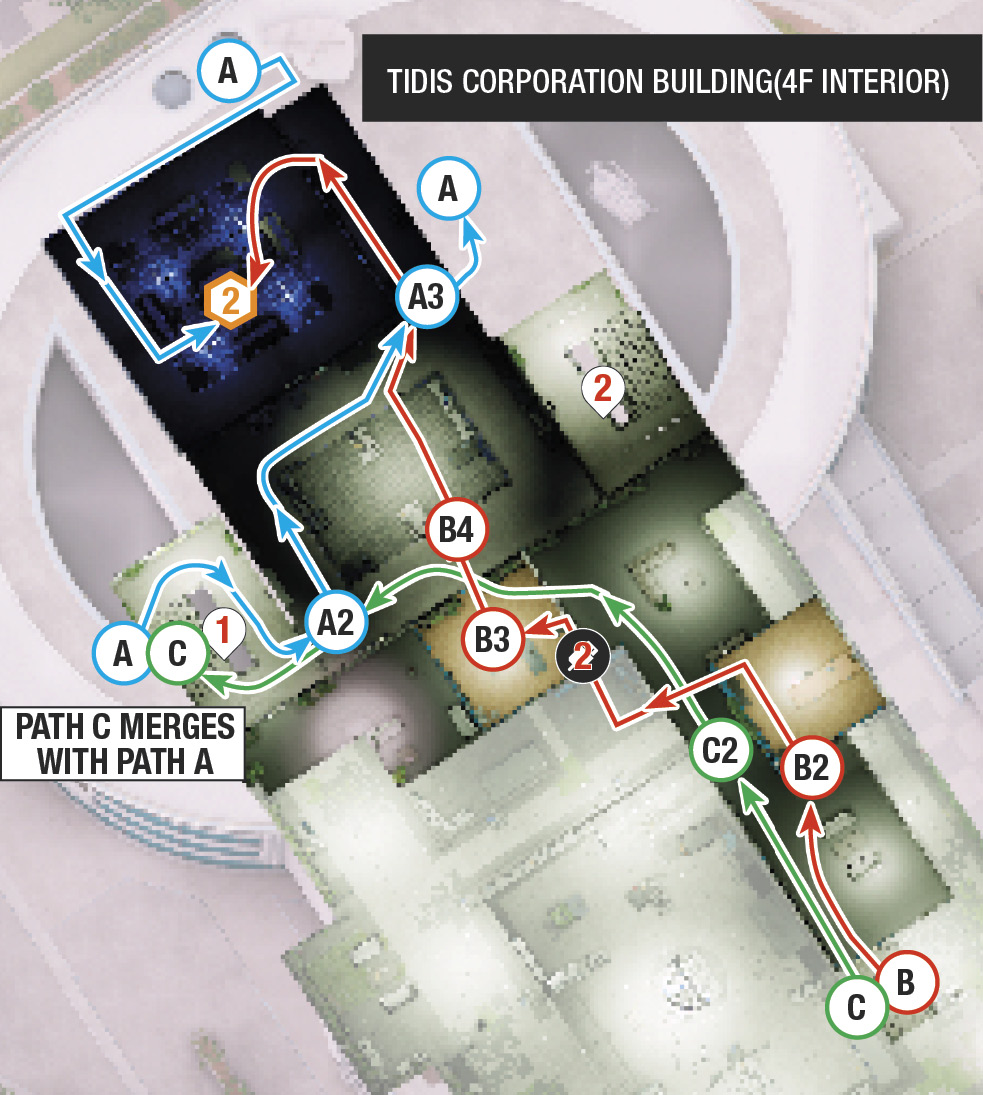
Enter via the lobby, immediately bringing down the guard patrolling the area (use the Tidis sign to hide behind at A.1). Throttle him from behind to minimize noise. Head to the main stairs (left of the lobby entrance) and check to see whether the guards are actively looking for you. If they are, hide and strangle as appropriate. If they aren’t, head up the stairs, wait for the patrolling guard to turn away from you, and step in and melee-strangle the door guard. Distract or tase him as you ascend the stairs first, to ensure he doesn’t raise the alarm before you take him down (A.2). Then sneak and neutralize the third guard (distracting or tasing are also options).
 Lobby Obfuscation

If you’re attempting stealth, the biggest problem is opening the mezzanine door (northwest) to reach the skybridge. Fly in your drone through the open window above the lobby doors (IP 1) or via the back doors (IP 2). Hack the mezzanine door so it opens. Then set up a trap at the nearby junction box (B.1). Explode the box once the guard comes to inspect. Then enter the area, hiding to avoid the other guards, and head into the stairwell to the skybridge.
Another option is to remotely hack the robot and power it down. The sound of the robot shutting off alerts the guards on the mezzanine, and they head down to investigate. Meanwhile, you can climb the main stairs across from the lobby.
Another option is to enter via IP 1, tase the lobby guard, and quickly head up the main stairs (to the left), as the noise has caused the guard by the door to investigate. Neutralize him halfway down these stairs. If he hasn’t moved, make a noise halfway up the stairs (such as a drone’s “voice” or a taser shot).
Lobby Conflagration

Cause a ruckus by the mezzanine door above the lobby, removing the three hostiles in the initial area. Then ascend to the skybridge, and perform violence as guards stream in from the tech wing. The narrow and enclosed bridge is perfect for dropping foes, lobbing grenades, and clearing the area. Then explore the tech wing (all the way to the CEO office) with only robotic foes to worry about. Using the taser on the bridge is great, as it incapacitates armored foes that could otherwise take a lot of bullet damage before going down.
TIDIS INFILTRATION: TECHNOLOGY WING TO SERVER ROOM
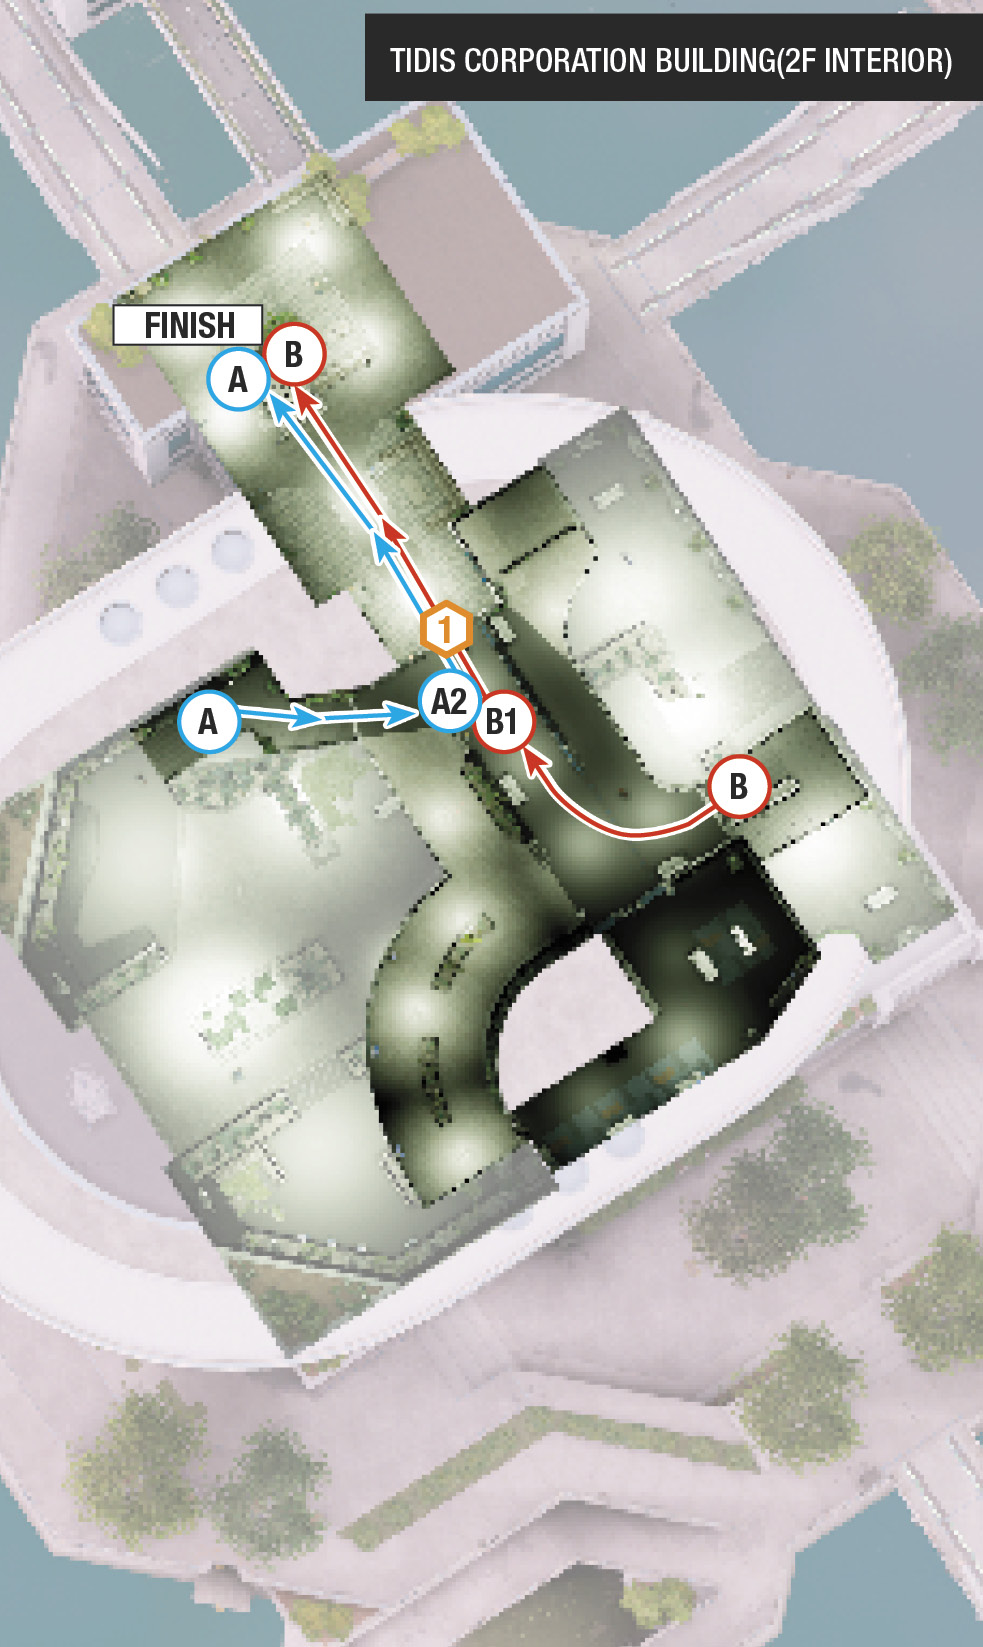
The skybridge leads to a north-south corridor, which has two double doors allowing access into the tech wing. This means infiltration occurs from one of these two areas. What you do inside the tech wing is where matters get more complicated.
Infiltration Points
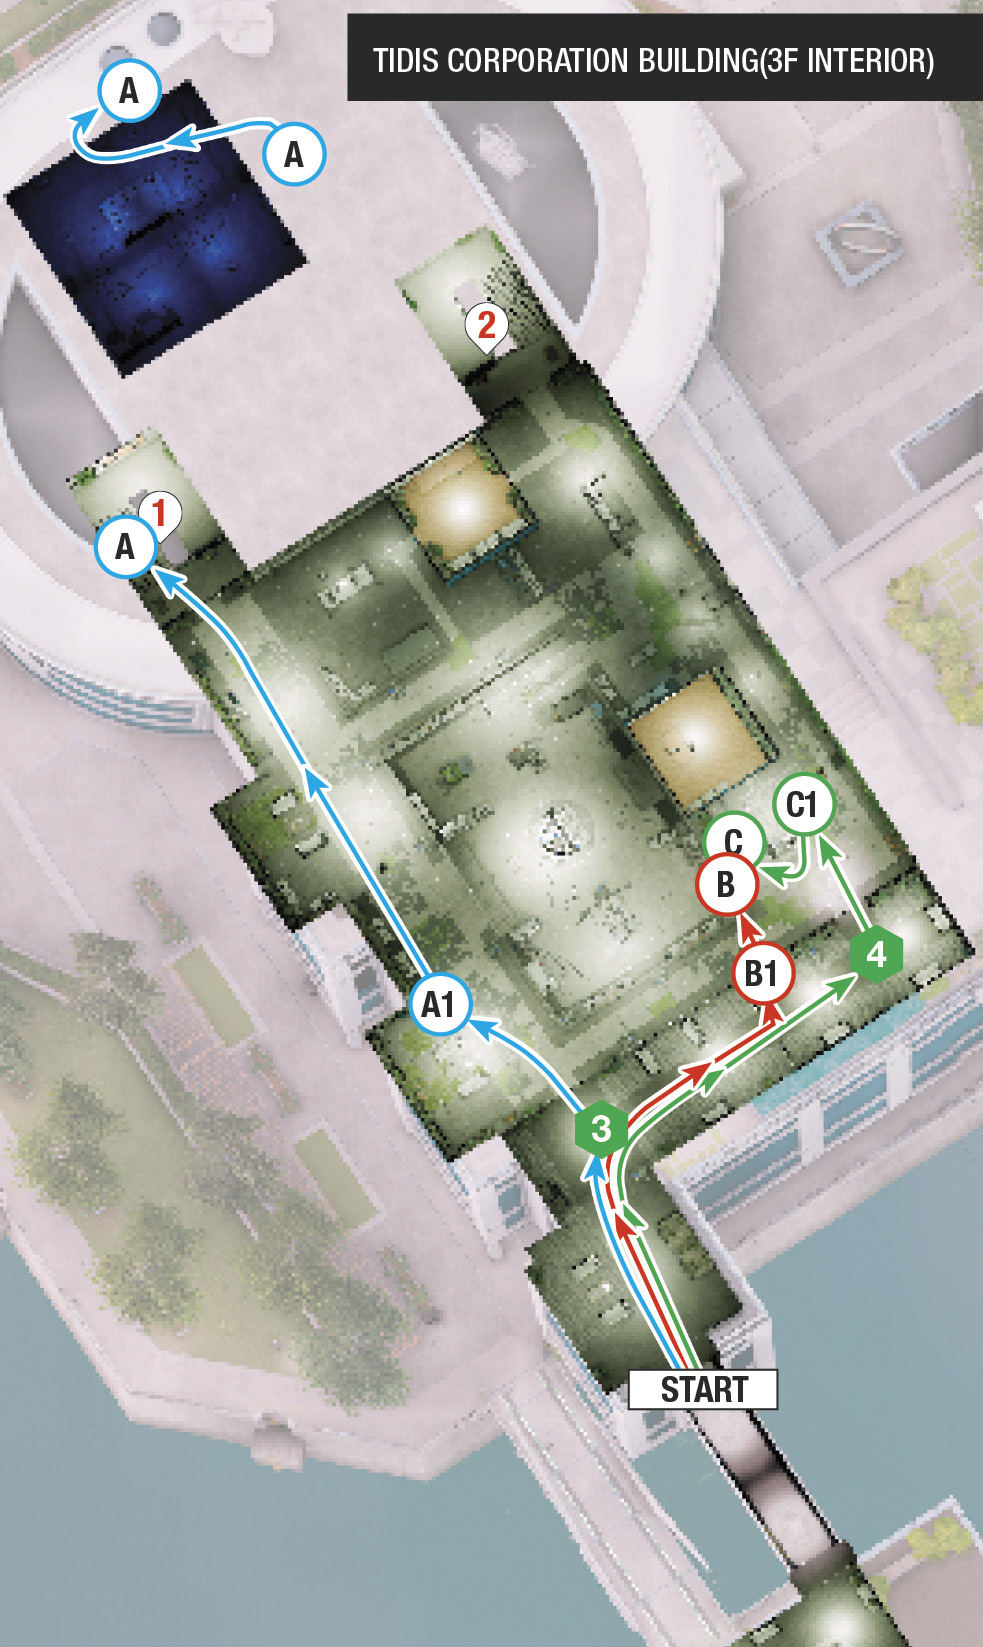
Just past the skybridge sofas is the nearest entrance into the tech wing. This allows you to venture into the tech wing’s main floor, where there’s a patrolling robot. Enemies are clustered ahead and right and above. Use this for less stealthy approaches into this area. 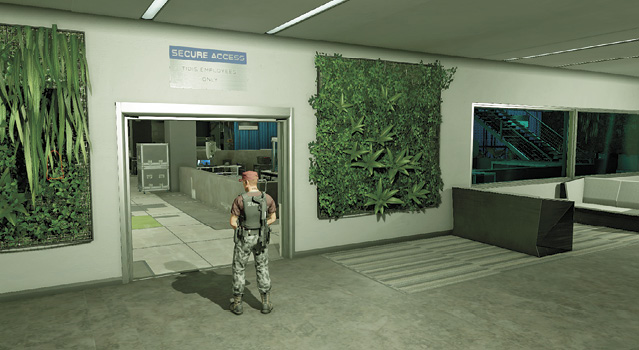
Head past IP 3, through the corridor doors. There’s a second doorway on the same main wall as IP 3. Note the ground vent, which is perfect for sending in your RC Jumper. This entrance leads to a meeting room and stairs up to the office with the CCT in it. On either side in the corner of this wing are stairs that ascend to the CEO office. In the far-middle (northwest) upper area is the server room. 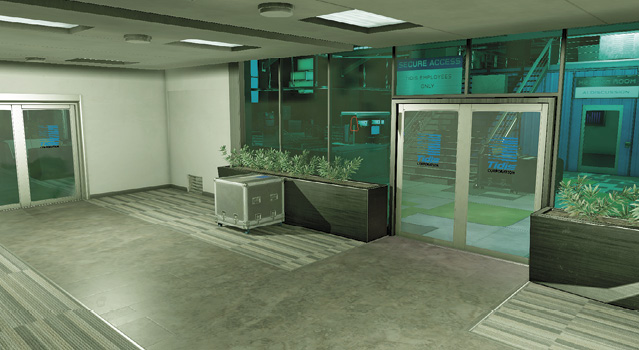 |
 Main Doorway (South):
 Main Doorway (Southeast):
|
 Closed-Circuit Terminal (for Server Room)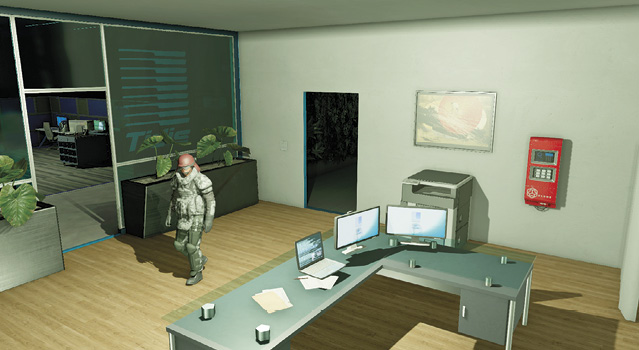
 Data Container (Server Room)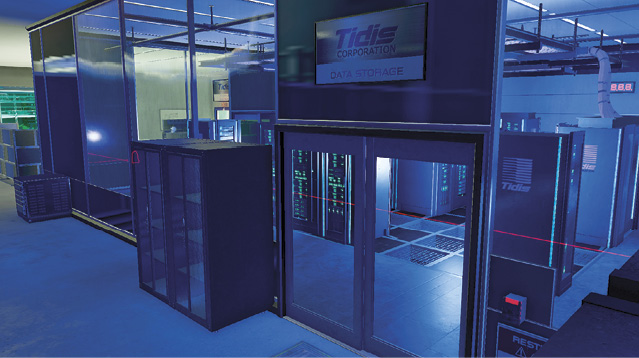

 Stairwells (West and North)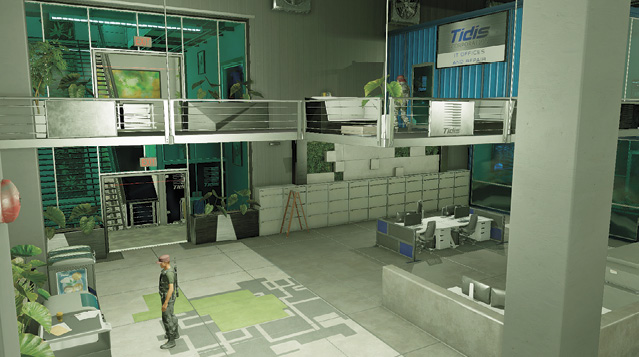
Paths To Completion
 A Tidy Path Through Tidis

Use this path to reach the server room without being seen by foes or having to interact with any or having to access the CCT. Enter the main tech wing floor when the guard by IP 3 patrols to the right, heading up the side corridor to the northeast (A.1). Hide by the left side area with the two sofas, waiting for the robot to pass (or shoot it with a taser). Then creep northwest toward the stairwell, stepping under the moving motion beam. Climb the stairs one floor, watching and hiding from any foes looking your way.
Hack the motion detector above the doorway on your left (or creep to the right of it), and enter the cubicle office adjacent to the server room (A.2). Beware of a patrolling guard in this room and the nearby office with the CCT. Creep around the cubicles to the server room wall, then around and down the corridor with the server room to your left. Hide by the rear (locked) server room doors.
Produce your RC Jumper; you’re about to circumvent the need to unlock the CCT. Drive the Jumper back down the side corridor, immediately opening and heading into the ground vent to your left (A.3). Follow the AC duct down to an area directly below you, hacking an exit vent to reach this narrow crawl space area. Check the right (northwest) wall for the sign reading “Server Room Air Intake” and open the vent under it.
Drive the RC Jumper into this intake duct and take it to the exit vent. Hack that and enter the server room. Hack the data container. You’re on the other side of the locked door, but the download is still accessible. Leave the RC Jumper, retracing your steps to the stairwell—watch for that motion detector under the doorway again!
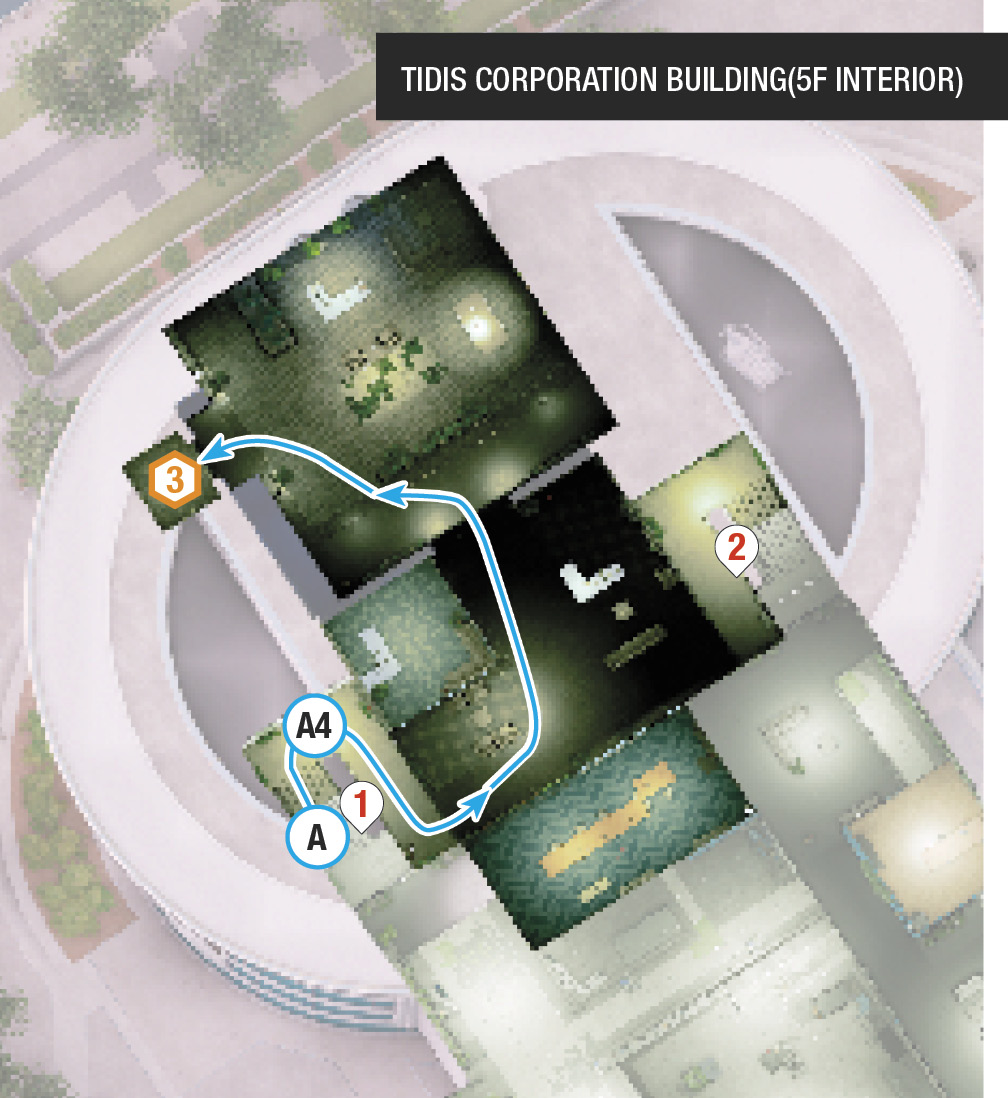
Climb the stairs (A.4), distract the guard outside the CEO’s office by hacking the door and then his phone, and creep to the elevator.
 A Trundle Through Tidis

This allows you to hack the CCT cunningly, before physically heading into the server room. Start by throttling the guard at IP 3, then move to IP 4. Produce your RC Jumper, open the vent (B.1), and drive it into the tech floor and up the stairs to the left of the AI Discussion room. Bounce up the tall planter by the upper office (B.2), onto the office’s metal roof.
Drive onto the Ethernet cable tray “gutter” (the empty metal gutter), heading southwest and then northwest, onto the roof of the IT Office and Repair with the CCB in it. Open one of the four roof vents as you arrive (B.3), then wait for the guard below to head into an adjacent office or turn away from you. Drop through the ceiling vent, quickly hiding behind the desk, and hack the guard’s phone to distract him while you unlock the CCT.
Then use the Jumper to trundle into the cubicle room (B.4), avoiding another guard, and then open the now-hackable doors to the rear right. Enter the server room, and access the data container. However, the download is out of range!
Not to worry; leave the Jumper where it is. As Marcus, head back to IP 3 and cross the tech floor; deactivate the robot and move the laser at the left stairwell door. Ascend to F5 and enter the CEO’s office by distracting the guard and throttling him. Then stand in the middle of the CEO’s office; you’re directly over the server room, so the download starts and you’re feet away from the elevator you need to reach next!
 Takedowns Through Tidis

Removing all human guard threats is not only possible, but also encouraged, as it allows you to progress without fear of reinforcements (as long as you don’t hit any motion detectors or lasers). Use the “distract, tase, and suppression execution” plan so no one wakes up afterward. Begin by throttling the guard at IP 3. Head up to IP 4, and enter the tech wing.
Remain on the lower level, stepping to the right side of the AI Discussion meeting room by the metal steps (C.1). Tase the guard near the wall motion detector (when he stands near the fire extinguisher on the wall). Then tase the subsequent guard who runs over to wake him up.
Head up the metal stairs and tase the guard patrolling the catwalk and Calm Pool meeting room (C.2). Check the IT Offices and Repair for the armored guard. Drop him on the catwalk but not in the office, as the guard in the cubicle room near the servers may see you. Then remove this last foe, ignoring the robot on this floor. Remember there’s a guard on F5 in front of the CEO’s office; a quick peek out from cover and tase is all that’s needed there.
As foes start waking up now (unless you used strangulation or suppressed gunfire), complete the objectives quickly.
Termination Through Tidis

If your tactical stealth plans go very, very wrong, use either stairwell to dash up to the CEO’s office, as enemies can only enter from the stairwell doorways on either side of the hallway. From the office, throw out explosives and make a stand; this chokepoint is easy to defend. Move to a stairwell and creep back down to mop up reinforcements.
PROTOTYPE LABS EXPLORATION
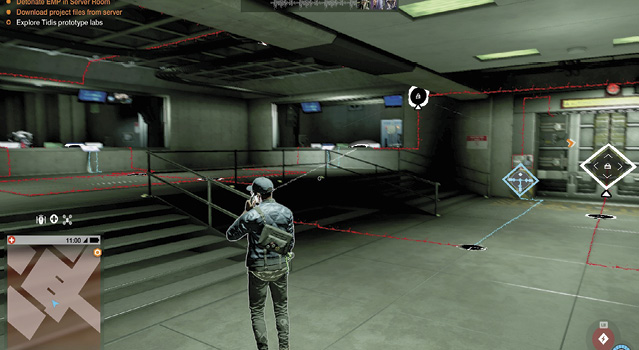
Step into sublevel six after descending in the elevator from the CEO’s office. You’re in some kind of nuclear bunker/parking garage. Hack the router at the thick iron door, and a Network Bypass appears. To solve it, access the three display screen podiums. These reveal additional nodes to hack, as well as the robots Tidis has been building. Now solve the puzzle:
Network Bypass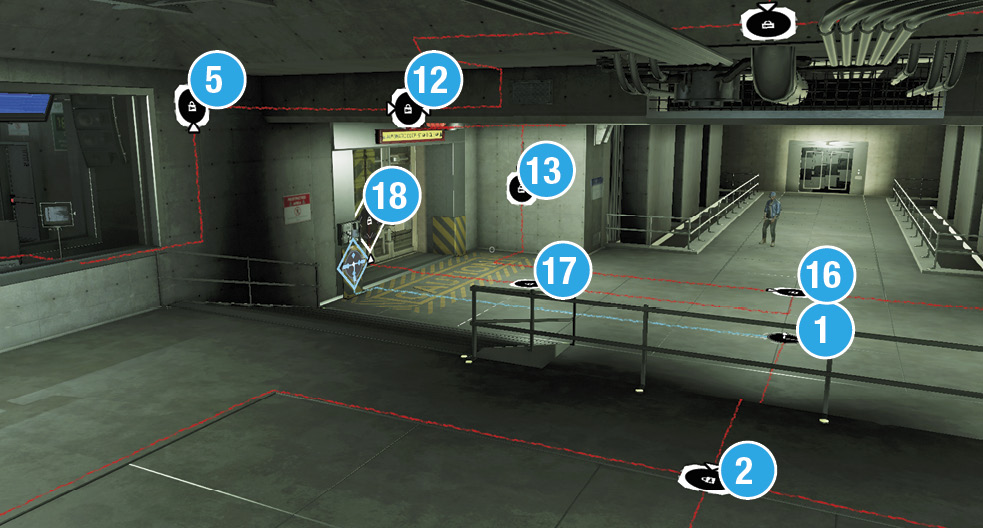 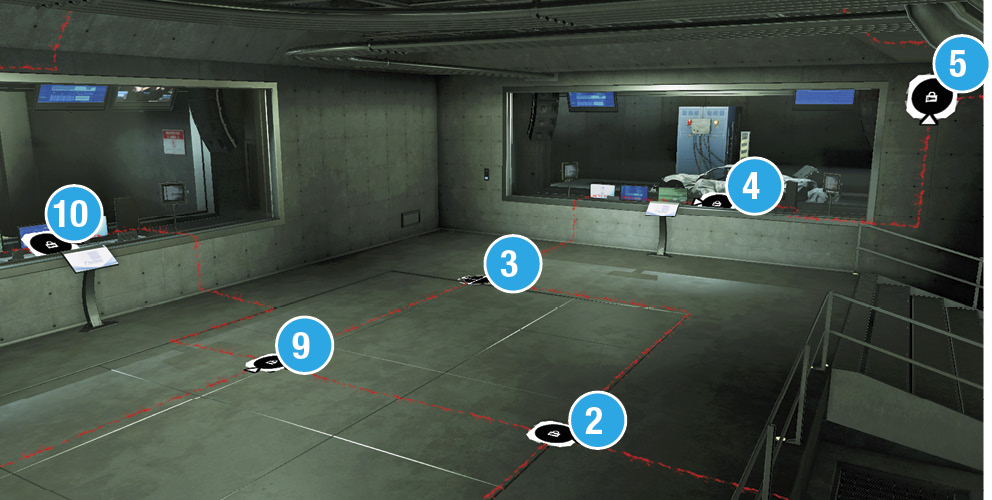 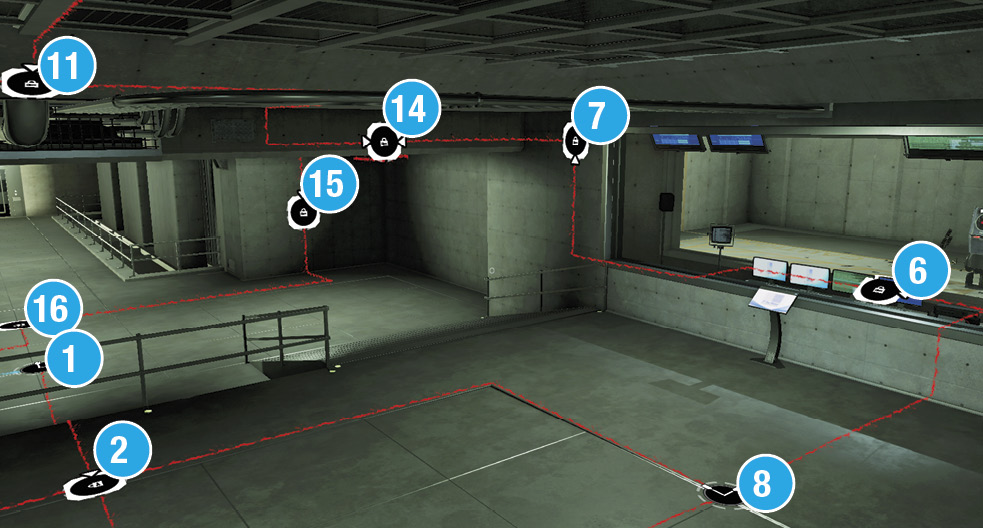 1: Turn x2. 2: Unlock. 3: Turn x2. 4: Unlock. Turn x1. 5: Unlock. Turn x2. 6: Unlock. Turn x1. 7: Unlock. Turn x2. 8: Turn x3. 9: Unlock. Turn x2. 10: Unlock. Turn x1. 11: Unlock. Turn x2. 12: Unlock. Turn x1. 13: Unlock. Turn x1. 11: Turn x1. 8: Turn x1. 9: Turn x1. 14: Unlock. Turn x2. 15: Unlock. Turn x1. 12: Turn x1. 16: Unlock. Turn x2. 17: Unlock. Turn x1. 18: Unlock. Puzzle complete. |
The doors open, and you find yourself staring at a fully operational Spiderdrone! Take control from the panel in the adjacent office. System online! Now to explode the five ducts in the “playroom”—a huge chamber where these weapons systems were tested, filled with concrete structures, cars, and foes—as part of your overall destruction of the prototype labs!
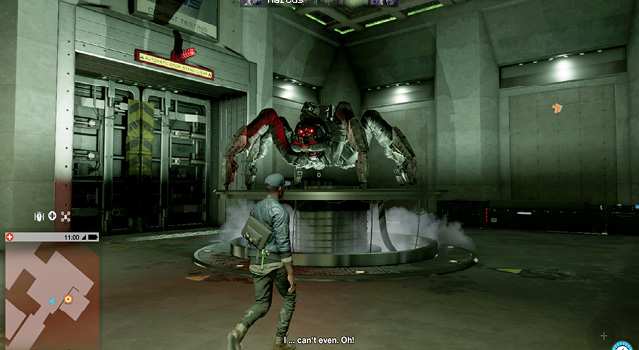
The plan is to destroy the five indicated duct wells in the demo room. Security personnel are there to stop you, but this only occurs if you stand in one spot and refuse to fire on the enemy. For the most part, ignore the hostiles, only neutralizing them if they’re in the way between you and the five objectives in this playroom. Note that some ducts (square-shaped and red) require you to leap onto a wall to get a direct shot at them. Punt two grenades into each to destroy it, or pepper it with about 5 to 6 seconds of minigun fire.
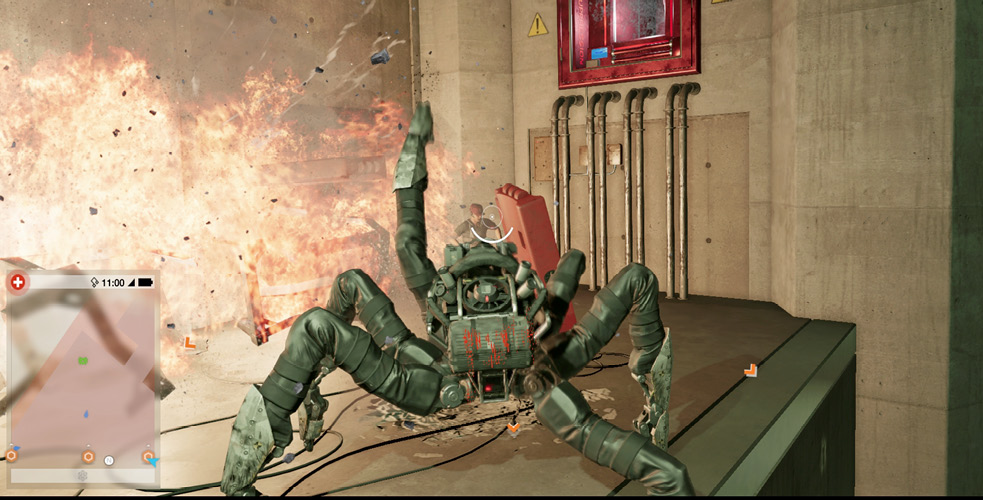
When you meet the first five objectives, the iron door to the north opens, allowing you into the three viewing chambers you just uncovered during the Network Bypass. Fight your way to each of them, pouncing on nearby foes with your pincers and blasting away at ranged enemies. Then pound on each prototype robot (which doesn’t fight back) with all three attacks until it explodes.
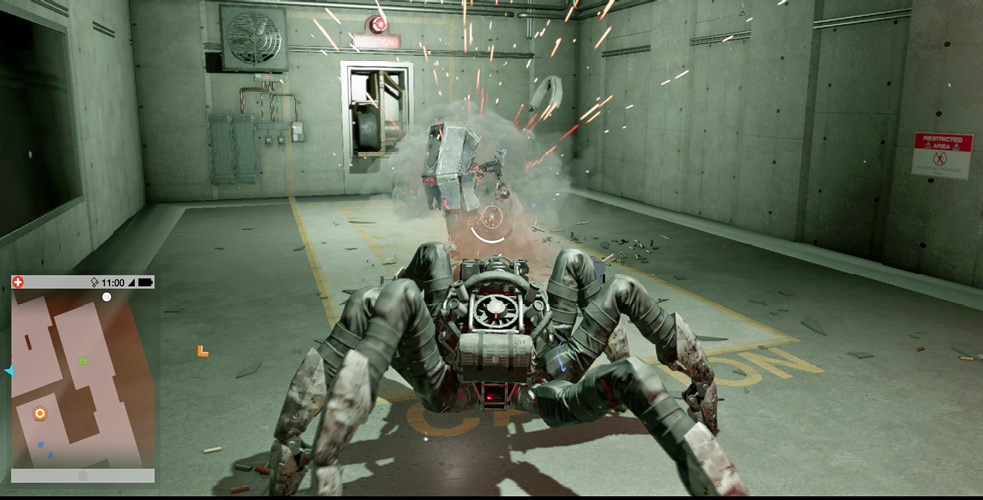
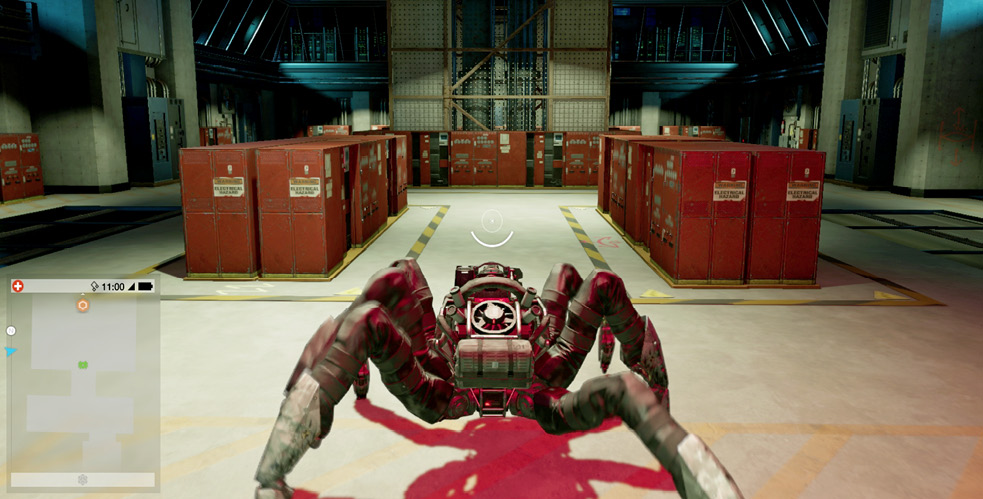
Time to leave! Head south, back through the playroom to the shaft marked “Sublevel 6.” Climb the shaft to Sublevel 3 and exit onto this floor. An iron door grinds open to reveal a giant generator room. Methodically rake and punt grenades at all the generator box clusters. There are clusters around the perimeter and in the middle of this room. Use pincers, too, if your minigun overheats. Keep up this methodical destruction until all the power supply generators are destroyed. This is straightforward, as long as you physically check that each generator sparks and looks wrecked.
After the mayhem, you escape Tidis, rendezvous with Ray and Wrench, and watch Sitara’s social media takedown of Tidis. The operation concludes.