
Watch Dogs 2 Guide Main Operations Eye For An Eye
2. Operation—A Brutal Discovery
Objectives
• Download Tezcas operation info. • Switch the irrigation system.
Difficulty
RewardsDedSec Followers: +32,400 BriefThe Tezcas took Horatio, and the only one you could identify is gang-member Luis Travino. Find him and maybe you can find Horatio. Hostiles
Location
|
 Track Horatio’s kidnapper.

 Tezcas Gang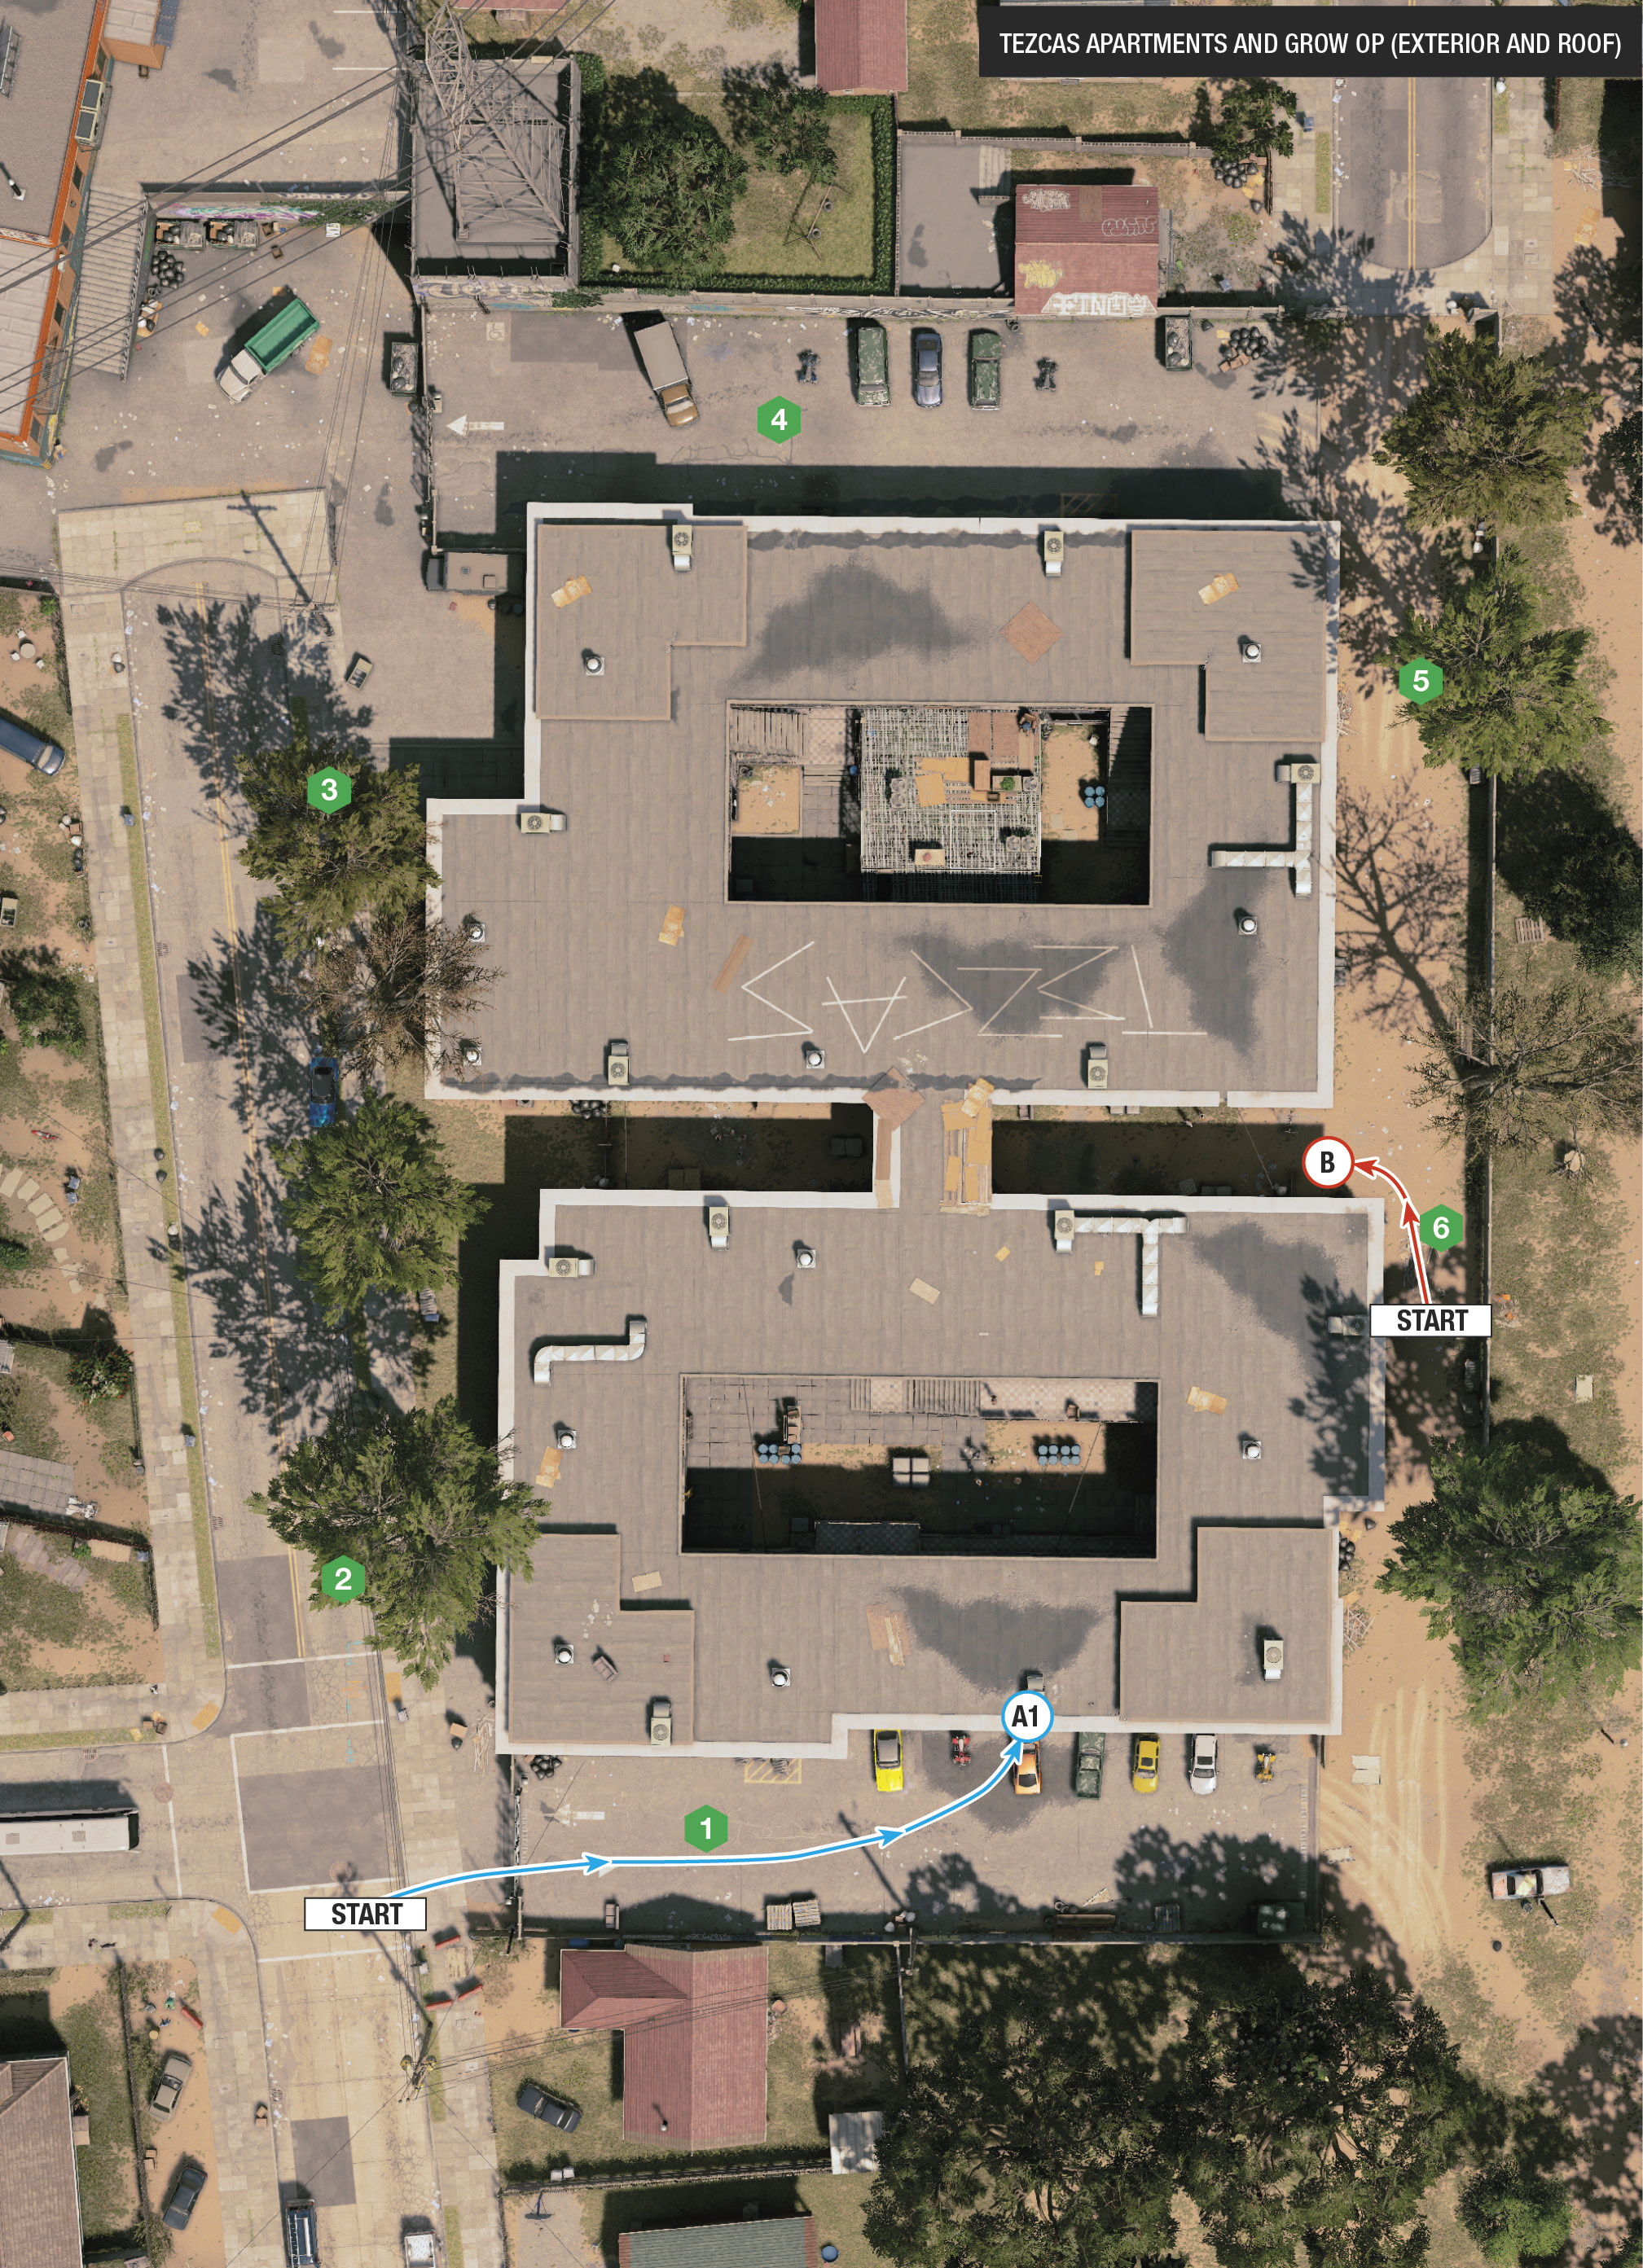
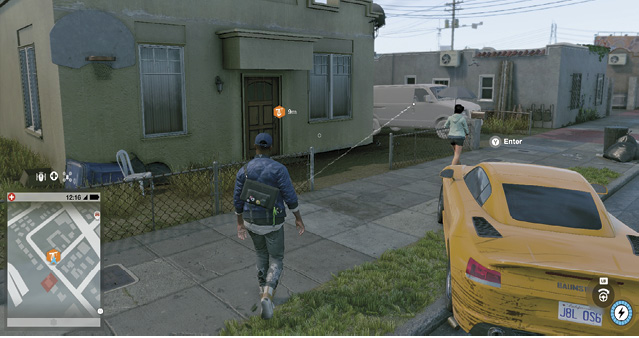
The camera footage leads you to a known Tezcas gang stronghold in Woodland. Enter the single-story Spanish-style home, where you make a grim discovery.
You need to track down those responsible, and Josh mentions a lot of phone activity coming from the apartment building up the road. As you reach there, you realize the place is a grow operation and extremely well defended.
Infiltration Points
The southern perimeter has gates to open in the southwest area and a ground vent inside for a drone to pass through. Don’t overlook the shuttered second-floor window. Hop on a van, hack the shutter to open, and infiltrate up to the second-floor alcove (and main balcony walkway) from here. 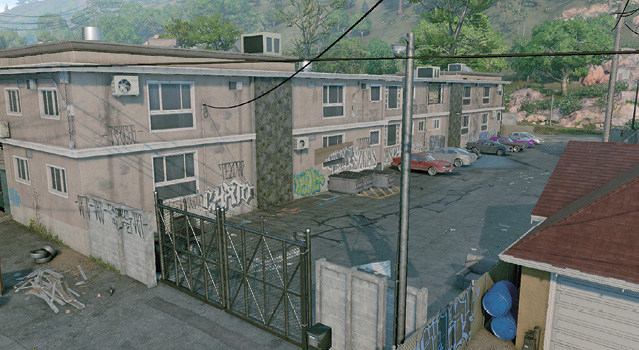
The side of both buildings closest to the road offers numerous insertion points: In the southwest area are unlocked double doors with a drone-sized hole above. Above the “welcome” graffiti is a window shutter you can hack and vault through. Between both buildings is a mesh fence you can drive through and an adjacent ground vent you can drive an RC Jumper through. 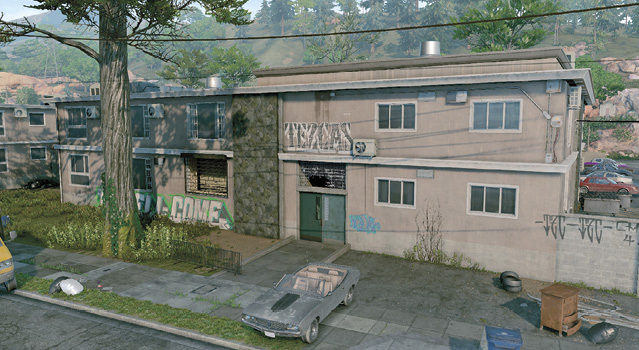
An open passage into the apartments is available for you to stroll into, close to an open ground vent. There are also gates to hack (for entering or exiting) in the northwest corner. 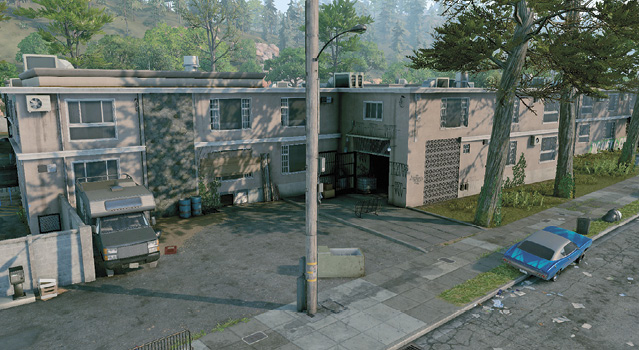
There’s only a single second-floor window shutter to hack and climb through, providing you have the height (drive a tall truck here first). It leads to the northern balcony walkway. 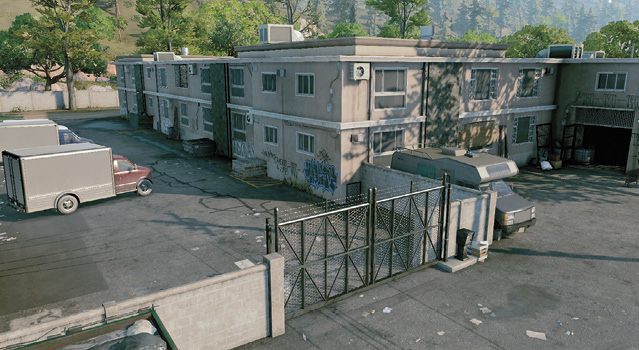
The stack of drywall here has a second-floor vent you can maneuver a drone into, once you unlock it. This is a good spot for RC Jumper infiltration, as you emerge on the upper balconies, reasonably close to the objective. Just drive a van and park it by the drywall so you can reach the vent. 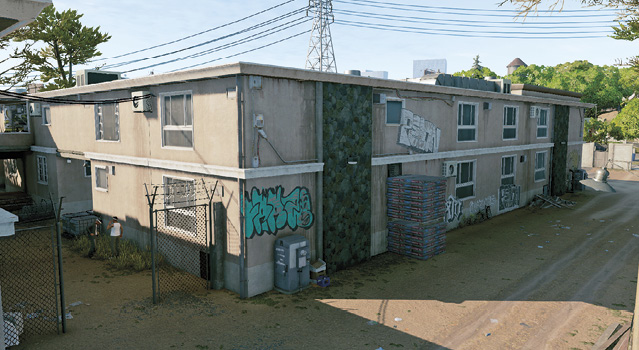
The main path between the buildings runs east to west here and is a critical location when hiding while downloading the operation info. Otherwise, the building on the alleyway side has no infiltration points. 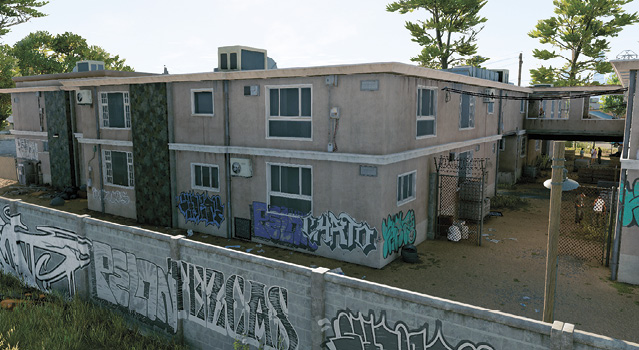
|
 Southside (South Building):
 Westside (South Building):
 Westside (North Building):
 Northside (North Building):
 Eastside (North Building):
 Eastside (South Building):
|
 POIs and Objective Points
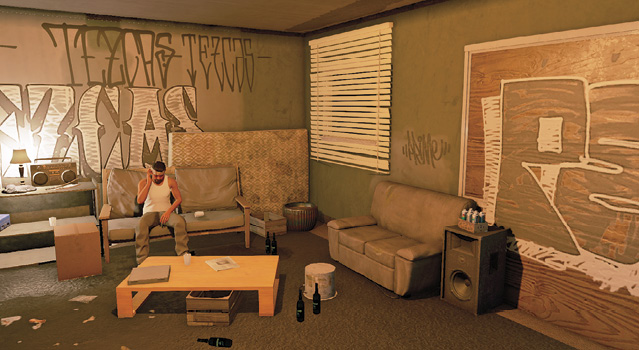
 Operation Info Laptop
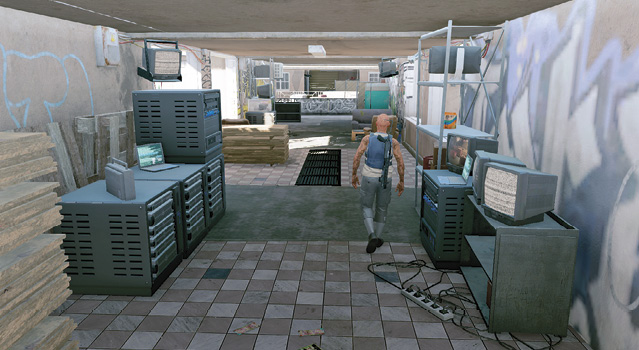
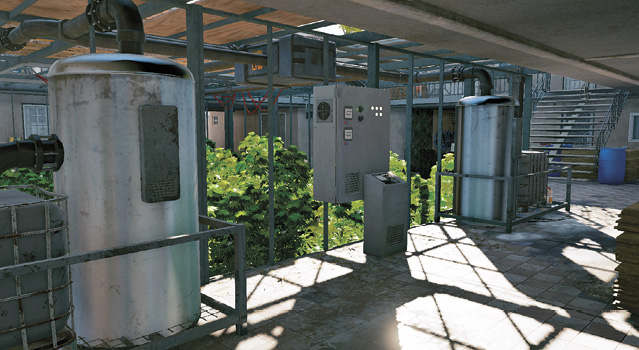
 Irrigation System
Paths To Completion
The tight spaces mean you’re more easily spotted maneuvering through these two connected O-shaped buildings. Having trouble infiltrating? Then change your entry point, and be aware that there are fewer gang members than you’d think; once you whittle them down, it becomes easier to maneuver.
It’s also worth remembering there are two linking corridors to each apartment block on the ground floor and one (with the objective) on the upper floor. Also keep in mind there are dozens of ways to reach and complete the objective; the following are the most proficient and safest:
 Electrical Storm

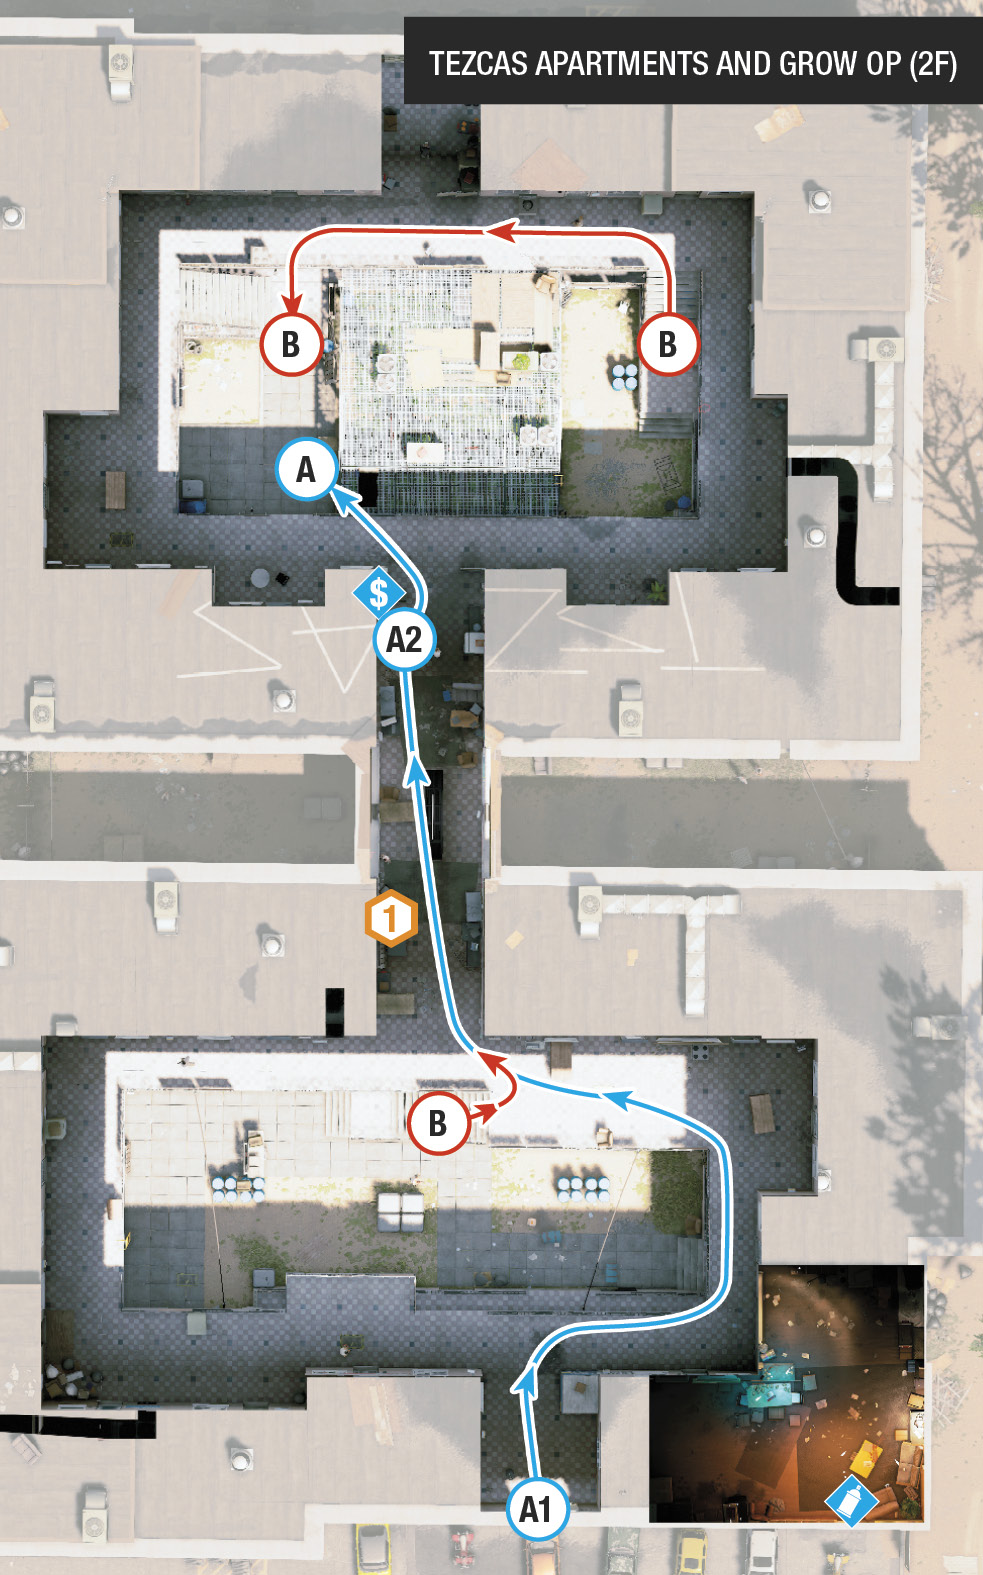
This takes care of all hostiles, including the dogs, and gathers all collectibles before both objectives are done. Rely on scenery electrocutions, taser shots, and suppressed pistol kills (to keep these foes down). Start at Infiltration Point 1, driving a van under the window shutter, then hacking the shutter to access the open window after climbing atop the truck. Vault over into the upper balcony of the south building near a punching bag, and hide behind the blue tarped pallet stack (A.1).
 Strangulation Is the Norm

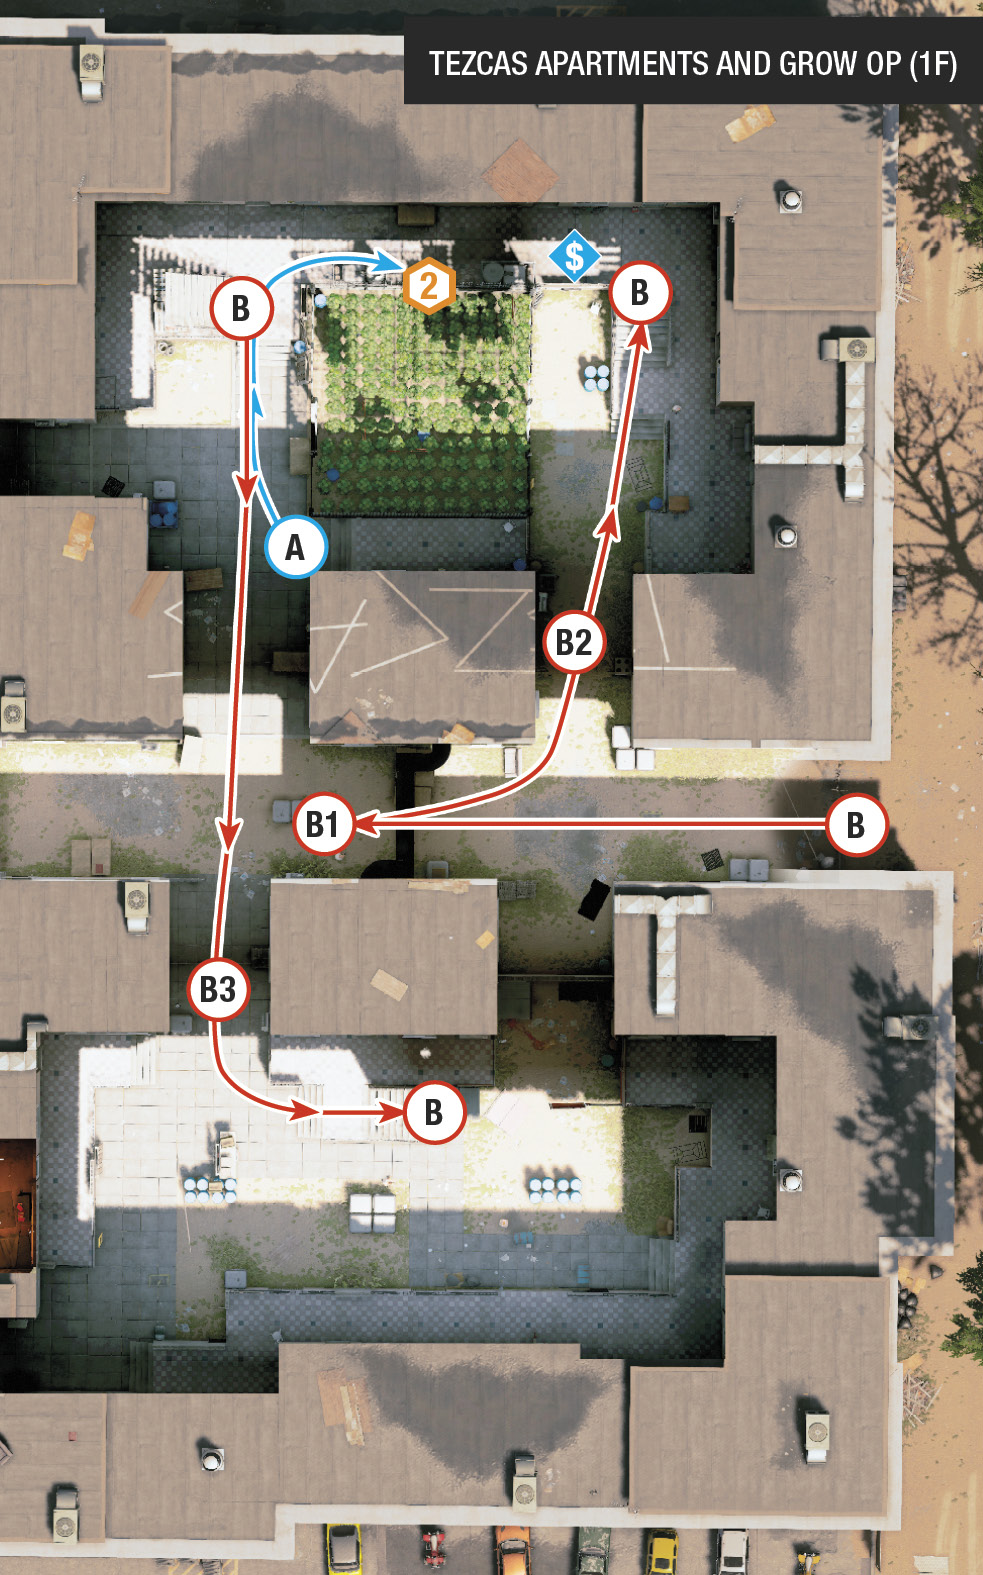
This is an alternate route, which has been tested using just strangulation, though it’s easier if you use phone distracts too. Enter the eastside alley, into the east-west passage between the apartments (IP 6). Sneak in and throttle the foe standing under the objective area (B.1).
Your actions may have caused the foe in the northern apartments to investigate the noise, so stand at the corner of the connecting passage into the grow-op area (east side). Step out to strangle him (B.2). Be careful as you reach the grow-up area; scan it for a foe patrolling the balcony, and look for an appropriate time to step up and throttle her.
Time to strangle some dogs. Drop down onto the paved area of the northern apartment block, then work your way south, directly down the corridor (B.3), moving from cover and running in to subdue the three dogs you encounter one by one. Finish with any foes in this corridor who’ve discovered the body of the first foe you dropped. If the two remaining human foes haven’t spotted the body and aren’t actively looking for you, coax them into this corridor (use your RC Jumper’s taunt, or hack a junction box to explode). Clear the remaining foes from here, then secure both objectives.
A Bridge Swarm

Drive a getaway truck with a high container attached, from the eastside alley, into the east-west passage between the apartments (IP 6). Driving the car is important; maneuver it very slowly so the first guard is alerted, then back out of the restricted area into the east alley, get out, and throttle her.
Check the bridge above for foes, and tase any that give you trouble. Park your truck under the bridge, climb atop the truck’s container, go through either open window, and into the bridge and laptop objective to start the download. Then hide, either behind cover or drop down and hide in the truck. Next, sneak to the second objective, light everything up, and escape in the truck or another vehicle.
Quadcopter Barnstorm

This completes both objectives without even meeting a foe. Wander into the edge of the restricted area in the east-west alley between the buildings, coming in from IP 6. Drop behind the stacks of metal and rebar cubes on the right (north) side. Launch your Quadcopter, and fly it through any open window on the upper bridge and to the laptop objective. Hack it, then fly the drone out of view, hovering over the grow operation. After you gather the operation information, fly the drone above the irrigation system, setting fire to the weed farm as soon as you finish talking. Then leave. Quickly.
Ductwork Form

The optimal vent to drive your RC Jumper into is located inside the southwest gates, in the ground-level corner of the south apartment. The duct ascends to the southwest corner of the upper balcony, allowing quick and easy access to the laptop. The only problem is the download radius of the hack, so run to the east-west alley for the safest place to wait.
Afterward, steer the RC Jumper into the vent just west of the laptop, on the north wall of the southern apartment building. This vent takes you under your foes to the north balcony and growing operation. From here, you can jump up and out (once the second objective is ready to hack) and finish the mission in seconds.
Rooftop Platform

An even better idea is to take your RC Jumper onto the roof! Start at IP 4 (north side of the north apartments). Drive a truck under the window shutter and roll back the shutter. Drive your Jumper onto the top of the truck, bounce into the window, over the railing (distracting foes with phone calls), and onto the wooden crate on the giant metal grow-op cage. Accelerate and jump from the crate, landing on the roof.
Now drive the RC Jumper south, along to the roof of the southern apartments, so you have a direct hacking connection to the laptop (from range). Hack the laptop, and move Marcus to the safest download spot in the radius (the eastern part of the east-west alley between both apartment complexes). After deciding to torch the grow operation, switch back to the RC Jumper (still on the roof) and drive it to the roof lip directly above the Irrigation System objective (there’s a tiny gap allowing the hack so you don’t need to drop your Jumper off the roof). Now explode the weed operation and flee!
Tezcas Firestorm

Need to enact a violent revenge? Then enter via IP 2, plant a grenade at the feet of the dogs, and climb the ladder in the southwest corner of the south apartment building. Then rush the southeast apartment (where the collectible is). This is a great location for hiding while engaging foes in a firefight. The door swings open (allowing you to punt grenades at foes hiding nearby), and the window has a shutter you can open or close, depending on threats. You can easily remove all threats and reinforcements from here.