
Watch Dogs 2 Guide Online Operations San Francisco
Restricted Area 11. Pier 27 Warehouse
Available Operations
| Operation Type | No. of Objectives | Variations |
|---|---|---|
| Data Breach | 1 | 1 |
| Deliver Vehicle | 1 | 1 |
| Destroy Shipments | 3 or 4 | 2 |
| Prisoner Release | 1 | 1 |
| Steal Encrypted Drives | 1 | 1 |
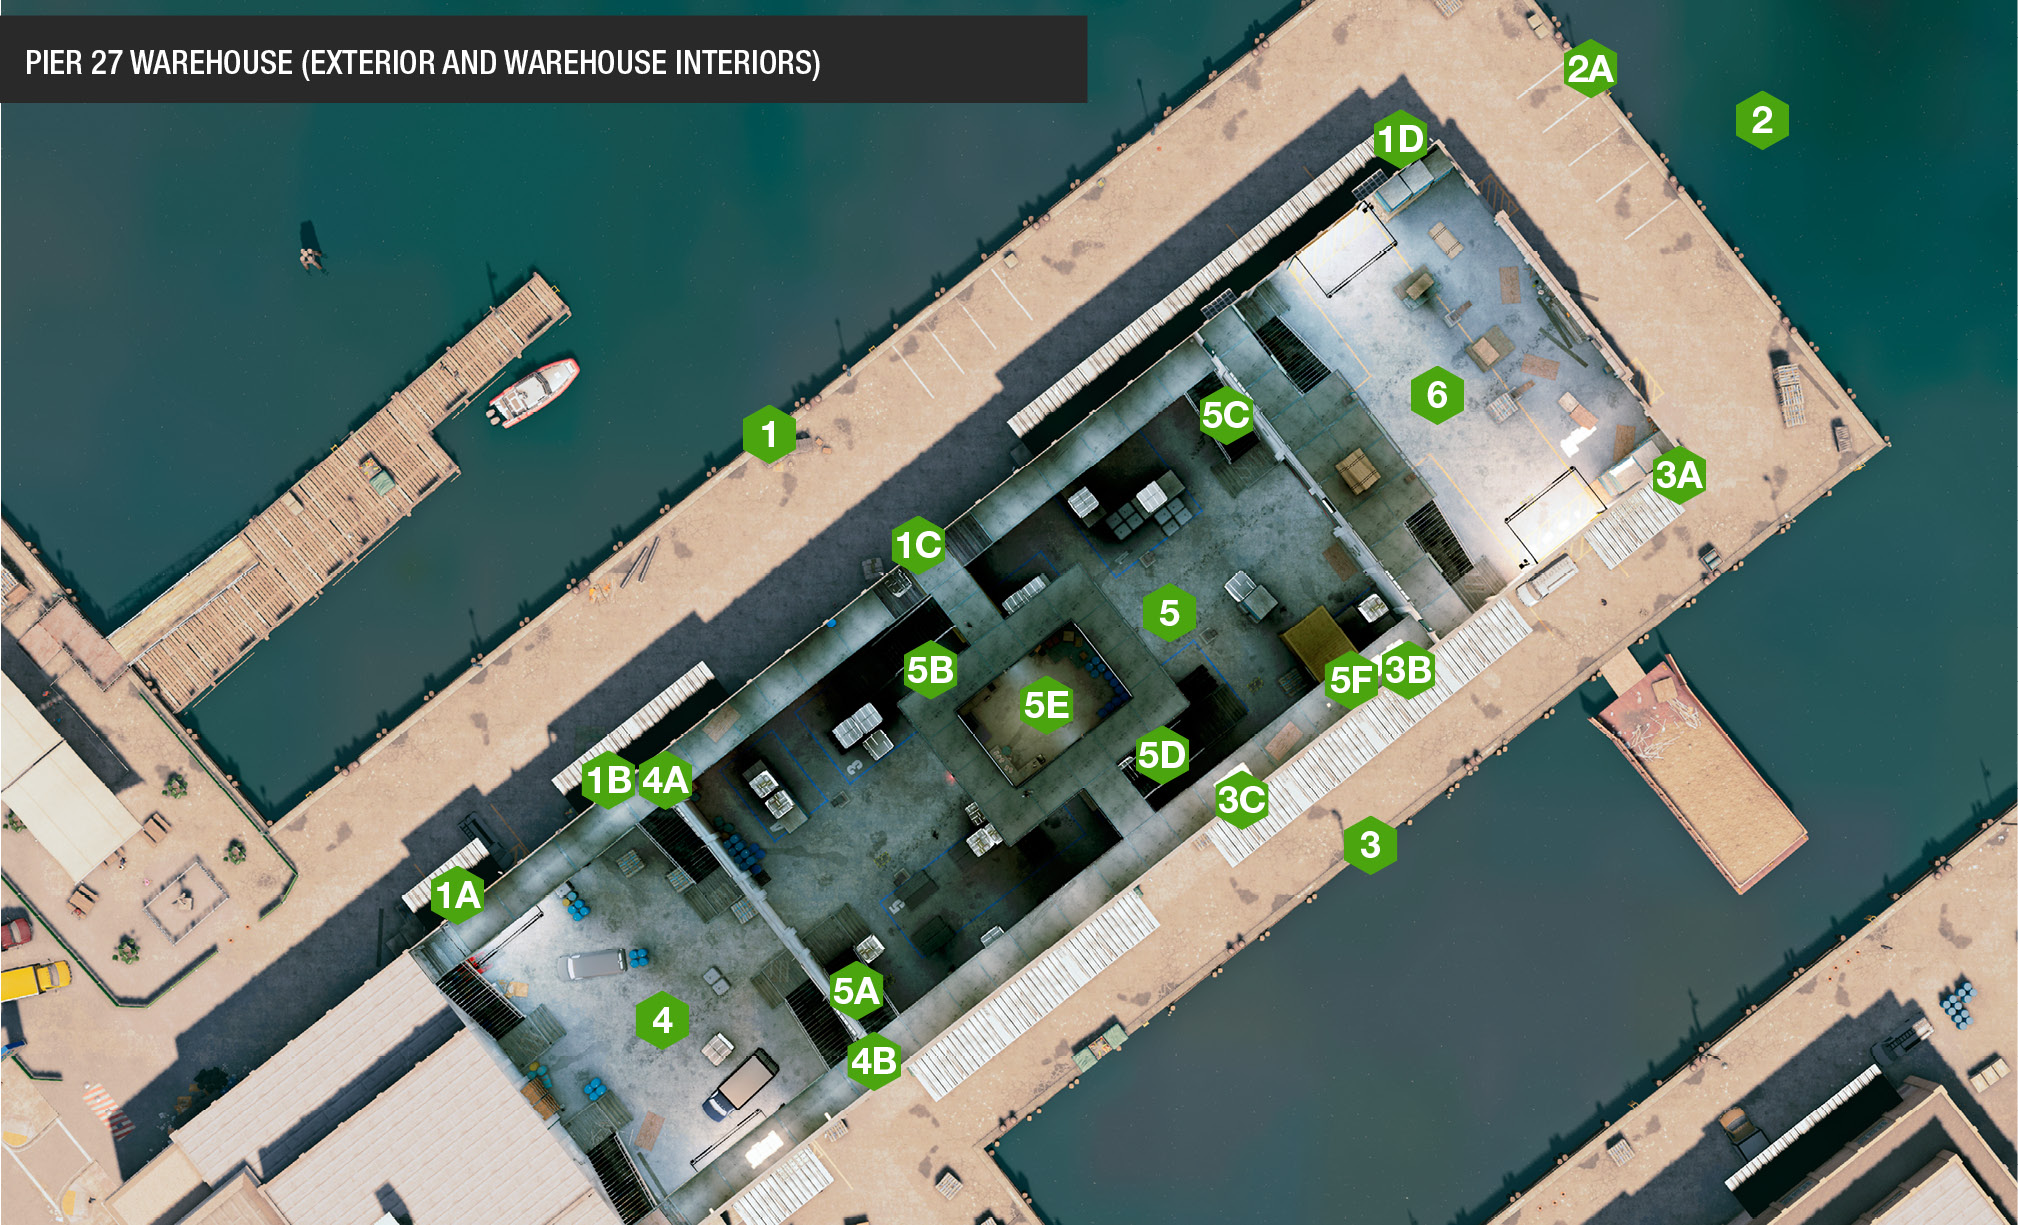
Structures and Infiltration PointsThis long warehouse structure is segmented into three smaller interior sections, and as long as you know which section you’re in, it becomes easier to navigate the maze of balconies and cargo crates.
Moving southwest to northeast along the concrete pier, the garage and awning include crates that grant access up to an open window (1A) outside the southwest warehouse—one of the best (and only) places you can drop an RC Jumper, allowing it to quickly find CCTs or reach other interior areas. Farther along are another awning and open window (1B). Both are useful escape locations. Outside the main warehouse, there are no infiltration points aside from one small window that’s open (1C), and allows a Quadcopter to scout the interior of the main warehouse for foes to tag, and access keys to hack. Outside the northeast warehouse on this side of the pier are a very long awning, crates at the northwest corner to climb (1D), and two open windows. Both are good spots to release the RC Jumper, or leap into (or out of) the warehouse itself. Remember that any of the open windows above the awnings that you can reach, either on this side or the southeast perimeter, allow you to reach the rooftop itself (by climbing atop the window). The roof can be scaled across at the AC ductwork protrusions. The roof makes an extremely safe place for using drones, hiding from foes, or sniping. 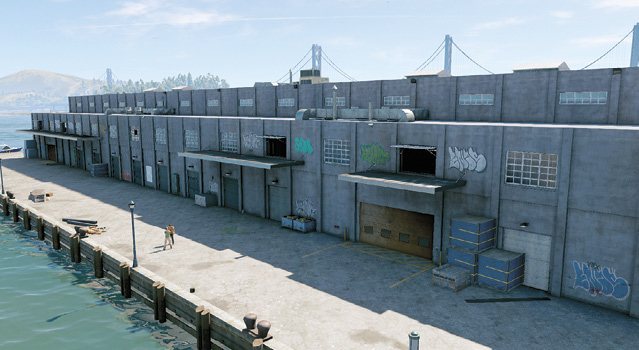
This is completely devoid of infiltration points. The only access to the pier, aside from the concrete area surrounding the warehouse building, is via a ladder into the water (2A), so feel free to infiltrate by sea, or escape by boat. 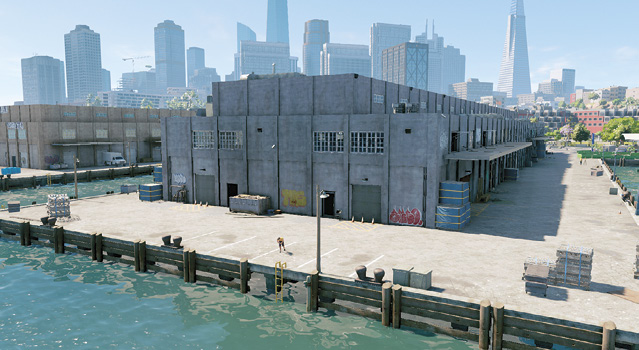
Starting at the northeast warehouse, use the crates in the corner (3A) to reach an awning and open window above the garage, which is the other way in and out. Outside the middle warehouse are two long awnings. The north one has an open window (3B) you can access (the only way directly into this location), and a smaller window (3C) only a Quadcopter can maneuver through. Reach either awning by standing on the car forklift truck and moving it adjacent to the awning, or by infiltrating from the northwest perimeter side, over the roof and down to the window. Outside the southwest warehouse, there’s a garage you can open and enter, and an awning and window you can’t get to from here (use it as an escape path or drop down from the roof to enter via the window). 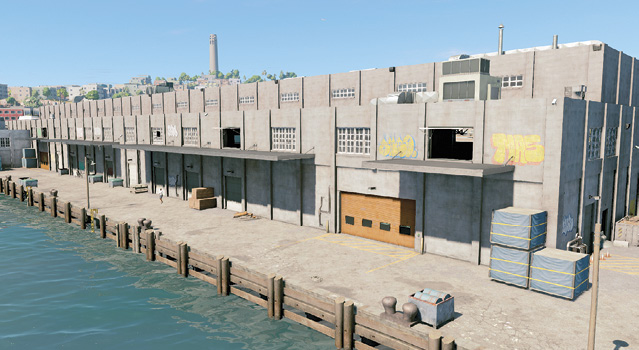
This small warehouse is closest to the main road. It’s roughly symmetrical, with gantry stairs at each corner, upper gantry doors into the main warehouse—one on each side (4A, 4B)—and open windows on both exterior walls to escape from. There are open windows on the northeast wall, into the main warehouse interior too; fly your Quadcopter in, or jump and boost the RC Jumper through the window. Don’t overlook the open wall hatch under the east gantry steps and door; this allows free movement into the middle warehouse, which is useful if you don’t want to bypass the gantry doors. 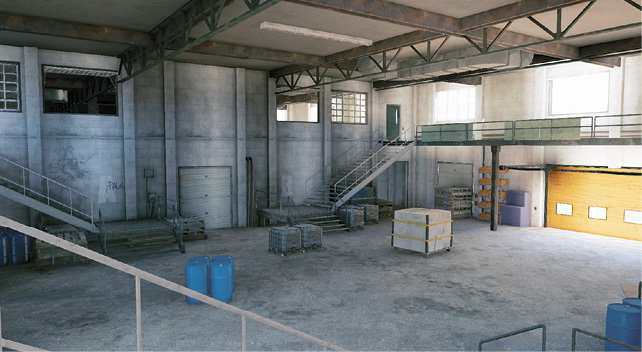
This large middle warehouse is also symmetrical in its layout of gantryways, metal stairs (5A, 5B, 5C, 5D), and a central “stilt” office (5E) where a CCT usually is. Watch for motion detectors depending on the operation. Use the vault transformers on the ground level, and hide behind the numerous crates, looking for ones you can climb onto to reach the gantry at various positions throughout the warehouse. Note the only fully open window—top floor, east side near the door to the northeast warehouse (5F)—the only escape to the outside from this chamber. 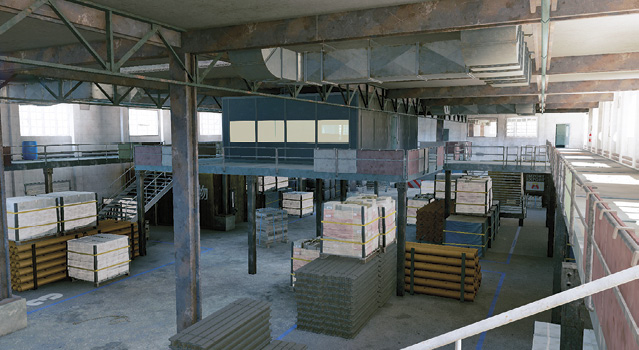
This symmetrical warehouse interior features a gantry platform accessed via one of two metal staircases, two doors into the middle warehouse on the top floor, and a garage door on the ground floor, making this an easier infiltration point than the southeast warehouse interior. The open windows on the inner wall (southwest) can be leaped through by an RC Jumper if you wish. 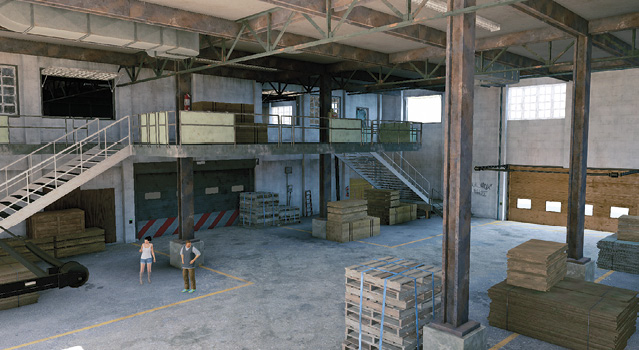
|
 Northwest Perimeter
 Northeast Perimeter
 Southeast Perimeter
 Southwest Warehouse Interior
 Middle (Main) Warehouse Interior
 Northeast Warehouse Interior
Operation Examples
Data Storage (Data Breach Operations): The data is hackable on the ground in the middle warehouse, so send in a drone after scaling to the awning on the southeast perimeter, near the only open window into the middle warehouse. Hack the access key, then the data, and physically head through the open window into the central office, and trap both doors with electro-shock grenades. Wait until the download ends, and leave the way you came.
Vehicle (Deliver Vehicle Operations): The vehicle is parked in the middle warehouse, so check the precise location with the Quadcopter, then enter the southwest warehouse via the roof awning window, and tackle the single foe inside. Creep through the east hatch (ground floor) into the middle warehouse, enter the vehicle, drive through the garage door to the northeast, and make a sharp left, out of the second garage door to the northwest perimeter pier. Don’t drop into the water! Flee using this route, as it’s safer than getting snarled up between warehouses to the southeast.
Shipments (Destroy Shipments Operations): There are many variations of this operation type. Here’s one example: Two of the shipments are in the middle warehouse; one is on the ground floor and requires a simple bombing with a Quadcopter. The other is inside the office; hack the access key to get into the office, then destroy the shipment using either drone. While you sit on the roof controlling your drones, look for the parked vehicle on the next pier over (to the east). Hack the car and remote-reverse it into the water.
Prisoner (Prisoner Release Operations): The prisoner is always located in the middle warehouse, in one of the shipping containers, and the container door requires a CCT to be unlocked. This is done at the upper-floor office in the middle of the gantryways.
It’s normally better to use an RC Jumper, but there are no special vents to use with this drone, and the prisoner must be freed by Marcus, so infiltrating the main warehouse is best done on foot, with a second player providing Quadcopter backup or distracting foes out of this room. Enter via the northeast warehouse, as it’s easier to get into the main warehouse from the upper doors or garage door. Flee the same way you came in.
Alternatively, crouch on the upper window outside the southwest warehouse (north side, accessed via the blue tarp pallet crates), drop in the RC Jumper, neutralize the guards, and hack the CCT in here. This allows easier escape routes before you hack the CCT in the middle warehouse office. Then creep in and complete the rescue.