
The Witcher 3: Wild Hunt The Complete Edition Guide Training Witcher Archetypes Alchemy-focused Archetypes
Archetype 8: The Alchemist
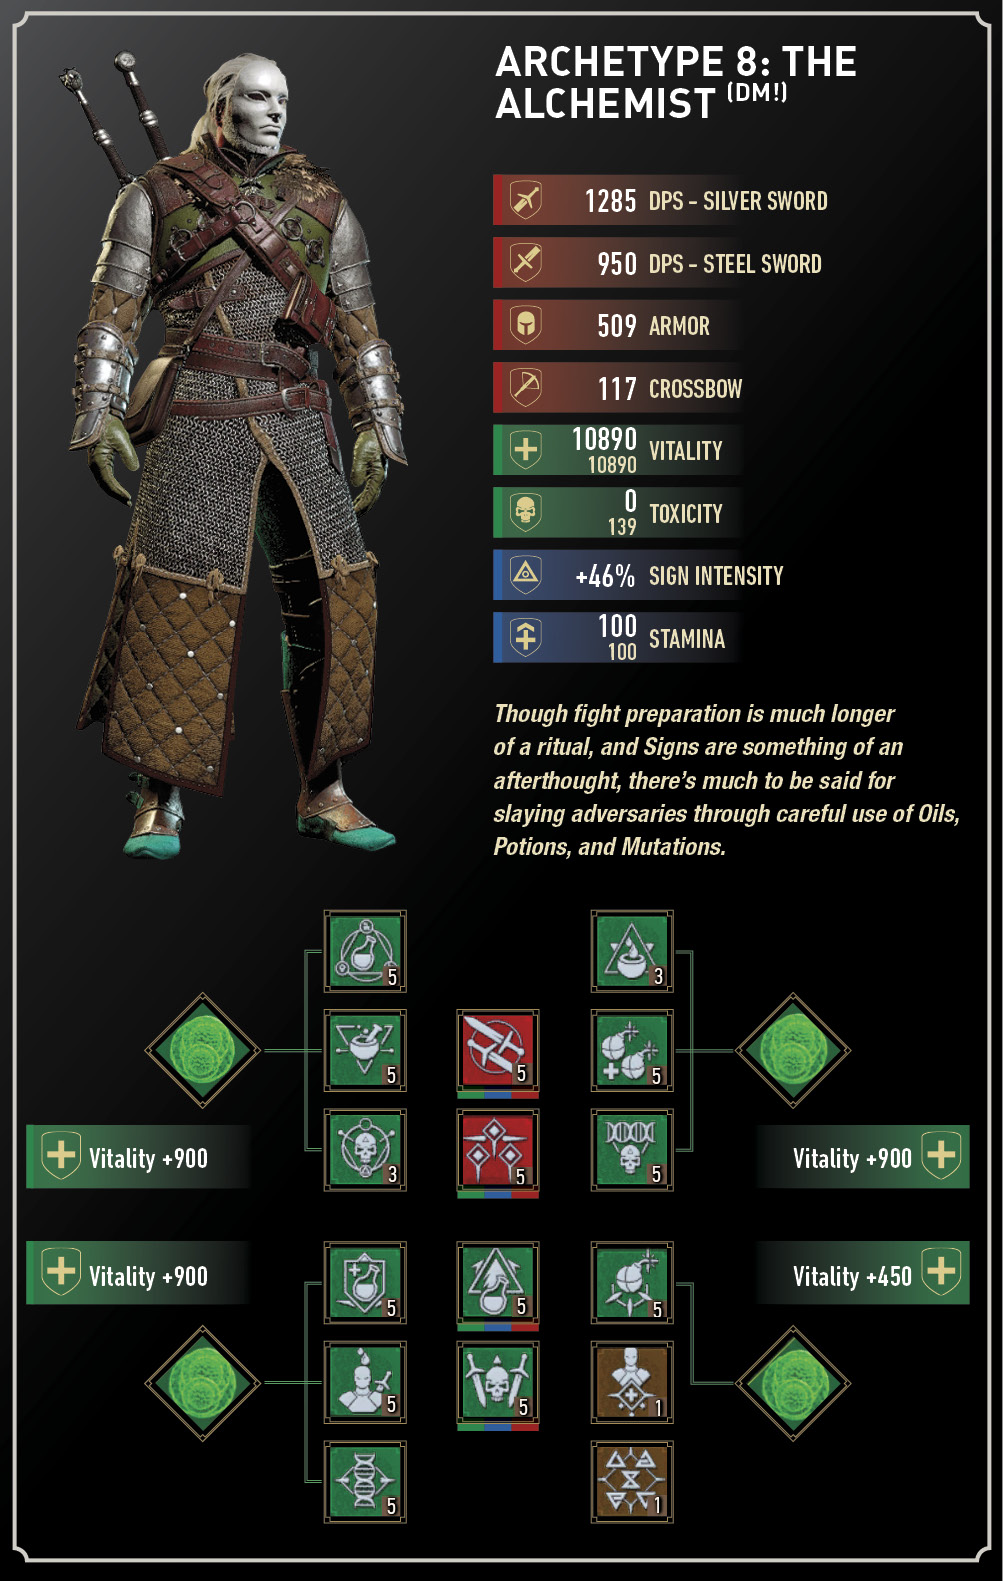
| Points to Unlock | Levels | Branch and Ability Name |
|---|---|---|
|
0 |
5 |
Fast Attack: Muscle Memory* |
|
0 |
5 |
Strong Attack: Strength Training** |
|
0 |
5 |
Battle Trance: Resolve* |
|
8 |
5 |
Fast Attack: Precise Blows** |
|
0 |
5 |
Brewing: Heightened Tolerance |
|
0 |
5 |
Oil Preparation: Poisoned Blades |
|
0 |
3 |
Mutation: Acquired Tolerance |
|
8 |
5 |
Brewing: Refreshment |
|
8 |
5 |
Oil Preparation: Protective Coating |
|
8 |
5 |
Mutation: Tissue Transmutation |
|
20 |
3 |
Oil Preparation: Fixative |
|
20 |
5 |
Bomb Creation: Efficiency |
|
20 |
5 |
Mutation: Synergy |
|
28 |
5 |
Bomb Creation: Cluster Bombs |
|
28 |
5 |
Mutation: Adaptation |
|
28 |
5 |
Trial of the Grasses: Killing Spree* |
|
0 |
1 |
Bear School Techniques |
|
0 |
1 |
Rage Management* |
| Total Ability Points Needed | ||
| 12/16*/18** Abilities | 52/68*/78** Points | |
(* Additional Abilities as 16 Slots are unlocked through Mutations)
(** These Abilities are optional, and are alternative Combat abilities)
Swords: Ursine Steel Sword, Ursine Silver Sword
Crossbow: Any
Bombs: Samum, Northern Wind
Potions: Blizzard, Maribor Forest, Tawny Owl, Thunderbolt
Decoctions: Cockatrice, Katakan, Ekimmara, Succubus
Glyphs: Quen
Runestones: Dazhbog, Morana, Stribog
Glyphwords: Protection
Runewords: Elation, Prolongation, Rejuvenation
Mutations: Toxic Blood (2 Research Points), Metamorphosis (25 Research Points)
This Archetype chooses the very best parts of the Alchemy Branches and uses it to incredible effect, though the first Ability to pick is Bear School Techniques (General Branch); as this increases your Vitality and Strong Attacks for each piece of Heavy armor you wear. As your Vitality increases are going to be astronomical in this build, this is well worth taking. A mixture of impressive resistances and Adrenaline increases using the Ursine Armor and bladed weaponry, this is useful for helping your bladed attacks, which don’t utilize Combat abilities, but rather the deadly oils you’ve coated your blade with. Another option is to don the Undvik armor (as shown), as this has incredible protection against all manner of attacks.
Begin with Brewing; Heightened Tolerance allows many more potions to be taken. Refreshment is also a very important choice, as it heals your Vitality each time you take a potion. Poisoned Blades enhances your blades, and although you don’t have the Combat Abilities to muster, continuously damaging the enemy with poison, even after your attack has finished, more than makes up for this deficit. Protective Coating adds further protection to enemies you’re facing provided you’ve coated your blade in the oil they are vulnerable to; don’t forget this important point! This allows you to wade into combat with fewer worries about being savaged. Complete the devastation by adding Fixative; at Level 3 this keeps oil on your blade for the entire fight, which is a sensational buff, and allows you to take fewer risks (as you have more time to kill; literally!).
Ignoring the first two Bomb Creation abilities (which aren’t imperative to purchase), pick Efficiency (which increases the bombs in each slot) and Cluster Bombs (which separates bombs into explosive fragments). If you’ve higher quality bombs (especially Grapeshot, which itself separates into fragments), you have the best parts of the Bombadier of Blaviken archetype, but with additional combat flexibility!
In the Mutations branch, Acquired Tolerance is the foundation of this archetype, as it allows a much greater number of potions and decoctions to be consumed; almost always at once! You aren’t using this Archetype properly if you don’t have three or four potion or decoction effects occurring (at higher levels)! Add more free Vitality by purchasing Tissue Transmutation. As you’re using large amounts of Decoctions throughout a fight, keeping Vitality up without thinking about it is always helpful. Synergy increases the bonus for mutagens placed in the slots linking your chosen abilities, essentially giving you even more Vitality (with green mutagens). Lastly, Adaptation grants you additional Decoction duration, all helping your decoction buffs last almost as long as your oil!
Also, as each Alchemy ability increases your potion duration time, slotting in as many as possible (11 of the 12, with the last being Bear School Techniques, before the Blood and Wine Mutations bolster this to 16) is a possibility. Otherwise, make three of your slots Combat-based.
While a good crossbow is of secondary importance, find the best one you can. Concentrate on learning and mixing Oils before fights, and consuming multiple potions and decoctions as your Toxicity toughness is so high. All the listed potions and decoctions are there to aid in almost every fight, but choose others too for specific uses. Remember Cockatrice decoctions (allowing you to use all your alchemic creations one additional time) grant you a host of additional bonuses, essentially for free!
As you’re hardly the most proficient swordsman in the land, focus your Glyph imbuing on Quen. For Runestones, pick those that can cause foes to falter (such as Stribog) or better yet, receive a possible poisoning (Morana). With Glyphwords, Protection helps your meager Sign defenses. For Runewords, Prolongation (increasing your potion duration time for each unblocked blow you strike) seems exceptional, unless your potions are already lasting throughout most fights. In that case, think about Elation or Rejuvenation (fatal blows with your sword give you Adrenaline Points or Stamina respectively).
When the time comes to choose Mutations, Toxic Blood is one option that turns a foe’s successful strikes on you into death for them (especially as your Toxicity is likely to be high, killing them quickly). However, you may find it difficult to slot in your combat abilities as this is a pure Alchemy Mutation. But arguably the best Mutation is Metamorphosis; allowing you to swig down a decoction for free, along with increased sword Attack Power, Sign Intensity, and Vitality!