
The Witcher 3: Wild Hunt The Complete Edition Guide Appendices and Compendiums Bestiary
Relicts
These are beasts that are truly unlike any other found on the Continent. From the brutish Fiends and Chorts to the tree-like Leshens, and the deceptive Sylvans to the stone-skinned Shaelmaars of Toussaint, all Relicts could be given another name: Demon. Relicts are among the rarest monsters a Witcher can face, and are arguably the most dangerous. If the Path leads to a Contract on one of these foes, prepare as thoroughly as possible.
Chorts
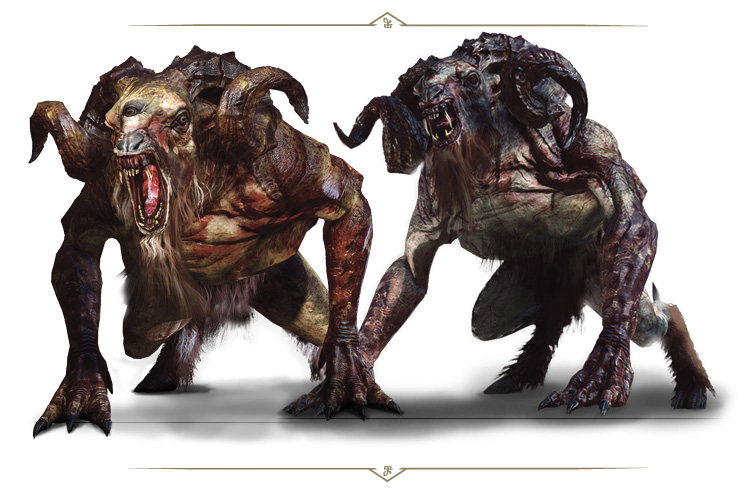
Chorts Danger Alert

Frequency

Howler Danger Alert

Frequency

Chorts are the somewhat smaller kin of Fiends and Bumbakvetches. Yet any Witcher who thinks their diminutive stature means they present no danger commits a grave error.
|
Loot: Chort hide, Raw meat, Chort mutagen |
|
Sub-Species or Named Variants: Bovine Defense, Force, Chort, Howler |
|
Environments: Usually in the wilds away from villages in dense woodland, with periodic rampages, especially if local cattle are threatened by predators. |
|
Specific Encounter:The cave due east of Kaer Morhen (during Secondary Quest: Berengar’s Blade, see page 434). |
|
Specific Encounter (Howler): Contract: Mysterious Tracks (see page 510). |
Vulnerable Against

Enemy Attacks
Legends often mistake Chorts for other rabid Relicts, ascribing to them the ability to speak, stand on two legs, gobble up cabbage, play pranks and work mischief around the household.
Charging Headbutt (ranged): Chorts fight with little finesse, running straight toward their opponent and trying to knock them to the ground with the force of their charge. A rapid sidestep or roll prevents you becoming stunned and heavily damaged.
Clawing Swipes and Butting (melee): After charging and downing their foe, they butt with their great horns, very occasionally kick, and usually strike with their claw-tipped paws. These can be blocked but not countered, or avoided by dodging or rolling.
Resistances: Due to their bulk and four-legged posture, they are mostly unperturbed by the force of the Aard Sign, and the regenerative powers of their body allow any wounds they receive to heal at a rapid pace.
The Best Battle Tactics
Chorts are speed and brute strength personified, rivaled only by Fiends among Relicts. They use their arms to pummel, claw, and smash their prey. They also charge with such speed they can barely control themselves as they smash headfirst into their unfortunate victims.
A stand-up fight against a Chort is not an option, even for a Witcher. Use their size and speed against them: bait them to charge, roll aside, and hope they run headlong into something they can’t just charge through. While they recover from this mishap, you can freely cut into their flanks. Slow down a Chort with Yrden, then maneuver around to its flank and try roasting it with Igni. It helps to think of this as a bear-like foe you can move to the side of, dart in with sword strikes, and retreat; usually beginning these bladed attacks just after the Chort makes a melee attack. Bolster yourself with Quen so any mistimed melee strikes don’t leave you vulnerable.
A less direct tactic involves using Devil’s Puffball bombs to poison the Chort. If you can drag it through the toxic fumes, it will breath in the poison, and ideally help resolve the fight sooner.
(*: Only one Chort is found during your adventure, unless you begin to murder cows in a location; after slaying three or four, a Bovine Defense Force – a Chort – appears to defend these cows)
DOPPLERS
Danger Alert

Frequency

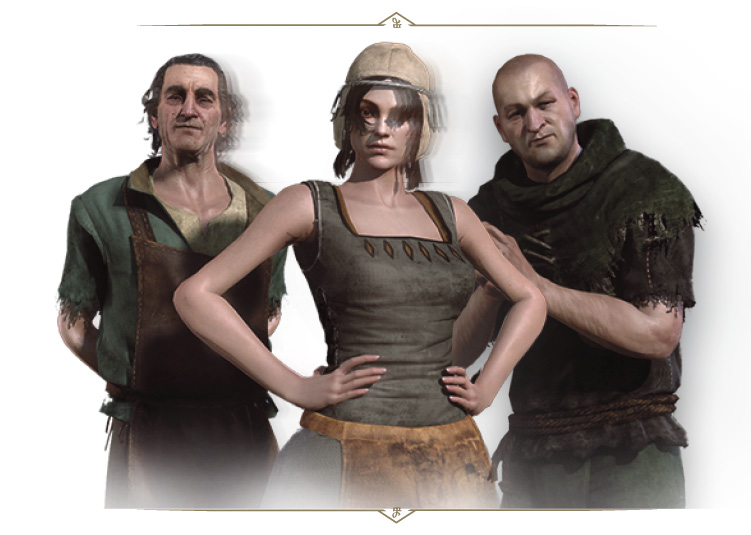
Also known as vexlings or changelings, these are beings able to take on the form of any humanoid or animal they please. This transformation is no mere illusion, but an authentic and complete metamorphosis.
|
Loot: Doppler mutagen, Assorted items and equipment |
|
Sub-Species or Named Variants: Doppler, Janne |
|
Environments: One may never rightly know where a Doppler is, due to their ability to wander disguised in any environment with inhabitants they can mimic. But Novigrad is the best starting point. The only Doppler (that you know of) you’ll ever face in combat is Janne. |
|
Specific Encounter (Janne): Contract: An Elusive Thief (see page 523). |
Vulnerable Against

Enemy Attacks
When backed into a corner, Dopplers can present a grave danger by taking on the form of their assailant (and along with it his strengths and abilities). The sum result is to force the assailant to battle against himself—a battle few can win. It doesn’t have any of its own attacks, but instead relies on the aggressive tactics of the human or creature it is mimicking.
Relict Oil, not Hanged Man’s Venom: Remember that coating your sword in Hanged Man’s Venom, when fighting a human-form of a Doppler, is useless: Your blades must be painted in Relict oil!
The Best Battle Tactics
Like other Relicts, Dopplers are extremely vulnerable to silver, and so a silver sword should be used when fighting them. Silver has the additional useful property of forcing a Doppler to change form on contact. When a Doppler assumes the form of its attacker, it gains some of its skills. In the case of the Doppler hunted by Geralt, he gains the ability to use the Active Shield mode for Quen, and can even use blasts of Igni. Additionally, the Doppler’s swordplay is nearly on par with yours; he can parry and strike just as swiftly.
Be patient when fighting the Doppler. Do not attack when his Active Shield is clearly visible, as the resulting detonation can knock you to the ground. Focus on counter-attacks and parrying. A proper counter creates the best opportunity to land an attack or two of your own. Yrden and Axii both provide openings to exploit against the Doppler. Axii is slightly less useful in that a single strike breaks the effect on the Doppler, while Yrden can be used to effectively corral the monster and allow for multiple strikes to land.
After defeating the Doppler in Geralt’s form, you are given a choice to spare it or finish the fight. If you choose the latter, the Doppler drops the Geralt disguise and assumes the previous form it tried to fool you with when it was fleeing from you. The subsequent fight actually becomes simpler, as the Doppler loses the ability to use magic Signs, and its swordplay is significantly less aggressive. Stay patient and remember your defense, exploit openings to the fullest, and you can win.
FIENDS
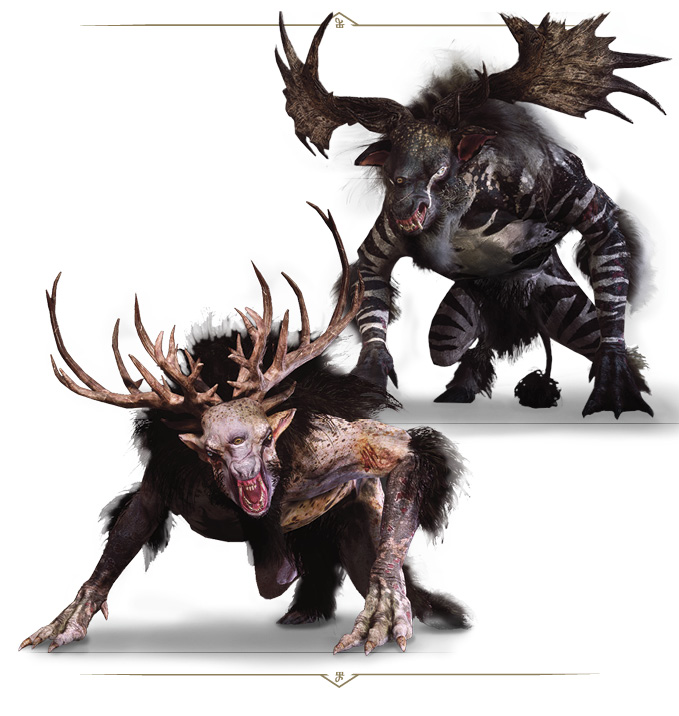
Fiends Danger Alert

Frequency

Morvudd Danger Alert

Frequency

Walking mountains of muscle capped with horned, tooth-filled heads. Like their rarer cousins, Bumbakvetches, they live in thick forests, swamps and bogs.
|
Loot: Fiend eye, Fiend mutagen, Fifth essence, Fiend dung |
|
Sub-Species or Named Variants: Fiend, Morvudd |
|
Environments: Fiends roam where they want, but are extremely rare to ever encounter. Caves and forests are their preferred hunting grounds, as well as the wilderness around Bald Mountain (in south Velen). |
|
Specific Encounter:The hidden treasure area just southwest of Kimbolt Way in south Velen (Crookback Bog). |
|
Specific Encounter (Morvudd): Contract: Missing Son (see page 530). |
Vulnerable Against

Enemy Attacks
Their size alone makes Fiends extremely dangerous; one blow from their powerful paws can kill a horse along with its fully-armored mount. Their enormous heft also makes them invulnerable to Aard; even Witchers specializing in the power of Signs could not move one even an inch. Furthermore, any wounds they receive heal at lightning speed.
Charging Antlers (ranged): Fiends favor brutal, head-long charges into their opponents, attempting to knock them to the ground with the force of their charge. A rapid sidestep or roll prevents you becoming stunned and heavily damaged.
Clawing Swipes and Butting (melee): After charging and downing their foe, they butt with their great antlers, very occasionally kick, and usually strike with their claw-tipped paws. These can be blocked but not countered, or avoided by dodging or rolling.
Burning Third Eye: They can also call on a more refined weapon: the third eye located in the center of their forehead, which they use to draw their prey into a state of hypnosis. During these times their victim does not see anything beyond this single burning eye—the last thing they see before their death. Interrupt this with a Sign attack or bomb before you’re transfixed.
Resistances: Due to their bulk and four-legged posture, they are mostly unperturbed by the force of the Aard Sign, and the regenerative powers of their body allow any wounds they receive to heal at a rapid pace.
The Best Battle Tactics
A Fiend’s only weakness is its fear of loud noises. Bombs such as Samum or Devil’s Puffball are thus quite effective when fighting this monster. Furthermore, a blade covered in Relict oil can increase a Witcher’s chances of victory, or at least of walking away from the fight. Consider Fiends as one would a Chort: incredible speed, strength, and a single-minded desire to kill—only more ferocious, larger, and angrier. They fight very much the same, and can be taken advantage of in similar ways.
The Fiend’s third eye defines this monster as a force with which to be reckoned. It can lure victims into a state of hypnosis, where all they see is the third eye glowing in the darkness. Inexperienced hunters will die in the seconds that follow. Witchers know to follow that burning eye, and understand to use that to judge precisely when to evade: A Fiend attempting its hypnosis can be interrupted by Signs. A well timed Samum bomb can permanently disable the Fiend’s third eye and prevent any use of hypnosis.
Fiends are not particularly vulnerable to fire, but it can help to use Igni or other fire-setting bombs to maintain the pressure on the monster. Otherwise, a plan of conjuring Quen (so your first enemy attack is automatically guarded), utilizing Yrden if you need to slow the Fiend down, and raking the Fiend’s flanks is the best way to eventually drop this massive foe.
GODLINGS
Danger Alert

Frequency

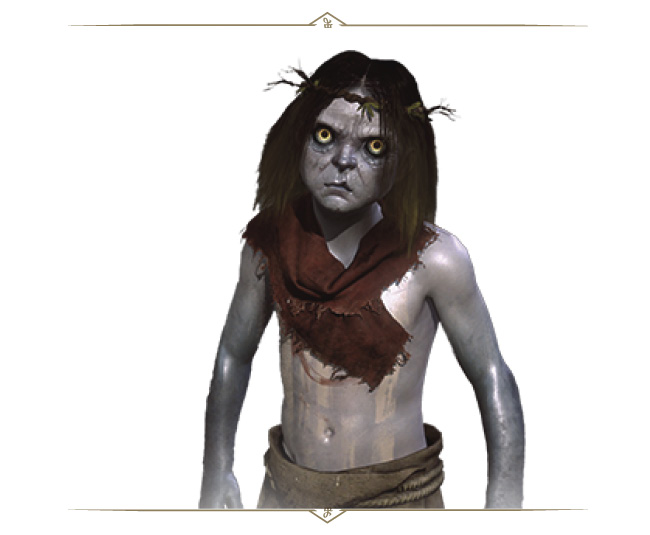
Godlings (sometimes mistaken for Lutin) are similar to children in behavior and appearance and, like children, delight in mischief.
|
Loot: None |
|
Sub-Species or Named Variants: Johnny, Sarah, Godling |
|
Environments: These are woodland creatures dwelling in burrows and moss-covered hollow stumps on the outskirts of human settlements. |
Vulnerable Against

The Best Battle Tactics
Godlings are deeply rooted in their home territory and perform acts of care and guardianship to those dwelling near their burrows. They watch over people as well as animals, but, shy creatures by nature, try to do so while remaining unseen.
These hard-working and clever creatures gladly perform small services for those in their care, asking only for respect and payment in the form of food or cast-off tools in return. They are easily offended by churlish, ungrateful, or simply rude behavior. Godlings also treasure their peace and quiet. When the village a Godling watches over becomes too populated or its inhabitants forget the old ways, it will abandon its burrow for good and wander off to destinations unknown. Godlings do not possess offensive capabilities, and are never challenged in combat.
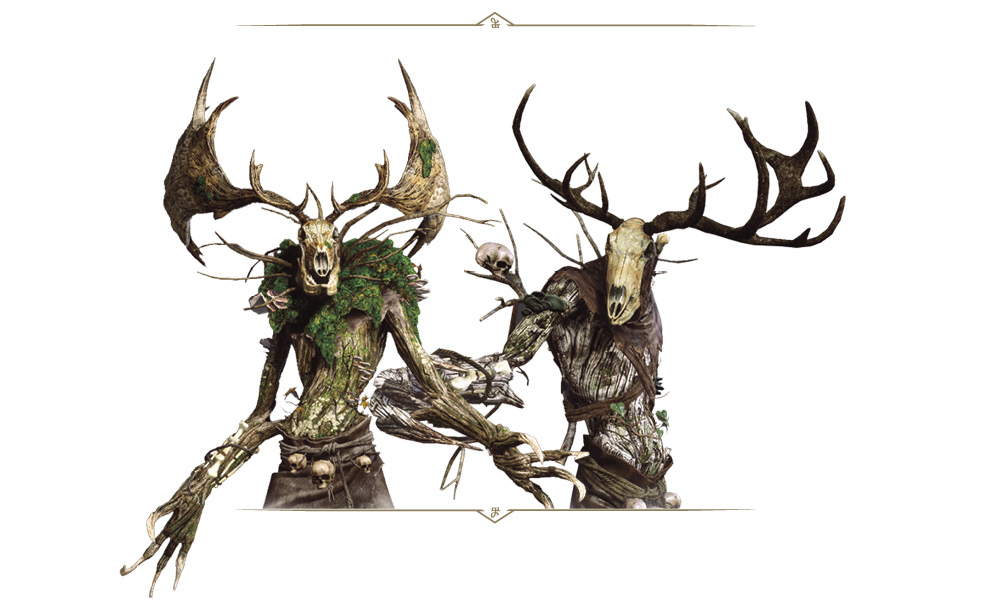
LESHENS
Danger Alert

Frequency

Danger Alert

Frequency

In some areas of the world these creatures form the center of local cults. Peasants living near their woods make offerings to them, usually of hares and birds, though human blood is not unheard of.
|
Loot: Leshen resin, Ancient Leshen mutagen, Fiber, Timber, Leshen mutagen, Infused shard, Hardened timber |
|
Sub-Species or Named Variants: Leshen, Ancient Leshen, Kernun |
|
Environments: Leshens make the forests their home, and rarely stray from their territory. |
|
Specific Encounter:In the dell below Arnskrone Castle Ruins, in Gustfields territory. |
|
Specific Encounter (Kernun): Contract: Lord of the Wood (see page 524). |
Vulnerable Against

Enemy Attacks
Leshens dwell in dense, primeval woods. Fiercely territorial creatures, they hunt with stealth and cunning as their only companions. They use their inborn magic to control the plants and animals within in their territory. When stalking them, half the battle is merely getting near enough to strike. Leshens old enough to earn the appellation “ancient” are particularly toughened from centuries of existence that make them particularly dangerous.
Forest Totems: Some Leshens create magic totems that increase their strength: In such cases these totems should be destroyed before or while fighting them.
Leshen Allies (The Raven): In combat Leshens use not only their long claws but also their many allies, including ravens, which harass and distract the Leshen’s opponent. Roll to avoid being pecked as the swarm of these birds converges on your location, and you’ll likely survive this ranged swarm attack unscathed.
Leshen Allies (The Wolf):Wolves also unfailingly answer the call of a Leshen, and these can number up to six, and be grey or white in nature. You may wish to retreat from the main site of battle and deal with the wolves individually (or as a pack) using the Bestiary tactics on page 720, before returning to slay the Leshen itself. Wolves must be slain whether or not the Leshen is defeated.
Root Tendrils (Ranged): Leshens are also able to bend plant life to their will and make it aid them in battle. Cracking up and snaking through the ground are massive tree roots that can stun and heavily damage you. Watch for a Leshen digging their root like arms into the ground. This is a sign that they are commanding the roots to strike. This attack has surprising range, and can only be rolled away from.
Black Smoke Teleport: After receiving a barrage of strikes from you, back up if you see the Leshen form a thick cloud of smoke around its form; it temporarily blinks out of existence into a flock of ravens, and maneuvers to a close location nearby. Break off the attack, readjust to the new position, and continue the battle.
Claw Slicing (Melee): Leshens are slow, but powerful melee fighters, and can cause serious injury if allowed. Dodge or roll away from the swipes of their claws, which cannot be parried.
Weaknesses:It is a Witcher’s good fortune that Leshens do have one weakness; they are extremely vulnerable to the Igni Sign.
The Best Battle Tactics
Igni, and any bombs that can potentially cause fire damage, such as Dragon’s Dream, are the keys to success when going against Leshens. While a Leshen burns, it will be unable to defend itself. So lob in a dragon’s dream, ideally just in front of a Leshen walking towards you at long or mid-range. Then light up the particles of the bomb with an explosive crossbow bolt, or better yet, Igni. Firestream provides a constant, focused burn so damage is continuous. If your sword is imbued with runestones that inflict fire damage, so much the better.
When close to a Leshen, press home with constant light attacks, chipping away at this Relict and have Quen active to resist the first enemy strike. Leshens have more types of attack (including wolves which can seriously impede your chances at higher difficulties) when at range, so close the distance to avoid having to deal with root tendrils and animal summoning. Instead, constant pressure and hack at the Leshen with sword and Igni attacks, rushing the Leshen as it reforms after the smoke condenses.
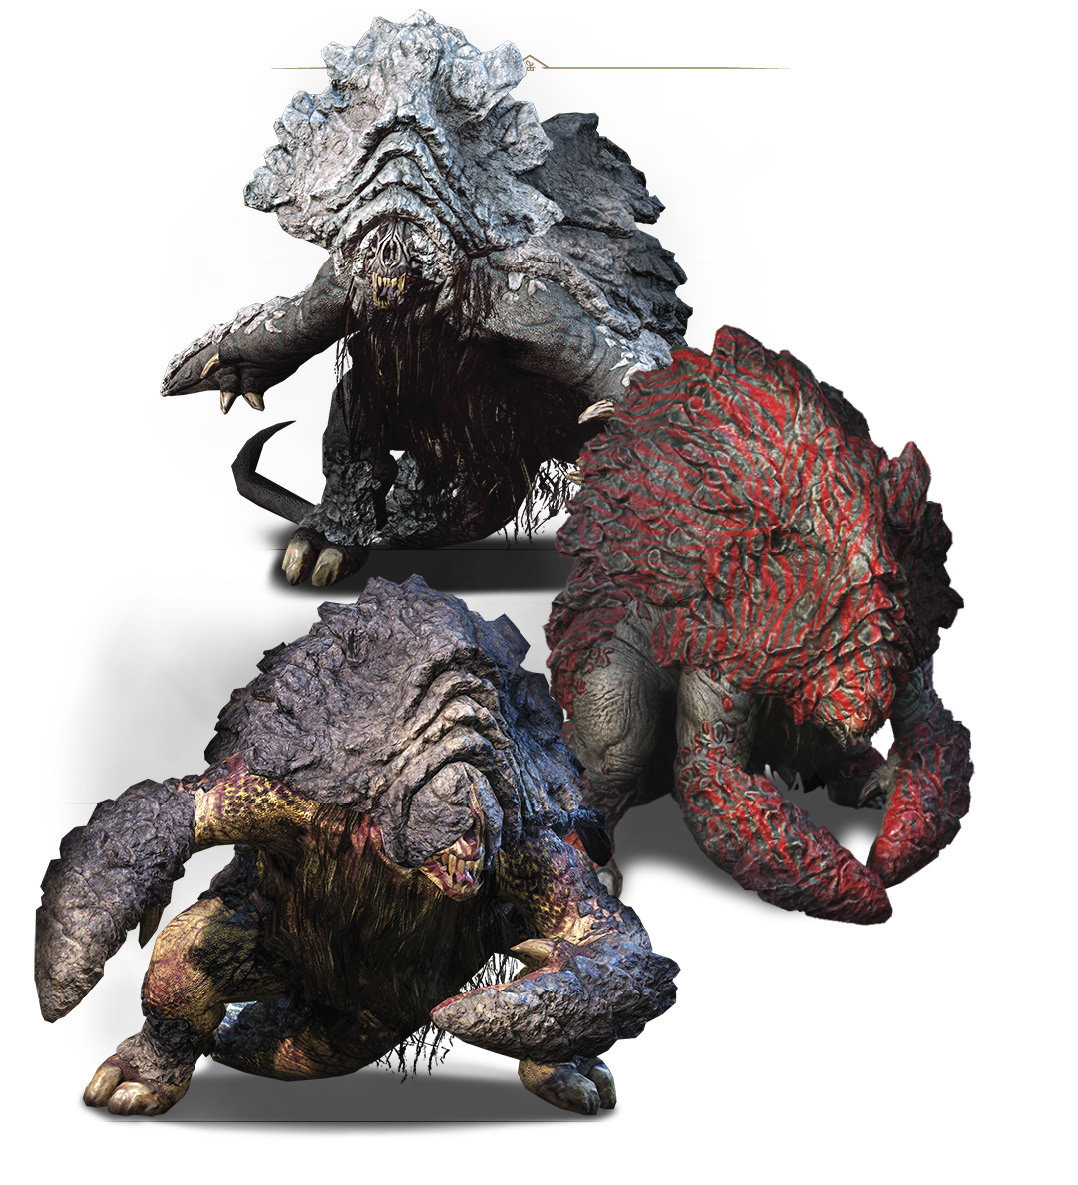
 SHAELMAARS

Shaelmaars Danger Alert

Frequency

Emperor of Nilfgaard’s Shaelmaar Danger Alert

Frequency

Monster of Tufo Danger Alert

Frequency

Shaelmaars spend most of their lives deep underground, having no contact with the world up above. At times, however, a Shaelmaar will dig its way to the surface and devour any men within its reach. Some Shaelmaars also burrow tunnels close to the surface, collapsing buildings and causing tremors in the process.
|
Loot: Powdered monster tissue, Monster hide, Monster carapace, Shaelmaar hair, Shaelmaar dust, Blue mutagen |
|
Sub-Species or Named Variants: Shaelmaar, Emperor of Nilfgaard’s Shaelmaar, Monster of Tufo |
|
Environments: Unless you’re fighting one of these rocky behemoths in an arena, expect to find them deep underground in expansive cave systems. |
|
Specific Encounter:The cave southeast of Rioux-Cannes Outpost (Vintner’s Contract). |
|
Specific Encounter (Emperor of Nilfgaard’s Shaelmaar): Main Quest: The Beast of Touissant (see page 317). |
|
Specific Encounter (Monster of Tufo): Contract: The Tufo Monster (see page 544). |
Vulnerable Against

Enemy Attacks
Since Shaelmaars are blind, they find their way by sensing vibrations and listening for sounds. Thus the best tactic when fighting such a monster is to hurl something heavy or noisy against a nearby boulder or wall. Then pray silently that the beast will roll toward the sound and knock itself out upon striking into the obstacle. Note that when you’re actively searching for a Shaelmaar, you’re likely to hear the ground-tremoring burrowing and moves it makes before you actually see one.
Blind as a Bat:Shaelmaars are blind and rely on sounds to find their prey. This makes combat much easier. Coax the Shaelmaar away from third parties by simply moving, lobbing bombs, or creating noises (with Signs, or your Crossbow, for example).
One-Hit Attacks:The Shaelmaar has three types of attacks that strike once: a left arm swing, a right arm swing, and a vertical swing (“uppercut”). Each deals heavy damage, and should be parried, dodged, or met with Quen to absorb the attack.
Head Smash: With its bulk and heavy armor plating, the beast lurches forward, leading with its head and neck. This can stagger you, and does a great deal of damage. Only by dodging (or otherwise ensuring you are somewhere else when the attack strikes) can you escape unharmed.
Counterattack: If struck too many times, the Shaelmaar tends to roll up into an invulnerable ball. You need to exercise patience and wait for it to unroll itself before attacking. Try to strike the beast while it is rolled up, and it can quickly counterattack with a swift and heavily-damaging swipe.
Charge: When it finds itself at a moderate or long distance from you, or after you have struck it a few times, the beast will curl into a ball and roll forward at great speed, knocking down anything in its path. If it hits you, expect to fall on your back and be stunned for a few seconds (while being vulnerable to additional attacks). The Shaelmaar will stop its roll after it strikes you or runs into an obstacle.You’re best off getting well out of the way of this attack, though you can also roll or dodge to the side, then damage the beast with a well-timed strike to its flank or, after its charge fails, to its exposed underbelly.
Ground Pummel: The Shaelmaar can use its large, shovel-like arms to throw copious amounts of rock and soil in a wave of destruction. It usually does so as an opening attack. Dodge to the side to prevent being damaged by the assorted projectiles.
Tremor: If you’re fighting a Shaelmaar in a cave, it can burrow into the ground, shaking its back plates and creating tremors that cause rocks to fall from the ceiling. It reappears shortly after, so keep your wits about you and watch the mini-map to track the foe.
Echo Location:If you stand still for long enough, the Shaelmaar sends sound waves to locate you, which can cause discomfort to your ears, though it isn’t debilitating.
However, your position is discovered, meaning you need to attack or retreat.
The Best Battle Tactics
The good news is that the Shaelmaar has limited ability to dodge any of your attacks. The bad news is that it turns and defends its vulnerable front by showing its back to you, a back that is heavily armored and difficult to penetrate. This also occurs if you attempt to use Igni. Expect it to violently roll around the arena if you attack it repeatedly and use its meaty paws to swipe if struck from behind.
Aside from well-timed strikes as the Shaelmaar finishes a combat move and deft dodging to avoid the pulverizing nature of its attacks, your best plans are to disorientate it using Aard and follow that up with Samum bombs that generate a large amount of noise and confuse the Shaelmaar (allowing you to strike with swords, crossbow, more bombs, or Signs). The number one best tactic against Shaelmaars is to throw a bomb at a wall, allowing the monster to charge that wall causing it to crash and fall on its back. It is most vulnerable when laying on the ground as it loses its armor buff for the duration of the knockdown.
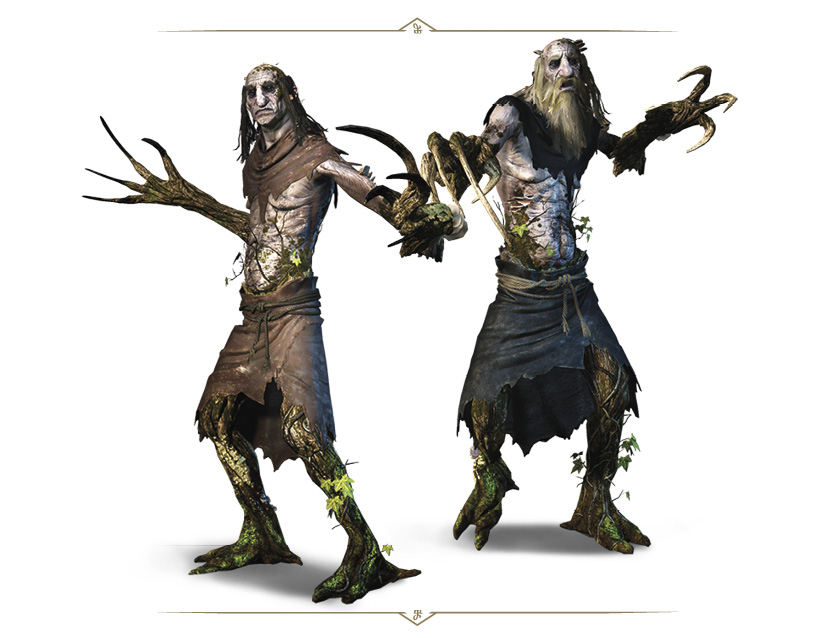
SPRIGGANS
Leshen: Spriggans Danger Alert

Frequency

Grottore Danger Alert

Frequency

Spriggans are a subspecies of the monsters known as Leshens. Their appetite is such that they can devour more flesh than an army at a wedding. Each Spriggan has mastery over plants and is inextricably tied to them. Thus if someone destroys greenery in its domain, it immediately comes to punish the disturber.
|
Loot: Leshen resin, Ancient Leshen mutagen, Fiber, Timber, Leshen mutagen, Infused shard, Hardened timber |
|
Sub-Species or Named Variants: Spriggan, Grottore |
|
Environments: The woodlands and caves of Toussaint. |
|
Specific Encounter:The undergrowth midway between Fox Hollow (to the west) and Plegmund’s Bridge (to the east), close to a Prophet Lebioda’s Footsteps marker. Have Secondary Quest: Big Feet to Fill active (see page 457). |
|
Specific Encounter (Groups): Contract: Feet Cold as Ice (see page 546). |
Vulnerable Against

Enemy Attacks
In combat a Spriggan makes skilled use of its powerful limbs. When riled it attacks swiftly and forcefully, which, given its considerable mass, can prove highly problematic. Its calloused hide can deflect even strong blows from a sword, and there can be no thought of parrying the Spriggan’s attacks. One must keep an eye out for roots, which the Spriggan attempts to use to entangle its foe.
Root Tendril Barrage (Ranged): Spriggans can command the roots of nearby trees: Cracking up and snaking through the ground are a massive tangle of tree roots that can stun and heavily damage you. Watch for a Spriggan digging its root-like arms into the ground. This is a sign that they are commanding the roots to strike. This attack has surprising range, appears in a random spot, and can only be rolled away from.
Root Tendril Lance (Ranged): A tendril is launched from the Spriggan’s arm directly at you, which can damage you as well as stun you. You’re wise to watch the Spriggan point its arm outward in preparation for this attack, so you can dodge it.
Root Teleport (Defensive and Offensive): A Spriggan can also teleport. This is usually employed when you’ve stood up to the Spriggan and sliced at it repeatedly with your swords; it counters by temporarily blinking out of existence after being swallowed by columns of roots, and maneuvering to a close location nearby (defensive) or directly in front of you to attack (offensive). Break off the attack, readjust to the new position, and continue the battle.
Claw Slicing (Melee): Spriggans aren’t quick by any means, but are powerful melee fighters and can cause serious injury if allowed. Dodge or roll away from the swipes of their claws, which cannot be parried.
Weaknesses:Like their Northern cousins, Spriggans do have one weakness: they are extremely vulnerable to the Igni Sign.
Resistances:The Aard Sign does not work against it, for no force on earth can knock it over.
The Best Battle Tactics
The tactics you perfected when battling Leshens across the Northern Realms are ideally suited to cutting down the Leshen’s forest brethren in Toussaint. Coat your blade in Relict oil, and when a Spriggan first appears, attempt to lob Dimeritium bombs at it to prevent its more potent root attacks. Launch a variety of Igni attacks and fire-based projectiles (dancing star, explosive bolts, and ability-based Igni attacks) before rushing the Spriggan with bladed slicing (if your swords inflict fire damage, so much the better).
Don’t dilly-dally! Close the gap by donning a protective coat of Quen and start hammering away at close range, remaining at less than a sword’s length until the Spriggan tries to teleport. Quickly roll or dodge the Spriggan as it tries to teleport in front of you, before continuing the barrage of swords strikes until one of you yields. Make constant use of Igni and Quen, and it is highly likely it will be the Spriggan who falls first..
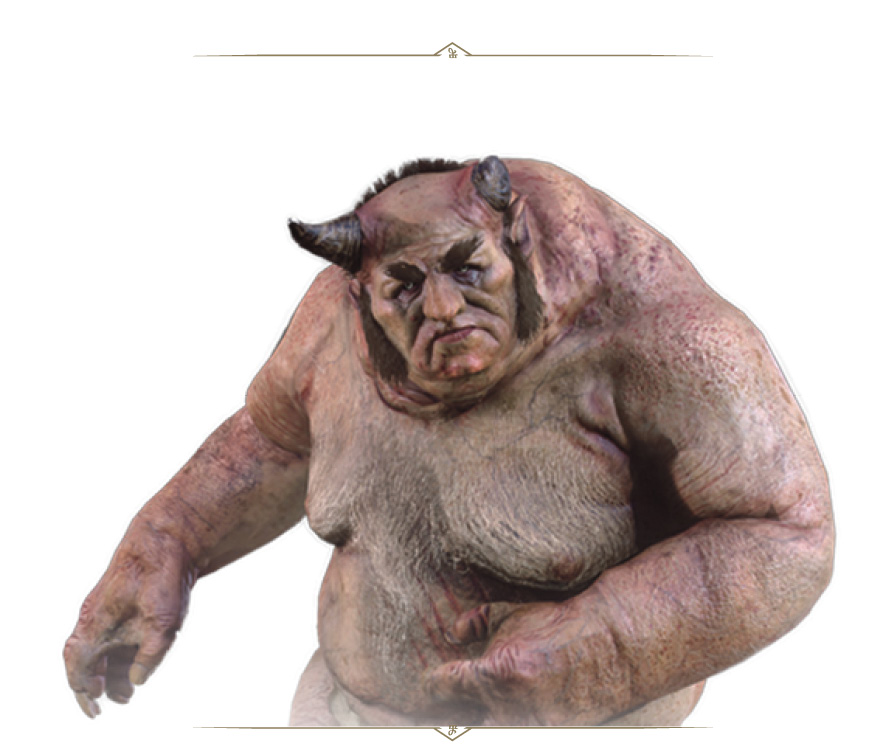
SYLVANS
Danger Alert

Frequency

Sylvans are extremely rare woodland creatures whose appearance combines traits of goats and rotund men. Lazy by nature, they would gladly spend every day in idleness, puffing on pipes, gorging on rich foods and downing strong drinks.
|
Loot: Leather, Orens |
|
Sub-Species or Named Variants: Sylvan, Allgod, Fugas |
|
Environments: Closer to farms and larders where they can feed. A Sylvan known as Fugas has been seen at Bald Mountain. |
|
Specific Encounter:The brick ruins south of Wastrel Manor in Velen (Secondary Quest: A Greedy God, see page 383). |
Vulnerable Against

Enemy Attacks
Sylvans, despite their corpulent frames, are astonishingly strong and agile. They also emit a powerful and extremely unpleasant scent which can cause even a Witcher, whose line of work accustoms him to foul stenches, to gag and feel faint.
Roaring Flatulence (Ranged): Stretching out both arms and producing a cloud of extremely unpleasant vapors, the Sylvan pollutes the combat area with a foul stench that increases your toxicity. Keep an eye on how much poisoning you can take, and react as you would when toxicity levels are approaching dangerous levels.
Fireball (Ranged): A quick conjure and fling of fire in your general direction is surprisingly quick and the attack the Sylvan uses most when at range. Dodge or roll to avoid it, watching for the Sylvan to place its hand behind its back before lobbing the fire so you know when to avoid it.
Fire Breath: A gout of fire is belched from a Sylvan’s mouth, causing fire damage that continues as it coats your armor. Roll around quickly to avoid it, or use Quen to absorb it.
Ground Stomp: When the Sylvan raises its foot up, step away from the area of effect when the stomp connects, lest you be staggered by the immense force of this attack. Blocking eases the staggering, as does backing out of the radius, which is usually easy (especially if you roll).
Swiping Claws (Melee): Up to three lumbering (but heavy) swiping attacks are possible in quick succession, with the Sylvan pushing forward as each strike connects. These can be blocked but not countered. A step to the side and retaliation is always acceptable in these circumstances.
The Best Battle Tactics
Sylvans (such as Fugas, the guardian of the Bald Mountain caves) are deceptive in appearance. That they are fat, and look clumsy, hides almost absurd amounts of physical strength. Melee combat against a Sylvan is difficult, even for a Witcher. Evade the physical strikes from a Sylvan, do not attempt to parry or counterattack. Yrden can allow you time to bring a silver sword into play, but a Sylvan can counter this by breathing intense flames that melt through the best armor.
Sylvans are slow, which is something you can use to your advantage, providing you’ve spent attribute points. Yrden’s magic trap is excellent at both slowing the Sylvan down and zapping it continuously (follow up with sword strikes). Devil’s Puffball and Igni, or just fire-based attacks on their own (Firestream in particular), can cause consistent damage, which is helpful as sword strikes can’t be maintained as this foe likes to swat at you with toughened, piglety hands.
If close-quarters combat is not going well, you should be prepared to make use of long-ranged options. A powerful crossbow loaded with good bolts can keep you relatively safe, while still effective at slaying this beast.