
The Witcher 3: Wild Hunt The Complete Edition Guide Appendices and Compendiums Bestiary
Elementa
Elementa can be described as representatives of the raw, mystical power of the elements, given purpose or sentience. Some of these beings may be better described as the mistakes of prideful men, with more power and knowledge than sense. Elementa are some of the rarest monsters a Witcher can be expected to face, and among the most deadly.
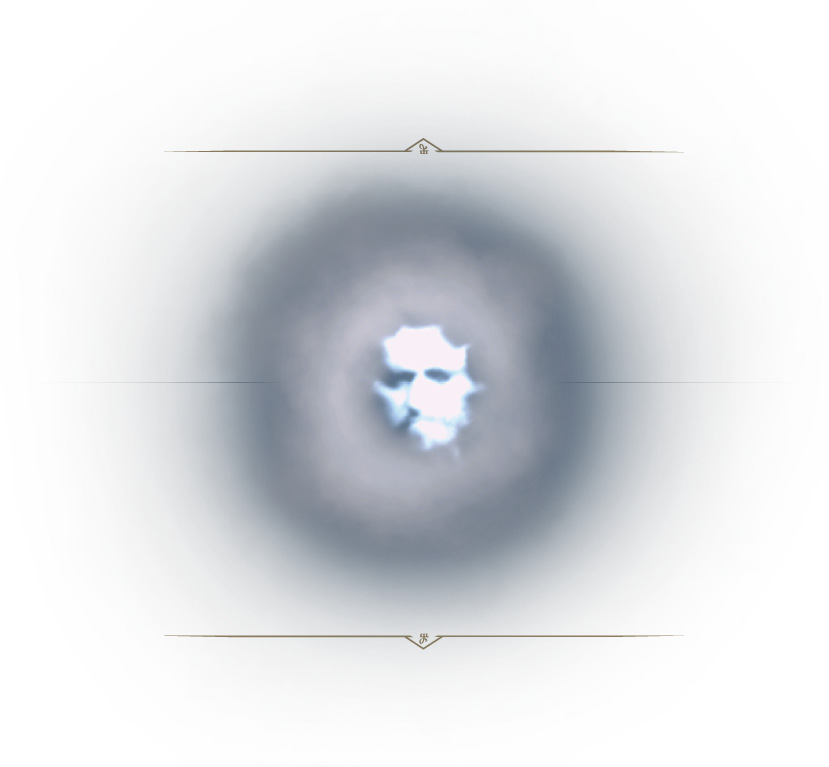
DJINNS
Danger Alert

Frequency

A fearsome spirit of the air, and one that grants wishes with a perverse nature about fulfilling these requests.
Loot: None
Sub-Species or Named Variants: Djinn
Environments: On the icy vessel of Amos var Ypsis, during the quest.
Specific Encounter: Secondary Quest: The Last Wish (see page 225).
Vulnerable Against

Enemy Attacks
The Djinn is a powerful air spirit; a condensation of the power of that element endowed with consciousness and character; the latter usually nasty. Only one Djinn has been ever spotted in the Northern Realms.
Teleport: If you attempt to maneuver towards it, the Djinn enjoys teleporting around the ship’s deck so you’re further damaged as you try to reach it. Keep to the middle of the deck so the Djinn’s teleport doesn’t move as far, and use Active Quen (or calm the Djinn with Aard or Igni) as you approach.
Electrical Pulse: A swift burst of white energy, sometimes with a crackle of electrical discharge, sends you staggering backward. Push on regardless, or step behind the mast so you aren’t struck by this.
Ice Shards: Sharp icy projectiles are conjured and thrown in your general direction. Dodge them or use active Quen to absorb them.
Lightning Bolts: A nasty blast of lightning crackles in one strong arc, or in multiple directions around the Djinn’s orb. Use Quen to absorb the damage and quickly move in to strike, as the Djinn is temporarily prone after this attack.
The Best Battle Tactics
Fighting a Djinn is about working quickly, and not something you should attempt without good cause, or good pay. If you must face a Djinn, Dimeritium Bombs are too useful to go without, giving you the chance to close the distance without being frozen, burned, or electrocuted before you can get close.
Djinn can teleport short distances to escape harm, even after being affected by Dimeritium Bombs. You must be able to quickly react to this and continue to pressure the Djinn, using additional Dimeritium Bombs as necessary to continue suppressing spells.
The closer a Djinn is to death or capture, the more dangerous it becomes. The massive area of effect spells it can cast come faster, and it may teleport more often the more desperate it becomes. Aard and Igni signs empower a Djinn and greatly calm it down and make it easier to combat. Another excellent
plan is to withstand the attacks it conjures using Quen’s active shield, before rolling in, usually behind the floating face of the Djinn, striking it three times, and retreating again. Attacking just after the electrical storm starts to dissipate is a good plan. Also use the ship’s mast for cover, moving so the mast is between you and the Djinn so the ship absorbs some of the attacks.
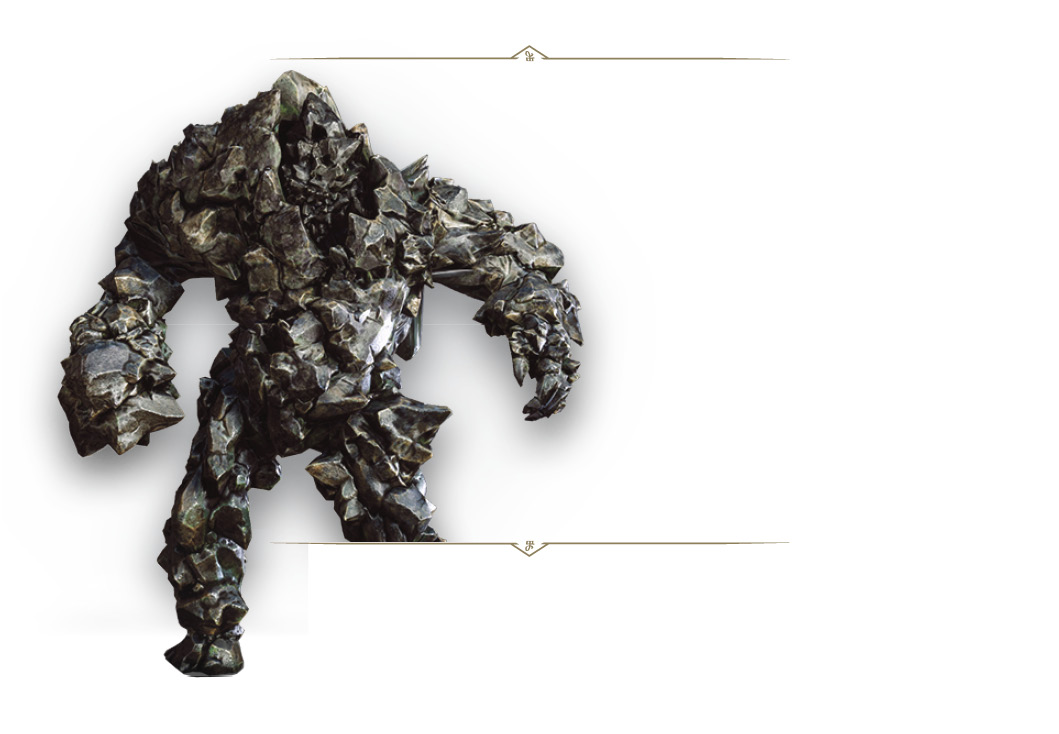
ELEMENTALS, EARTH
Earth Elementals Danger Alert

Frequency

Therazane Danger Alert

Frequency

Though plodding and slow, the sheer immensity of an Earth Elemental, and the damage it causes with its fists of granite, make this monster a frightening prospect to face.
Loot: Mutagens, Elementa Essence, Glyphs, Infused Shard, Fifth Essence
Sub-Species or Named Variants: Earth Elemental, Therazane
Environments: Usually in magical traps; places such as long abandoned ruins, or former research laboratories once home to powerful sorcerers.
Specific Encounter: Ruined Tower (Signpost) in Crookback Marsh.
Specific Encounter (Therazane): Secondary Quest: Doors Slamming Shut (see page 521).
Vulnerable Against

Enemy Attacks
The named Earth Elemental (known as Therazane), is a toughened variant of the usual Earth Elemental you encounter.
Earth Elementals are constructed from mud, clay, sand and rock fused together with magic. While seemingly slow and ponderous, these creatures are exceptionally dangerous, and can withstand tremendous punishment. Therazane is a toughened variant of the usual Earth Elemental you encounter, but is otherwise identical in terms of its attacks.
Bellow: If an Earth Elemental sees you, or you’ve done something particularly unpleasant to it, the behemoth bellows its lack of pleasure at your antics. This has no effect on combat, unless you’re mentally unprepared for such a sound.
Ground Pound (Single or Double Fist): If an Earth Elemental jumps off the ground, move away as quickly as possible. The resulting shockwave knocks down any nearby victims in a large circle around the behemoth. Retreat!
Ground Stomp (Shockwave): You should be alert for Elementals to raise a foot high off the ground. What follows is a powerful ground stomp that sends a wave of rock piercing through the earth in a line before the Elemental. Dodge or roll to avoid being caught in this shockwave.
Rock Fist Swipes (Left and Right): Sometimes accompanied with a glowing yellow around each fist, the Earth Elemental loves to swing using either arm, hoping to connect. Dodging around or backing up avoids such a strike, which is seriously damaging if it connects.
Resistances: The Earth Elemental is resistant to poison and bleeding.
The Best Battle Tactics
Earth Elementals are a test of strength and endurance. Even with a silver sword coated in elementa oil, Earth Elementals can resist impressive amounts of punishment before crumbling, while being able to dish out frighteningly powerful blows with their fists. Dimeritium Bombs make these Elementals more susceptible to harm. They do not make them less dangerous. Strike once, twice if you judge it safe, then roll out of the way of an inevitable counterattack. Use heavy attacks for better damage output.
Though it is relatively easy to whittle down an Earth Elemental’s vitality from a distance, increase your chances of success by employing Yrden. The hammer blows delivered by an Earth Elemental’s fist can be avoided more easily using this Sign, and the Magic Trap ability allows you to damage this slow-moving foe as it is caught in your circular trap, and zapped by your ongoing magic. It is also possible to actually stagger an Earth Elemental with Aard, after which a dash in and strike before retreating is called for.
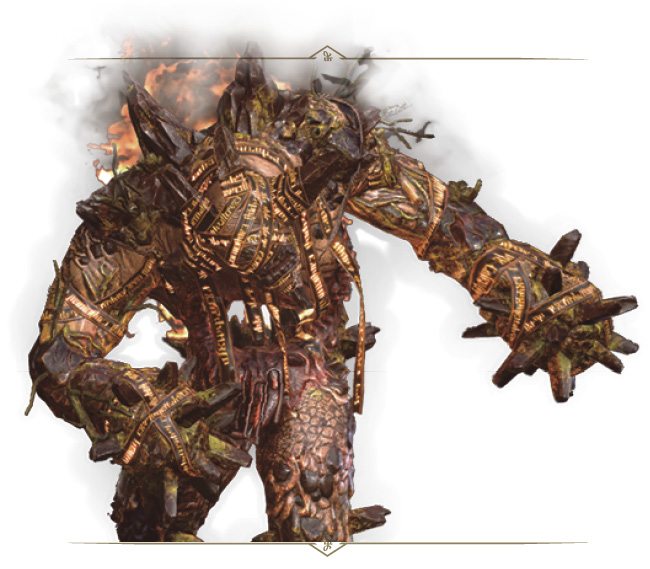
ELEMENTALS, FIRE
Danger Alert

Frequency

A form of fire and fury that reduces anything in its path to ashes in the blink of an eye. Poison does not touch it, and it does not bleed.
|
Loot: Golem heart, Elementa essence, Runestones, Infused shard |
|
Sub-Species or Named Variants: Fire Elemental |
|
Environments: Found in magical ruins. Mages have tried to create and control Fire Elementals, and often failed. |
|
Specific Encounter: Within the ruins of Est Tayiar (Signpost) in Gustfields. |
Vulnerable Against

Enemy Attacks
Fire is the most destructive of the elements, thus the aggressive lethality of the creature that embodies its essence should come as no surprise. Fire Elementals are forged in complicated magic rituals for one purpose—destruction. And they pursue this with murderous determination.
Ground Pound (Single or Double): If a Fire Elemental jumps off the ground, move away as quickly as possible. The resulting circle of fire knocks down any nearby victims in a large wave around the behemoth. Retreat!
Fire Ball: During a particularly potent strike, a Fire Elemental sometimes lets loose a large ball of fire in your direction, which should be dodged or rolled away from.
Ground Stomp (Fire Wall): You should be alert for Elementals to raise a foot high off the ground. What follows is a powerful ground stomp that sends a wave of fire racing along the ground in a line before the Elemental. Dodge or roll to avoid being caught in this wall of fire.
Flame Fist Swipes (Left and Right): With a blaze of fire accompanying each swing, the Fire Elemental loves to swipe using either arm, hoping to connect. Dodging around or backing up avoids such a strike, which is seriously damaging (and inflicts additional ongoing fire damage) if it connects.
Resistances: The Fire Elemental is resistant to poison and bleeding, and in particular Igni and any fire attacks (from weapons, bombs or bolts); these should not be employed under any circumstances.
The Best Battle Tactics
Fire Elementals employ similar abilities to an Earth Elemental, with the key difference that fire enhances and empowers them. Being harmed by a Fire Elemental has effects beyond the immediate harm sustained, since they can light clothes and armor on fire.
Simply drawing close to a Fire Elemental is dangerous, due to the intense heat they constantly generate. The flames can be temporarily extinguished by Aard. Avoid Igni at all costs, this only empowers a Fire Elemental and re-ignites its flames.
Northern Wind bombs are highly effective, freezing the Elemental in place. Dimeritium Bombs are also excellent to employ as they can prevent it from using certain attacks. Otherwise, use heavy attacks to quicken the ultimate destruction of the Elemental.
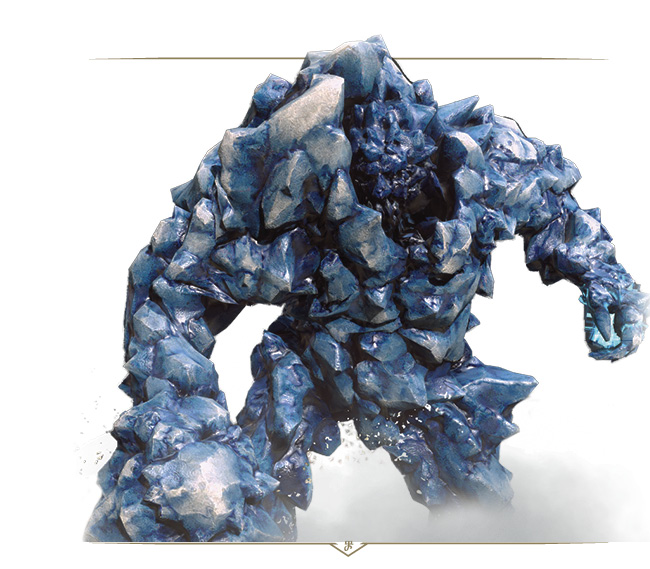
ELEMENTALS, ICE
Danger Alert

Frequency

Hard as permafrost, deprived of sensitive organs, and gifted with incredible strength, these are mindless, bone-crushing automatons and cold as ice.
|
Loot: None |
|
Sub-Species or Named Variants: Ice Elemental |
|
Environments: Summoned by powerful sorcerers in combat, though some have been sighted in Skellige. |
|
Specific Encounter:The watchtower northeast of Rogne (with Gargoyles), on Ard Skellig. |
Vulnerable Against

Enemy Attacks
A mass of frozen water animated by magic. Deprived of consciousness or independent will, this is boundlessly obedient to the orders of the mage who created it. These orders usually contain but one syllable—kill.
Bellow: If an Ice Elemental sees you, or you’ve chipped away at its frozen exterior without its approval, the oversized ice cube bellows its lack of pleasure at your antics. This has no effect on combat, unless you’re mentally unprepared for such a sound.
Ground Pound (Single or Double Fist): If an Ice Elemental jumps off the ground, move away as quickly as possible. The resulting shockwave knocks down any nearby victims in a large circle around the behemoth. Retreat!
Ground Stomp (Shockwave): You should be alert for Elementals to raise a foot high off the ground. What follows is a powerful ground stomp that sends a wave of icy rock piercing through the earth in a line before the Elemental. Dodge or roll to avoid being caught in this shockwave.
Ice Fist Swipes (Left and Right): Sometimes accompanied with a white glow around each fist, the Earth Elemental loves to swing using either arm, hoping to connect. Dodging around or backing up avoids such a strike, which is seriously damaging if it connects.
Resistances: The Ice Elemental is resistant to poison and bleeding.
The Best Battle Tactics
Ice Elementals fight similarly to Earth Elementals. They can strike with their massive fists, stomp on the ground to knock over their targets, or send a ripple of ice carving through the terrain at their foes. As with other Elementals, avoid attacking the Elemental from the front if you can, dodge its attacks as they cannot be parried, and make extensive use of Yrden to slow it down (particularly Magic Trap). Cast Quen too, so that first strike they employ is absorbed, as this foe strikes infrequently, but hits hard. Don’t forget a Witcher’s best chance is to toss a Dimeritium bomb; shrapnel made of this metal interferes with the workings of the spell that gives this creature life.
GARGOYLES
Danger Alert

Danger Alert (groups)

Frequency

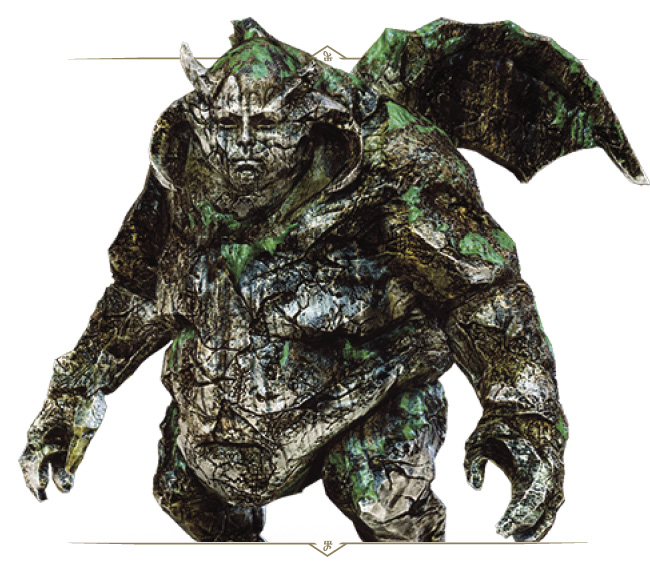
Those who do not take fright at the sight of these horned and winged monstrosities usually die shortly thereafter, torn to shreds by stony claws.
|
Loot: Gargoyle heart, Gargoyle dust, Elemental essence, runestones |
|
Sub-Species or Named Variants: Gargoyles |
|
Environments: Abandoned ruins and castles; beware of statues that allow you to move in close before they attack. |
|
Specific Encounter:The watchtower northeast of Rogne (with Ice Elemental), on Ard Skellig. |
Vulnerable Against

Enemy Attacks
Gargoyles are stone statues brought to life by magic in order to guard mages’ laboratories and lairs from intruders. They are usually slow-moving on the ground, but take to the air and slam down onto the earth with amazing speed.
Flying Drop: The Gargoyle takes off into the skies, too quick to track, and slams down on the ground near you (or on top of you), stunning you as well as inflicting damage. An evasive roll as far from the position you were standing in before the monster took off enables you to dodge this potentially stunning strike.
Rock Throwing: Grabbing large, head-sized rocks and lobbing them with fast and accurate lobs, a Gargoyle can stun you with this projectile attack. Keep an eye on Gargoyles for just this reason (or keep constantly moving and dodging) so you aren’t struck, wounded, and stunned.
Poison Breath: Do not linger in front of a Gargoyle for long, as they usually counter overly-aggressive Witchers with a belch from their mouths, a fetid cloud that can cause poison damage over time. Don’t be greedy with your strikes, and back up or dodge when you see the Gargoyle’s mouth open, ready to spew.
Ground Stomp (Shockwave): You should be alert for Gargoyles to raise a foot high off the ground. What follows is a powerful ground stomp that sends a wave of energy around the monster in a circle. Get caught in this and expect to be stunned. Dodge or roll to avoid being hit by this shockwave.
Fist Swipes (Left and Right): Gargoyles swing using either arm, hoping to connect, and sometimes throw a combination of up to four quick swipes in succession. Gargoyle melee attacks may not have the same reach as an Elemental’s, but they cannot be parried. Dodging around or backing up avoids them.
Resistances: The Gargoyle is resistant to Aard and Igni Signs, as well as weapons inflicting poison and bleeding.
The Best Battle Tactics
A Gargoyle is nearly as sturdy as any Earth Elemental, but significantly faster, more versatile, and seemingly more intelligent. Aard and Igni are almost entirely useless. However, Yrden can slow a Gargoyle down, making it easy to evade their melee attacks, and allowing you to strike back.
But do not linger in front of the Gargoyle for long. They can counter overly aggressive Witchers by using their poisonous breath. The safety of range is fleeting versus a Gargoyle. They can not only throw rocks with a great degree of accuracy and power, but they can leap into the air and crash down atop or next to a Witcher with terrifying speed. Both attacks serve to harm and stun victims.
A Gargoyle can also stomp the ground with such force that they can stun and partially blind nearby threats. Dimeritium Bombs can weaken the defenses of a Gargoyle, but they do little to blunt their offense. Stay focused on limiting the damage they cause to you, while remaining mobile and ready to dodge the jumping attacks. Utilize Quen to protect you from their first, heavy-damaging strikes, then Yrden to limit a Gargoyle’s more confusion leaping drop, and dash in with limited strikes before retreating.
 GOLEMS & MOREAU’S GOLEM

Golems Danger Alert

Frequency

Moreau’s Golem Danger Alert

Frequency

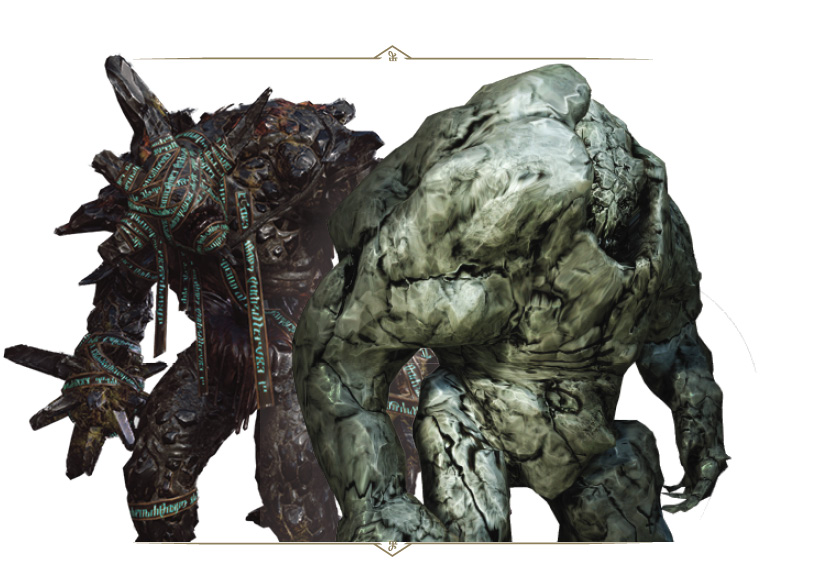
Golems use no weapons. Their fists, weighing over a hundred pounds each, can crush solid granite with one hit. There is no sword that can parry it.
|
Loot: Golem Heart, Glyphs and Runestones, Infused Dust |
|
Loot (Moreau’s Golem): Powered monster tissue, Monster claw, Glyphs, Infused shard |
|
Sub-Species or Named Variants: Golem, Moreau’s Golem |
|
Environments: Ruins, abandoned by those to created them. |
|
Specific Encounter:Inside the Cavern (Signpost), east of Novigrad, in Gustfields. |
|
Specific Encounter (Moreau’s Golem): Scavenger Hunt: Grandmaster Griffin Gear (see page 605). |
Vulnerable Against

Enemy Attacks
Moreau’s Golem is a toughened variant of the usual Golem you encounter and exhibits a more powerful pounding move.
Golems are mindless matter brought to life by a spell. They obey their creator’s orders without question. Once provoked, they will not tire of battle until they have either crushed their opponent or have crumbled into dust themselves.
Bellow and Fist Bump: Bellowing, or pounding both fists together, the Golem builds up energy before attacking. This doesn’t affect you, but is worth watching for as it shows signs that the Golem is about to try a more devastating move.
Ground Pound (Single Fist): If a Golem jumps off the ground, move away as quickly as possible. The resulting shockwave knocks down any nearby victims in a large circle around the behemoth. Retreat!
Fist Swipes (Left and Right): Sometimes accompanied with a short jump beforehand, the Golem swings either arm, hoping to connect. Dodging around or backing up avoids such a strike, which is seriously damaging if it connects.
The Best Battle Tactics
Do not attempt to parry the punches delivered by a Golem. The sheer weight and power behind them reduces such thinking to suicidal tendencies. In addition, a charging Golem cannot be easily stopped, but a cunning fighter can use this lurching sprint to their advantage: Roll out of the path before striking in retaliation. As with the Elementals, a Golem can pound the ground with such ferocity, anyone standing near it is knocked prone.
Dimeritium Bombs are great to lob before you close in for more melee-ranged combat, as they block a Golem’s magical abilities, reducing the potency of its attacks considerably. Ensure you keep the Golem within the radius of the exploded bomb.
Yrden is helpful when going toe-to-toe with a Golem, but remember that the Golem is merely slowed, not helpless. They can still fight despite Yrden’s effects, and can interrupt your sword strikes with a single crushing blow. Prevent losing an inordinate amount of vitality by employing Quen (or Active Quen) so you can shrug off the first hit from a Golem. Since these foes strike slowly and with great damage, absorbing one of these strikes is extremely helpful, as it also allows you to continuously leap in, hit the Golem with multiple light attacks, and dodge or leap away again.
HOUNDS OF THE WILD HUNT
Hounds of the Wild Hunt Danger Alert

Frequency

Apiarian Phantom Danger Alert

Frequency

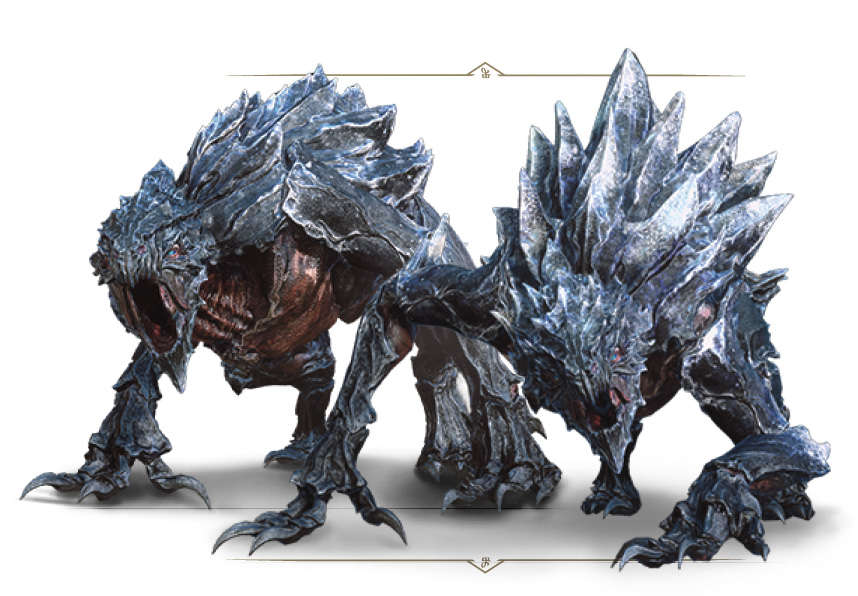
Fear the Red Moon, or when fighting these atrocities during blizzards or in glacial regions; they gain strength at these times.
|
Loot: Rotten Meat, Sulfur |
|
Sub-Species or Named Variants: Hound of the Wild Hunt, Apiarian Phantom |
|
Environments: Whereever the Wild Hunt goes, expect its hounds to follow. |
|
Specific Encounter (Groups): Main Quest: Wandering in the Dark (see page 165). |
|
Specific Encounter (Apiarian Phantom): Contract: The Apiarian Phantom (see page 518). |
Vulnerable Against

Enemy Attacks
The named Hound of the Wild Hunt (known as the Apiarian Phantom), is a toughened variant of the usual Hound you encounter.
Born, or so some experts believe, of magic ice crystal, the hounds of the Wild Hunt race alongside their spectral masters. Like ravenous, feral dogs they are capable only of mindlessly attacking whatever crosses their path.
Spikes of Ice: A little like your casting of Yrden, the Hound stops and summons a circle of protruding icy boulders that damage you as they appear, and protect the beast for a couple of seconds. Wait until the spell is over before continuing the fight.
Leaping Claw: The main attack the Hound exhibits is a leaping front claw slash using either front paw. It can be blocked or dodged, and then retaliated against as the Hound recovers.
Defensive Leaps: These Hounds are nimble, and able to dart back and forth around you, making it difficult to pinpoint or strike accurately. Axii (or waiting until the Hound changes to an offensive attack) stops this from becoming an insurmountable problem.
The Best Battle Tactics
These otherworldly hounds fight as viciously as wolves or wild dogs. They can be momentarily weakened by Axii, but only for an instant. Nevertheless, this is the time to launch an offensive series of strikes (then, or after the Hound finishes a Leaping Claw attack).
Usually, these hounds hunt in packs, and can quickly overwhelm the unprepared. Don’t let them surround you; utilize Yrden to slow any hounds too close for comfort, and break away if needed. If Yrden can catch multiple hounds in one circle, throwing in a Dragon’s Dream bomb and igniting the gas cloud with Igni can seriously damage an entire group of hounds. Another option is the Dimeritium Bomb, which causes havoc and prevents them from inflicting quite as much damage, or attempting their spikes of ice.
Back off from the hounds if they start forming icy spikes. These barriers will pierce through you if you attempt to strike. Environment also plays a key factor too; cold climates empower them, so take great care in combats in the cold. The icy nature of the hounds makes them perfect targets for Igni; roast these otherworldly beasts with regular Igni, Firestream, and even Dancing Star bombs that inflict fire damage. Then follow up with your Elementa Oil-covered silver sword strikes.
 PIXIES

Pixies might look like gentle, harmless creatures, yet in their case, the saying about appearances being deceiving fits all too perfectly.
|
Loot: None |
|
Sub-Species or Named Variants: Pixie |
|
Environments: Pixies dwell within the Fablesphere, a magical realm created by Duchess Anna Henrietta’s uncle, and accessed via a book of fairy tales. |
|
Specific Encounter (Groups): Main Quest: Beyond Hill and Dale (see page 338). |
Vulnerable Against

Danger Alert (groups)

Frequency

Enemy Attacks
The Pixies from the Land of a Thousand Fables were created to protect that magic place from intruders and ensure the ducal daughters, Sylvia Anna and Anna Henrietta, did not come to even the slightest harm. Thus whenever anyone else crossed the Pixies’ path, it ended badly for them, for Pixies are aggressive, war-like creatures, created to kill, defend and fight until they can fight no more.
Jumping and Standing Swipes: A Pixie’s main attack is to make a short leap, or simply step to melee range and make one or two quick slapping strikes with its ethereal, smoke-colored hands. This is damaging, but can be easily parried or countered.
A Group Mentality: Otherwise, Pixies cluster together in a group, taking turns to strike you and trying their best to swarm around you.
The Best Battle Tactics
Pixies only ever appear in a few specific spots throughout the Fablesphere, and when this crowd of around ten, pointy-hatted shadow gnomes spot you, they usually try to reach melee range and crowd around. React by raising your sword to block (much in the same way as you would react to a group of Wolves or Nekkers), and begin to systematically demolish them one after another. In-between, try constant dodging or rolling.
Your bladed attacks are good choices as Pixies don’t tend to block; they are more of a nuisance than a fear-inducing foe. As they are magical, most Sign strikes work reasonably, but not spectacularly. Yrden isn’t usually potent, but Igni can knock Pixies back and damage them while you maneuver so you aren’t surrounded. Axii is good for stunning individuals, and bombs that cause blanket damage are reasonable, though Pixies swarm you, making projectiles difficult to throw and dodge.