
The Witcher 3: Wild Hunt The Complete Edition Guide Appendices and Compendiums Bestiary
Special Battles And Entities: Blood And Wine
Ah, Toussaint! Where the wine (and the blood) runs free! Throughout the many quests in this Duchy, you may be called upon to face some truly impressive adversaries, usually only for a single bout. These include a man-mountain clad in heavy armor, a strange Hermit with a supreme command of the water, a host of fairy-tale folk, and the second-most powerful Vampire you’ve ever met. These special encounters have specific tactics that differ from other combat opportunities you may face, and are placed in a separate section of this Bestiary.
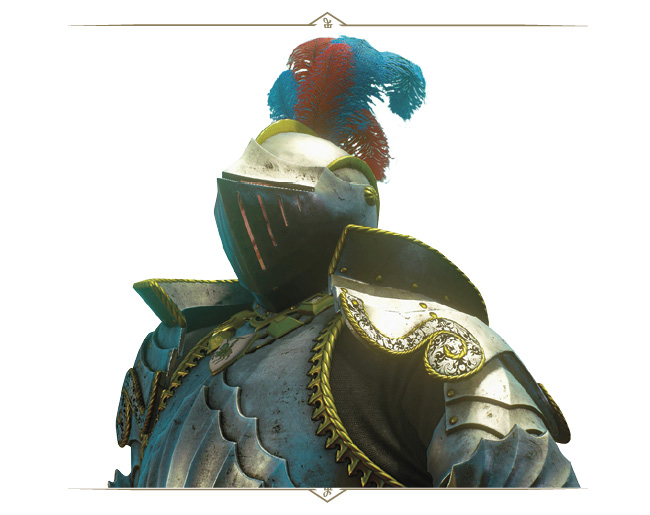
 SIR GREGOIRE DE GORGON: CHAMPION OF THE ARENA (HUMAN)

Danger Alert

Frequency

This lumbering mountain of a man is a giant knight with a mysterious past who has taken a vow of silence; he lets his sword do the talking.
|
Loot: Sir Geralt of Rivia’s Sword OR Ravix of Fourhorn’s Sword |
|
Sub-Species or Named Variants: Gregoire de Gorgon |
|
Environments: Tourney Grounds (Arena) |
|
Specific Encounter:Secondary Quest: The Warble of the Smitten Knight (see page 443). |
Vulnerable Against

Enemy Attacks
Gregoire de Gorgon has the following attacks and maneuvers to be aware of:
No Vulnerabilities: As you cannot use Signs, bombs, projectiles, or oils, this opponent has no vulnerabilities to exploit, aside from those inflicted by your steel sword, and the tactics you learn about while fighting him in sword combat. Remember that healing potions are accessible, however.
No Parrying, No Countering: This plate-metal monster has attacks that inflict such damage and are swung with such force, that they cannot be parried or countered. This means you have ever fewer combat options than for any other battle fought previously!
Punch and/or Kick: He occasionally employs a gauntlet punch or boot kick if you’re close to him, and usually at his side, to knock you back so he can regroup and begin his sword swinging.
Quick Horizontal Slice: A rapid slice through the air in front of him, offering damage to those caught in the arc of his large sword.
Quick Vertical Uppercut: A step forward and a swing upward that can knock you back and deal nasty damage (like all his attacks).
Quick Overhead Strike: A vertical (and sometimes slightly diagonal) strike down in front of him, with a small window of opportunity to hit him as he recovers and pulls his sword back afterward. This sometimes occurs with a step forward.
Heavy Overhead Strike: A step forward and a more pronounced strike down in front of him, and a second or two afterwards where he pulls his sword back to his chest afterwards. This is an excellent visual clue to retaliate at this point.
The Best Battle Tactics
Tackle this prolonged battle as the ultimate test of your sword skill and maneuvering! Though this towering knight has some truly grotesquely damaging attacks, he has one overall weakness to exploit; a lack of speed. He isn’t slow by any means, as his attacks are reasonably rapid, but he lacks extreme dexterity and quickness, and hasn’t bothered to learn the fine art of dodging around a foe.
Whittle down his vitality by reacting to his recovery time; it is far safer than timing slashing attacks between his sword swings. Wait for an attack, dodge around to his flank, and retaliate with one or two light strikes or a heavy attack. Then retreat so you aren’t caught by a punch or wild slash of his sword.
Of particular merit is the recovery time after his Heavy Overhead Strike, which is the very best time to lay into him. While a flurry of light attacks is reasonable, this is the perfect opportunity to hit with a strong attack (covering any ground from retreating). Better yet, try a Rend Strong attack with quick timing to punish this move. Continue with these tactics until the battle is over. Remember parrying and countering are out, but dodging (backward and around) are in! You may also wish to bring your very best steel sword with you into this combat; one that ignores armor and causes criticals is a fine choice.
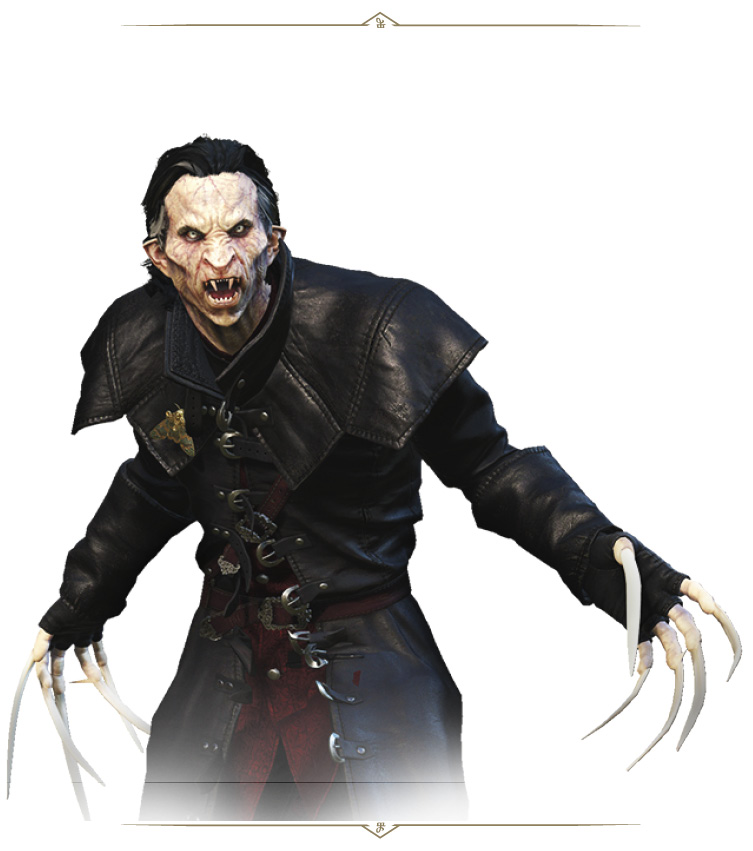
THE BEAST OF BEAUCLAIR (BEAST)
Danger Alert

Frequency

Higher Vampires are superhumanly strong and fast. They can turn completely invisible, and each comes with its own personalized set of talents. When Geralt realized he was dealing with such a creature, he swore foully and realized the rumors about the Beast had not been exaggerated in the slightest.
|
Loot: None |
|
Environments: Dockside Warehouse (Beauclair) |
|
Specific Encounter:Main Quest: Blood Run |
Vulnerable Against

Enemy Attacks
The Beast of Beauclair has the following attacks and maneuvers to be aware of: Dettlaff is inhumanely fast, and you should remain extremely cautious when fighting this Higher Vampire. With super-human speed and strength, he uses fog to literally disappear into and dash out of to claw with almost unmatched ferocity. This mist is also how he quickly changes position, almost faster than you can blink!
Light Attack (Melee): Expect a light attack with his talons; there are three variations of this, and all are best parried.
Strong Attack (Melee): Watch for a slightly slower, more pronounced strike with his talons. There are three variations of this, and all should be parried, or better yet, countered so you can quickly deal damage back to him.
Combination Attack (Melee): Expect a combination of three to five connected strikes, with two variations, usually from the flank, from behind, and appearing from the mist. You have little time to react, so continuously parry. Failing that, roll or dodge just before the first strike connects.
Short Dash Attack (Special): Watch for a fast dash attack, a brief transformation into mist, finishing with a second fast dash attack. Don’t be coaxed into attacking after the first hit; you’ll slice through mist and miss him. Remain on the defensive.
Dash Attack (Special): A variation on the short dash finishes with a short stop before a strong slashing attack. This is a good place to retaliate; countering the strong final strike with one (or two) of your own. But don’t get greedy; he flees from your strikes with ease!
Strong Uppercut Attack (Melee): Expect a strong attack with a flourish that can stagger you, leaving him moments to regenerate, thus increasing this battle and leaving you vulnerable. Blocking the strong attack is good; countering is preferable.
Resistances: Dettlaff is resistant to poison, bleeding, and Yrden, so employing any of these in battle is simply a waste of time.
The Best Battle Tactics
Staying patient and cool under the extreme speed and savagery exhibited by the Beast of Beauclair is key to surviving this fight. Counter any of Dettlaff’s attacks, and wait until he attempts his stronger strikes. If you can counter them, you have a tiny window of opportunity to land a couple of strikes before the Beast vanishes or warps behind you to strike.
Judicious use of Quen helps, not only to shield you but to shrug off any attacks you aren’t quick enough to parry while you learn the timing to thwart this foe. Swig Black Blood to ensure any damage Dettlaff causes is partly reflected back at him, coat your silver sword in Vampire Oil to ensure each strike damages him as much as possible, and then fight back only after he finishes his strong attack. The battle may take a while, but it’s the best way to remain in one piece and stop this higher Vampire, if only for a temporary moment….

THE HERMIT OF LAC CELAVY (HUMAN)
Danger Alert

Frequency

Step by step, in trial after trial, Geralt demonstrated that he was indeed in possession of the Five Chivalric Virtues. The test culminated in a last secret trial; to defeat the Hermit sat upon the lake.
|
Loot: Aerondight (Silver sword) |
|
Environments: The island on Lac Celavy |
|
Specific Encounter:At the end of Secondary Quest: There Can Be Only One (see page 460). |
Vulnerable Against

Enemy Attacks
Blue Staff Attack: At close combat range, the Hermit employs his wooden staff with glowing blue gem as a physical weapon. He employs quick single strikes to the left and right, single heavy overhead strikes, as well as multiple rapid strikes. Simply parry and counter or dodge these close range attempts to hit you, as you would a
normal opponent’s strikes.
Vanish in the Mist (Defensive): He may avoid combat, or move to another part of the lake by simply vanishing in a column of water, only to appear a few moments later, usually to begin conjuring a water tornado. Simply scan the area until you see him again, rolling or dodging away if you’re in the path of a large-scale attack.
Vanish in the Mist (Offensive): Sometimes after vanishing the Hermit appears extremely close to you, conjures a water spout or uses his staff, and can stagger you, so be prepared for this.
Invisibility: Occasionally, (and usually if you’ve struck him a few times), the Hermit simply blinks out of existence, with only his blue glowing staff orb showing. Simply look for that, and launch a ranged attack to coax him back to show himself.
Water Bolt: With his left hand outstretched, he pushes a bolt of water forward to strike you almost instantly, like a snowball. This projectile doesn’t deal heavy damage, but it is fast. It can be parried or dodged. After the bolt, he sometimes summons one or two ground waves that splash in a circular target; dodge both of them.
Water Vortex (Horizontal): A more pronounced version of the bolt, the Hermit launches a twisting column of water directly out from his staff, in a long cylindrical attack that can knock you back or stagger you. Dodge left or right of it. If cast at close range, this pushes you back and staggers you.
Tornado Storm: The Hermit’s most impressive attack is when he whips up the water surrounding him into a maelstrom of vapor and slowly walks toward you inside this raging storm. There’s little to do except get out of the way here (dodging is better than
running as the storm sucks you in and heavily damages you), and follow up with a ranged attack (or Igni) after the storm dissipates and the Hermit is recovering.
The Best Battle Tactics
This fellow, much like the Ofieri Mage you may have encountered during Hearts of Stone Main Quest: Evil’s First Soft Touches (page 286) is an extremely dangerous and competent foe, and becomes more potent at longer distances. Close the distance between you both, so fewer large-scale attacks can be launched by him.
When you can easily leap in with a sword strike, employ Aard or Axii to temporarily stagger and incapacitate him, and immediately strike with two or three fast attacks, or a single, nasty strong attack (like Rend). Then retreat (roll or dodge) before you’re caught by him reacting.
Axii and Aard are also excellent for interrupting the Hermit at range, before he launches one of his spectacularly-brutal water conjuring attacks. Axii is better, as it flummoxes the Hermit no matter what the range.
You can repeat this technique for as long as you can cast Aard or Axii (before needing to rest your Signs), and catch him in a continual “stagger loop” where you cast Aard or Axii, leap in and strike with your sword, then cast again. Igni also works to a lesser extent. Continue with this “attrition” plan, and don’t get too greedy with the sword strikes!
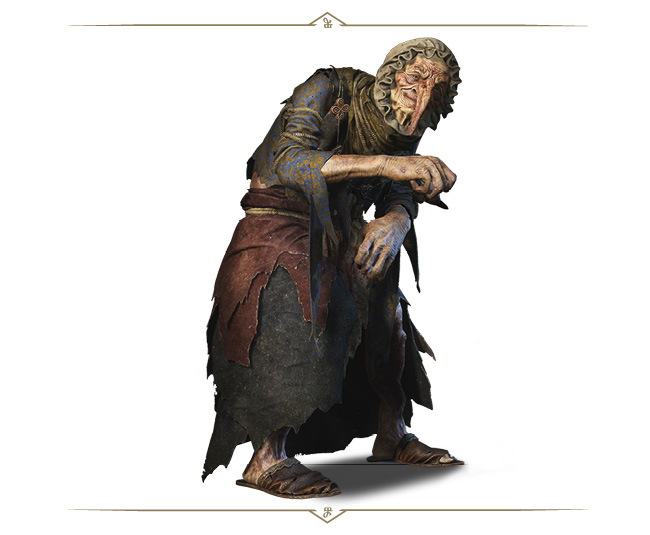
WITCH (RELICT)
Danger Alert

Frequency

Not only did the Witch in fact eat men, but had mastered the cooking of humans to a fine art. They are said to be particularly fond of children’s liver fried in butter and served in a saffron sauce, balsamic vinegar-marinated fingers roasted to a golden crisp and, yes, even freshly-squeezed corpse juice.
|
Loot: None |
|
Sub-Species or Named Variants: Wicked Witch |
|
Environments: Wicked Witch’s House |
|
Specific Encounter:During Main Quest: Beyond Hill and Dale… (see page 338). |
Vulnerable Against

Enemy Attacks
The Wicked Witch has the following attacks and maneuvers to be aware of:
Phase 1: Monster Summoning: The Witch takes to her broomstick, and flies about the combat area, summoning Archespores and Panthers from her bubbling cauldron, and letting them spit their disgusting projectiles at you. During her flight, she is completely impervious to attacks while encased in her magical bubble. Concentrate your attacks on the Archespores and Panthers.
Phase 2: Airborne Projectiles and Divebombing: Once her summoned plant life has been cut down, she tries harming you with revolting liquids from her cauldron, in a long, airborne attack. She also tries to knock you over by swooping down in a divebomb, while riding her broomstick. Dodge out of the way during either of these attacks, and refrain from striking her during the time she is encased in her bubble, for then she is invulnerable. However, when her bubble disappears (usually just before not after. The bubble dissapears as she starts divebombing the divebomb), she can be struck.
Phase 3: Cauldron Broth Projectiles and Melee Strikes: When she is on the ground, she will throw large, unpleasant globs of cauldron contents at you, which act like Archespore spittle, and should be dodged. She can bring down the cauldron with both hands, creating a large explosion that damages and staggers (so back up or interrupt this attack). She also has claw attacks (left or right) at melee range which can be dodged or parried. Spend too long neglecting her broomstick, and she flies off again, and Phase 2 begins anew.
Resistances: The Wicked Witch is resistant to Axii, and usually counters you successfully if you manage to strike her three times in succession.
The Best Battle Tactics
Phase 1: Produce your silver sword, and watch the flight path of the Witch, but don’t attempt to strike her. She lobs projectiles that spawn into Archespores and Panthers. Face and cut these down continuously, until she starts Phase 2 of her attacks.
Phase 2: Avoid her cauldron-spilling airborne attacks, and watch for her impenetrable bubble to disappear during these divebombs; as soon as the bubble has gone, hit her hard with Igni, Aard, your crossbow, or a bomb. She tumbles to the ground and separates from the broom. She now begins Phase 3 attacks. However, the broom seems sentient, and hops around, finally rejoining the Witch as she takes off again, forcing you to strike her from the air just like before. Combat this problem by concentrating all your attacks on the broom, as soon as it becomes separated from the Witch. Destroy the broom, so the Witch is left on the ground. It is worth noting (stressing) that the player should avoid the Witches heavy cauldron attacks. This attack staggers the player and the witch will use this time to get back on her broom.
Phase 3: Once she is on the ground permanently, combat is both swift and unrelenting; dodge the revolting projectiles the Witch lobs, dodging around to slash at the stout foe when she waddles quickly towards you. Usual combat planning is necessary, but the fight is straightforward. Though there’s no oven to shove this Witch into, Relict Oil (as offense) and Quen are useful (as defense), as well as a quick burst of Igni to put an end to her.

LONGLOCKS (SPECTER)
Danger Alert

Danger Alert (Skeletons)

Frequency

After the duke’s daughters grew up and the Land of a Thousand Fables went feral, Longlocks, whose prince never came and who suffered greatly from her loneliness, decided to hang herself by her own braid. After she died, her ghost stayed to haunt the castle in which she had awaited her suitor.
|
Loot: Yellow Bean |
|
Sub-Species or Named Variants: Longlocks (Banshee) |
|
Environments: Longlocks’ Tower, in the Fablesphere |
|
Specific Encounter:During Main Quest: Beyond Hill and Dale… (see page 338). |
Vulnerable Against

Enemy Attacks
Longlocks has the following attacks and maneuvers to be aware of:
Banshee Wail: After taking damage from your attacks, Longlocks will rise to her place of death (the light in the center of the tower ceiling) and let out a scream that could wake the dead—literally. This summons a group of five or more skeletal foes (and she is invulnerable for a few moments during and after the wail). Longlocks then heals while you’re preoccupied with the skeletons (who are easily dispatched like Bandits, or blown backward with Aard and stabbed while prone).
Banshee Scream: Longlocks has a second scream that’s just as ear-piercing, but is used to stun you instead of summon skeletons. Beware of this and dodge or roll away from the sound wave.
Dash Attack: If you’re stunned, Longlocks bursts forward with great speed and performs a powerful melee attack; don’t let this happen by avoiding the scream in the first place!
Melee Combo: Expect some nasty clawing, which can strike you up to four times (usually three or four hits). These are quick and light, and can therefore be parried. She quickly floats backwards after each successful attack or counter that she performs.
Counter: If you’re successful with two or more melee attacks, Longlocks attempts a counter attack; a very quick spin that causes heavy damage, and pushes you (and her) away from each other. You’re encouraged to strike twice before adjusting and striking again, so this is avoided.
Resistances: The critical effects of Signs, Bombs, and bolts do not affect Longlocks. She is slow, attempting to stay at medium range and away from your attacks and only approaching when attempting a dash or melee combo strike.
The Best Battle Tactics
Use Yrden to slow Longlocks down enough to dart in with a couple of hard-hitting, specter-oil-coated attacks, and whittle down her health until she starts her infamous Wail. As soon as the skeletal foes appear, defeat them as quickly as possible using fast attacks and knocking them over with Aard; this means Longlocks has fewer opportunity to heal herself, and you can continue this combat of attrition.
Longlocks strafes, tries a melee attack, dashes away, tries the scream to stun you, then uses her dash attack if successful; then she begins this attack pattern again. If wounded, she stops this pattern and summons her bony brethren. When she does, remove the skeletal threats quickly, before attacking her with well-timed sword strikes once again.
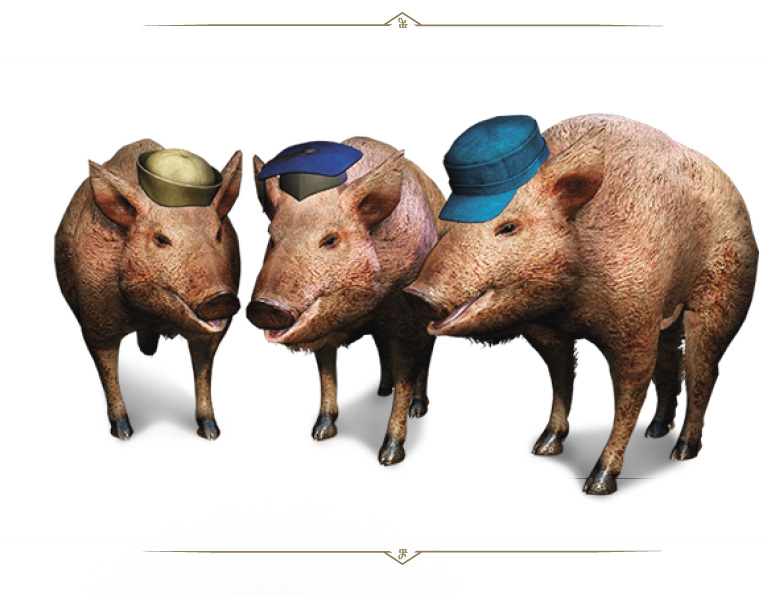
THREE LITTLE PIGS (BEASTS)
Danger Alert

Frequency

The three little pigs from the Land of a Thousand Fables were left for years without Artorius Vigo’s supervision. During this time, they went completely feral, transforming into three wild boars which attacked anyone who dared approach their rui ned home.
|
Loot: Blue Bean |
|
Sub-Species or Named Variants: Three Little Pigs |
|
Environments: The Fablesphere (Land of a Thousand Fables). |
|
Specific Encounter:During Main Quest: Beyond Hill and Dale… (see page 338). |
Vulnerable Against

Enemy Attacks
Leave even a kind-hearted, warm, naively benign creature to fend for itself, and it won’t remain so benign for long. Treat this battle with the Three Little Pigs in exactly the same manner as you would when facing Wild Boars:
These piggies are able to maintain their speed throughout an entire fight, can knock you down, surround and harass lesser warriors, and act more erratically than other beasts.
Erratic Running: These piggies won’t usually make a direct line when charging towards you, but instead can circle or weave around before charging with their tusks. They also like to “wing” you as they pass with their tusks, and continue to charge about, making them difficult to react to. Quen is useful protection under these circumstances.
Charging Gore: Expect these piggies to charge you from time-to-time, especially if you’re preoccupied with one of their pack and don’t notice another approaching swiftly. The subsequent strong tusk attack can knock you down. A swift dodge is necessary here.
Hind Leg Stomp: If you’re burning these piggies with Igni or projectiles, they tend to run in a circle in a highly-agitated manner, kicking their legs out. These hind-leg strikes also occur if you try and strike a pig from behind (after the beast usually rears up). Obviously, avoid bladed attacks to a piggy’s behind, and watch a squealing boar as it careens chaotically; dodge to avoid additional damage.
The Best Battle Tactics
As they maintain their speed throughout an entire fight, and are difficult to predict (they run to and from you constantly), you must be cautious so you’re not surprised by a charge and gore that knocks you down. Expect to be surrounded and harassed.
These piggies are susceptible to all Signs, bombs, and bolts. For those lacking finesse, you can quite easily single out a piggy, concentrate on killing it with hammering light attacks, before moving onto the next one. But the best idea is to approach them defensively (blocking and with Quen active), locating and isolating one, and then stunning it (Aard or Axii is useful here) and/or attacking from the front or the side. If you’re surrounded, utilize crowd-control tactics (stunning or slowing these piggies with your preferred Signs or bombs) before resuming the “isolate and slay” plan.
BIG BAD WOLF (BEAST)
Danger Alert

Frequency

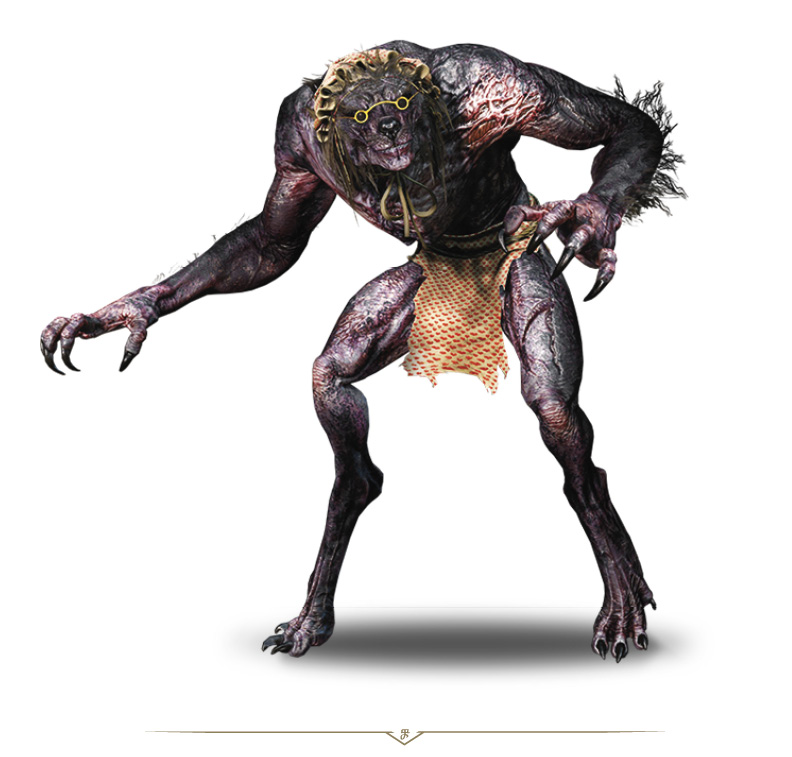
The Big Bad Wolf once served as a playmate to the duke’s daughters, acting out scenes with a certain red-hooded girl and her grandmother, but as the fable land slowly degenerated, so did he.
|
Loot: Red Bean |
|
Sub-Species or Named Variants: Big Bad Wolf |
|
Environments: Grandmother’s house, in the Fablesphere. |
|
Specific Encounter:During Main Quest: Beyond Hill and Dale… (see page 338). |
Vulnerable Against

Enemy Attacks
Geralt and Syanna met the Big Bad Wolf while he was nursing a nasty hangover and was not eager to cooperate. Yet since our heroes needed a bean which the wolf had, they forced him to act out his tale. And act out he did, performing a series of aggressive maneuvers akin to a Werewolf:
Lunging Claw Strike: Should the Big Bad Wolf wish to close the gap, it leaps from the ground in your general direction, landing with a huge and vicious clawing swipe. Dodge this to avoid being struck and possibly stunned; watch and dodge just as the Big Bad Wolf’s feet leave the ground, or as soon after as possible. Dodging away, diagonally backward, gives you the distance you need to avoid the landing and swipe.
Clawing and Double Clawing: At close and melee distances, the Big Bad Wolf tends to stand and swipe with his powerful claw. Or, he raises up both arms, and brings them down vertically with a double clawing move that is both highly-damaging and can stagger you, causing bleeding. Another timed dodge is required, usually when you see his arm (or both arms) raised up before the strike. There is a tiny opportunity to retaliate with your blades just after either claw attack, as the Big Bad Wolf recovers.
Bite Attack: After dropping to all-fours, the Big Bad Wolf launches a highly-damaging biting lunge. Look for the change in stance, then dodge as soon as you see all four claws on the ground to avoid being struck.
Regeneration: As combat continues, the Big Bad Wolf is able to regenerate vitality back, increasing the need to interrupt this and dish damage, so you aren’t fighting a foe that continuously heals!
No Summoning Wolves: The Big Bad Wolf has no ability to summon wolves. Unless you talk to Joss. Then he’ll tell you otherwise.
The Best Battle Tactics
Yrden is of great use in avoiding the Big Bad Wolf’s attacks, though his speed sometimes means he misses your circle of slowdown. Instead, employ Quen to shrug off the first attack the Big Bad Wolf inflicts; they are fast enough that you may not be able to parry or time attacks without being struck. Another good tactic is to cast Quen, and as soon as he claws at you and Quen pushes the beast back, retaliate with two or three fast attacks, possibly followed by an expertly timed Rend.
When possible, use Igni. Setting the Big Bad Wolf aflame can force him to stay still long enough to score more vicious strikes (hopefully with critical hits), usually on his flanks. Fire, bleeding, and poison effects can be used to slow his regeneration.
Explosive bolts for a crossbow can be useful for inflicting fire damage at greater range, should the Big Bad Wolf be at a distance. My, what muscular haunches he has! He won’t for long, though!
DETTLAFF VAN DER ERETEIN (VAMPIRE)
Danger Alert

Frequency

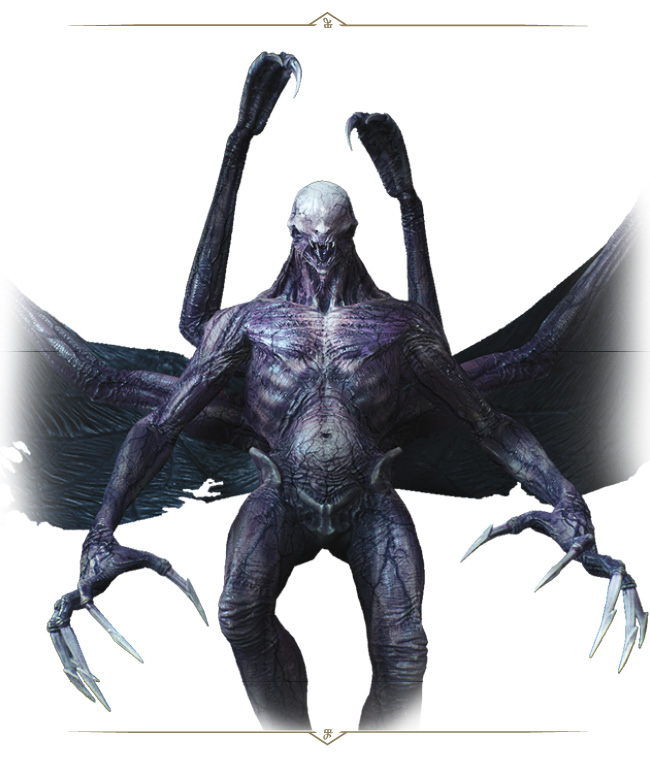
Dettlaff is a higher Vampire and one of the most terrifying creatures the world has ever known. Some Vampires of his sort live among men easily and inconspicuously. Yet even the most civilized Vampire can be incredibly dangerous if provoked, and Dettlaff…Dettlaff is far from civilized.
|
Loot: None |
|
Sub-Species or Named Variants: Dettlaff, Blood Construct |
|
Environments: Tesham Mutna, in southern Toussaint. |
|
Specific Encounter:During Main Quest: Tesham Mutna (see page 348). |
Vulnerable Against

Stage 1: Vampire Form: Enemy Attacks
Dettlaff exhibits the same level of initial ferocity that he did during your first encounter with him, during Main Quest: Blood Run. Therefore, similar tactics apply:
Dettlaff is inhumanely fast, and you should remain extremely cautious when fighting this Higher Vampire. With super-human speed and strength, he uses fog to literally disappear, and dash out of to claw with almost unmatched ferocity. This mist is also how he quickly changes position, almost faster than you can blink!
Light Attack (Melee): Expect a light attack with his talons; there are three variations of this, and all are best parried.
Strong Attack (Melee): Watch for a slightly slower, more pronounced strike with his talons. There are three variations of this, and all should be parried, or better yet, countered so you can quickly deal damage back to him.
Combination Attack (Melee): Expect a combination of three to five connected strikes, with two variations; usually from the flank, from behind, and appearing from the mist. You have little time to react, so continuously parry. Failing that, roll or dodge just before the first strike connects.
Short Dash Attack (Special): Watch for a fast dash attack, a brief transformation into mist, finishing with a second fast dash attack. Don’t be coaxed into attacking after the first hit; you’ll slice through mist and miss him. Remain on the defensive.
Dash Attack (Special): A variation on the short dash finishes with a short stop before a strong slashing attack. This is a good place to retaliate, countering the strong final strike with one (or two) of your own. But don’t get greedy: he flees from your strikes with ease!
Strong Uppercut Attack (Melee): Expect a strong attack with a flourish that can stagger you, leaving him moments to regenerate, thus increasing this battle and leaving you vulnerable. Blocking the strong attack is good; countering is preferable.
Resistances: Dettlaff is resistant to poison, bleeding, and Yrden, so employing any of these in battle is simply a waste of time.
Stage 1: The Best Battle Tactics
Staying patient and cool under the extreme speed and savagery exhibited by Dettlaff’s Vampire Form is key to surviving this fight. Counter any of Dettlaff’s attacks and wait until he attempts his stronger strikes. If you can counter them, you have a tiny window of opportunity to land a couple of strikes before the Beast vanishes or warps behind you to strike.
Dettlaff is adept at parrying; he blocks all attacks from the front, and after three parries (or hits), he usually teleports behind you and counters. If you manage to strike him in the back, he dashes away, so as not to receive further punishment from you. Not only that, but he can regenerate up to 30 percent of his essence, usually while standing at range.
Judicious use of Quen helps, not only to shield you but to shrug off any attacks you aren’t quick enough to parry while you learn the timing to thwart this foe. Swig Black Blood to ensure any damage Dettlaff causes is partly reflected back at him, coat your silver sword in Vampire Oil to ensure each strike
damages him as much as possible, and then fight back only after he finishes his strong attack. The battle may take a while, but it’s the best way to remain in one piece and stop this higher Vampire, if only for a moment.
Stage 2: True Form: Enemy Attacks
When you’ve removed around a quarter of Dettlaff’s vitality, a grotesque transformation takes place, as Dettlaff reveal his true form! This fearsome flying enemy is essentially immortal, and so fights with no regard to his personal safety, and with a ferocity not previous encountered! When in the air, he is impervious to any attack. In addition, watch for the following offensive maneuvers:
Flight and Flying Dash: While airborne, he isn’t able to be harmed, though he sometimes executes a Flying Dash, striking you before he flies away again. It is during this attack that you can make a well-timed sword strike or aard, igni, bolt, or bomb. Actually Igni and aard are best for bringing him down as they require the least perfect timing of all available options interrupting the dash and bring Dettlaff to the ground, one of only two opportunities to strike him.
Teleport: He is able to teleport short distances; keep an eye on where he is at all times so you aren’t slaughtered from the flanks or rear.
Dive Attack: Using his massive wings to raise himself up and out of your reach, he flaps up, then brings himself down with a mighty pummeling ground strike that can hit hard and possibly stagger. However, he requires some time to recover from this dive and is vulnerable on the ground.
Swarm Attack: A massive swarm of bats is conjured and thrust towards you, damaging and staggering you. Just roll, dodging is not sufficient for this attack. to avoid this.
Traps: After Dettlaff recovers from an attack, he conjures a revolting, oil-like trap that can severely impede your movement. He uses a special Dive Attack to hammer you while you’re prone, so avoid the Traps whenever possible by remaining mobile, and don’t get too greedy when striking Dettlaff during his recovery.
Resistances: Dettlaff’s True Form is immune to burning (Igni and weapons), stuns, blinding, and Axii. If he’s flying, he dodges or reflects any bombs or crossbow bolts you may try to strike him with. When he’s recovering from a strike, he can send you flying backward, knocking you over, so get in with strikes and retreat quickly.
Stage 2: The Best Battle Tactics
Put your projectiles away when Dettlaff is airborne, as you cannot harm him when he’s flying. The only times he is susceptible to harm is at the end of his Dive Attack (he lands on the ground, and is vulnerable for a moment), and during the Flying Dash (where this attack can be interrupted, and Dettlaff brought to the ground). Signs are best employed here, though bombs work too. Then whittle Dettlaff’s health down with two or three strikes before backing away, out of the range of the trap he conjures, and let him fly away. Then begin the tactic anew.
Stage 3: Blood Construct (Final Form): Enemy Attacks
At around one third vitality, after you’ve successfully clipped Dettlaff’s wings, this horror wraps himself up completely in a revolting cocoon of blood. Quickly sculpting an encased arena from gore and flesh, supported by three vein columns that pump blood into the cocoon hanging from the middle of this atrocity. A doppelgänger of Dettlaff is also conjured, made from the blood and sent to fight in Dettlaff’s stead.
An Idiot Construct: The Blood Construct is a magical being formed from the blood and willpower of Dettlaff. It does not possess any intelligence of its own, and exists only to kill you. Expect a constant barrage of attacks with little time to rest.
Melee Strike (one hit, six variations): A quick single attack that is damaging, and can be parried or dodged. You can retaliate afterward, but as the construct shouldn’t be the focus of your fighting (aside from getting rid of it momentarily), think of all these attacks as a hindrance to your main goal.
Combo Strike (four variations): A series of attacks, inflicting damage up to four times in a single combination. These can be parried or dodged.
Dash Attack: A sliding strike that can be interrupted or countered, allowing you to stun the construct for a few moments; only of the best ways to quickly remove yourself from its clutches to deal with the real solution to your problem.
Flying Attack: Once you dispel the Construct with your attacks, it reappears near Geralt, applying a knockdown. Dodge away from its landing spot, or take a chance at hitting it to remove a small amount of its health.
Resistances: The construct is immune to any critical attacks, and can easily parry your sword strikes. It also revives itself each time you kill it, making it effectively immortal.
Stage 3: The Best Battle Tactics
The three columns resembling veins, which pump blood into Dettlaff’s cocoon, are the main focus of your attacks: Make sure you are slicing, blasting, or bombing these stationary targets as quickly and as often as possible. Waylay the Blood Construct by using Yrden, quickly maneuvering around the flesh arena, and use ranged attacks at the flesh columns so you don’t need to physically move to each one. Treat the Blood Construct as you would Dettlaff in Phase One of this battle, but know that you can never defeat this golem; though removing it temporarily before it reforms allows a few seconds of uninterrupted flesh-column removal! When all three flesh columns are removed, Dettlaff finally yields.