
The Witcher 3: Wild Hunt The Complete Edition Guide Atlas
Map Legend
This Atlas employs a number of icons you may find familiar if you utilize the in-game map. For each area under examination, expect a brief synopsis of the important facts related to the area, followed by maps and imagery labeled with the following icons:
Map Legend
| Signposts | ||
 |
These are important geographical locations and Fast-Travel points. All the nearby quests, points of interest, Gwent opportunities, and merchants are listed. | |
| Quests | ||
| Every important quest that appears in your quest menu is flagged using these icons so you can quickly flip to the quest itself. | ||
 |
Main Quest | A critical path Main Quest begins at this point. |
 |
Secondary Quest | An optional Secondary Quest begins at this point. |
 |
Contracts | An optional monster hunt can begin at this point; this is usually the location of the quest giver, though most of these quests can be started by stumbling into the monster’s territory. |
 |
Gwent Quest | An optional Secondary Quest related to the card game Gwent begins at this point. |
 |
Fistfight | An optional bout of fisticuffs is available here. |
 |
Horse Race | An optional race on horseback can occur at this point. Hearts of Stone and Blood and Wine Horse Races are also flagged with this iconography. |
 |
Scavenger Hunts | An optional treasure hunt to find diagrams for fabled arms and armor of the Witcher schools is available here (this may not be a starting point, as these quests can begin at any diagram stash). |
  |
Treasure Hunts | If you’re looking for the smaller Treasure Hunts, usually involving the finding of a clue and key, before locating the chest itself, look for the Key and Chest icons in the “Chests” part of this legend. |
 |
Epilogue | One of the game’s endings begins at this point. |
 |
DLC | Occasionally, a Secondary Quest or Contract is flagged with the letters “DLC”, meaning it is a downloadable quest. |
 |
Hearts of Stone Content | This quest is available in the Hearts of Stone Expansion. |
 |
Blood and Wine Content | This quest is available in the Blood and Wine Expansion. |
 |
Hearts of Stone: Main Quests | A critical path Main Quest in the Hearts of Stone expansion begins at this point. |
 |
Hearts of Stone: Secondary Quests | An optional Secondary Quest in the Hearts of Stone expansion begins at this point. |
 |
Blood and Wine: Main Quests | A critical path Main Quest in the Blood and Wine expansion begins at this point. |
 |
Blood and Wine: Secondary Quests | An optional Secondary Quest in the Blood and Wine expansion begins at this point. |
| Points of Interest | ||
| A variety of interesting areas not immediately obvious are dotted across the landscapes. They are divided into the following: | ||
 |
Abandoned Site | A location, sometimes in disrepair, that may have been taken over by monsters. Any Merchants you may see on the maps of this general area only appear after clearing the vicinity of enemies. |
 |
Bandit Camp | A (usually) small encampment with human-sized foes, who are almost always hostile. Usually, they are guarding a chest of reasonable value. |
 |
Boats | If you require a boat to sail the waterways of the Realms, look here. |
 |
Guarded Treasure | Expect treasure guarded by an enemy or monsters here. The type of enemy is listed. |
 |
Hanse | An outlaw stronghold, governed by an anarchic band of bandits, their dogs, and (usually insane) leader. |
 |
Knight Errant in Distress | A small bandit camp where a Ducal Knight is being held prisoner. Mount a rescue, without the foes killing the knight. |
 |
Monster Den | A monster-infested location, and constant worry for those living nearby. Investigate and rid the area of foes. |
 |
Monster Nest | A disgusting collection of spittle, rocks, branches, or other detritus. A Samum, Dancing Star or Grapeshot bomb required to destroy these nests. |
 |
Notice Board | A wooden board, usually found within a settlement, with a variety of notes. You can start some Secondary, Contract, Heroes’ Pursuits, Fist Fights, and Gwent quests by reading the missives here. Initial tasks are listed throughout this Atlas; but additional tasks may be pinned to Notice Boards later on, so keep checking back. |
 |
Person(s) in Distress | A citizen, usually caged and in despair. Free them and they head to a particular location (also indicated). |
 |
Place of Haunting | These are areas where ghosts are known to have been seen. Produce the Magic Lamp given to you by Keira Metz to uncover more. |
 |
Place of Power | An important stone of magic that increases a particular ability. The Sign of the Place of Power is indicated, as well. |
 |
Smuggler’s Cache | A small hidden item, sometimes valuable, and inside a chest or a bundle. |
 |
Spoils of War | Usually the site of a battle, and now usually pockmarked with bodies of the fallen. Sift through here for valuables. |
 |
Stash | A large chest, and permanent fixture in the location you find it, allows you to dump any unwanted equipment you’ve found. |
 |
The Prophet Lebioda’s Footsteps | A series of five locations where stone mason caravans have encountered problems, and must be rescued. Only available during Blood and Wine Secondary Quest: Big Feet to Fill. |
 |
Unmarked Location | A dwelling of interest that does not appear on your World Map. Sometimes it is a place of business that you can visit, such as a tavern or local landmark in a city. |
 |
Vineyard Infestation | A local vintner is having a heck of a time with a Monster Nest, and prowling or burrowing enemies ruining his grapes. Treat these encounters just like Monster Nests. |
 |
Vintner’s Contract | A special, Toussaint-only contract where you must rid the immediate area of any hostile beasts, before being rewarded by a grateful wine merchant. |
| Merchants and Repairs | ||
| Merchants and Repairs: Interact with the following traders and obtain a variety of services and enhancements. Most of these individuals are also Gwent players, too. Also seek out the complete list of Merchants. | ||
 |
Alchemy Supplies | Alchemists specialize in selling the materials required for Alchemy. |
 |
Armorer (Amateur, Journeyman, Master, or Grandmaster) | These traders specialize in making protective equipment from materials salvaged in the field, as well as selling basic equipment. If they have the skill to follow diagrams you bring to them, for a fee and for the materials required, an Armorsmith can make what you request. These smiths can sell equipment diagrams as well. |
 |
Barber | Change the appearance of Geralt’s beard and flowing locks at any of these establishments. |
 |
Blacksmith (Amateur, Journeyman, or Master) | These traders focus entirely on the sales and creation of weaponry. For your purposes, this means steel swords, silver swords, and crossbows. As with Armorers, the Blacksmith’s individual skill determines what diagrams they can craft from. Blacksmiths may also sell equipment diagrams. |
 |
Brothel | If you fancy an evening (or even a morning) of rumpy-pumpy, feel free to visit one of the three knocking shops of Novigrad. |
 |
Grindstone | Grindstones and Armorer’s Tables are often found near a blacksmith or armorer. They provide a temporary increase to the effectiveness of your weapons (Grindstones) and armor (Armorer’s Tables). They do not restore lost durability. |
 |
Armorer’s Table | |
 |
Herbalist | Instead of exploring the wilderness for wild flowers, mushrooms, or berries, purchase them here, instead. |
 |
Innkeep | Expect a variety of consumable goods; mainly food and alcoholic beverages. |
 |
Merchant (Shopkeeper) | A wide variety of goods can be found here, from rare books to swords, equipment, Gwent cards, foodstuffs, and many other trinkets. |
 |
Runewright | An Ofieri Runewright crafts runes and glyphs and can also form them into words to be placed in swords and armor. Rune- and glyphwords give their items new, powerful properties. |
  |
Wandering Merchant | Some merchants wander the roads, plying their wares. They tend to use the paths shown, resting at the start and finish of their path. |
 |
Vintner | Occasionally, Toussaint has these type of merchants, who specialize in various types of wine. These can be sold and drunk. What a bouquet… I’m getting the smell of chestnut… a soupcon of honey… and just the faintest whiff of dead Drowner... |
| Gwent Players and Vendors | ||
| Whether you’re after a quick bout of Gwent, or you’re aching to spend some crowns for a couple of rare cards, seek out the following individuals. Also seek out the complete list of Gwent Players and Vendors. | ||
 |
Gwent Player | Expect a game of Gwent at this location. The name of the Gwent player is noted. Remember that some Gwent vendors are also players, some players give you a random card if you beat them, and others are only accessible if you’re completing a particular Gwent quest (so may not be available immediately). |
 |
Gwent Card Vendor | Expect to purchase multiple Gwent cards at this location. These sellers may not always be available, so buy what they have as soon as possible. |
| Chests | ||
| Gathering valuable items is extremely important during your adventure, and this guide details the (random) quality of the treasure you should expect to find: | ||
 |
Good Chest | Expect reasonably valuable (random) items in this type of chest. |
 |
Better Chest | Expect better, more valuable (random) loot. |
 |
Relic Chest | An extremely valuable relic is found in this chest. |
 |
Scavenger Hunt Chest | Loot from the Witcher School is found here, almost always in Diagram form. |
 |
Quest Chest | This chest is utilized in a specific quest. The loot itself is not required to complete the quest. Such quests may also be accessible when this quest isn’t active, but it’s usually advisable to find them during a quest that takes you to this location. Check the quest you are on to see if the location is mentioned. |
  |
Treasure Hunts: (Hidden Treasure) | Some chests require a key to unlock. This may be hidden somewhere, on the corpse of a fallen fellow with clues to read, or in an area to loot. Check the area where they key is shown carefully. A large proportion of these refer to named Treasure Hunt Quests. |
| Dungeons | ||
  |
It is well worth checking each map area for these two icons—which show the locations of dungeons within a realm—instead of stumbling into a cavern without the knowledge of the monsters that may lie within. If a dungeon has an interior larger than a house, that map is also included so you can see how big the dungeon is that you’re about to explore. A Dungeon icon with a small green chest in the lower-right, indicates that an important Scavenger Hunt chest is contained within the Dungeon itself. | |
types of Chests
Chests of loot, for the most part, contain random items. However, some chests have more valuable contents than others, described in the Legend.
Chests can also be discovered while swimming underwater, or peering down into the water while on a boat, or by using your Witcher Senses.
Submerged underwater chests often yield better loot than those on dry land.
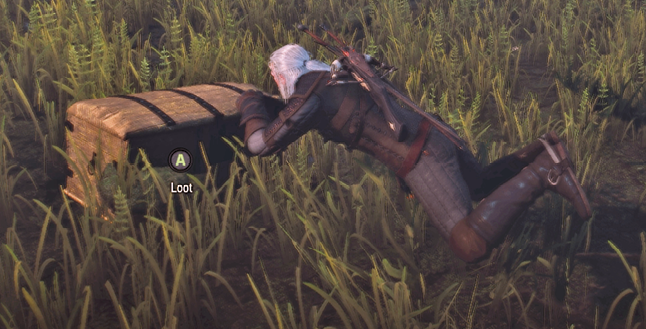
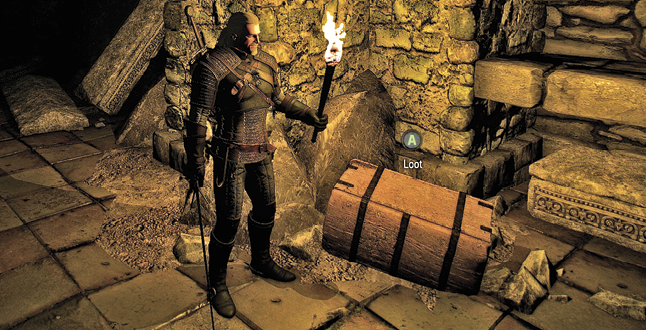
Some chests may be obscured, or out of the way, and may require the use of a Sign to find (such as a chest hidden under floorboards requiring Aard to remove and discover). These chests may yield better quality loot, but this is not guaranteed.
The chest icon also incorporates barrels, crates, otherwise seemingly-innocuous containers, and even occasional dead bodies, which hold valuable items. So, if you see a chest icon in this Atlas, but no chest in your game, be sure to rummage through any nearby containers.
Merchants, Selling, and Stashing
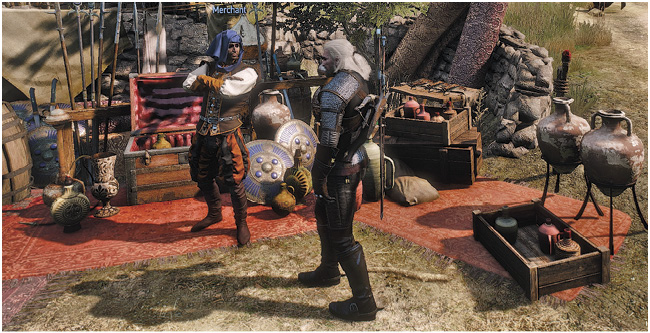
A thorough inspection from White Orchard to Toussaint, has revealed every single Merchant and trader you can interact with, so when your saddle bags are full, and you’ve become over-encumbered, you can sell off your haul as quickly as possible. Or, you can find a Stash Chest (also marked) and keep your valuables if you’re more of a hoarding type.
Merchant Ratings
| Available Crowns | Money Rating |
|---|---|
|
0 |
Zero |
|
1-199 |
Poor |
|
200-499 |
Below Average |
|
500-999 |
Average |
|
1000-1999 |
Above Average |
|
2000+ |
Rich |
Good Hunting To You!
This Atlas could best be described as “exhaustive.” There are locations of every Witcher Gear diagram and every Relic class item, but the pleasure of exploration and overcoming the obstacles needed to find certain chests has been left to you. We have striven to show what types of monsters may be nearby, but we leave the preparation up to you. If you’re unsure about what monsters you might encounter and where, look around you, observe the area (always using your Witcher Senses) and turn to this guide’s Bestiary for advice on tackling any threats you spot.
It’s a pleasure to immerse yourself in the search for hidden treasure, and often hunts of this kind provide a very palatable sense of the world. While we have given you the chest’s location, we encourage you to obtain and read any lore that might hint toward the approximate location of the treasure. Keep your eyes open, however, for the power of observation alone is sometimes enough to learn the story behind a cache.