
The Witcher 3: Wild Hunt The Complete Edition Guide Secondary Quests Of Dairy And Darkness
Trial Of The Tyromancer: Cheesed Off
Objectives
|
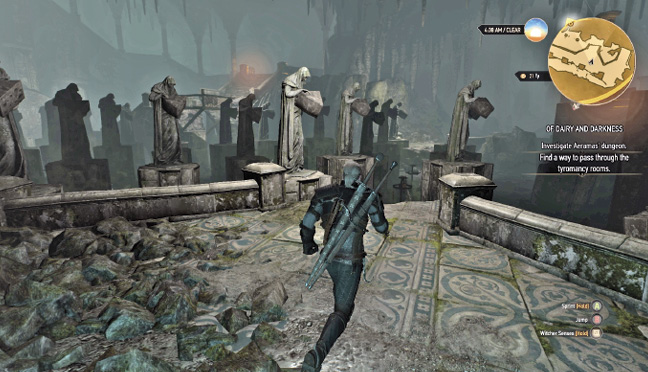
You’re transported underground, to a vast and impressive tyromancer’s chamber. Study the rows of statues and giant glass jars, and look for the crumbling remains of a staircase on the opposite side of the room (as shown). Head there directly (you can move left, around the perimeter if you wish), as the smell of cheese becomes overpowering, and can kill you if you run out of air! Climb the stairs, and enter the portal.
Objectives
|
Descend some similar stone steps to an underground lake with two branching tunnels. Swim east, and you reach a cavern with walkways above that you can’t reach. So swim north, diving down underwater and surfacing in an adjacent cavern, before scrambling up onto wet ground and rocks to climb over.
This has giant natural pillars and ornate floor tiles to traverse, and a broken bridge leading to Aeramas’ laboratory. Rid the area of a foglet.
Inspect the area, using your Witcher Senses if you wish, to find some of Aeramas’ notes (which you can optionally read) and another of his figurines. In one corner near a burning torch is the carcass of a cow to inspect. The laboratory itself contains a human corpse attached to a contraption of iron (and cheese).
|
Items: Quest Items: Bull Figurine, Aeramas’ Notes |
Beyond the cheese collection to the northwest is an archway. Locate another statue on Aeramas’ desk, and use it to conjure the portal. You are transported to the final chamber.
End: The Smell of Victory
Objectives
|
A large dome of crackling magic is preventing you from accessing Aeramas’ fabled treasures, so investigate the alcove to the right of the barrier to find a small pyramid switch that reacts to your Igni sign. Find a second one on the opposite side, hidden behind an illusion (which you dispel using the Eye of Nehaleni. Light them both up!
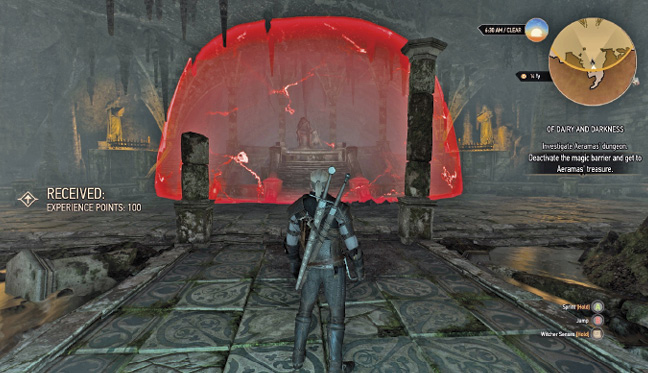
Once through, gather the treasure from the chest and the sword from the statue, before heading to a final archway behind the steps, activating it with the final figurine from the treasure chest, and transporting yourself back to the surface, where this quest concludes.
|
Items: Quest Item: Snake Figurine, Crowns, Weapon: Sword of Maribor, Weapon (Relic): The Emmentaler |