
The Witcher 3: Wild Hunt The Complete Edition Guide Appendices and Compendiums Bestiary
Humanoids
The Conjunction of Spheres brought humans, nonhumans, and monsters from different worlds together. This irreversible cataclysm continues to be felt over 1,500 years later. Witchers were born from this strife, seeking to protect humans and nonhumans from the creatures plaguing their fields. Commonly, a Witcher’s role was to kill beasts while wielding blades of silver, but there are times when steel swords must be drawn. Humans and Nonhumans, either trained soldiers and assassins, or thugs and bandits who prey on the weak, will stand against you on the Path as often as any kind of monster.
Of greater concern, the Wild Hunt has been seen roaming the Continent, seeking something or someone. These are among the most skilled warriors a Witcher could be forced to face. They are as well-armed and armored as any soldier from the richest kingdoms of man, and they are relentless in combat. Each Wild Hunt warrior should be treated as a grave threat alone. And these huntsmen never ride alone.
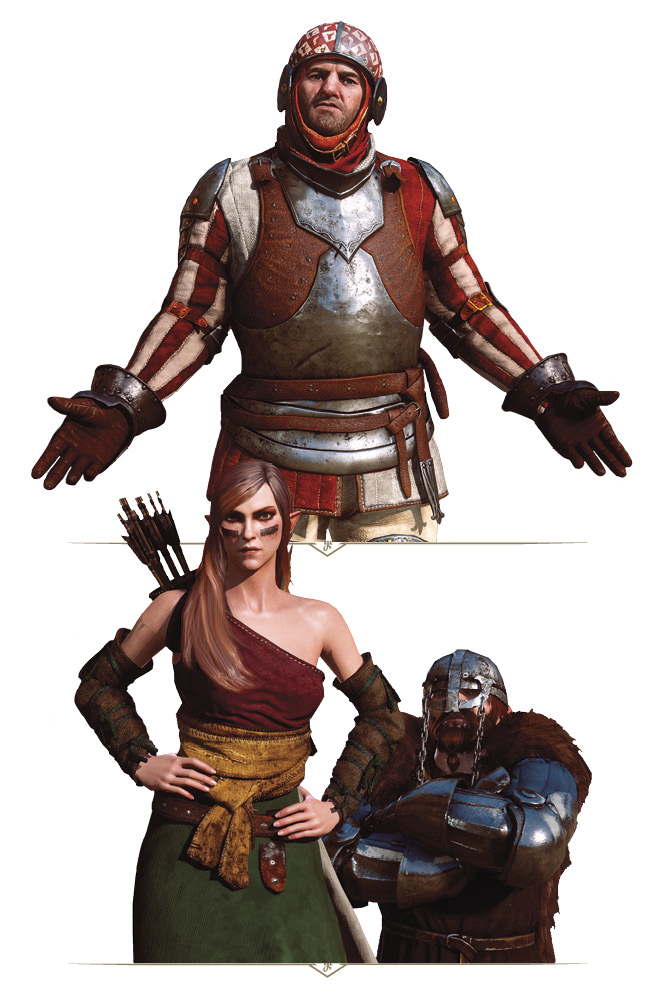
Humans and NonHumans
Danger Alert

Danger Alert (groups)

Frequency

Beware fighting multiple humans, as they often fan out to cut off your escape routes.
|
Loot: Weapons, Equipment, Currency |
|
Sub-Species or Named Variants: Baron’s Men, Bandits, Guards, Thugs, Pirates, Order of the Flaming Rose, Scoia’tael, Bouncers, Whoreson’s Men (and others) |
|
Environments: Found across the known world. |
|
Specific Encounter:Any Bandit Camp: Coast of Wrecks (Velen) |
|
Specific Encounter (Groups): Any Outlaw Hanse: Arthach Palace Ruins (Toussaint) |
Vulnerable Against

Enemy Attacks
Weapon Swings: The mainstay of a human-sized foe’s attack varies depending on the weapon (expect attackers to use swords, maces, hammers, and other sharp instruments of pain), usually with a hefty swing, and sometimes two in succession. Either react and hit them first, parry and retaliate, counter, or dodge (or roll) and attack back.
Two-Handed Attacks: Some foes carry two-handed swords, long hammers, maces, or pikes. These foes are more dangerous, and have a greater reach. Dodging is the best plan here, reacting just as the foe starts to attack. Dodge or roll to their flank and then retaliate.
Shield-Bashing: A shielded foe is obviously more difficult to strike, and also pushes you back with a bash that can knock you off-balance, stunning you. Simply avoid such confrontations by dodging or bashing back with offensive Signs like Aard.
Armored Foes: The toughest foes are wearing more impressive armor, but aside from their gleaming metal, techniques for slaying them are the same as for those wearing less armor. You may wish to knock these foes off the feet and skewer them to avoid more protracted combat.
Archers: They usually back up, firing arrows (one every few seconds). Prevent this by stepping to them, after which they swap their ranged weapon (bow or crossbow) for a sword, and attack with that.
The Best Battle Tactics
Humans and Nonhumans carry a variety of weapons, and can wear various types of protection, from light peasant clothing to full sets of the heaviest armor.
Holding your block button is critical to your continued well-being; even if you’re surrounded, remaining in this defensive posture means you’ll block human-sized foes’ attacks (that aren’t two-handed or involve a shield) even if your back is to them. Also utilize blocking and dodging, stepping away from an incoming attack after blocking it, then stepping back with a light or strong strike afterward. Block after each Finisher you perform too, if there are more foes to face.
Your most common fighting technique is usually to start with light attacks after spotting an opening in your foe’s stance, after they strike, or after dodging or rolling to their flank. Such techniques form the basis of the Training section of this guide, and should be studied. You cannot parry the attacks of a human or nonhuman who uses two-handed weapons. Dodge or roll away from these attacks, and strike while they recover from their swings.
Against shield-bearing opponents, avoid taking sword swings at them unless you have flanked them, or they have committed to an attack of their own and are not prepared to block. Hammering at a blocked shield is a waste of time. Be wary of shield-bearers using their shields offensively. Shield bashes can stun you, leaving you extremely vulnerable to any follow-up attacks. If you see the wind-up for such an attack, evade or roll to safety. Do not try parrying or countering!
Do not attack recklessly. Counter melee strikes from one-handed weapon-carrying assailants to throw them off-balance, then score a heavy strike as they reel from the counter.
Humanoids wielding bows and crossbows are serious nuisances. Prioritize these foes if possible, running them down if necessary. If you cannot find or remove a ranged foe, use the terrain for cover while engaging other enemies. Or utilize protective abilities (such as Arrow Deflection) or Signs (such as Quen) to minimize or nullify arrow attacks. At higher Ranks, abilities such as Arrow Deflection can actually allow you to return perfectly-parried arrows back to the sender!
Combat abilities such as Whirl (Light attacks) and Rend (Strong attack) are extremely effective at culling multiple foes, though it is usually better to face them one at a time.
The use of Aard is encouraged: Blast foes off their feet, allowing you to skewer them when they are prone on the ground, or concentrate on other threats. Knock shield-bearers with Aard and quickly attack the opening. The use of Igni is recommended: Roasting multiple foes, or single entities with a focused Firestream allows you to burn through enemies effectively, even those carrying shields. The use of Axii is a good choice: Though it flummoxes a single foe at lower ability ranks, stopping an enemy and essentially confusing it into being temporarily defenseless is a great way to keep crowds under control, or focus on more dangerous threats. Remember at higher ranks, Axii can turn foes against each other, allowing you to watch bandit camps start attacking each other! Quen and Yrden are both excellent defensive choices, especially if abilities relevant to these Signs are used, such as Magic Trap (Yrden), which causes damage as well as slowing your foes. Exploding Shield (Quen) causes damage too, pushing foes back and sometimes knocking them down.
Terrain is often a factor in combat; attacking from above or below (for example, on stairs) doesn’t really make a difference, but using the terrain to your advantage (luring foes into cramped corridors so fewer of them can attack you) is always a good idea. Terrain should be constantly evaluated during combat, so you don’t get surrounded or trapped. Though having your back against the wall prevents foes from swarming you, are you competent enough to keep from being overwhelmed if you’re standing in front of an obstacle? Remember you can always flee (or “retreat”) and return to finish the job!
Crossbow bolts are a good idea to soften up foes (especially if you have associated abilities to strengthen this attack). Special bolts (such as explosive ones) are great, too. Bombs are excellent when facing multiple foes at the same time; lobbing a Northern Wind (for example) can freeze a host of enemies allowing you to concentrate on fewer foes at once. Otherwise, bombs are best when used to wound enemies before your blades and Signs finish them off.
Knocking down a foe is always preferred; even the toughest opponent can be skewered with a single execution once they are down on the ground; quickening your fights considerably!
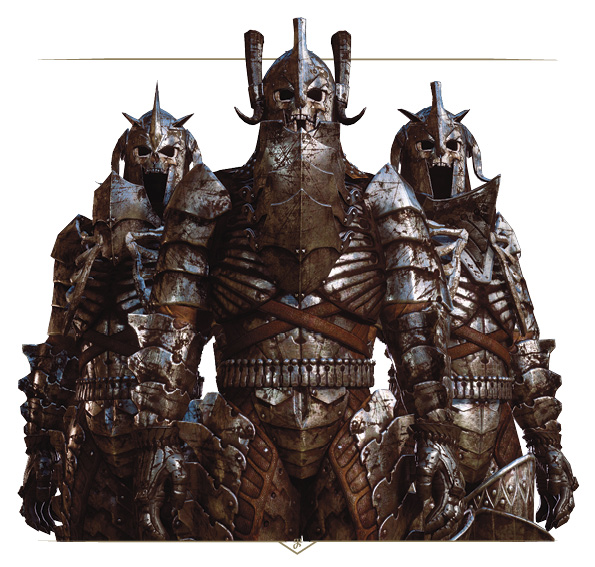
THE WILD HUNT
Danger Alert

Danger Alert (groups)

Frequency

The fundamentals of fighting other humanoids still applies to the Wild Hunt.
|
Loot: Weapons and Equipment |
|
Sub-Species or Named Variants: Wild Hunt Warriors |
|
Environments: The Wild Hunt can appear where they desire, thanks to their ability to manipulate space and time to their advantage. |
|
Specific Encounter:Main Quest: The Battle for Kaer Morhen |
Vulnerable Against

Enemy Attacks
Though the Wild Hunt Warriors are taller and wield more frightening weapons than a motley bandit, their attacks are very similar, and are countered or avoided in exactly the same way.
The Best Battle Tactics
Wild Hunt warriors wear heavy, intimidating sets of armor, are taller than almost all humanoid foes, and are very sturdy opponents in a melee. Many wield large two-handed weapons with great ferocity.
Remember that you’re utilizing a silver sword against these otherworldly elves, not a steel one! With this in mind, be sure you have a good supply of Elementa Oil; it is useful when damaging both the Warriors and the Hounds of the Wild Hunt.
Igni Signs improved with abilities (Melt Armor, Firestream, Igni Intensity) can greatly reduce the effectiveness of their armor. Do not underestimate the speed of a Wild Hunt warrior. They are just as quick to flank and strike as lesser-equipped humanoids. Aside from the differences listed previously, tackle Wild Hunt Warriors using the same tactics recommended for Humans and Nonhumans.