
The Witcher 3: Wild Hunt The Complete Edition Guide Secondary Quests The Warble Of A Smitten Knight (Blood and Wine)
Tour Of The Tourney Grounds

|
Locations: Tourney Grounds, Rosetree Hill (Unmarked), A Hidden Clearing (Unmarked) Characters: Guillaume de Launfal, Lady Vivienne, Baron Palmerin of Launfal, Llinos of Mettina, Rainfarn of Attre, Horm Akerspaark of Maecht, Donimir of Troy, Guy de Bois-Fresnes, Delwyn of Creigiau, Count Tailles of Dorndal, Prince Anseis of Lyria and Rivia, Sir Gregoire de Gorgon, Le Papillon Enemies: Tailles’ Bodyguards, Boars, Panthers, Barghests, Wight |
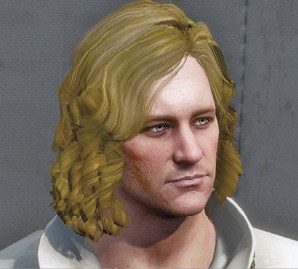
Seek out the well-meaning knight named Guillaume de Launfal at the medics tent on the eastern edge of the Tourney Grounds, near the arena walls and hill down to Corvo Bianco. Guillaume, if you remember, was challenging the giant named Goylat when you first arrived in Toussaint, and he was wounded during the Shaelmaar battle in the arena. Now he has a matter of prime urgency and import! Due to his arm, he’s unable to take part in the chivalrous tournament currently occurring, and wonders if you’d stand in for him.
Furthermore, he believes something foul has occurred to a certain maiden—nay, a lady—that he’s had his eye on; a spell or curse has befallen Vivienne, one of Duchess Henrietta’s ladies in waiting who is overseeing the tournament. Optionally jest you can guess her symptoms, before asking why she seems cursed. Guillaume explains Vivienne shuns the company of others, shrieked strangely when they were walking, and ventures into the woods where she seemed to melt into thin air. You have two optional conversation choices (noticing anything else unusual and mentioning the odd behavior might not be as strange as Guillaume remembers) before asking for more information about Vivienne. He tells you about her mother (also a lady-in-waiting) and her father (a knight). Little more is known.
Now for the tourney plan; optionally ask Guillaume more about it, before agreeing to help (and upping your fee if you wish). Now Guillaume wishes to see how well you shoot, ride, and fight; as the three tournament events showcase one or more of these talents. Tournament rules should be learned, and put into practice. At this point, you can choose what to practice (in any order you like, though the events are in the following order):
- “Target practice”: This begins Practice Makes Perfect Part #1 (below).
- “Horsemanship”: This begins Practice Makes Perfect Part #2 (below).
- “Let’s try sword fighting”: This starts Practice Makes Perfect Part #3 (below).
- “Don’t need any practice”: This skips the practicing sessions, which isn’t recommended, and starts the competition.
PRACTICE MAKES PERFECT #1
Objectives
|
It is a short walk to the shooting range, where Guillaume explains the simple premise; you must simply shoot the six red knights before the time ticks down to zero, and ignore any of the white and blue knight targets. Whether you complete the task or not, Guillaume asks afterward if you wish to practice again. You can practice as many times as you wish. Then you can opt to practice for the other two events, or temporarily halt the quest.
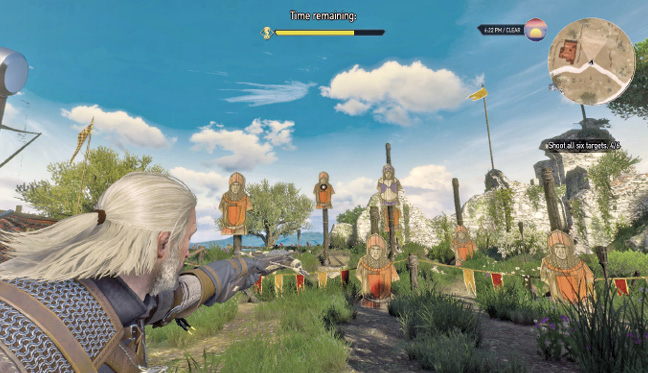
- Employ your regular bolts (so you don’t waste any special bolts), and use manual aiming.
- Work from left to right, or right to left, so you are making small aiming adjustments when moving from one target to the next.
- Tag each target in order (passing over targets to return to them later slows you down).
- A most proficient Witcher should be able to knock all six targets down with around three-quarters (around 22 seconds) left in the “Time Remaining” bar.
- You can increase this still further by bringing a better crossbow with you, and/or purchasing crossbow-related Abilities; read up on these in the Training section, starting on page 56.
- It’s worth perfecting this so you can easily win the Tournament Event itself.
PRACTICE MAKES PERFECT #2
Objectives
|
The second of the events is over by the racing track arena, and tests your horse riding skills, and ability to shoot and use your sword while on horseback. It is a lot more difficult than simply tagging wooden knights with a crossbow bolt! You must understand the three aspects of this event:
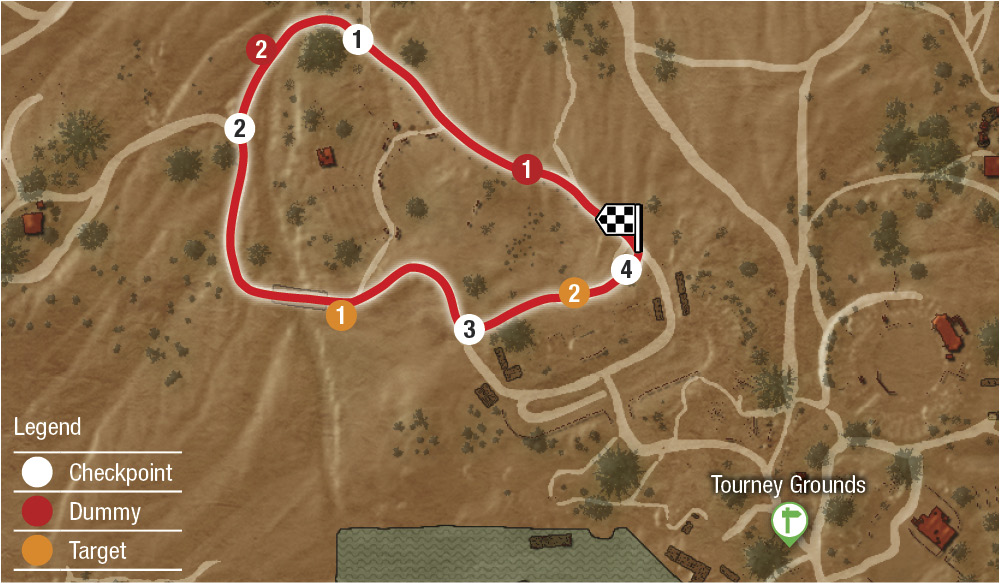
- You must ride as if attempting a horse race; although no others are racing with you at the same moment (either in practice or at the event); they attempt the same course, and each knight earns a point if they beat the clock.
- There are a number of dummies on the route; these can (but don’t have to be) cut with your blade.
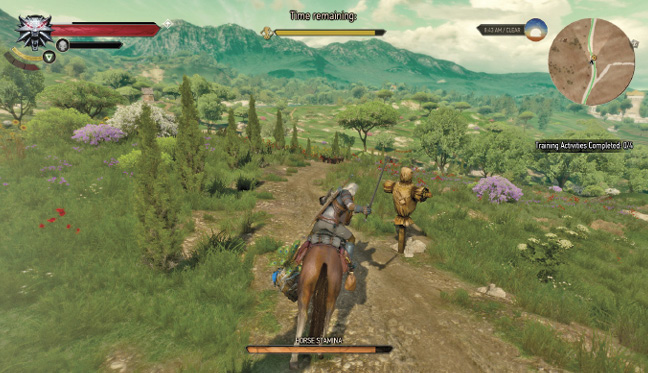
- There are a number of targets along the route; these can (but don’t have to be) shot using your crossbow.
- The reason to strike each dummy and target with your blade and bolt is that a successful hit increases the time you have left to complete the course, essentially giving you a better time.
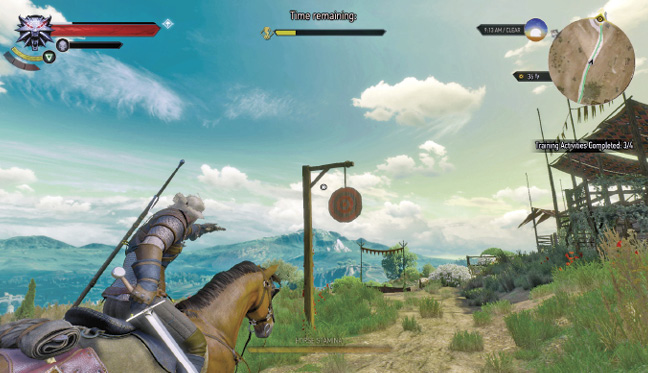
Whether you complete the task or not, Guillaume asks afterward if you wish to practice again. You can practice as many times as you wish (and it is well worth perfecting this). Then you can opt to practice for the other two events, or temporarily halt the quest.
- Track: Just like Races, you must gallop through each checkpoint, though you don’t need to be on the track between each checkpoint; so study the map to see any possible shortcuts you can take. Be careful, though. You lose the race if you move too far from the track.
- Track: Some checkpoints are around tight bends and easily missed. Fail to pass through one, and you must turn Roach around, and try again, which effectively takes you out of the running for winning this in the event itself. Treat checkpoints as more important than any other activity in this event.
- Track: Every time you approach a dummy or target, time slows down so you can more accurately strike them. Why not raise your sword when approaching an obstacle (like a checkpoint or bridge) so you can more accurately steer over or through it?
- Track: Obviously, a quicker horse means a quicker race! You should gallop as often as possible, easing off only when sharp corners, or obstacles you are in danger of missing, appear.
- Track: Augment Roach with quality saddles and blinders to help him maintain a higher top speed and stamina.
- Dummies: Hold down your sword-swinging button and release it around five feet before you reach the dummy, so you knock its head off at the correct time. This is relatively easy providing you look ahead and manually spot each dummy. Feel free to hold down the sword button earlier than normal.
- Targets: These are much more difficult to strike, as Roach continues in a straight line while you’re aiming, which can mean he veers off-course. So look for targets as early as possible. They are always on the right side of the route.
- Targets: You usually only have one chance to hit a target before you become too close to the target to aim properly, or before Roach veers into a ditch or off a bridge; it’s more important to keep your speed up and ignore a target than to keep aiming at one. If you haven’t struck a target with your second bolt, ignore it and keep going!
- Targets: When hitting a target, look for the timer bar to increase, and the target to rock back and forth slightly (and the objective to update); this is easier than manually peering to see if you struck the target successfully. There is also an indication on the screen that you just hit a target.
- Targets: It isn’t necessary to strike each target or dummy to win this event; so expect to miss around four or five (in total) and still have a chance to win, providing you pass through every checkpoint at a relatively quick speed.
- A proficient Witcher should be able to strike both dummies and hit both targets, then complete the course with around two-thirds left in the “Time remaining” bar.
PRACTICE MAKES PERFECT #3
Objectives
|
Move to the open area where a group of knights are practicing their parrying, and Guillaume introduces you to infantry combat. Each knight has a different method for attacking, and it’s up to you to defend yourself while looking for an opening. Expect to face well-armored foes armed with halberds, or a sword and shield (this depends on which knight you randomly face). Whether you win the fight or not, Guillaume asks afterward if you wish to practice again. You can practice as many times as you wish (subsequent knights have different types of weapons and possibly shields, so you are encouraged to repeat this). Then you can opt to practice for the other two events, or temporarily halt the quest.