
The Witcher 3: Wild Hunt The Complete Edition Guide Appendices and Compendiums Bestiary
Special Battles And Entities: Hearts Of Stone
Strange and ferocious foes you may only face one single time in your adventuring through Gustfields, as part of Hearts of Stone, involve placating a gigantic Toad, fending off an impressive magic user from far-off shores, dealing with a rapscallion named Olgierd, and demolishing the three forlorn (but ferocious) creatures born of torment within the walls of the von Everec Manor. These special encounters have specific tactics that differ from other combat opportunities you may face, and are placed in a separated section of this Bestiary.
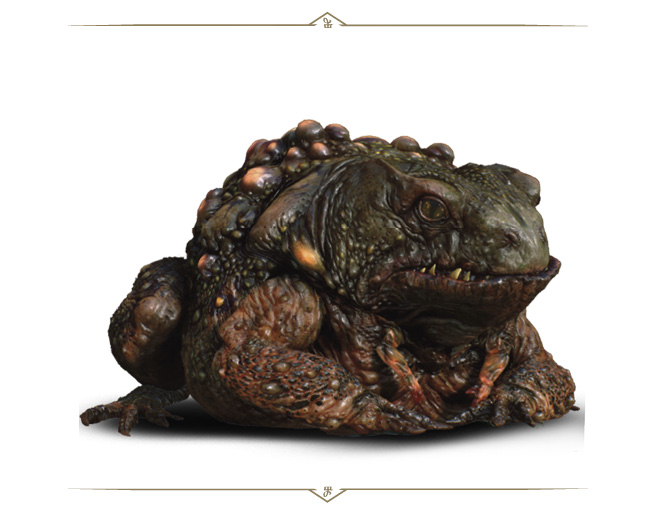
 THE TOAD PRINCE (CURSED ONE)

Danger Alert

Frequency

The legend of the frog prince has a grain of truth to it, or at least that’s what the folk of Oxenfurt wished to believe. However, the beast they encountered was no small, sweet frog, but a bloodthirsty beast.
|
Loot: None |
|
Sub-Species or Named Variants: The Toad Prince |
|
Environments: The sewers under Oxenfurt. |
|
Specific Encounter:During Main Quest: Evil’s Soft First Touches (see page 286). |
Vulnerable Against

Enemy Attacks
The Toad Prince has the following attacks and maneuvers to be aware of:
Jump: Expect a leaping maneuver whenever the Toad jumps to face you, jumps forward to change position, or leaps back when you’re too close. It likes to leap and land behind or to the side of you, forcing you to change view. Simply lock onto the beast when this happens so you don’t lose sight of it, and roll or dodge so you aren’t a sitting duck.
Jump and Squash: Closer in, the Toad Prince’s leap sometimes ends with it trying to land on top of you, staggering you. Make sure you rapidly react with a well-timed roll or dodge.
Vomit: This disgusting projectile is usually vomited out at closer ranges, obscures your vision like a Water Hag’s attack, hits in a wide arc, and is poisonous. It is also easily dodged.
Spit: Another revolting offensive technique, the Toad launches a blob of spit at you, inflicting poison damage if it connects, and turning into a poison cloud at the point of impact if it doesn’t. Dodge it!
Tongue Lash: When you’re at long-range, expect a darting lash straight at you. At mid-range, the lash is at a wider, horizontal angle. A roll or block, or retreat when you see the monster’s maw open helps minimize damage. A riskier plan is to roll directly at the Toad, slicing at it (usually at the side) while the tongue attack finishes.
Gaseous Emissions: Poison sacs on the Toad’s back throw up large poison globules that explode and cause a small puddle and poison cloud to appear when they impact (which are three random points in the arena). Avoid the puddle and cloud; backing up is a good plan here. Then light the gas clouds with Igni (assuming you’re not inside them!).
General Toad Tactics: As soon as the battle begins, the Toad utilizes ranged attacks to dominate the arena. Get in close, and the Toad jumps, landing and attempting to strike you to inflict tremendous damage and knocking you down. Stay too far away and remain defensive, and expect poison clouds (both via spit and gas attacks). The Toad’s large health and powerful attacks means you need to keep moving, and looking for an opening to inflict as much damage as possible.
The Best Battle Tactics
As the battle begins, cast Quen to add an extra layer of protection (following up with sword strikes). Even
better is the Golden Oriole potion, which nullifies the Toad’s poisonous attacks and allows you to heal yourself using the Toad’s previously deadly gas clouds!
Keep yourself moving at all times, ideally circling left or right of the Toad and moving toward it; this usually allows you to more easily evade any of the Toad’s attacks, or at least have a greater chance to react to them.
Cast Yrden at mid-range and retreat so the Toad follows you, enters your magic circle, and slows down considerably. Coat your sword in Cursed Oil, then make up to three strong strikes before retreating. Without Yrden, dodge or roll to the side (as you would attack a Bear), inflict two regular slashes and retreat.
Despite Shani mentioning the Toad’s lack of fearing fire, this foe can be damaged with Igni, though this isn’t as significantly damaging, and is mainly used to clear any poison clouds in your vicinity. At long range, lob in as many Northern Wind bombs as you have to weaken this foe. Throwing Superior Dancing Star from the chamber’s edge is another option, to stun the Toad before following up with sword violence.
Never stay in the same spot for long: the Toad’s spit attacks leave poison clouds on the ground and his various other ranged attacks can damage you no matter where you try to hide. Approach the Toad and provoke it to jump up and slam down until it is facing you (dodge in close then dodge away as soon as the Toad jumps up; this keeps you out of its attack range but keeps you close enough to start attacking as soon as its safe). When close enough, cast Yrden on the ground to trap the Toad, then attack it with your sword; the Toad becomes untrapped after three hits or five seconds. Northern wind bombs will also freeze and trap the Toad preventing it from attacking, allowing you to get close and attack. The Golden Oriole potion causes the Toad’s poison to heal you instead of damaging you; using this potion during the fight as you’re almost guaranteed to be able to walk into a poison cloud. Using Igni forces the Toad to jump away, useful to interrupt the Toad’s maneuvers and force it to jump to a new location within the arena.
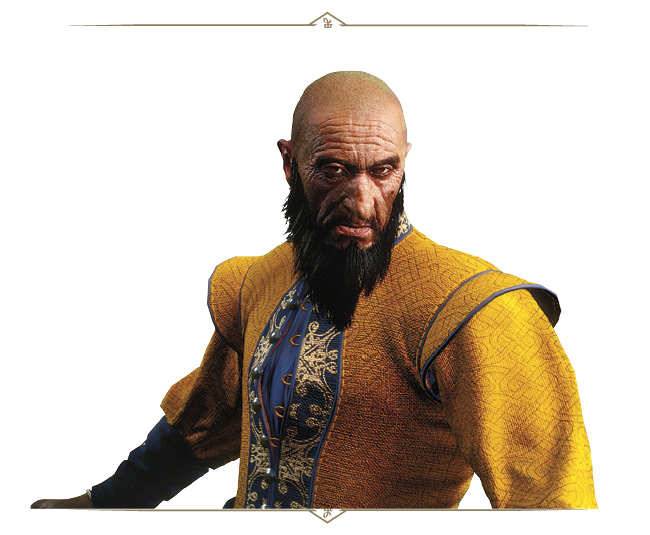
OFIERI MAGE (HUMAN)
Danger Alert

Frequency

Crawling from the wreckage of the Phakbarthojl (or “Albatross” in the common tongue), torn apart by a mighty storm on the beaches northwest of Novigrad, an impressively-skilled Ofieri Mage must be faced.
|
Loot: None |
|
Sub-Species or Named Variants: Ofieri Mage |
|
Environments: Close to the ship wreckage, on the beach just east of Crane Cape. |
|
Specific Encounter:During Main Quest: Evil’s Soft First Touches (see page 286). |
Vulnerable Against

Enemy Attacks
The Ofieri Mage is quick to strike with a variety of impressive spells and moves:
Sand Cage: A number of small clouds of sand appear around you, before quickly closing in to damage and knock you down. Simply roll or dodge out of this maelstrom (the Mage’s most damaging attack), and close the distance. The Mage doesn’t tend to attempt this when he’s facing you in melee combat. If you’re fighting warriors too, back away from the Mage completely and coax the warriors into fighting first.
Sand Tornado (Long Range): A fast-moving whirl of sand whips towards you in a straight line. This gust causes damage and slows you considerably, but is only cast directly ahead of the Mage, the tornado is signaled by the Mage whirling his staff around him, and he remains within the tornado itself. As the tornado is relatively slow-moving, multiple dodge or rolls can quickly avoid this.
Sand Tornado (Close Range): At closer range, he casts a similar attack, which doesn’t cause as much damage, but staggers you; this is his way of exiting close combat after you strike him repeatedly. So don’t be greedy when tackling him; roll in with a couple of strikes and then back up so you aren’t struck by this and staggered.
Sand Coil Attack: The Mage points his staff in your direction and starts to spin it in a circle; sands shoots out of the staff (like a sideways tornado), causing damage and temporarily stunning you. Dodge to the side!
Staff Attack: At close combat range, the Mage uses his magic staff as a physical weapon (striking multiple times); simply parry and counter or dodge the attack as you would any other.
A Vanishing Act (Defensive): Expect him to disengage or avoid combat by simply vanishing, only to appear a few moments later with a whipping sand gust around him that damages those nearby. He can also dispel Yrden, reflect most bombs and bolts back at you, and tends not to burn or freeze for nearly as long as a normal human. Simply re-acquire the target once he vanishes (by locking onto the foe again) and roll out of his way until his attack concludes.
A Vanishing Act (Offensive): The Mage randomly teleports close to you, while simultaneously causing a large sand blast that damages and staggers you.
Weaknesses: Sword Damage: The Mage is very susceptible to sword strikes. If you manage to get in close (after stunning the Mage), it is possible to hit him
three times before he counters. This is the foundation of your attack plan.
The Best Battle Tactics
Begin by equipping the armor you’re carrying, as it’s not wise to fight the Ofieri bare-chested (despite what many a Skelliger might tell you).
Back up away from the Mage and save him for last. Then battle the warriors in the same way you would tackle a group of bandits or other human soldiers. All the usual tactics apply here.
Be advised that as long as more than one soldier is alive, the Mage only uses his teleports to stay away from you and any solders in the vicinity. When one soldier is left, the Mage begins using some ranged attacks. When only the Mage remains (or you’re more than 30 meters away from him), expect him to utilize all his attacks. Expect him to teleport when you get too close. He also always counters if struck three times, using a force blast that knocks you down. So don’t get greedy while hitting him; instead, try a well-timed roll to get behind the Mage without being hit by the counter.
The Ofieri Mage is extremely dangerous at long range, and attacks from this distance that you might attempt are almost always dodged or reflected back at you. So close the distance as quickly as possible, using dodging and rolls to avoid any magical attacks along the way.
Once you’re within sword-clipping distance, use Aard or Axii to stagger the Mage, and quickly follow up with two or three fast strikes. Then roll or dodge away, avoiding any sand he whips up.
Continue with this “attrition” based tactic; staggering him with Aard (or Igni, which is another option) and rolling in to inflict two or three nasty sword strikes without being too greedy, before retreating back again, until the Mage yields.
Other Advice: After re-equipping your missing armor pieces, focus on the solders first. Dodge any area-of-effect attacks from the Mage, and once he’s the only enemy left, quickly use Axii to stun him for long enough to reach him and inflict sword damage. Igni and Aard can also keep the Mage occupied, allowing you to reach him.

OLGIERD VON EVEREC (HUMAN)
Danger Alert

Frequency

From their very first encounter, Geralt knew Olgierd was a unique character. He led an informal band who worshipped the ground he walked on. Yet Geralt also perceived something indefinable within the man, a “void crying out to be filled.”
|
Loot: Crowns, Von Everec’s Blood |
|
Sub-Species or Named Variants: Olgierd von Everec |
|
Environments: In front of the Garin Estate (Gustfields). |
|
Specific Encounter:During Main Quest: Evil’s Soft First Touches (see page 286). |
Vulnerable Against

Enemy Attacks
Should you challenge Olgierd to a duel in front of his lackeys, be ready to perform more than adequately. He certainly has a full complement of maneuvers:
Advanced Swordplay: Olgierd is most adept at flurries of swordplay. He has incredible speed and power. Not only does he use quick combo attacks, but he can take on a shadow form and quickly dash towards you, launching powerful special attacks. Dashes and combo attacks end with special attacks that knock you down and inflict serious damage.
Using his Noggin: If you try to cast Signs on him, Olgierd dashes away. He’s also immune to mind-control spells (so no Axii for you!).
Poison Cloud: If you strike him with swords, or after hitting him thrice when he is stunned, Olgierd points his sword at you, and a mass of black poison clouds his form. Remove yourself from the vicinity and employ poison-reducing potions. He has a brief rest period after this, which you can exploit with sword strikes, though this isn’t always an option (as he may be too far to reach).
Zig-Zag Charge: A series of dashes with Olgierd’s sword glowing red and his form in shadow usually ends in you being struck and knocked back or over. Dodge or roll to avoid this. With skill, try parrying the end of the technique and fight back with sword strikes.
Straight-Line Charge: An almost-instant dash forward and a mighty swipe; this looks like an impressively devastating technique, but if you time a parry, you can counter and fight back; usually using this plan to win the fight.
The Best Battle Tactics
Expect Olgierd to immediately launch a relentless series of attacks. The type depends on your location: if you’re very close, he uses sword combo strikes ending with a very powerful attack. If you’re further away, expect various dashing attacks so he can get in close and whittle you down.
Olgierd’s special attacks stand out thanks to the red energy surrounding them (and his sabre), as well as a brief period of slow motion right before the attack. Let’s hope you can react in time!
Are you a master of countering? Then you can complete this fight without ever being hit!
As you might not be expecting this fight, it’s worth meditating first, and coating your weapon in Hanged Man’s Venom. Next, cast Quen so you’re protected from his impressively-damaging sword swings. Certain decoctions (the Leshen, for example) that reflect damage are also helpful.
The dashing and swordplay Olgierd employs is as impressive as it is dangerous, so fancy footwork is always a good option; dodge (or roll) around him and make a trio of sword swings just after he finishes a technique (ideally followed by a dodge to the side). Yrden is also an option after his strikes, too, to slow him down.
If other techniques aren’t working, feel free to back away from Olgierd, until he’s prompted to try a straight-line charge at you with his red sword a-glowing; the weakness after the charge is key to winning this fight:
Waltzing in and slashing isn’t wise. Though you can parry during his sword flurries (when he’s in shadow), you’re usually not able to parry them all. Instead, wait until Olgierd makes his charge attack, and then parry it. Follow up with some damaging strikes. Repeat this process to wear him down and eventually he loses his head.
When the fight starts, roll away from Olgierd, forcing him to be on the offensive, thus leaving him open to your counter attacks. If you keep your distance, he always tries dashing, and these maneuvers have a large window of opportunity for countering right before Olgierd tries his special attack (easily seen by the red glow). Attack when his sabre glows red, and time slows, Tap the parry button and counter: the energy from the blade is reflected back on Olgierd, stunning him. Then follow up with three sword attacks before Olgierd counters. As he starts to counter, roll backward and right so you’re not hit. Then repeat this plan.
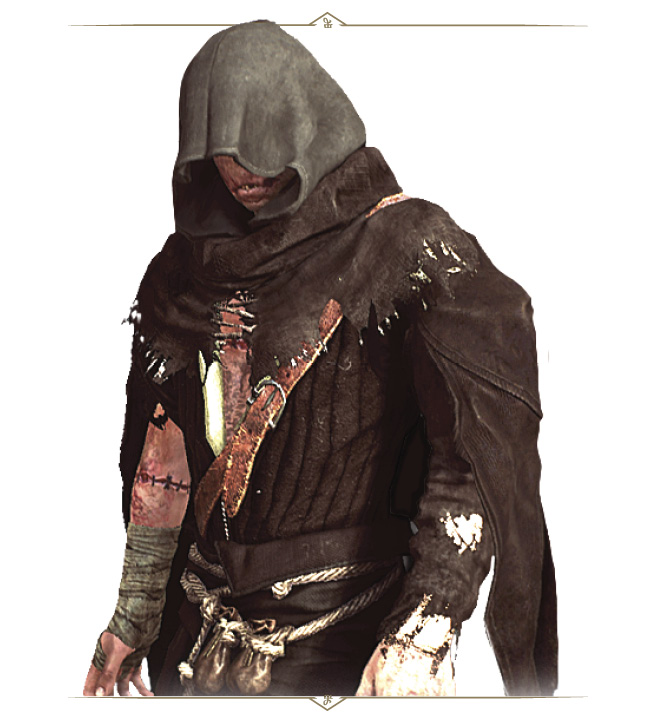
THE CARETAKER (RELICT)
Danger Alert

Frequency

Summoned from another realm, making “demon” its most accurate designation, the Caretaker had been forced into servitude by magic, performing its tasks pedantically, and murdering all intruders.
|
Loot: The Caretaker’s Spade |
|
Sub-Species or Named Variants: The Caretaker |
|
Environments: In the grounds of the Von Everec Estate. |
|
Specific Encounter:During Main Quest: Scenes from a Marriage (see page 302). |
Vulnerable Against

Enemy Attacks
The Caretaker has the following attacks and maneuvers to be aware of:
Regeneration Strikes: Whenever he strikes you with his spade successfully, he can regenerate a small amount of health. Simply avoid being struck to avoid this, (and for the usual reasons).
Summoning Ghosts: After around three or more attacks, or when he suffers substantial damage, he can invoke ghosts that shuffle towards him, allowing themselves to be destroyed and absorbed by the Caretaker, and in turn regenerating his health considerably. Stop this quickly by special positioning (see “Coaxing the Caretaker”, below), or by reaching the ghosts first and simply striking them with a single hit to dismiss them. As more ghosts are summoned (continuously for around 30 seconds), continue to look for ghosts (especially on your map) and race to prevent the Caretaker reaching them as quickly as possible while dismissing each with your sword.
Combination Attack (Spade): This is a powerful series of spade attacks the Caretaker can string together to form a devastating combo. If you’re caught in this, you can be killed easily. Do not try to attempt to parry or block; step out and away from this attack.
Special Attacks (General): These cause a large amount of damage and cover a large area around
and in front of him. They are as follows:
Special Attack: Shovel Slam: The Caretaker raises his spade above his head and then slams it down into the ground, causing a wide, cone-shaped area to be bathed in attack energy; this causes massive damage to you, and knocks you down. Look for the Caretaker to raise his spade, and back away from the area. As the shovel becomes temporarily stuck in the ground after the energy dissipates, venture in to attack afterward. Then leap away as soon as you see more energy starting to appear around him.
Special Attack: Charging Shovel: The Caretaker barges forward with his spade outstretched, racing forward around eight meters and causing massive damage and a knockdown if he strikes you during this time. Afterward, there is a brief recovery time, during which you can strike back. Simply step to the side, or roll into or around the attack so the Caretaker runs past you. Then target and attack the foe during his recovery.
Impressive Immunity: The Caretaker is immune to most Sign, Bomb, and crossbow bolt effects. He also immediately destroys any Yrden traps you place making them especially ineffective.
The Best Battle Tactics
The Caretaker makes a slow but constant approach towards you, attempting his combo attack when close. These usually end with a Shovel Slam, in an attempt to knock you over.
When you manage to reduce the Caretaker’s health to the first of its three segments, and again when two-thirds of his health is lost, the Caretaker breaks away from the fight and summons ghosts from their graves within the garden. He slays and absorbs the ghosts’ energy, and this can easily bolster his health back up to maximum. These invoking phases last 30 seconds, so it is imperative you clear the ghosts away from the Caretaker to avoid prolonged combat. Afterwards, the Caretaker begins attacking again. At two-thirds health, the Caretaker summons ghosts, then starts to employ the Charging Shovel attack exclusively. At one-thirds health, the Caretaker summons ghosts for a second time, then uses both the Shovel Slam and Charging Shovel attacks.
As the ghosts are summoned within the low stone walled section of the back garden, if you back away from the Caretaker during the combat phase, forcing the Caretaker to follow you up the steps and to the pathway where you met the Black Cat (or where the thief’s body is at the opposite end of the garden), you can quickly leave the Caretaker when he starts to summon ghosts, race into the garden, and mow down ghosts quickly before the Caretaker can reach them; at least until he follows you back into the garden. Area-of-effect attacks, like Igni, are particularly helpful in ridding an area of multiple ghosts. Then concentrate on any ghosts within the Caretaker’s path, preventing more health being sucked up by this foe. Don’t engage the Caretaker during this time; focus on the ghosts.
As the fight begins, approach but do not engage the Caretaker; stay directly outside the range of his combination attack. Then watch for the start of the Shovel Slam; as energy arcs out of his weapon, you can easily spot this; at this point, roll behind the Caretaker, and as the Caretaker tries to remove the shovel from the ground, batter him with sword attacks coated in Relict Oil.
Once the Caretaker performs his Charging Shovel attack, a simple sidestep, followed by sword attacks during his recovery time, is the key to success. Then repeat the previous tactics mentioned until the conclusion of this battle.
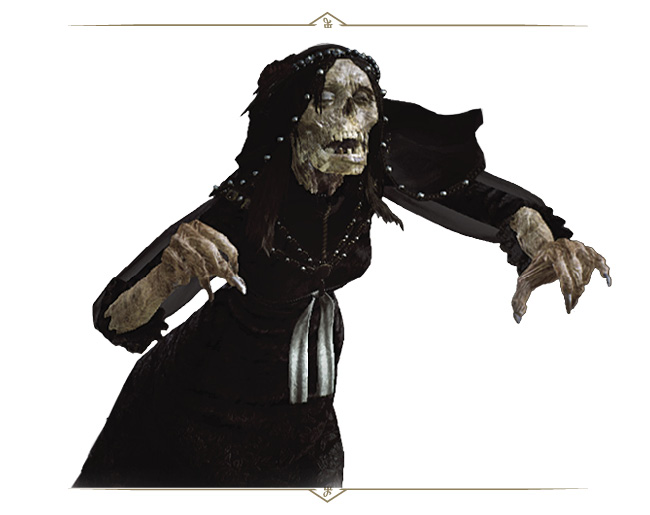
THE WRAITH FROM THE PAINTING (SPECTER)
Danger Alert

Frequency

This restless spirit had mastery over the house’s furnishings, moving freely between the canvases of the many paintings adorning the walls of the Von Everec manor: a strong emotional tie from which the Wraith drew strength.
|
Loot: None |
|
Sub-Species or Named Variants: The Wraith From the Painting |
|
Environments: Inside the Von Everec Estate manor house. |
|
Specific Encounter:During Main Quest: Scenes From a Marriage (see page 302). |
Vulnerable Against

Enemy Attacks
This Wraith attacks in a similar manner to any other floating specter you may have encountered before. before, though it has a few characteristics that make it more problematic than other lost souls:
Relentless and Immunities: It is relentless, fast, and aggressive. It is also immune to Signs that cause damage and special effects from Bombs and crossbow bolts.
Close Attack Clawing: A barrage of close-range clawing attacks can keep you stunned due to being constantly struck. It can also pass through you during this attack, usually used as a counter if you attempt to defend.
Painting Regeneration: Any lost health is regenerated as the Wraith flies higher into the air (to escape your attacks), and opens a portal into one of the paintings found in the long gallery. Attacks resume after the portal opens, until it floats and enters the painting portal. If it enters, she disappears for a few moments, then returns via a different painting portal, regenerated with health.
The Best Battle Tactics
Quen, not Yrden: Unlike the Wraiths you may have faced before, Yrden isn’t a recommended tactic to use. Come to this fight with a boosted Quen augmented by Abilities and utilize these defenses (such as Active Quen) frequently. In this situation, Quen isn’t a passive defense, but is instead the key to victory: you’re absorbing this Wraith’s damage rather than attempting to prevent it. For this reason, it’s also worthwhile to carry a supply of Tawny Owl potions to boost the stamina regeneration you need to cast Signs.
Now Quen is allowing you to fight back more frequently, you’ll damage the Wraith (especially if your sword is coated with Specter Oil), causing her to float up and open one of the painting portals. As soon as this occurs, look for the beginnings of the (green) portal and focus every attack on the location of the painting portal. You can use sword attacks, or bombs, crossbow bolts, or offensive signs (Igni for example offers a quick closing of the portal).
Without a portal to enter, the Wraith starts to attack you again, but without the boost in health she craves. Use Quen, counter and wound her again, and prevent any subsequent portals from opening. Continue this tactic until the Wraith is slain.
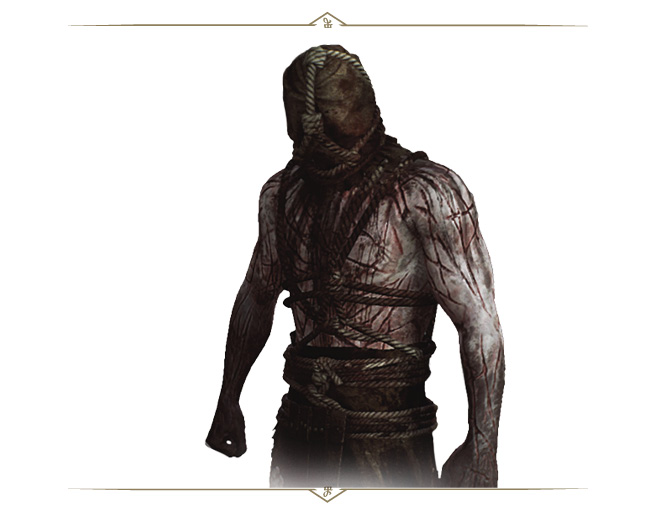
ETHEREAL (IRIS’ GREATEST FEAR) (SPECTER)
Danger Alert

Frequency

The painted world of Iris von Everec was home to dangerous, predatory creatures; the embodiments of her fears. The most dangerous of these, the Ethereal, invoked her greater fear—and wore the face of h er husband.
|
Loot: None |
|
Sub-Species or Named Variants: Ethereal |
|
Environments: Inside the Von Everec Estate. |
|
Specific Encounter:During Main Quest: Scenes from a Marriage (see page 302). |
Vulnerable Against

Six Olgierds to Fight: Enemy Attacks
This nightmarish form of Olgierd is split into six separate beings. They have all the strengths, weaknesses, and attacks as Olgierd, so you should read up on how to defeat Olgierd when you were presented with this option at the end of Main Quest: Evil’s Soft First Touches (page 286), or access similar information earlier in this Bestiary. The same tactics apply here.
Remember there is an Achievement/Trophy which is only unlocked if you coax all six separate beings into attacking you at the same time!
Strengths: Essentially clones of Olgierd, these demons are as fast and relentless as he is. Initially motionless, they wake when you attack to each one, so if all the enemies are awoken at the same time they will all attack together. The main difference is that these enemies gain Olgierd’s skills as they die (in other words at the beginning of the fight the enemies only have basic sword attacks, when one dies the remaining foes all gain another of Olgierd’s skills like a shadow dash. Then, as each additional enemy is killed, the rest gain another skill until the last one left has every skill that Olgierd had when you had the option to fight him at the Garin Estate).
Weaknesses: These are the same as Olgierd’s original shortfalls: you can counter and stun the enemies when they are attempting a special attack. The first three clones have so few skills, they are reasonably easy to defeat.
The Best Battle Tactics
As all their attacks are the same as Olgierd’s, you should have some familiarity coming into this fight. When battle commences, there are six opponents, but only one is active. Killing that enemy causes another to wake up and attack, and this process repeats until the last wakes and is beaten. However, any idling foe can be awoken at any time if you accidentally attack them. Need more of a challenge? Then wake everyone up and slay them all at once!
One at a Time: The easier plan is to keep away from the idling foes, moving to the far end of the arena, and slay each form of Olgierd one at a time, using tried and trusted tactics from the first time you faced him.
All at Once: Throw caution to the wind and slay all six foes in a crowd by preparing yourself accordingly. You require maximum damage inflicted in the shortest amount of time. Use damage-enhancing potions and decoctions, and use the Whirl Combat skill to great effect here.
Since these enemies only gain skills as they die, when they are all woken up, they are all relatively weak. Use this to your advantage by corralling them in one place and unleash as much damage as quickly as possible. A solid whirl attack can take up to four of them out at once. Once fewer of these enemies are in the arena, treat them as single foes and employ original Olgierd-slaying tactics.