
The Witcher 3: Wild Hunt The Complete Edition Guide Training
Mapping And Points Of Interest
As you explore the world, locations are revealed and marked on your map. As you pass by, your mini-map identifies the locations of herbs as you pass them. Enemy positions (picture 1) are also marked (including the positions where they fell—an “x” mark—to allow for finding and looting the corpses), as well as stairwells and important cave entrances, merchant locations, and quest objective waypoints (picture 2).
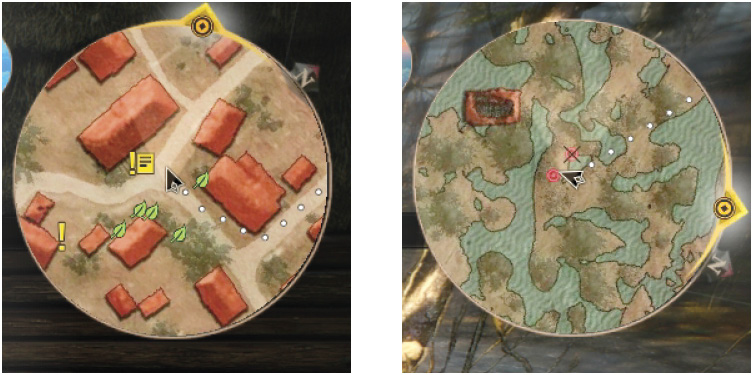
Discovering A Point Of Interest
Points of Interest cover a wide variety of locations (and types of locations) in the world, including special events, battles, or hidden treasures that can help increase Geralt’s strength, line his coffers with crowns to use to better equip himself, or contain diagrams and formulae for better armor, weapons, potions, or sword oils. Most Points of Interest appear on the World Map as a large “?” question mark after Geralt overhears interesting information from townsfolk, or reads about a location on a Notice Board, flyer posted to a wall, or obtains special maps from a vendor (when adventuring across the isles of Skellige). It is then up to you to decide whether or not to travel to those locations and discover what’s there. It’s also possible to stumble upon a Point of Interest with no prior knowledge of its existence.
Exploring Points of Interest can not only fatten Geralt’s coin purse and inventory, but he also gains experience once a POI is explored and any problems at the location are solved, and/or treasure is looted. It’s in your best interest to take the time and explore the world, and visit all these Points of Interest.
Points Of Interest: Types (World Map)
This section details all the different Points of Interest you can discover on your travels. These all appear on your World Map, and can be toggled “on” or “off.” Most important are Signposts, after which all other POIs are presented in alphabetical order. They are also tracked throughout the Atlas section of this guide. Interactive versions appear on the free digital guide Atlas maps that accompany this tome.
 Signpost

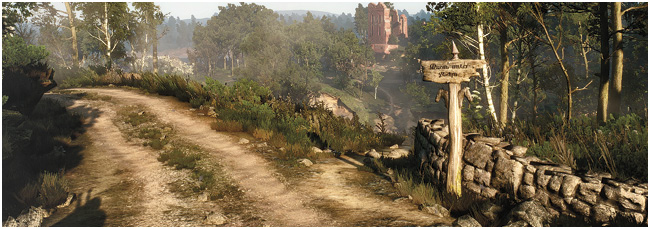
Important locations across the Northern Realms are usually marked by signposts, both on your maps and by a physical signpost placed somewhere in that location. These signposts act as a Fast Travel network that you can use to more swiftly move from one location to another. This can significantly cut down on travel times, particularly during quests that span entire regions. However, you can only fast-travel to signposts you have already discovered (either by visiting them already, or by reading a map you’ve bought or found). Think of Signposts as anchor points across the Northern Realms; explore around each of them to discover other Points of Interest, and then find more signposts so you can perfect your fast-travel network.
 Abandoned Site

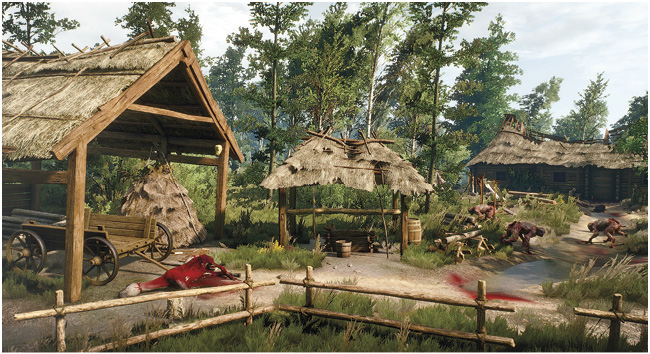
Also known as “Abandoned Settlements,” these are locations where the usual peasantry are nowhere to be seen. Shrines left abandoned after monsters took interest; logging mills overrun by bandits; villages plundered by soldiers—all of these are examples of settlements or landmarks that have been left to rot in the hands (or claws) of those who usurped them from the innocent. If you can clear these locations of all danger, the people will return, rewarding you for your efforts. Reclaiming (also known as “liberating”) abandoned sites can open up new merchants, blacksmiths, or armorers to purchase goods and services from. Additionally, each reclaimed settlement awards an experience point bonus, as well as a fistful of crowns. For a definite enemy fight, followed by a possible vendor appearance and money reward, seek these settlements out.
 Alchemists and Alchemy Supplies

Usual Items for Sale (Type): Upgrades, Junk, Crafting Components, Alchemy Formulae, Alchemy Ingredients
Crafting Opportunities: Alchemy Substances (Mutagens), Alcohol, Bombs, Oils, Potions
This location, usually a building within a hamlet or village, has a supplier of alchemy ingredients for you to use in your crafting. As the current political situation has forced many of these vendors to flee or ply their trade underground, don’t expect a large number of these merchant types. This trader almost certainly is a Gwent player too. For a complete list of Alchemists, and the type of wares they sell, consult the Merchants Appendix.
 Armorer

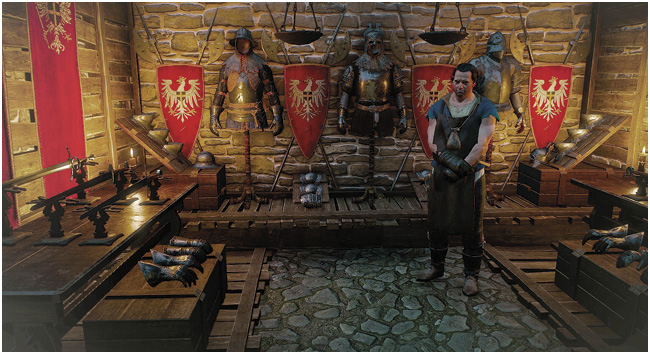
Usual Items for Sale (Type): Armor, Weapons, Upgrades, Crafting Components, Crafting Diagrams, Alchemy Ingredients
Crafting Opportunities: Chest Armor, Crafting Components, Junk
Repair Opportunities: Weapons and Armor
Remove Upgrade and Dismantle Opportunities: Available
Here, you can craft armor, repair damaged equipment (armor and weapons), dismantle equipment for parts, or remove upgrades from sockets. Be certain you know the experience of any Armorer you wish to utilize the talents of: Amateur, Journeyman, Master, and Grandmaster Armorers craft increasingly better quality equipment. Their skill elvel also increases the number of components they are able to recycle when disassembling items. This trader almost certainly is a Gwent player too. For a complete list of Armorers, and the type of wares they sell, consult the Merchants Appendix.
 Armorer’s Table

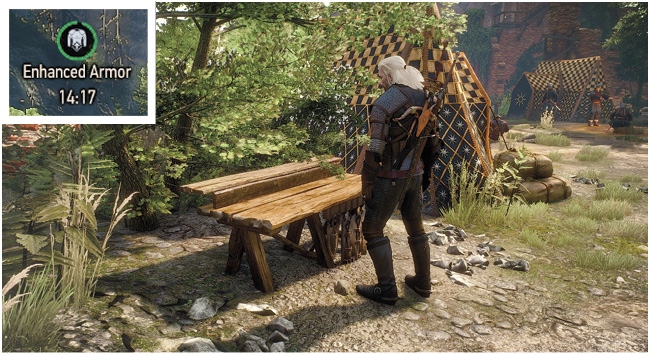
Also known as “Workbenches,” Armorer’s tables are usually found near Grindstones, and both are situated close to a Blacksmith or Armorer within a settlement. Simply walk up to a table, and use it to grant your gear increased Armor for a limited duration. This is where to go to get a boost before a tough fight.
 Bandit Camp

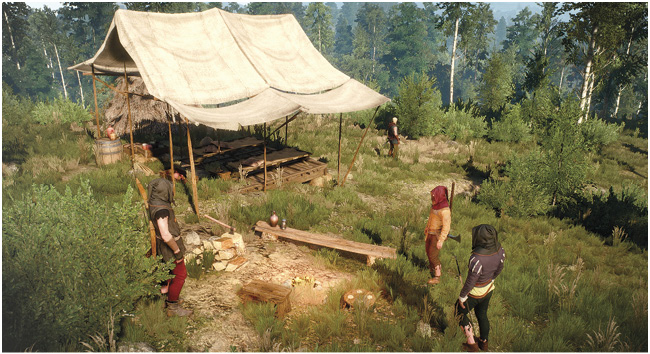
As the war between Redania and Nilfgaard drives on, deserters or common thugs have seen an increase in numbers, forming roaming gangs that attack travelers, usually on the roads between villages. Some of these gangs are organized enough to have set up camps to rest, recuperate, and divide the loot of the day. Entering these camps unprepared can be a fatal mistake, even for a Witcher, as you must face off with large numbers of bandits who wish to keep their camp a secret for as long as possible. Of course, dead men tell no tales! You are encouraged to remove this threat, as the spoils that can be gained from killing all the bandits and looting the camp are potentially quite lucrative, and can occasionally lead to the discovery of a quest.
 Barber

Visit a barber for a shave (usually costing five crowns) or a new haircut (usually costing 10 crowns). Look for the large scissors both on your World Map, but also hanging as a sign above a Barbershop door. Unlike most traders, Barbers don’t concern themselves with Gwent playing.
 Blacksmith

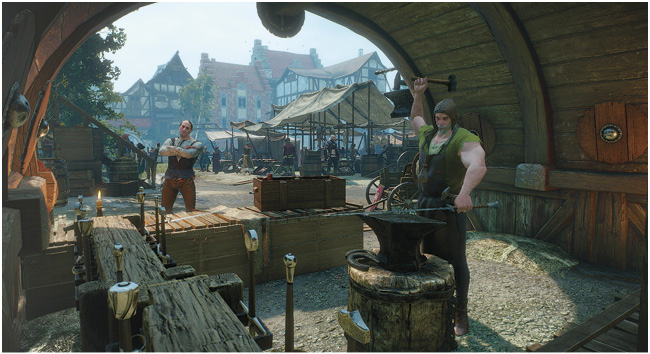
Usual Items for Sale (Type): Weapons, Crossbows, Upgrades, Junk, Crafting Components, Crafting Diagrams, Alchemy Formulae, Alchemy Ingredients
Crafting Opportunities: Chest Armor, Crafting Components, Junk
Repair Opportunities: Weapons and Armor
Remove Upgrade and Dismantle Opportunities: Available
Here, you can craft weapons, repair damaged equipment (armor and weapons), dismantle equipment for parts, or remove upgrades from sockets. Be certain you know the experience of any Blacksmith you wish to utilize the talents of: Amateur, Journeyman, and Master, and Grandmaster Blacksmith craft better quality equipment. Their skill elvel also increases the number of components they are able to recycle when disassembling items. This trader almost certainly is a Gwent player too. For a complete list of Blacksmiths, and the type of wares they sell, consult the Merchants Appendix.

 Harbors and Boats


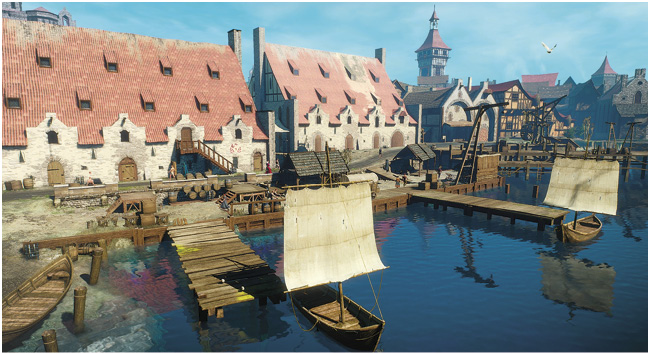
Whenever you wish to find a boat to use on a trip across water, locate the Boat icon on the World Map; a sailing vessel is always at the indicated location.
 Brothel

Usual Items for Sale (Type): Prostitutes
Should the mood take you, and you wish to spend a night of naughtiness among the brothels of Novigrad City, visit the madame indicated with this symbol. You can choose the lady you visit to enjoy relations with beforehand. This trader almost certainly is a Gwent player too. For a complete list of Brothels, consult the Merchants Appendix. For a complete list of ladies to invite to a bed chamber, consult the Carnal Knowledge Appendix.

 Dungeon


This signifies an interior or underground area, either a location that is primarily man-made (signified in the guide with a Temple icon) or naturally-occurring (signified in the guide with a Cave icon). Dungeons have their own cartography appearing on your mini-map, and are sometimes labyrinthine in nature. If you come across a Dungeon on your travels, be sure to consult the Atlas so you know how deep and intricate the area is. Some Dungeons are part of Signposted areas, while others have their own unique names.
 Grindstone

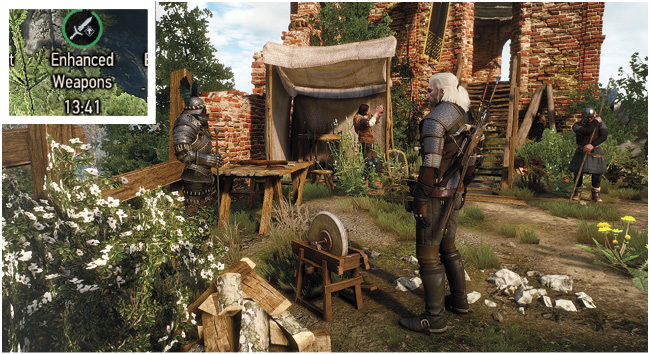
Also known as “Sharpening Stones”, Grindstones are usually found near to Armorer’s Tables, and both are situated close to a Blacksmith or Armorer, within a settlement. Simply walk up to a Grindstone, and use it to grant your weapons an increase in its sharpness (allowing for more damage to be dealt for a short while). This is where to go to get a boost before a tough fight.
 Guarded Treasure

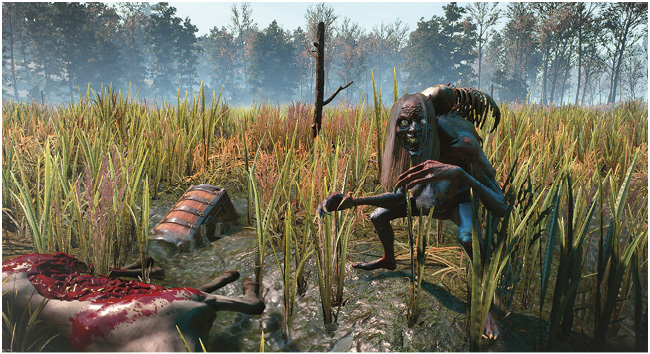
Sometimes shipments of goods or treasures are lost between villages. The reasons for this are numerous, but bandits or monsters have become the distressingly common cause. You may hear about such loot as you pass through the villages of the Northern Realms, and may even feel inclined to investigate this personally. The bandits or monsters can be found surrounding the item of interest (usually a chest or corpse with treasure of reasonable value); and it stands to reason that they must be forcibly removed before you can claim the goods for yourself.
 Herbalist

Usual Items for Sale (Type): Upgrades, Junk, Crafting Components, Alchemy Formulae, Alchemy Ingredients
Crafting Opportunities: Alchemy Substances (Mutagens), Alcohol, Bombs, Oils, Potions
A high proportion of Herbalists are halflings, and may have gardens surrounding their place of operations where further ingredients can be harvested. Such Herbalists are vital for their knowledge of formulae, and for mixing Alchemy ingredients. This trader almost certainly is a Gwent player too. For a complete list of Herbalists, and the type of wares they sell, consult the Merchants Appendix.
 Hidden Treasure

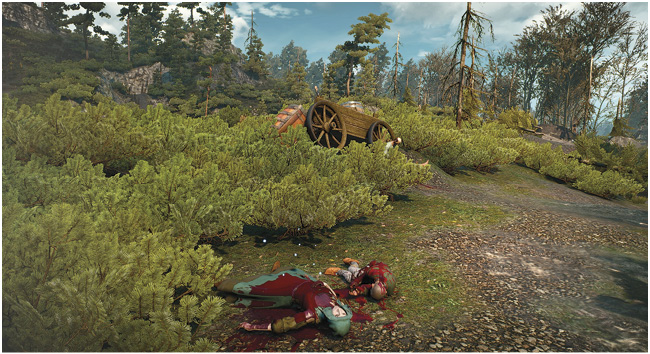
You also come across information about treasures hidden in various parts of the wilderness, left forgotten to the world. In these instances, it is simply a matter of finding the treasure and claiming it to resolve these Points of Interest. Usually, the place where hidden treasure is indicated on the map has a small area of investigation. This leads to a clue (and sometimes a key) to the whereabouts of the actual treasure, and a small quest begins until the treasure is found. There are well over 40 of these secret Treasure Hunts, and all with a related quest are revealed in the Treasure Hunt chapter of this guide.
In addition, some Hidden Treasures start much more involved Scavenger Hunts, which always uncover a wealth of written materials, clues, and other information regarding a different Witcher School, and its associated gear. These more involved Scavenger Hunts are detailed later in this guide.
Finally, there may be occasional Hidden Treasure that doesn’t start either a Treasure Hunt or Scavenger Hunt quest. Simply find the icon on the map, and the treasure will be nearby.
 Innkeep

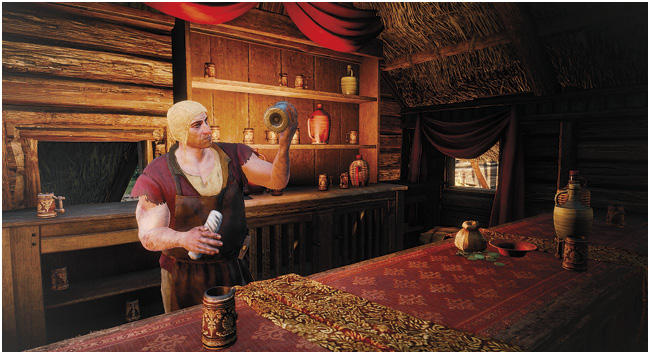
Usual Items for Sale (Type): Alchemy Ingredients, Gwent Cards, Food and Drink
The many taverns and inns scattered across the Northern Realms have a variety of proprietors that you can benefit from knowing. Aside from local gossip, and some sustenance as well as alcohol to consume, each Innkeep is likely to be carrying around four Gwent cards you can purchase. This trader almost certainly is a Gwent player too. For a complete list of Innkeeps, and the type of wares they sell, consult the Merchants Appendix.
 Monster Den

This location is infested by monsters and a constant worry for those living nearby. Hopefully some white-haired cat-eyed mutant warrior with a penchant for Signs might deem the location interesting enough to visit? If you do, expect to battle one or more monsters, before gathering any treasure afterward. This location only turns grey once the quality loot, and the unpleasant entities, are both removed. Clearing Dens provides experience, treasure, and monster materials used for crafting and alchemy.
 Monster Nest

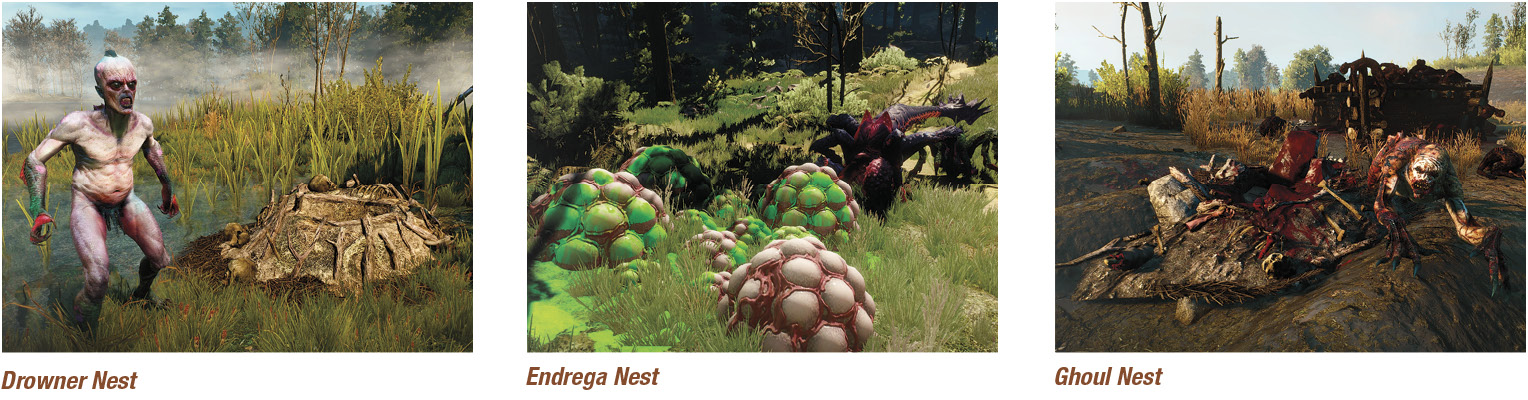
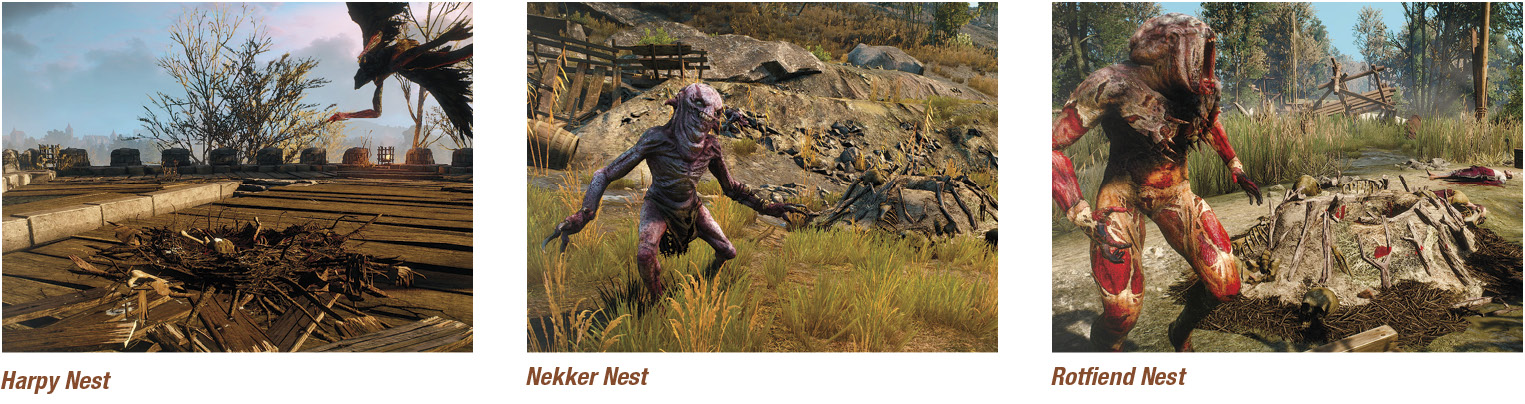
Nekkers, Ghouls and Alghouls, Rotfiends, Drowners, Harpies, and Endrega are some of the most common threats that plague the land, and they tend to be the most aggressive at colonizing new regions to build nests. While every nest encountered may not be part of a Contract, it benefits you to destroy Nests as you encounter them to make a region safer. As one might expect, monsters guard their nests ferociously. However, once the defenders of a Nest are slain, you can destroy the Nest using one of the many bombs you can craft. Destroying nests provides experience and monster materials used for crafting and alchemy.
 Notice Board

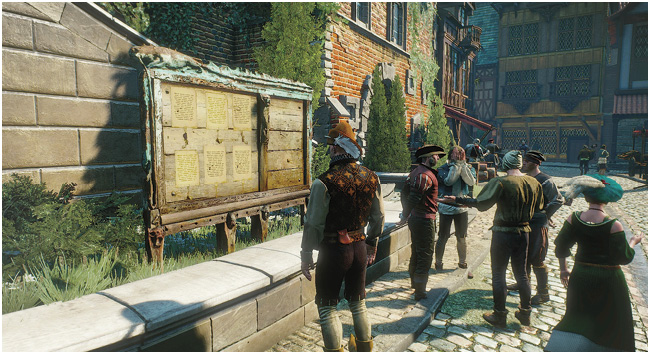
Many villages and city districts have a Notice Board (the city of Novigrad contains more than one) where citizens post news. Informative and sometimes humorous notes can be found on Notice Boards, revealing Points of Interest on your World Map. More often than
not, Secondary Quests and Contracts are pinned to notes left on a Board. Contracts send you after a dangerous mark at the request of a village or local lord.
 Person in Distress

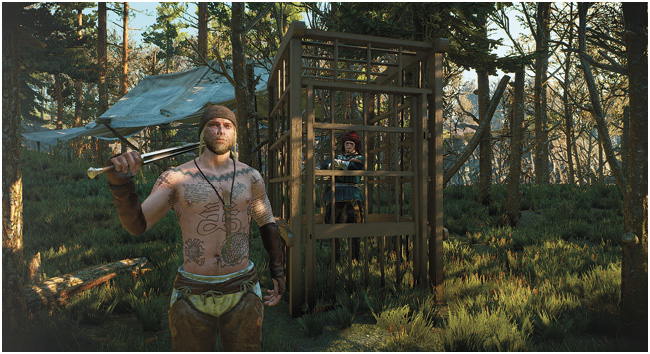
In some bandit camps, and occasionally in rural spots across the Northern Realms, you may encounter a prisoner locked in a holding cage. Freeing these folk—almost always after delivering a series of killing blows to their captors and looting the cage key from the captor leader—may result in rewards. In some cases, the prisoners are actually merchants, armorers, or blacksmiths, who then return to their home villages and offer you their services at a reduced rate, as thanks for the rescue.
 Place of Haunting

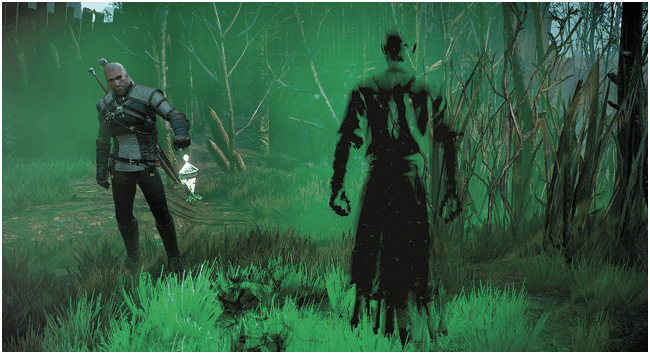
Use Keira’s magic lamp at these locations to conjure up a vision tied to this location’s past. The Magic Lamp is a specific quest item, and allows you to watch a ghostly past happening occur on the cursed land on which you stand. Most are related to quests.
 Place of Power

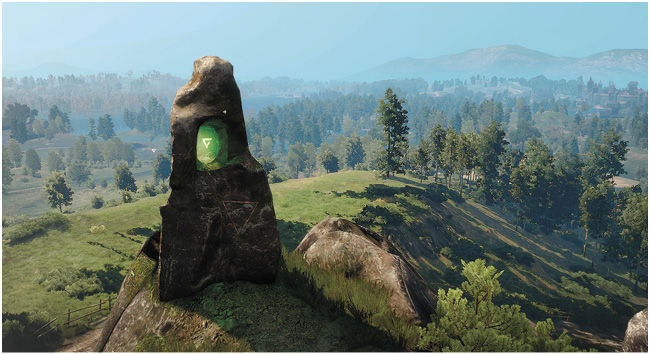
Arguably the most important Points of Interest are the Places of Power. Finding one allows you to draw the energies from these stone monoliths, providing a temporary magical enchantment to one of your Signs. They also reward you with an Ability Point which you can use to purchase upgrades from your Character Ability trees. For this reason, it is worth knowing where every Place of Power monument is, and if any are guarded by foes or only accessed during a quest. The Places of Power Appendices helps immensely.
 Portal

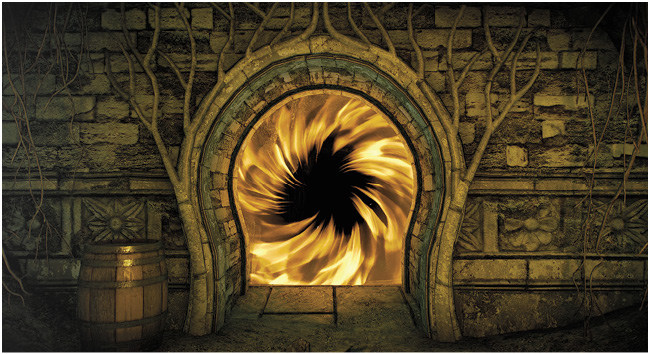
Portals (usually) require some kind of power source to be turned on before they can be used. Mainly utilized during quests, or by sorceresses as a means of rapid travel, expect to walk through these rips in time and space, before emerging in a different location—and sometimes even a different world! These icons aren’t shown in the guide’s Atlas, as they are always related to a particular quest, and the quest information reveals exact routes to take where portals are concerned.


 Quest Available


A new quest is available at this location. Sometimes, the conversations (or lamentations) of a person at a location reveal a quest. Other times it is a Notice Board missive. Or simply walking near to a person enables this icon on your World Map. Move to the location of the quest when you wish to start it. Your World Map does not differentiate between quest types (aside from Hearts of Stone quests (blue) and Blood and Wine quests (red). However, this guide’s Atlas does further subdivide quests; so check the Atlas maps for the type of quest, and where the quest walkthrough is in this guide.
 Roach, Faithful Steed

Your loyal, if somewhat finicky mount is never more than a whistle away. Even if you’ve dismounted in Velen and fast-traveled to Ard Skellig, Roach always appears when you whistle, except when you’re underground. Remember Roach can be given items that improve her usefulness:
Contract Trophies
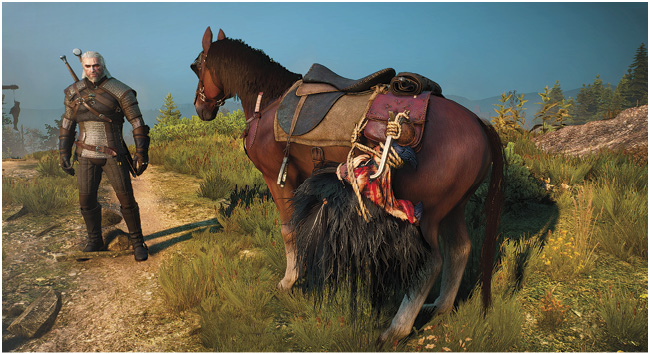
Trophies from successful Contracts can be mounted on a hook hanging from the side of the horse to provide special bonuses. For example, if you slay a Cockatrice during Contract: Shrieker, and fix it to Roach’s hook, you receive a +10% chance to dismember enemies! Trophies can be swapped depending on the bonus you want, or sold for crowns if you wish to give up the bonus. Look for Trophies in your Food and Drink menu, and place the desired trophy in Roach’s Inventory space (on the right side of the Inventory Menu screen).
Horse Blinders, Saddles, And Saddle Bags
Saddles can be purchased from certain vendors (see the Merchants Appendix) or won during Horse Races, or found as loot. Saddles allow you to gallop for longer distances before Roach tires herself out.
Saddle Bags are earned in the same way, and allow Roach to take some of the burden off your back. You can even find Horse Blinders that help Roach remain calmer for longer when enemies are closing in.
 Shopkeeper (Merchant)

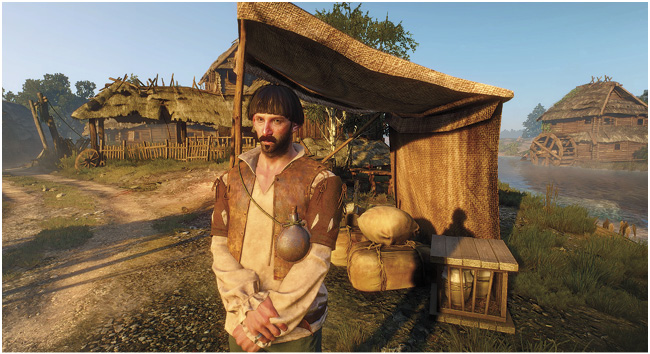
Usual Items for Sale (Type: Not all types available from all Merchants): Armor, Weapons, Common Items, Quest Items, Upgrades, Junk, Crafting Components, Crafting Diagrams, Alchemy Formulae, Alchemy Ingredients, Gwent Cards, Food and Drink, Books, Money-lending.
Merchants are by far the most ubiquitous trader you find in your travels. Some Merchants provide food, others deal in formulae and ingredients, and others sell books. Merchants are marked with a special icon. Some merchants are constantly traveling the highways and byways (usually between two settlements), which places them in danger from the local wildlife. If they come under attack, you must rescue them or else risk losing their services. Other merchants can be found as prisoners (Persons in Distress). All have good to trade, and coin to gather as you sell off items you don’t need. Merchants almost certainly are Gwent players too. For a complete list of Merchants and Wandering Merchants, and the type of wares they sell, consult the Merchants Appendix.
 Smugglers’ Cache

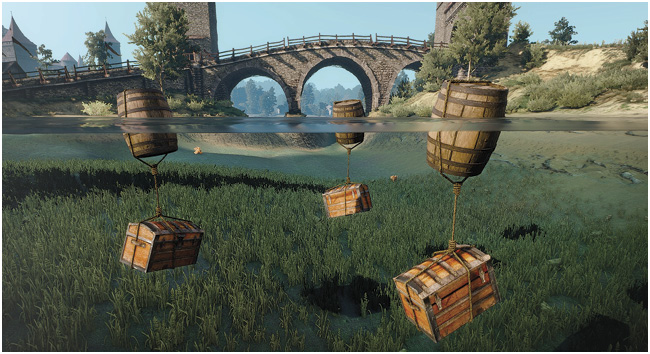
Similar to hidden treasure, Smugglers’ Caches are locations where clandestine peasants hid a variety of goods with the intent that only they would ever find them. The caches themselves tend to be well camouflaged to the unpracticed eye, and Witcher Senses are recommended to find them. A cache could be found hidden under a bridge, or could be a series of treasure chests dangling from barrels floating in water. Search the area where you see this icon to find the cache you crave.
 Spoils of War

Battles between Redanian and Nilfgaardian factions have left fields littered with corpses. Squabbles in Skellige have led to the spilling of blood. Ships have been sunk at sea and in rivers. You can often find valuable supplies left behind by the victors and the defeated, if you search these areas.
 Stash
Stash

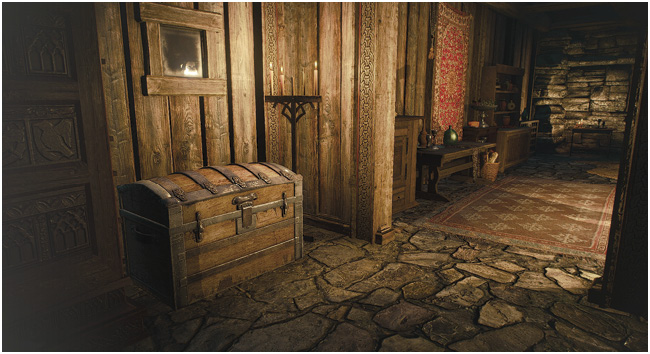
Each territory you explore (Kaer Morhen, White Orchard, Velen (No Man’s Land), Novigrad, Skellige, and Toussaint) has a location (usually the largest settlement of the region) with a Stash crate where you can store items for safekeeping. As you constantly risk the penalties for being over-encumbered (slow movement, ineffectual combat techniques), and even with Saddle Bags, Roach may not carry enough for those adventurers with hoarding tendencies, you may wish to utilize this large chest. It keeps any items you don’t wish to carry or sell. Simply return here if you want to take an item (if you want to sell it or break it down for parts, for example). Stashes are also perfect for:
Starting a collection of items, such as swords you find on your journeys through Skellige, and displaying them in a Stash.
Placing an item at one Stash, and then finding it at a Stash in a different location (all Stashes are linked to each other).
But remember that Stashes can get full too. If you’re finding you and Roach are weighted down, and your Stash is full, you really need to find a Merchant and start selling some of your hoard!
 Points Of Interest: Additional

The Hearts of Stone Expansion gives you another mapping point of interest to discover, along with more points of interest you should already be familiar with:
 Runewright

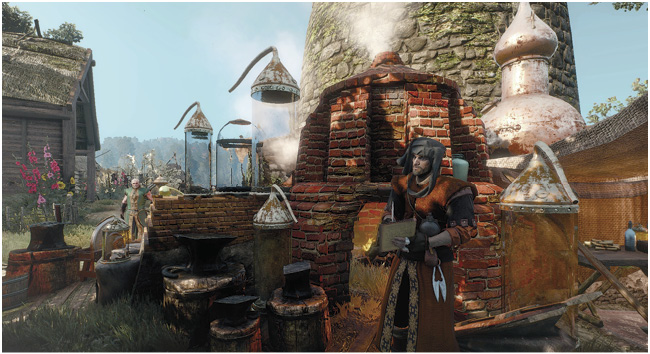
An Ofieri Runewright has recently traveled from foreign lands to set up the most rudimentary of shops (actually a tent with nothing to sell). Once you visit him at the Upper Mill in Gustfields, and complete his series of quests, agreeing to finance his operations (and giving him close to 30,000 crowns in the process), he is able to imbue your weapons and armor with a specific runic word. This is an alternative enchantment to runes and glyphs. To find out more about the Runewright.
 Points Of Interest: Additional

The Blood and Wine Expansion allows exploration into a brand new realm; the Duchy of Toussaint. Here, along with the usual points of interest to find, are some brand new exploration areas to familiarize yourself with:
 Corvo Bianco Vineyard

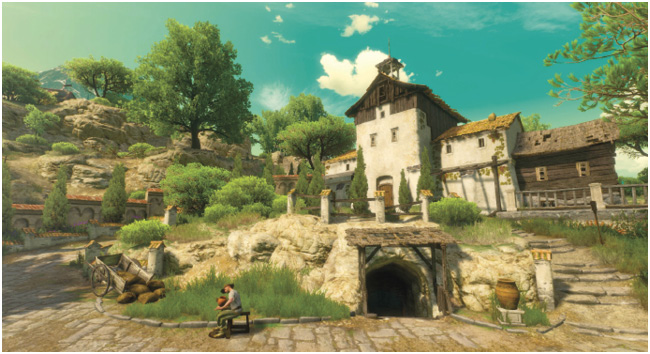
During Blood and Wine Main Quest: The Beast of Toussaint, you receive deeds by Duchess Anna Henrietta to a run-down winery known as Corvo Bianco. Complete Blood and Wine Secondary Quest: No Place Like Home to fully upgrade this location, allowing the growing of greenhouse herbs create and change the colors of mutagens for your Mutations, an orchard where you can grow plants to create dyes to change the color of your Witcher gear, as well as the following:
 Corvo Bianco Master Bedroom: Bed

Inside Corvo Bianco is a master bedroom, which should be upgraded. There is a bed to sleep on, which can also be upgraded (to Level 3) during the quest. Rest (Meditate by accessing the bed) for at least one hour to receive the following bonuses:
- Initial Bed: No bonuses.
- Bed Level 1: Heals you.
- Bed Level 2: +500 Maximum Health.
- Bed Level 3: +1000 Maximum Health.
 Corvo Bianco Stables

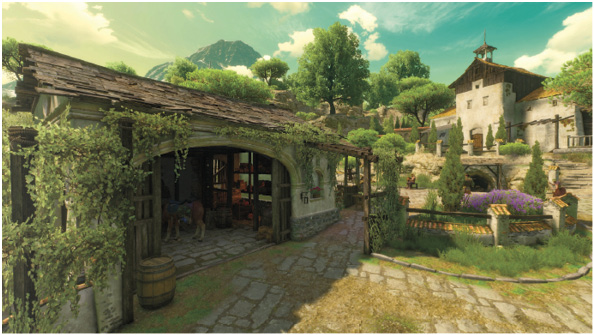
Rest in your bed for at least one hour, once you’ve improved the stables at Corvo Bianco, and Roach receives +100 Stamina.
 Alchemy Laboratory: Dismantling Table

Charging Table
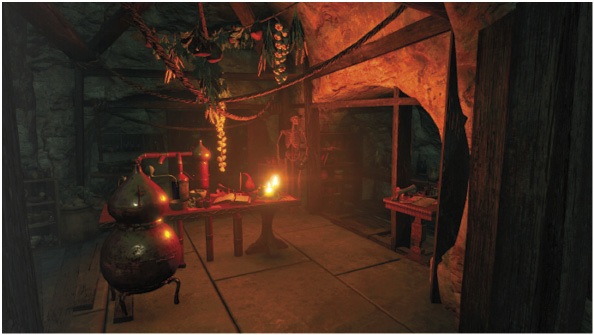
During Blood and Wine Secondary Quest: No Place Like Home, your majordomo discovers a hidden alchemy laboratory under your manor, in the wine cellar. Further exploration uncovers a table where you can Dismantle items (without having to bring them to a merchant and pay them for this).
Rest in your bed for at least one hour, then visit your Alchemy Laboratory under the manor house, and access the Charging Table, which grants you one additional charge for each set of bombs and potions every time you use it.
 Ducal Camerlengo

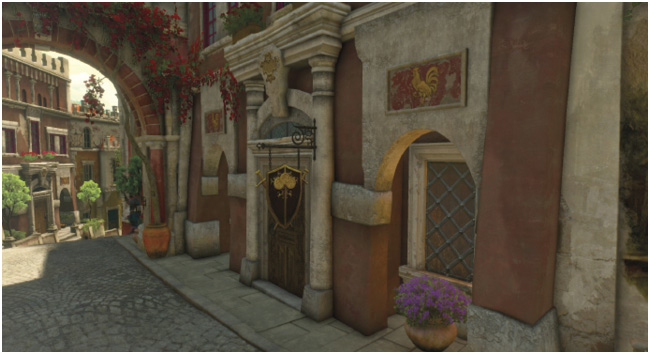
Close to the Gran’place Signpost in central Beauclair is the Ducal Camerlengo, an official who doles out rewards for unmarked contracts. He offers 100 crowns each time you complete the following:
- Save a Knight Errant in Distress.
- Save a Person in Distress.
- Remove all threats in most (but not all) Abandoned Sites.
- Remove all threats at an Outlaw Hanse.
Simply visit him and request your reward. Note he only pays for successful clearings of areas (if a Knight Errant in Distress dies, no reward is given for example), and he’s only interested in contracts completed in Toussaint: So saving a Person in Distress in Velen makes no difference to him!
 Knight Errant in Distress

At this location, which is ostensibly a Bandit Camp, a group of bandits are engaged in combat with a Knight Errant of the Duchy. You are encouraged to save the knight before he is killed, after which you can claim a reward (100 crowns) from the Duchy Camerlengo. Fail, and this is simply a bandit camp and place where a Knight Errant met his match.
 Outlaw Hanse

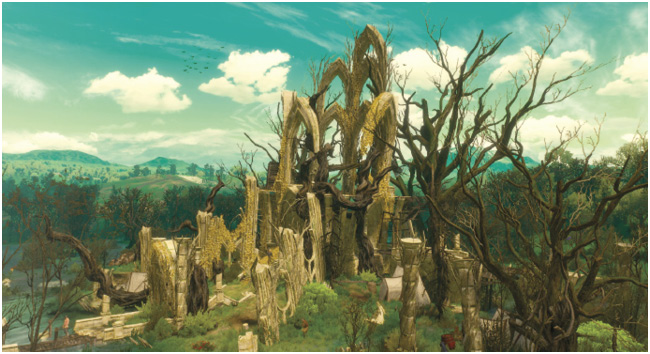
Three large-scale fortifications (Tulasens Caves, Arthach Palace Ruins, and Mont Crane Castle) have been overrun by an outlaw gang of bandits, who have Bandit Camps (and sometimes Knight Errants in Distress and Abandoned Sites) surrounding this central stronghold. They are armed-to-the-teeth, number in the dozens, and can call upon reinforcements if you let a torch-carrying bandit light a signal fire at this location. Clear the Hanse of all foes (Bandits, Hanse Dogs, and
the bandit leader), and expect the Knights Errant to arrive to secure the area (and an armorer or blacksmith to offer deep discounts depending on the location). You can also claim a reward (100 crowns) from the Duchy Camerlengo for each Outlaw Hanse you wipe out.

 Grandmaster Armorer and Blacksmith


Northwest of the Metinna Gate in Beauclair is the residence and shop of Lazare Lafargue, an enthusiastic armorer and blacksmith who studied under the fabled Thrahaearn’s side, a legendary elven master armorer. Should you complete the Blood and Wine Scavenger Hunts of Toussaint, he can craft fabled Grandmaster Witcher gear, as well as Master gear, and both armorer and blacksmith items. He’s a must-visit fellow!
 The Prophet Lebioda’s Footsteps

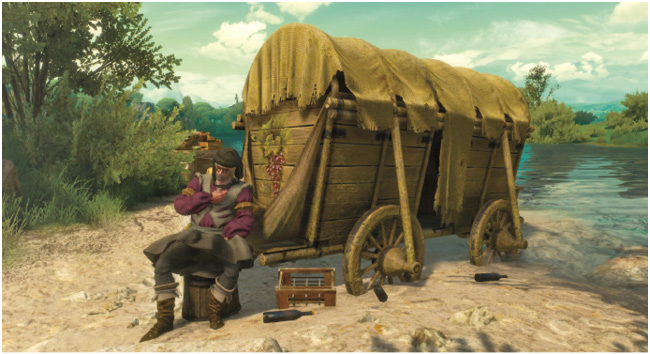
The foreman at the Ardaiso Quarry in eastern Toussaint is currently managing the transportation of workers and tools to a building site in northwest Toussaint where a massive statue of the Prophet Lebioda is being erected. However, there are five locations where the foreman’s wagons have run into problems, indicated by this icon. All are part of Secondary Quest: Big Feet to Fill.
 Vintner

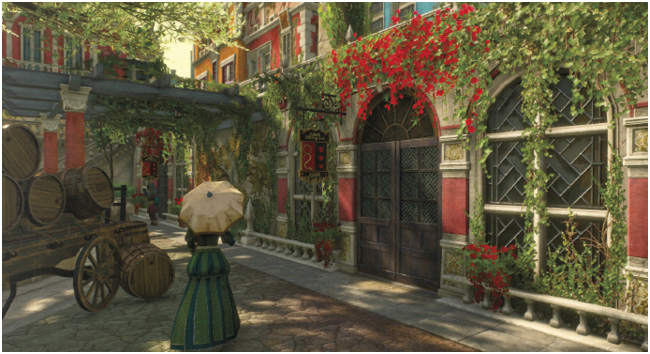
A new type of merchant, and one that resides in Beauclair close to the Gran’place signpost, visit the Adder and Jewels tavern and purchase some of the finest wines known to humanity. In all other aspects, the vintner acts as an Innkeep.
 Vintner’s Contract

Here you can help a vintner clear a cave of monsters. The vintner is a merchant who offers you discounts on his goods once you succeed in ridding his nearby cave (used for wine storage) of a particular pack of monsters.
 Vineyard Infestation

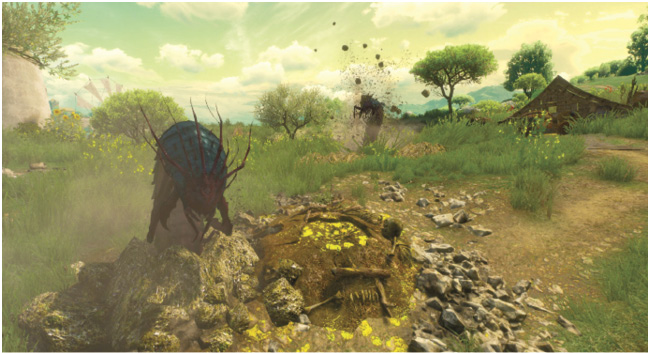
Monster Nest threats that plague the Duchy of Toussaint’s vineyards, and have built nests at these locations. Treat these like Monster Nests you’ve encountered before; destroy these infestations to make the region safer. Once the creatures at an infestation are slain, destroy the nest using one of the many bombs you can craft. Destroying nests provides experience and monster materials used for crafting and alchemy.
Points Of Interest: Additional (Guide Only)
This guide also gives you more information than even a fully-traversed World Map! In addition to all the previously-listed Points of Interest, this guide tracks the following additional Points of Interest:
 Unmarked Location (Dwelling of Interest)

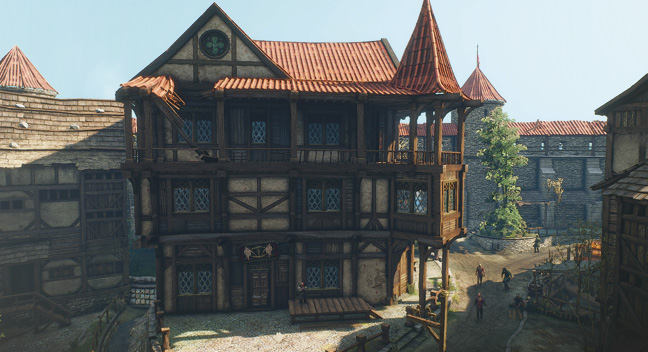
Dwelling of Interest: An unmarked location that you can visit, such as a tavern or local landmark in a city. In this example picture, the Rosemary and Thyme (Novigrad City) is shown. Occasionally when you are journeying into a new area that doesn’t have a Signpost, you may notice the name of the area appear on-screen for a few moments. Where appropriate, such locations are flagged and described in the Atlas.
 Gwent Player

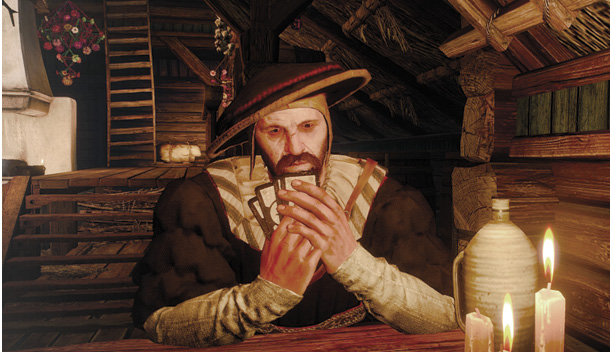
Expect a game of Gwent at this location. Note that some Gwent players are only available during certain conditions (for example, they might die during a quest), so don’t expect them to be available consistently. They are also usually (but not always) a Trader already at the location shown in the Atlas.
 Gwent Vendor

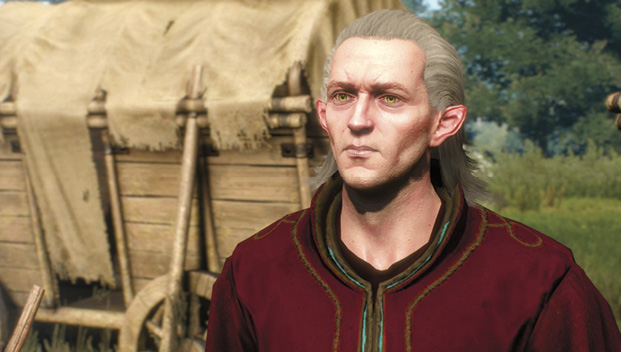
Expect to purchase a Gwent card at this location. As with Gwent Players, these sellers may not always be available, so you may wish to buy what they have as soon as possible. Gwent Vendors are usually Merchants or Innkeeps, and have four cards (and occasionally more) for sale. Buy these as early as you can to bolster your deck. For a complete list of Gwent Vendors.
 Treasure Chests

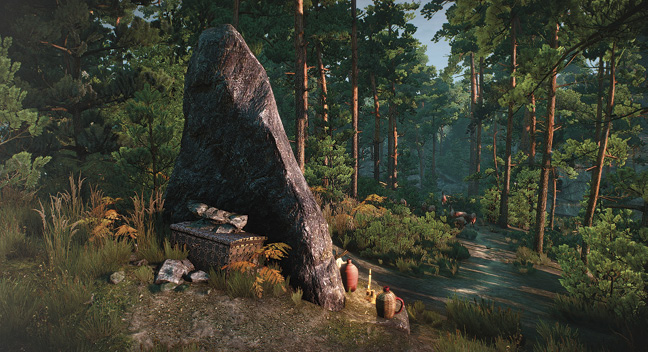
Gathering valuable items is extremely important during your adventure, and this guide details the (random) quality of the treasure you should expect to find. Consult the Atlas Chapter for all chest locations dotted throughout the Northern Realms.
 Good chest: Expect reasonably valuable (random) items in this type of chest.
 Better Chest: Expect better, more valuable (random) loot
 Relic Chest: An extremely valuable relic is found in this chest.
 Scavenger Hunt Chest: Loot from the Witcher School is found here.
 Quest Chest: This chest is utilized in a specific quest. The loot itself is not required to complete the quest. Such quests may also be accessible when this quest isn’t active, but it’s usually advisable to find them during a quest that takes you to this location. Check the quest you are on to see if the location is mentioned.

 Hidden Treasure Key and Chest: Some chests require a key to unlock. This may be hidden somewhere, on the corpse of a fallen fellow with clues to read, or in an area to loot. Almost all of them are related to named Treasure Hunts. Check the area where they key is shown carefully.