
The Witcher 3: Wild Hunt The Complete Edition Guide Training
Items And Equipment
As you adventure throughout the Northern Realms, inspecting the items you have won, scavenged, looted, or stolen becomes increasingly important, especially as you run the risk of becoming over-encumbered if you’re a hoarder. This section details the types of items you will find in your Inventory panel, and on your travels.
The Inventory Panel
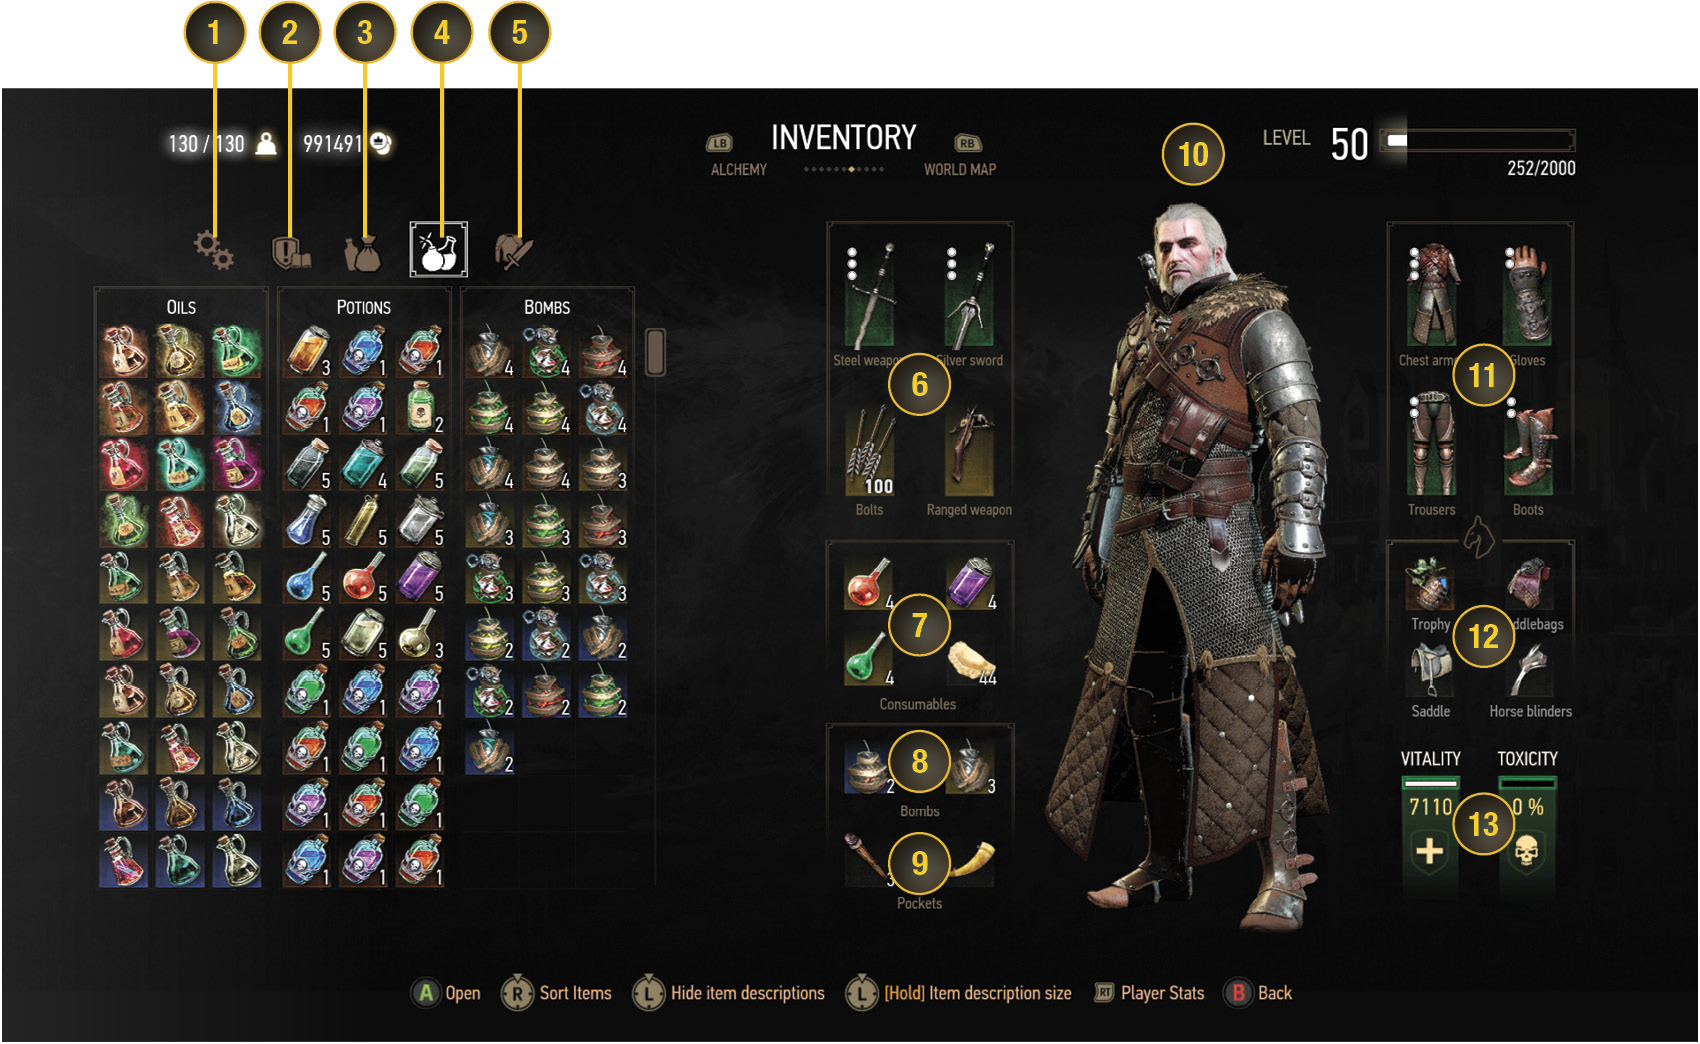
 Crafting and Alchemy: This houses all the Crafting Components and Alchemy Ingredients you have on your person, which are used to craft gear and items. The section on Crafting details how these are used.
 Quest Items and Other Items: Quest items are, as you’d expect, gathered during any of the hundreds of quests. Once a Quest item has seen all the use required from it, it can be sold to a vendor, or dropped and forgotten. Some of the key quest items can be used while exploring the Northern Realms. Other Items take the form of monster trophies you can affix to Roach’s saddle for a bonus. Currency (Crowns and Orens), any books and notes not related to quests, junk items, and “other” items are placed here.
 Food and Drink, and Roach: This rather self-explanatory section houses all the consumables you can digest, or place in the “Consumables” inventory area. The Horse Items area houses all the items you can affix to Roach, from Trophies to Saddles, Saddle Bags, and Horse Blinders.
 Oils, Potions, and Bombs: This lists every single Oil, Potion, and Bomb you have either bought or crafted, and these are placed in the Consumables or Bombs area of your Inventory for quick access (aside from Oil, which is combined with a weapon just before combat).
 Weapons, Armor, and Upgrades: This menu gathers every single one of your Steel Swords, Silver Swords, other weapons (such as maces), Crossbows, Bolts, and Upgrades (Runestones) for your weapons. Weapon Repair Kits are also accessed from here, too. On the second part of the menu, all the sets of Armor, along with Gloves, Trousers, and Boots are catalogued, along with Upgrades (Glyphs) for your armor. Armor Repair Kits are also accessed from here, too.
 Carried Weapons: These are the weapons you have strapped to your back, and use in combat. A Steel Sword, Silver Sword, Crossbow, and type of Crossbow Bolt are shown here, along with small circular icon slots to determine whether the weapon can be upgraded (empty circle) or has been upgraded (white circle). Swap between your Weapons menu and here if you wish to change weapons.
 Consumables: These are the Potions, Decoctions, and Food you have placed in one of the four slots to allow easy access before, during, or after combat. Healing potions, food such as Dumplings, or combat-enhancing potions or decoctions should be placed here.
 Bombs: You have two slots where the bombs you most frequently use can be placed for easy access. Try to tailor your bombs to favor those that can affect a wide variety of targets, switching out for more specialized explosives if you’re hunting something that demands it.
 Pockets: You have two slots where you can place other items you frequently use. One great example is a Torch to light your way during Dungeon explorations (if you aren’t using Cat Potion), while another could be the Hornwall Horn (used to neutralize sirens).
 Geralt of Rivia (Level and Experience): This handsome fellow shows off his current armor and weaponry. Above and right of his head is your current level, and the experience points needed to reach the next level.
 Worn Armor or Outfits: These four slots show the armor or outfits you are wearing. Torso armor, Gloves, Trousers, and Boots each have a slot, along with small circular icon slots to determine whether the armor can be upgraded (empty circle) or has been upgraded (white circle). Swap between your Armor menu and here if you wish to change outfits.
 Roach’s Equipment: Your horse has a small inventory of her own, which features a slot for a Trophy (the head of a vanquished Contract monster), Saddlebags (increasing carry weight), Saddle (allowing Roach to canter further before tiring), and Horse Blinders (to reduce Roach’s panic when enemies are near).
 Vitality and Toxicity: This quickly allows you to note your current vitality (both as a percentage and a points total; the higher the better), and your Toxicity (whether you’ve been poisoned by enemies, environmental effects, or potions you have used).
The Player Statistics Menu
The Player Statistics Menu, sums up your various bonuses so you can see how all your different enhancements and other elements are helping Geralt, along with other pertinent data. This menu is influenced by your equipment, enchantments, and primarily by the Character Menu Abilities of the same color:
 Red is Combat-related data.
 Green is Alchemy-related data.
 Blue is Signs-related data.
 Yellow/Brown is general data.
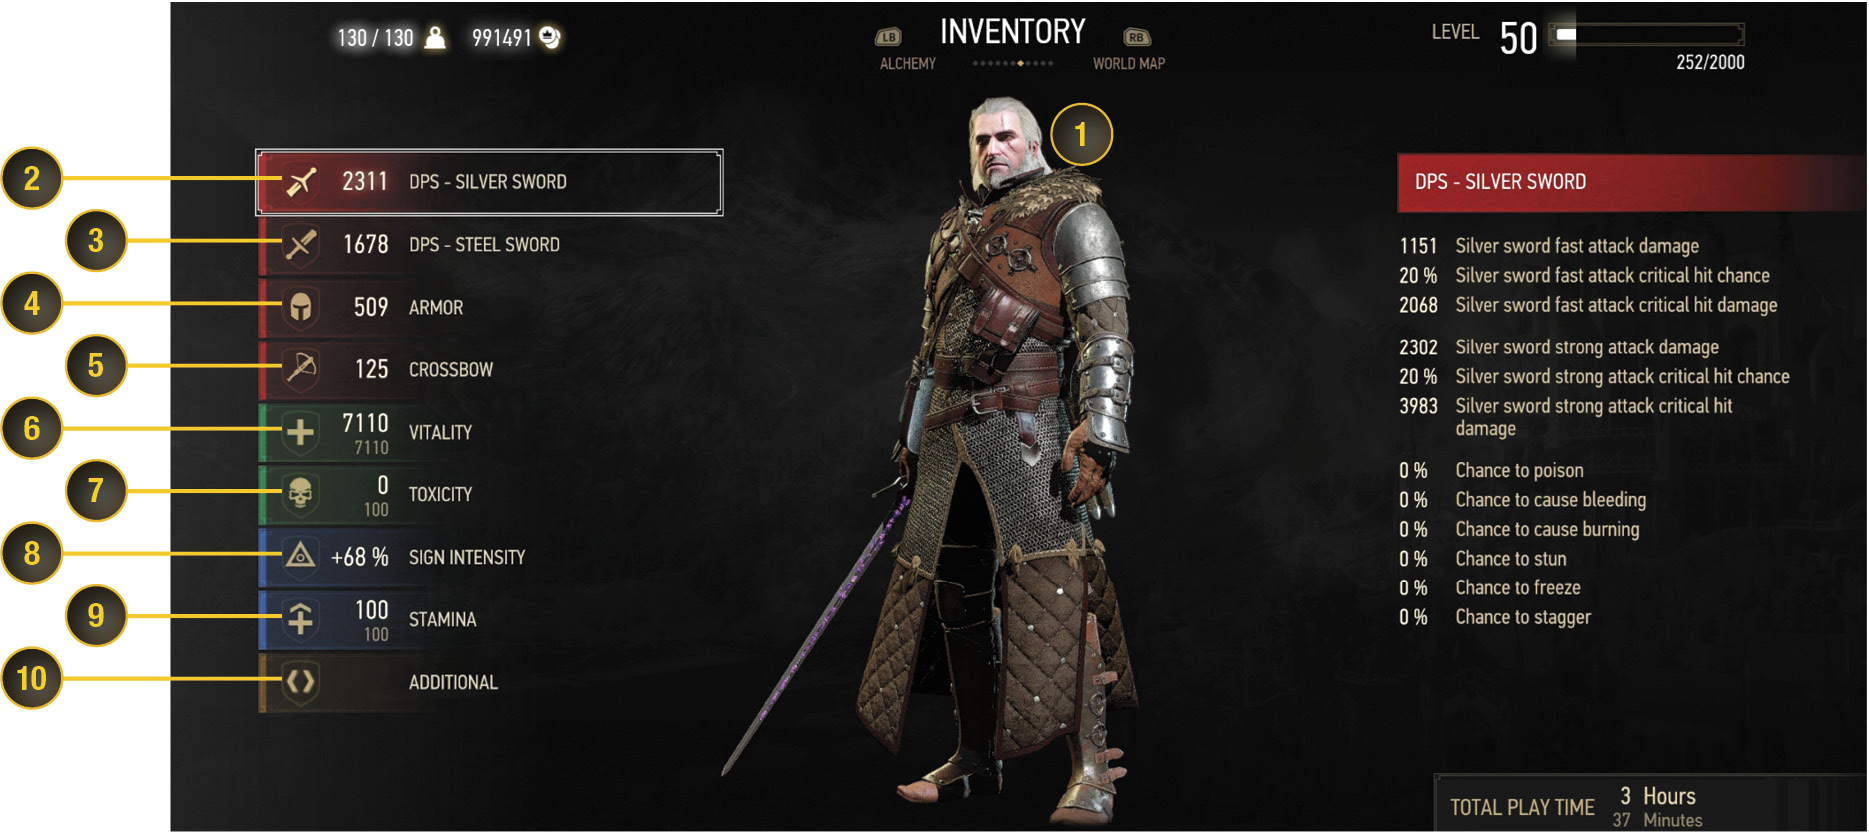
 Geralt of Rivia: You can rotate and examine Geralt, and unsheathe both his blades.
 DPS – Silver Sword: This details the DPS (Damage-Per-Second) of your currently-equipped silver blade, along with current bonus/es.
 DPS – Steel Sword: This details the DPS (Damage-Per-Second) of your currently-equipped steel blade, along with current bonus/es.
 Armor: This details all the bonuses your torso armor, gloves, trousers, and boots are giving you (all together).
 Crossbow: This indicates the impressiveness of your ranged weapon.
 Vitality: This shows your current and maximum Vitality; which is your general health. In addition, it shows your Vitality regeneration in and out of combat.
 Toxicity: This shows your current and maximum Toxicity levels. Current levels increase every time you drink a potion or decoction (and the amount is shown when you highlight the potion or decoction in question).
 Sign Intensity: This reveals the statistical data for each of your five Signs. Compare your base levels before and after equipping items and abilities that increase this statistic, to discover your bonuses. Each Sign has its own information.
 Stamina: This details your current and maximum Stamina (which governs how long you can sprint, and more importantly, how often you can cast Signs). It also shows your Stamina regeneration in and out of combat.
 Additional: This gathers some general data, usually based on equipment from your Inventory screen (such as those given by Roach’s Trophies) and abilities (such as the Deadly Precision ability, which influences the chance of an instant kill).
The Burden Of Items And Inventory
A Witcher doesn’t succeed simply by being a great fighter. It requires preparation and using everything in their inventory to craft an arsenal that ensures victory. Outside of the armor he wears and the swords he wields, Geralt’s Inventory can be filled with items of various kinds, used for different circumstances before, during, and after combat. You can find items in the world, receive them as quest rewards, or buy them from merchants. Neglecting items makes the Witcher’s life very hard, as weapons can fall into disrepair unless properly maintained.
Managing your inventory is important. You can’t take absolutely everything you find with you everywhere you go. If you try, Geralt becomes overburdened, and unable to move beyond a slow walk while on foot, and his ability to fight is severely diminished. However, you do need to seek out a good supply of materials to keep your potion, oil, and bomb supplies well stocked.
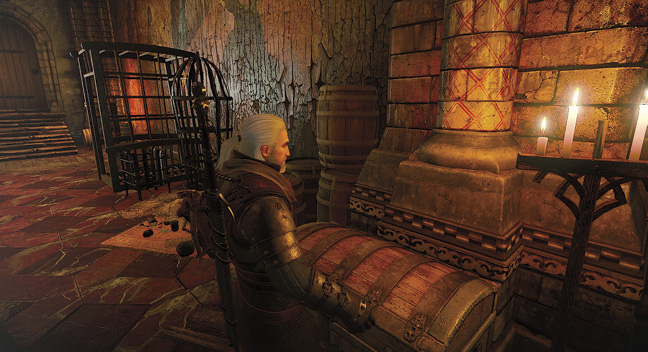
Geralt can carry 60 units of weight on his person at any time, and more on his faithful steed Roach, if you purchase Saddle Bags from a merchant (or win them in a Horse Race). This increases the maximum to 160 units. Avoid problems by remembering to sell or disassemble any useless weapons and armor you loot from foes, as these tend to weigh the most.
Try not to carry items specified as “Junk” if they have a weight value, unless they sell for a decent price, or you know they can be broken down into useful crafting components. The golden rule here is to take only what you need or can use in some way. Attempting to collect every single item you find is a little like a dulled sword—pointless.
Items: Ingredients
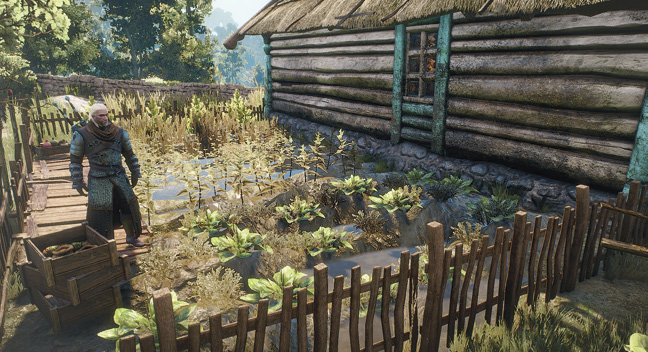
Making things requires their material components, and the world provides these if a Witcher takes the time to hunt for them. Materials found within monsters and wild animals can be combined with various plants found growing throughout the world to make potions, bombs, and oils. Other materials you find, such as ores, planks of wood, or leather skinned from wild animals, can be used by armorers and blacksmiths to craft better armor and weapons.
Weapons and equipment found in the field can be another source of ingredients. An armorer or blacksmith of the right skill level can break down equipment, as well as other items in your inventory, to help you receive extra crafting materials. This process does cost money though.
Items: Quest Items
Geralt finds a variety of key items throughout his questing, and while some have monetary worth, it would be a mistake to get rid of them so easily. Quest items are marked as such when you inspect them in your Inventory Menu, and are always filed away in the Quest items area. They remain in your inventory and cannot be discarded until they are no longer needed. Once a Quest item has seen all the use required from it, it can be sold to a vendor, or dropped and forgotten. Some of the key items can be used while exploring the game world.
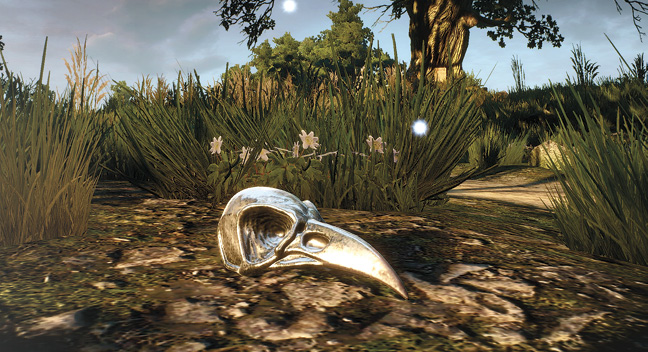
A quest item usually performs one of two functions: It allows additional areas to be explored, interactions to occur, or gives you an advantage in combat. Or, it is starts a quest, or is utilized as part of a quest objective. The following examples show a variety of quest items, but are by no means close to showing them all: Consult each individual Quest for items that are needed or found during the course of a quest.
 QUEST ITEM: THE MAGIC LAMP

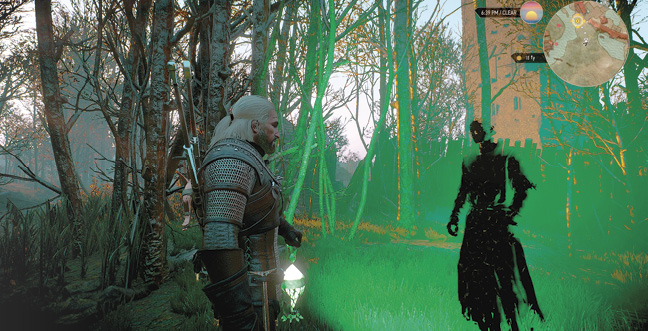
Related Quest: Secondary Quest: Magic Lamp
The Magic Lamp allows you to watch the terrifying past communications of ghosts, a necessity for completing an early quest. When you approach one of these locations (which are tracked on your World Map and in the Atlas), they appear as green-tinged energy fields close to bones or corpses.
 QUEST ITEM: THE EYE OF NEHALENI

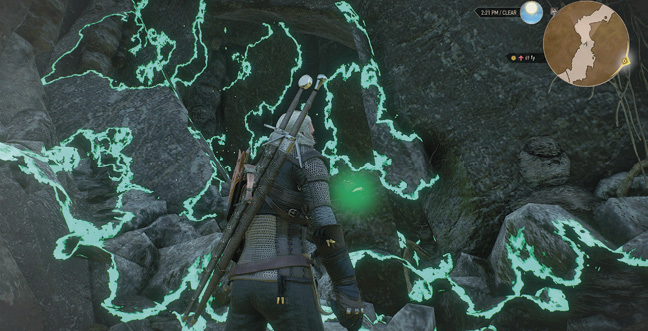
Related Quest: Main Quest: Wandering in the Dark
This is used to dispel magic illusions that guard hidden passages throughout the world. When you approach an object that can be dispelled, Geralt actually points out that his medallion is indicating a strong magic presence. Once you have the Eye of Nehaleni, you can dispel the illusion.
QUEST ITEM: HORNWALL HORN

Related Quest: Secondary Quest: The Lord of Undvik
If you care to complete this terrifying quest across the Skellige island of Undvik, one of the prizes is this horn, which can cause any Sirens (or related airborne enemies across this realm) to shriek and plummet to the ground. This is exceptionally helpful when boating across oceans!
QUEST ITEM: THE CURIOUS CASE OF VIRTUOUS VEGGA
Related Quest: Secondary Quest: Free Spirit
Though you may not know it when you purchase it from a merchant in the Gildorf district of Novigrad City, this book is a key to providing knowledge to a stranded Skellige, over on the extinct Skellige volcano known as Snidhall Isle. There are other books to collect, too.
QUEST ITEM: LIZARD FIGURINE
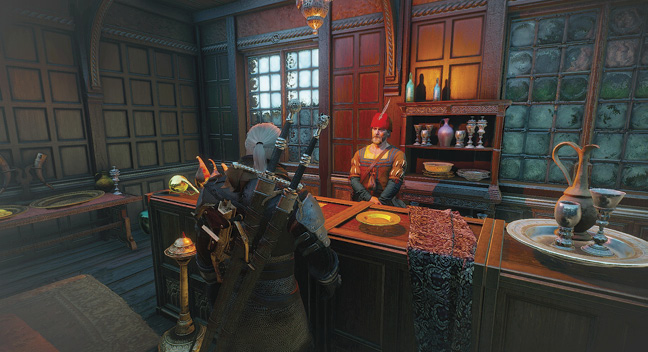
Related Quest: Secondary Quest: Of Dairy and Darkness
The fancy merchant in the Gildorf district of Novigrad City also has a variety of trinkets to examine and purchase. One of them (a small Lizard Figurine) enables you to discover the otherwise-inaccessible underground laboratory of a mad, cheese-obsessed mage!
Items: Lore Books, Torn Notes, And Notices
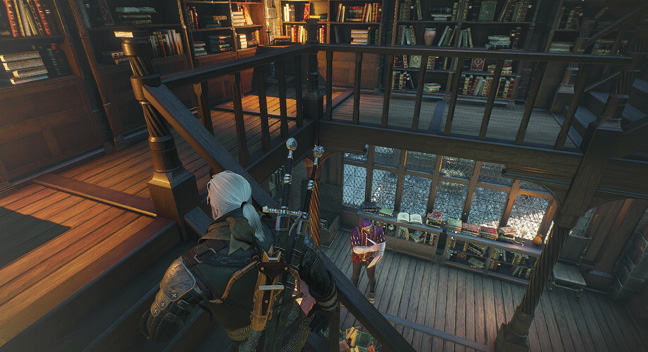
Lore books, torn notes, and notices collected during your adventures deserve a reading: not only do these items give information and history about the Northern Realms and the quests you are undertaking, they can also occasionally lead to knowledge about Points of Interest! Some lore books also add information to the Bestiary. A good place to start your rummaging through old books is the Scrolls and Books shop in Hierarch Square, Novigrad City. Tell that Hodgson fellow we sent you!
Items: Food, Junk And Other Minor Items
Junk items and items that don’t fall into other categories include currency that can be changed into crowns at the Bank of Novigrad, torn sheets from notebooks, lore books, food, Witcher Contract notes, and mutagens found on dead bodies. Don’t forget to chow down on any Food you collect either; it allows you to regenerate health quickly (even during combat) without the need to Meditate. Mutagens can be used on the Character Abilities menu to provide significant boosts to your statistics.
Junk Items should be sold or stored in your Stash chest. Unless the description of the item tells you that it is an ingredient or can be dismantled (broken down) for base components, there’s little reason to keep Junk in your inventory, as it just weighs you down.
Equipment: An Overview
A sword is only as good as the Witcher using it, and his armor is only as good as the materials he was willing to invest in its creation. To survive this adventure, you must wield a multitude of swords both steel and silver. Should those fail you, only a durable set of armor is all that prevents the claws of your enemies from rending your flesh to shreds.
Equipment in Witcher 3: Wild Hunt requires Geralt to reach a requisite level of experience before he can use it. Any weapon not available to you is crossed out in your Inventory menu. Common weapons and armor can be found randomly with stats that reflect Geralt’s current level. However, crafted items, relics, and unique pieces of armor (such as Witcher School Gear) have set level requirements and stats. While earning these pieces of gear takes supreme effort, they are often the best items one could equip.
Equipment: Swords
Geralt carries two types of sword; Steel and Silver. These blades are intended for two very different threats; Steel for humans and beasts, Silver for monsters. At lower difficulty levels, Geralt draws one of these blades automatically when combat begins, typically the sword meant for his nearest threat. Some battles require you to switch between both blades, so be prepared to adapt to those situations.
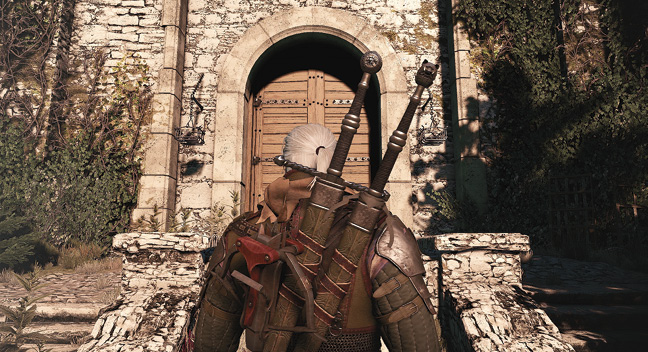
Swords deteriorate with use. With each blow landed, or shunted aside by sword, shield, armor, or claw, a blade continues to lose Durability until the weapon becomes unusable. Low Durability weapons strike for less damage. This is a serious liability in battle and can cost you life and limb.
Regular maintenance at an Armorer or Blacksmith will help keep your gear in shape at the cost of some coin. When venturing on to a difficult quest or facing extended battles that will test the durability of your equipment, make sure to purchase or craft Armor and Weapon Repair Kits to maintain your edge in the field.
In addition to acting as your primary offense, swords are your defense against any physical attack. You can block most melee attacks with either type of sword, though some attacks must be dodged rather than blocked. With sharp timing, you can also counterattack most melee attacks, placing your foe off balance while you remain on the offensive.
Every sword has a base attack rating representing the damage per second (DPS) it’s capable of under ideal conditions. Additional values exist for fast and strong attacks, including damage and critical hit chance. Any enchantment, skill, or upgrade that increases a sword’s damage applies a bonus to the weapon’s base attack rating. An opponent’s armor, resistances, and other modifiers will affect a sword’s damage during combat.
Improving Weapons
Enchanted swords have a chance to cause additional effects on their target with each strike. These enchantments can poison, bleed, burn, stun, freeze, or stagger a target. Lesser and Greater runestones can be placed in weapon upgrade slots to further increase a blade’s effectiveness (see the Upgrades section). However, if a target’s resistances are too great, these additional effects may be dispelled.
Another way to improve the effectiveness of your swords is to apply special oils to them before combat. Unlike runestones, this bonus is temporary and ends after repetitive attacks wipe the oil away. This is the most economical way to enhance your swords and allows for a great deal of flexibility when preparing for multiple types of targets. You cannot apply these oils in the middle of a fight, so pay attention to your surroundings and spot threats before you must engage them. Unfortunately, you don’t always have this opportunity.
Finally, a very rare set of crafted weapons can be improved by finding diagrams for more powerful versions of the weapons. These diagrams and the materials to produce these weapons are rare, indeed, so you must be thorough in your exploration of the world.
Alternate Weapons
While Geralt has no formal training with weapons beyond the swords of his profession, he is not helpless with the odd axe or bludgeon nicked from bandits foolish enough to cross his path. These weapons are not as lethal as a good sword, but you can still put down humans with them if a situation demands it.
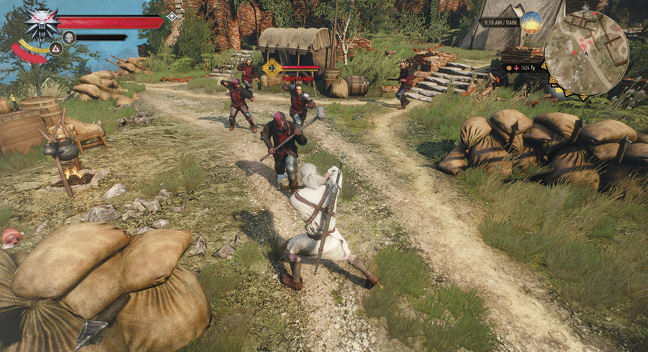
Equipping alternate weapons places them in the slot that would be occupied by your steel sword. You can also apply the appropriate blade oils to them. Realistically, though, you should stick with your swords if you have a choice.
Equipment: Witcher’s Crossbows And Bolts
Very early in Geralt’s search for Ciri, he is gifted a crossbow, which comes with an unlimited number of standard bolts that Geralt can fire at enemies or wildlife. These bolts are typically quite weak, but they can stagger enemies in the middle of an attack, and even knock flying enemies out of the sky. The crossbow is also the only weapon Geralt can use underwater. Armed with this weapon, he is not without defenses when he must explore the depths of the ocean or an underground tributary.
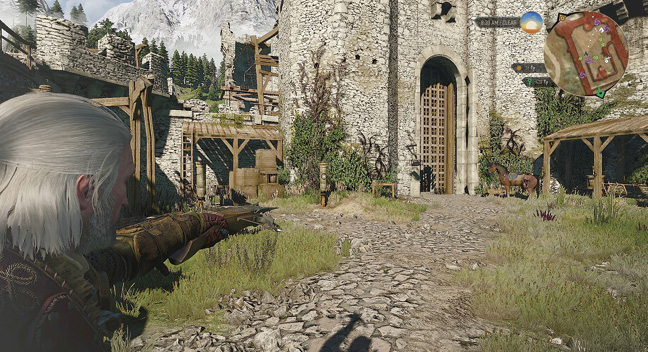
You can find more powerful crossbows over the course of the game. Some of the most deadly are crafted from secret Witcher School Gear diagrams, hidden in the world.
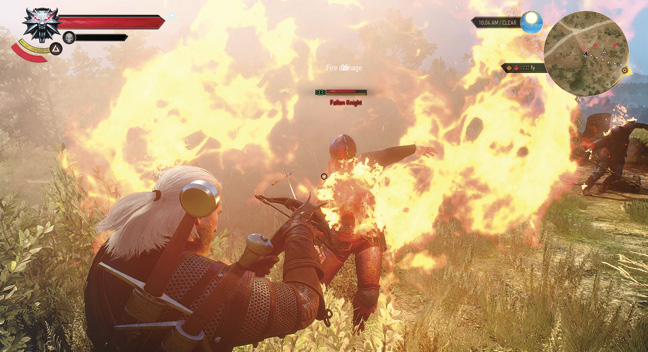
Crossbows become more effective in two different ways. The first is through the use of specialized ammunition. You can loot them from caches in the world, and even craft special ammunition from diagrams. Specialized bolts not only hit harder, but can also cause additional effects. Explosive Bolts, for example, can knock enemies to the ground and are especially devastating against flying foes. Another type of bolt splits into three arrows, making it easier to shoot fast moving enemies. The statistics on bolts may not look impressive by themselves, but when you factor in the power of your chosen crossbow, you can easily see the bow overpowering lone monsters and humans before they even get close!
Another way crossbows see great improvement is through purchasing specific character abilities from the Combat and General branches. You can earn flat increases to the overall damage of each shot or slow the world down to take more time to carefully aim your shots.
Equipment: Armor
Geralt’s armor consists of four separate pieces: Chest Armor, Gloves, Trousers, and Boots. Together, these provide protection against physical damage and persistent effects. Each piece of armor has an armor rating, along with a number of additional protection ratings against the different types of damage that Geralt can suffer in combat: slashing, piercing, bludgeoning, elemental, and rending damage.
There are three weight classes for all pieces of armor: Light, Medium, and Heavy. These classes determine how much protection an armor piece provides, but can also affect statistics like stamina regeneration. Each weight class caters to specific combat tactics, but you can mix and match your gear to fit your preferences.
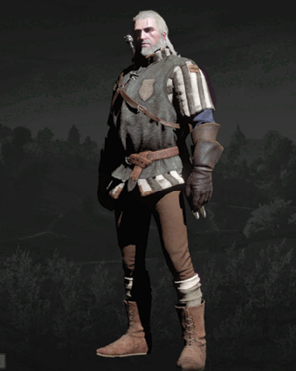
Light armor provides a significant bonus to stamina regeneration, at the cost of sturdiness. This allows Geralt to control the pace of a fight by staying agile, engaging or evading enemies at will.
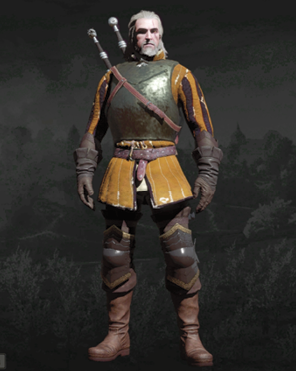
Medium armor provides no regenerative benefits or penalties, and is the weight class Geralt starts the game with.
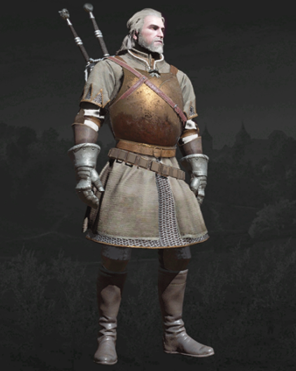
Heavy armor provides the most protection, but slows down stamina regeneration. While movement is slowed, Geralt can wade into the melee and survive far more punishment.
Improving Armor
Glyphs can be used to upgrade high-quality pieces of armor, providing bonuses to Sign abilities. As with weapons slots and runestones, some armors have slots that allow Glyphs to be placed. Glyphs can be found as loot in the field or on monsters, and there are diagrams that allow you to craft lesser and greater Glyphs, provided you can find them. Consult the Upgrades section for more details.
Dyeing Armor
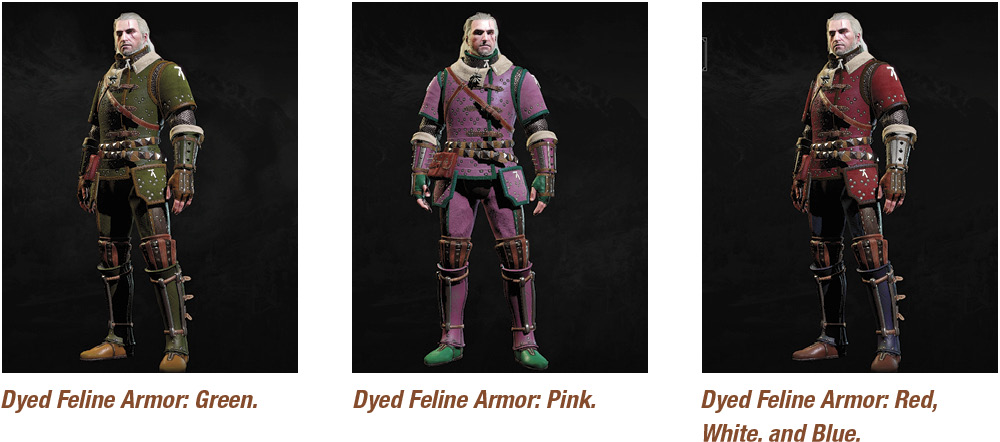
Should you find the color of your Witcher gear to be less than ideal, and you prefer to dye Witcher armor in a variety of colors, you can color each part (chest armor, gloves, trousers and boots) in aone of 12 colors. Examples are shown below.
This is achieved by completing the following: Plan 1: Purchase Armor Dyes from merchants. Plan 2: Find or purchase special Alchemy recipes that dye Witcher armor. Then pick ingredients needed to mix the dye, and complete the dye in your Alchemy menu. If you own the Corvo Bianco Vineyard, and you’ve improved it as part of Blood and Wine: Secondary Quest: No Place Like Home, you can grow herbs in your orchard that are specifically for armor dyeing.
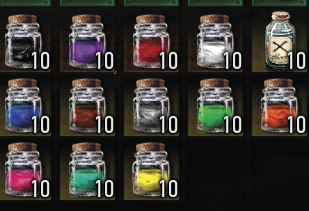
Then simply apply vials of dye to your piece of Witcher armor (and only Witcher armor). You require four amounts of a dye to fully cover all your armor. If you wish to change your color, use dye remover (made or purchased in the same manner).
Consumables, Bombs, And Pockets: Additional Equipment
It’s possible to set consumables, bombs, and pocket items for quick use in the field. Consumables include food, or Witcher potions and decoctions. It’s usually best to keep potions that have immediate beneficial effects in these slots, either focused on enhancing your combat effectiveness or survivability. Food, potions, and decoctions can be consumed from the Inventory menu too. Potions can determine whether or not you survive to even do that. With bombs, try to tailor your choices to favor bombs that can affect a wide variety of targets, switching out for more specialized explosives if you’re hunting something that demands it. Your two pocket slots, however, will likely be occupied by key items that are required for specific purposes, generally for non-combat reasons.
Preparation: Setting Up Quick-Use Item Slots
Part of preparation is making sure you have the right items in your item slots. Wearing your best armor and using your best swords is obvious advice. Having the right consumables and bombs set up for quick use can mean the difference between life and death.
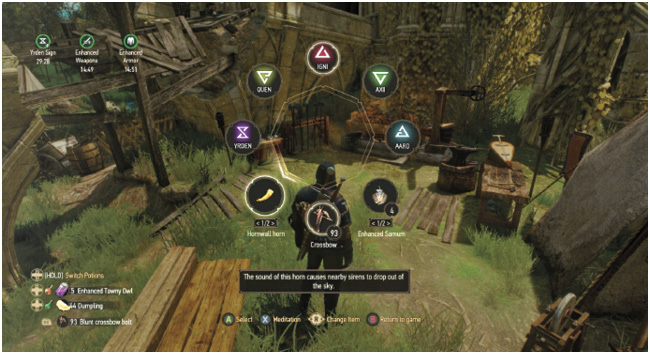
Quick-Use Consumables should have immediate effects: Potions like White Raffard’s Decoction, for immediate burst healing, or Thunderbolt, for a short burst of increased attack power, are excellent for the quick use item slots. In place of White Raffard’s Decoction, you can use any form of healing food to speed up health regeneration in combat. Potions like Cat, or decoctions, which have very long lasting effects compared to most other potions, are best accessed from the Inventory menu.
Tailor quick-use potions to your strategy and build: You can build Geralt to focus on his swordsmanship and crossbow skills; his Sign use; the bombs, potions, and enhancements gained through alchemy; or have a spread of skills throughout all of his ability trees. Likewise, there are potions that can greatly enhance the effectiveness of these aspects. If you want to have high-powered signs on demand, use Potions that power up their intensity. If you want your swords to hit harder, Thunderbolt is an obvious choice.
At least one bomb should be general use: There are many types of bombs, but you can have only two set up for on-demand use. Grapeshot is an excellent general purpose bomb that falters only against fire resistant foes. Samum is also good for its ability to blind or stun enemies caught in the blast radius.
Your second bomb slot should fit the situation: There’s little reason to carry two bombs that accomplish similar tasks. If you know you’re up against enemies weak to fire, switch in Dragon’s Dream to set up a powerful combo with Igni. If you know you’ll be battling large numbers of enemies, Northern Wind can literally bring the fight to a standstill, allowing Geralt to calmly pick out a priority target to bring down first.
Preparation: Meditation
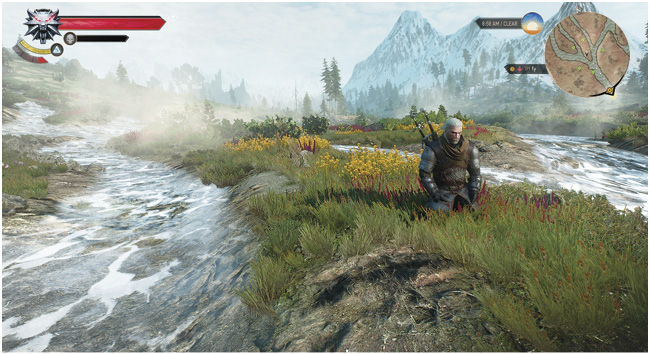
You need to prepare before you can start killing monsters. It’s not just about throwing on the best equipment you’ve got and running in to battle. Geralt is a skilled alchemist if he’s got the materials and formulae to work with, but more importantly, he can Meditate.
Meditation is one of Geralt’s most important abilities. Doing this allows you to skip ahead a set amount of time, changing the time of day and, at lower difficulty levels, restoring any Vitality he has lost. While meditating, Geralt automatically replenishes any prepared potions and oils as long as he has base alcohol in his inventory.