
The Witcher 3: Wild Hunt The Complete Edition Guide Appendices and Compendiums Bestiary
Ogroids
Ranging from massive Cyclopses and Giants to the deceptive Nekker, the ogroid family of monster is surprisingly diverse, requiring a variety of tactics and approaches to fighting them. One aspect that ultimately defines the ogroids is their propensity for brute strength: Even the diminutive Nekkers can become terrifying forces of nature.
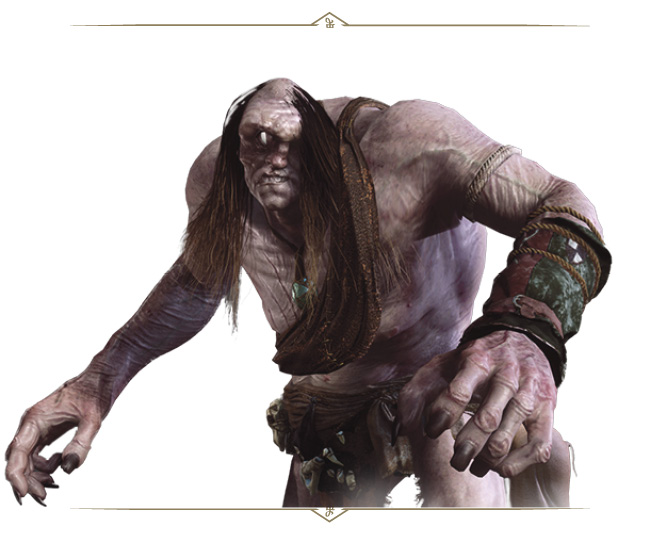
CYCLOPSES
Danger Alert

Frequency

Easily recognized by the single eye in the center of their foreheads, other tell-tale signs of a Cyclops are its enormous size, incredible strength, and a seething hatred for all humans.
|
Loot: Cyclops eye, Old bear skin, Infused shard, Orens |
|
Sub-Species or Named Variants: Cyclops, Speartip |
|
Environments: Caves and mountainous regions. Kaer Morhen’s Witcher trainees have long been tested by a Cyclops named Speartip, who lurks in the lake cave north of the aging castle. |
|
Specific Encounter:The Destroyed Bastion in far south Velen (Bald Mountain territory). |
|
Specific Encounter (Speartip): During Main Quest: The Final Trial (see page 240). |
Vulnerable Against

Enemy Attacks
As in the case of Giants, one can only guess at the strong and weak points of a Cyclops. Its heft alone precludes effective use of the Aard Sign, while its enormous physical strength would make its blows particularly deadly. Cyclopses are most likely vulnerable to ogroid oil. As monsters with relatively well-developed minds, they might also fall under the influence of the Axii Sign.
Charge: Expect this colossus to charge forward at you, when it focuses on your presence. It usually attempts a subsequent attack afterward, from the list mentioned below. Take this time to survey the combat ground, and prepare to maneuver around this behemoth, rather than stand in front of it.
Ground Pound: If a Cyclops raises both hands in the air, avoid being anywhere close to the front of it. The resulting ground-pound flattens even the toughest warriors. If you don’t fancy being prone and open to a bludgeoning from the ogroid’s fists, retreat immediately. Rolling away (which covers more distance than dodging) is the safest method.
A Rough Landing: Cyclopses can also leap into the air, knocking over anyone or anything too close to where they land. React in the same way as you would when backing up from a ground pound.
Lumbering Swipes: The usual attacks to dart from, when this gigantic ogroid heads into your personal space, are swatting swipes from each hand, usually horizontally, that can easily stagger, stun, knock you over, and damage you severely. As parrying or blocking isn’t possible, nimble dodging maneuvers (to get around the flanks of the foe for retaliation) is the best course of action.
Strengths: The strongest Witchers cannot parry or block any punch or slap delivered by a Cyclops, and a mere hop backward may not be enough to stay out of reach. Roll to the side or behind a Cyclops to evade their attacks and reach their vulnerable flanks.
The Best Battle Tactics
Cyclopses go where they want; even a Witcher should move to the side if a Cyclops is charging forward. Do not stand in one place when fighting a Cyclops. They rarely flinch from anything you inflict on them, so they keep trying to fight no matter how many cuts from a silver blade they take. However, getting close to a Cyclops is dangerous, but still a necessity for slaying one. The Yrden Sign can help you do more work every time you get within sword range of these monsters. To protect yourself from the first swinging fist of a Cyclops, use Quen.
Axii can temporarily confuse a Cyclops, giving you time to recuperate while the creature rages at something else. You may also wish to begin your bout lobbing some bombs that have a high-damage strike (like grapeshot), as well as peppering the beast with crossbow bolts; if you can wound one of these creatures before it gets too dangerously close to you, so much the better. Another action is to lob Northern Wind bombs to freeze the foe, then attempt a single, devastating Rend strong attack before the Cyclops thaws. This effectively nullifies all the Cyclops’ melee attacks, providing you have enough bombs, and inflict enough damage with your sword.
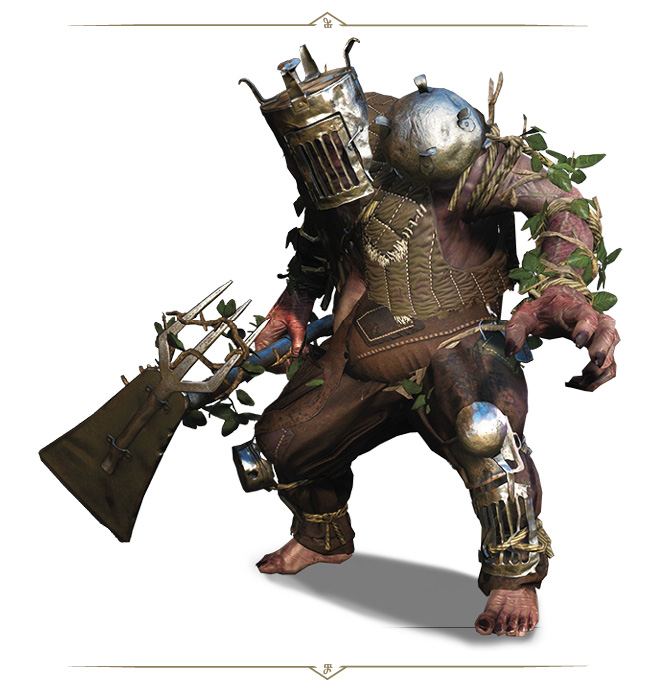
 GIANT, CLOUD

Danger Alert

Frequency

The Cloud Giant is a degenerated illusory being and an inhabitant of the castle in the sky in the Land of a Thousand Fables. After Jack stole his goose that laid golden eggs, the Cloud Giant decided in the future anyone who climbed onto his cloud would be tossed off, without a word of warning.
|
Loot: Relic Sword: Geshelft (if you follow the willow-the-wisp afterward) |
|
Sub-Species or Named Variants: Cloud Giant |
|
Environments: In the cloud castle, at the top of the Giant beanstalk. |
|
Specific Encounter:During Main Quest: Beyond Hill and Dale… (see page 338). |
Vulnerable Against

Enemy Attacks
The Cloud Giant resembles a clumsy, overgrown human and appears to be capable of reason, though he says nothing and does not seem too interested in any other form of communication. He has learned to use his natural surroundings, meaning the cloud on which he lives, to aid him while fighting; he will jump inside the cloud and pop out in an entirely different place, surprising his opponent.
Weapon Swing: A medium-range weapon swing. Dodge or leap to the side, or back away to avoid being struck.
Weapon Overhead Smash: A medium-range weapon smash, dropping vertically. Highly damaging, so avoid it using dodges and retreating.
Kick, Stomp, and Swipe: The Cloud Giant sometimes kicks, stomps, or swipes with his left arm; both push you back, increasing the distance between you, allowing the Giant to be more effective with his weapon swings. Simply avoid these by dodging.
Charge Attack: If you’re at long range, the Cloud Giant occasionally attempts a charge to close the distance. If you’re caught, expect to be pushed back, and possibly sent tumbling over. Recover and retreat, or simply roll or dodge to the side to avoid it.
Whirlwind Attack: Occurring at both short and long distances, this is the Cloud Giant’s most severe series of strikes, so watch for him raising his weapon up to the side of the head before he spins around. If he connects, the damage is significant, and you’ll be sent flying. Parrying is not an option, but dodging (or letting Quen bear the brunt of this) is.
Cloud Teleport: Using his lair to the best of his advantage, he drops into a cloud, and a moment later, leaps back out and brings his mighty weapon slamming down with an overhead smash. React by dodging, while keeping an eye on where he leaps up from so you aren’t caught.
Resistances: The Cloud Giant is immune to most signs aside from Igni, and is particularly resistant to Axii.
The Best Battle Tactics
Engage this behemoth in combat amid the clouds. Syanna helps, but it still takes skill and cunning to vanquish this tough son of a wench, which hits pretty hard for an illusion. Use the techniques you attempted when you slew the Giant named Golyat while first adventuring in Toussaint (the next Bestiary entry), or employ similar techniques to those when facing a Cyclops or the Ice Giant in Undvik.
To shorten combat considerably, stay within the three piles of metal objects. As this battle takes place on a cloud, during a thunderstorm, these objects are frequently struck by lightning. The objects remain electrified afterward, so lure the Cloud Giant close to one of the metal piles still writhing with energy, and wait for the foe to make a giant swing, and a giant mistake! The Giant’s weapon strikes the metal, electrocuting the fool and allowing you to attack him for a few moments. Keep this up!
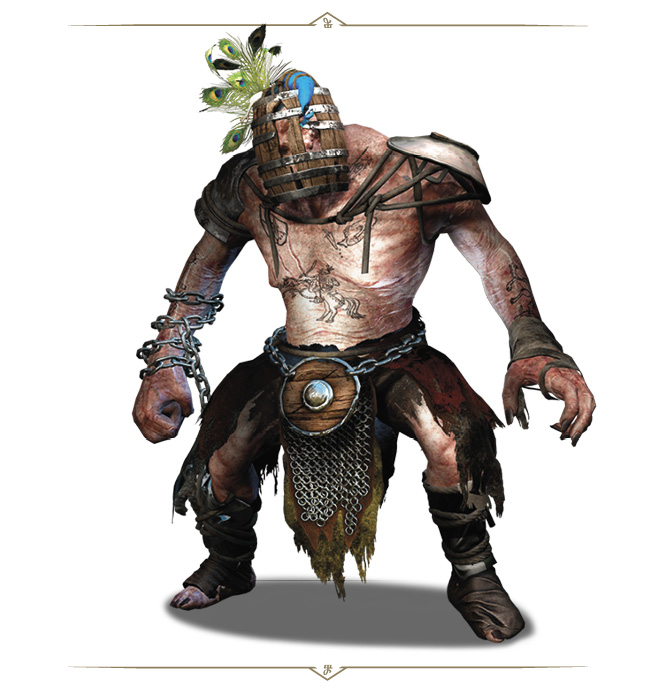
GIANT, GOLYAT
Danger Alert

Frequency

According to legend, Golyat had once been a knight who violated his vows, for which he was punished by the Lady of the Lake. Transformed into a Giant, he fled into the mountains and would only descend into the inhabited lowlands when hunger forced him to it.
|
Loot: Crowns and Golyat’s Trophy |
|
Sub-Species or Named Variants: Golyat |
|
Environments: Dulcinea Windmill, Toussaint. |
|
Specific Encounter:During Main Quest: The Beast of Toussaint (see page 317). |
Vulnerable Against

Enemy Attacks
Though he came across as a wild, unthinking beast, Golyat used simple tools and any item could turn into a deadly weapon in his powerful hands. When fighting Golyat wields a millstone, making his every blow truly crushing. This lumbering behemoth has the following attacks and maneuvers to be wary of:
Golyat uses a Giant mill wheel on a tree trunk to deliver massive bludgeoning damage in vertical pounds or massive horizontal sweeps. He loves to swing this weapon, smashing things all around. His attacks are far-reaching; he’s extremely aggressive and tends to keep moving toward you, mostly ignoring the three knights.
Weapon Swing: A medium-range weapon swing. Dodge or leap to the side, or back away to avoid being struck.
Weapon Overhead Smash: A medium-range weapon smash, dropping vertically. Highly damaging, so avoid by using dodges and retreating.
Kick, Stomp, and Swipe: Golyat sometimes kicks, stomps, or swipes with his left arm; both push you back, increasing the distance between you, allowing the Giant to be more effective with his weapon swings. Simply avoid these by dodging.
Charge Attack: If you’re at long range, Golyat occasionally attempts a charge to close the distance. If you’re caught, expect to be pushed back, and possibly sent tumbling over. Recover and retreat, or simply roll or dodge to the side to avoid it.
Whirlwind Attack: Occurring at both short and long distances, this is Golyat’s most severe series of strikes, so watch for him raising his weapon up to the side of the head before his spins around. Damage is significant, and you’re sent flying. Parrying is not an option, but dodging (or letting Quen bear the brunt of this) is.
The Best Battle Tactics
Golyat moves like his Cyclops brethren, refraining from running or strafing, and utilizes lumbering strides in your general direction. He is also incredibly tough, requiring a lot of damage in order to topple over. Exhibit patience, and work with your new knight friends. Occasionally they prove most worthy at distracting Golyat, allowing you to get in strikes when he’s pre-occupied.
Otherwise, dart in with a strike once Golyat finishes one of his troublesome, and damaging swings, and is recovering in readiness for his next attack. Darting in, damaging, and retreating is the key. You need not worry about the knights’ health, so let them bear the brunt of this enemy.
Or just shoot Golyat in the head with a crossbow; aim for the eye and unlock a hidden Achievement.
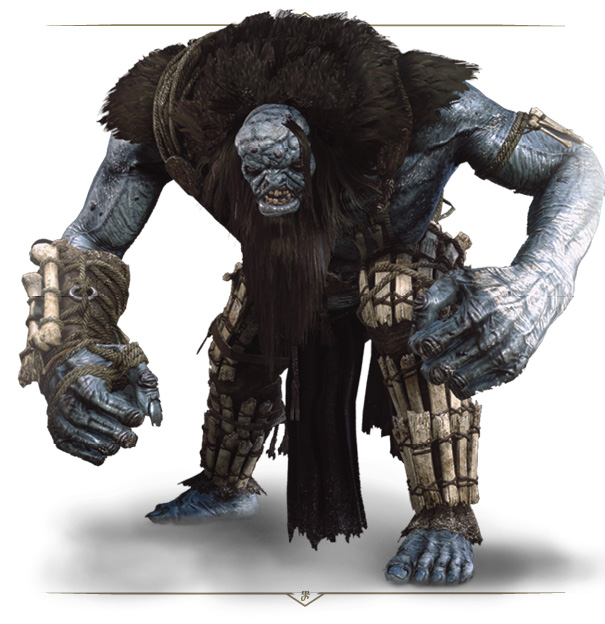
GIANT, ICE
Danger Alert

Frequency

This powerful, primeval monster is possibly the last of its race. Resembling a man, but blue as frost and taller than a tree, all attempts to communicate with it have ended in the same way: a quick and painful death.
|
Loot: Elemental essence, White bear pelt, White wolf pelt, Glyphs, Runestones, Infused crystal |
|
Sub-Species or Named Variants: Ice Giant |
|
Environments: An Ice Giant has been observed in the Skellige island of Undvik. If any exist on the Continent (outside Toussaint), they’ve yet to be discovered. |
|
Specific Encounter:Main Quest: The Lord of Undvik (see page 228). |
Vulnerable Against

Enemy Attacks
This powerful primeval monster draws strength from frosts, and can bind Sirens to its will. It treats victims cruelly, and is particularly fond of human flesh. It uses simple but devastating weapons made from items looted from the bodies (and ships) of those it has slaughtered. On the occasion you face this behemoth, it has a ship’s anchor attached to a huge rusty chain, which it uses for bludgeoning during the latter part of the fight.
Charge: Expect this frozen foe to charge at you when it focuses on your presence. It usually attempts a subsequent attack afterward, from the list mentioned below. Take this time to survey the combat ground, and prepare to distract it while your friends attack, lob bombs before getting out of the way, or shoot crossbow bolts until it is too dangerously close to you.
Ground Pound: If the Ice Giant raises both hands in the air, avoid being anywhere close to the front of it. The resulting ground-pound flattens even the toughest warriors. If you don’t fancy being prone and open to a bludgeoning from the ogroid’s fists, retreat immediately; rolling away (which covers more distance than dodging) is the safest method.
A Rough Landing: The Ice Giant can also leap into the air, knocking over anyone or anything too close to where it lands. React the same way as you would when backing up from a ground pound.
Lumbering Swipes: The usual attacks to dart from, when this gigantic ogroid heads into melee range, are protracted swipes from each hand, usually horizontally, that can easily stagger, stun, knock you over, and damage you severely. As parrying or blocking isn’t possible, nimble dodging maneuvers (to get around the flanks of the foe for retaliation) are the best course of action. Activate Quen so the first of these swats is shrugged off.
Anchors Away: A long-range weapon swing. Dodge or leap to the side (rolling is another fine option), or back away to avoid being struck. Employ Quen before the battle so the damage from the crushing anchor, if it hits you, is absorbed.
Strengths: The strongest Witchers cannot parry or block any punch or slap delivered by this Ice Giant, and a mere hop backward may not be enough to stay out of reach. Roll to the side or behind him to evade his attacks, and help your fellow Skelligers by constantly maneuvering so the beast has no single victim to crush.
The Best Battle Tactics
Though similar to the Cyclops in terms of combat ability, there is one aspect of the Ice Giant that must be cautioned; reportedly the monster draws its strength from cold weather with blizzards allowing them to reach their physical peak.
Creatures such as the Siren can be bound to the will of an Ice Giant. Witchers should coat their silver swords in oil that affect any potential allies to the Ice Giant to help eliminate them more quickly. A Hornwall Horn was once crafted to help repel Sirens attacking Skelligers, knocking them out of the sky with a single blast of noise. Having the horn is of great use against an Ice Giant, directing them to attack its enemies.
As with a Cyclops, evasiveness and footwork are your best defenses against an Ice Giant. Use Yrden to improve your chances of avoiding any attacks! The initial battle is similar to that of a Cyclops; use bombs or crossbow attacks to soften up the Ice Giant, then use Quen to protect yourself and make consistent and rapid dodges and rolls to avoid those swiping hands.
When the huge anchor is used by the Ice Giant, it becomes slightly less mobile, allowing you to launch sword strikes, or bombs like dancing star, or Igni that can damage this ice-loving foe. You can cunningly step forward, in front of the collision spot where the anchor hits the ground, and launch Igni (or Yrden), or lob bombs while the Giant struggles to haul the anchor back in for another swing. Repeat these plans until the terror of Undvik is no more.
NEKKERS
Nekkers Danger Alert

Frequency

Hagumban Danger Alert

Frequency

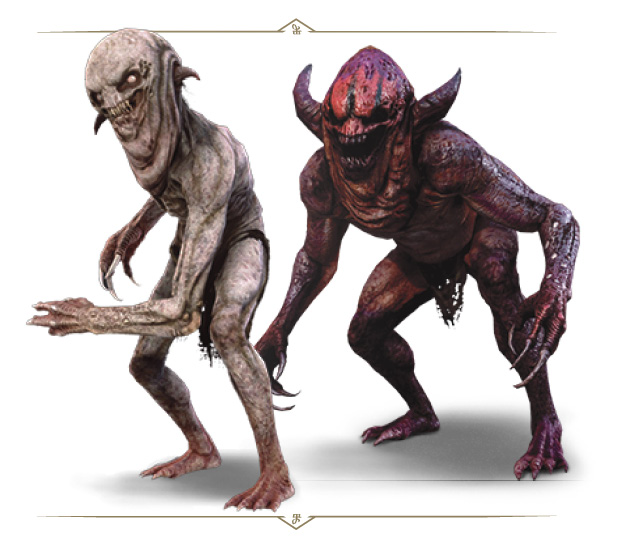
A lone Nekker is harmless. Five are dangerous. Ten can kill even a veteran monster slayer.
|
Loot: Nekker blood, Nekker claw, Nekker eye, Nekker heart, Nekker Warrior liver, Nekker Warrior mutagen |
|
Sub-Species or Named Variants: Nekker, Nekker Warrior, Hagumban |
|
Environments: Found in numbers across the known world, though they prefer locations near roads, where ‘food’ regularly passes by. Nekker nests can be defended by large numbers of these creatures, with the occasional Nekker Warrior to maintain rule; all must be defeated. |
|
Specific Encounter:The Monster Den (cave) just northwest of Hanged Man’s Tree in Velen. |
|
Specific Encounter (Hagumban): Contract: Waylaid Transport (see page 535). |
Vulnerable Against

Enemy Attacks
Nekkers live in the dark woods that grow in damp, mist-filled valleys, in colonies of one to several dozen individuals. They dig deep burrows for lairs and connect them with a network of narrow tunnels. They always attack in groups and by surprise, trying to surround their prey as quickly as possible, cutting off all escape routes. Luckily their attack is for the most part disorganized.
Charging Leap and Swipe: The Nekker leaps forward from mid-range with a leaping swipe. Well-timed sword slashes can interrupt this leap if it occurs just before the Nekker takes off.
Jumping Swipe: While hissing and baying at melee range, one or more Nekkers attempt to slice at your hide with thick-nailed clawing attacks. Parrying these is straightforward. Try employing Quen in case an attack gets through your defenses when you’re trying to parry or counter. After parrying, press home the advantage with a flurry of sword strikes.
Burrowing: Occasionally, Nekkers attempt to burrow to flee from your rage, or to maneuver behind you for a surprise attack. Yrden slows this down considerably (either before they burrow, or as they are appearing), and simple blocking or parrying stops this surprise attack.
Warriors: Tougher Nekkers usually have skull-shaped helmets and are fiercer opponents than the swarm of usual, bony foes. Feel free to target them first, though every single Nekker needs to die!
The Best Battle Tactics
Individual Nekkers are weak, easy marks compared to other monsters; Nekkers do not tend to fight as individuals. If you see one, expect anywhere from 2-10 more. Nekkers overwhelm their targets through sheer numbers, surrounding them, then pummeling and clawing victims to death. Even veteran Witchers can fall prey to this.
Initially approach Nekker combat with a similar plan to dealing with a crowd of bandits: long-range weaponry that controls groups of foes, such as Aard, or bombs such as Dancing Star or Northern Wind (the latter is excellent at freezing multiple Nekkers bunched together, followed up by rapid slicing and dicing before the effects of the freeze wear off). This helps thin out a Nekker herd before close combat becomes necessary. Aard can knock a Nekker to its back, allowing for swift execution. Aard can also knock over several Nekkers at once, a good way to break through large groups of attackers.
For singling out Nekkers (such as Hagumban or Warriors), Axii can cause them to pause in a stupor (so you can cut down other foes or wound the tougher enemy with sword strikes). Igni is also a good choice for roasting groups, or individuals if you use Firestream. After incapacitating a tougher Nekker, follow up with Rend to deal a single, devastating strong attack. For waltzing through multiple Nekkers, parrying is great (countering is always possible), and Whirl (fast attack) is fantastic for demolishing a pack.
TROLLS, ICE
TROLLS, ROCK
Ice Trolls Danger Alert

Frequency

Rock Trolls Danger Alert

Frequency

Wham-a-Wham Danger Alert

Frequency

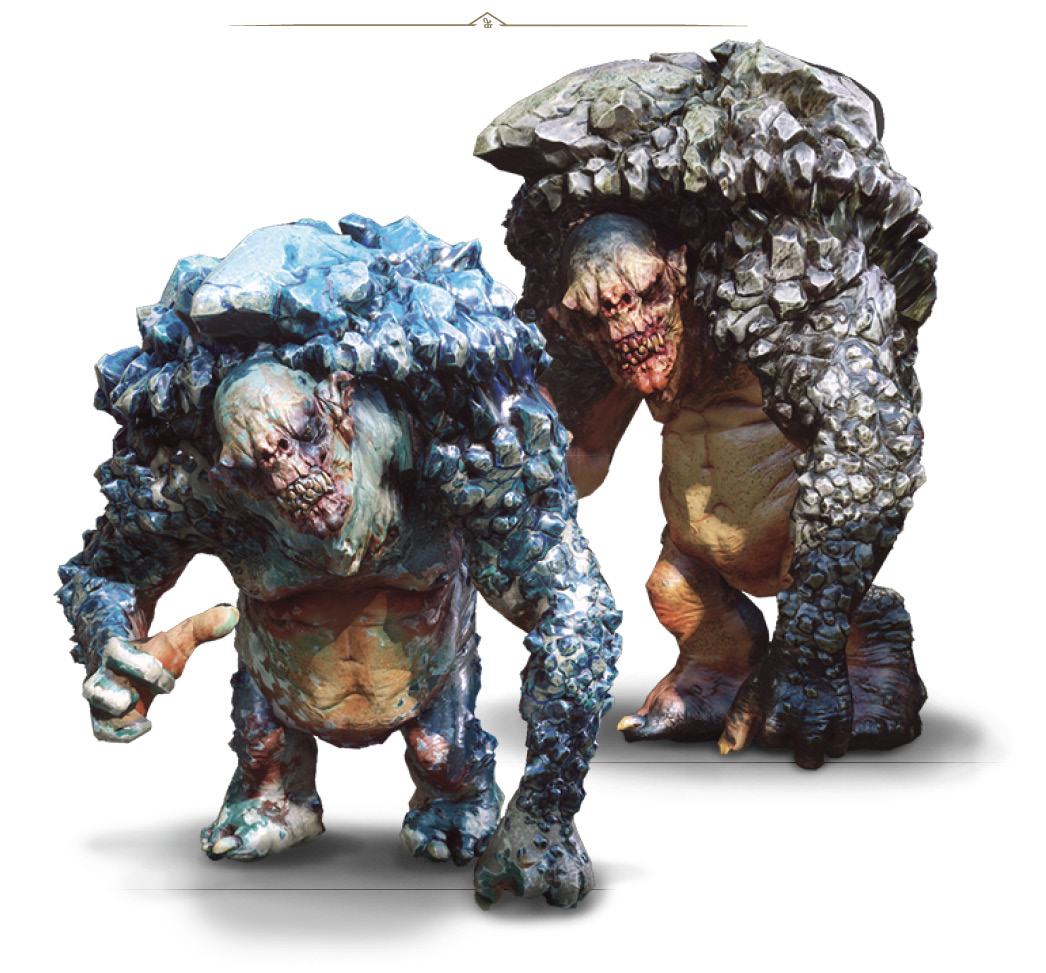
Trolls live atop high mountain ridges so inaccessible they rarely encounter humans, while others hide away in caves. Some suppose this is why they have not mastered the basics of common speech. Others claim their harsh lairs have stripped them of an ability they once possessed, for in a land of never-ending cold or darkness there is no room for mercy or understanding.
|
Loot (Ice Trolls): Monster blood, Monster brain, Mosnter ear, Monster tooth, Troll skin, Cave Troll liver, Infused shard, Troll mutagen |
|
Loot (Rock Trolls): Troll skin, Infused dust, Troll mutagen |
|
Sub-Species or Named Variants: Ice Troll, Rabid Rock Troll, Rock Troll, Cave Troll, Wham-a-Wham |
|
Environments: Ice and Rock Trolls prefer rocky and mountainous terrain. They have been known to claim bridges, though many hide away in caves. |
|
Specific Encounter (Ice Troll): In the cave north of Abandoned Village on the isle of Undvik (Skellige). |
|
Specific Encounter (Rock Troll): The stone bridge southwest of Crossroads (south Velen) once the bandit camp is cleared. |
|
[[DLC ICON]] Specific Encounter (Wham-a-Wham):Contract: Missing Miners (see page 529). |
Vulnerable Against

Enemy Attacks
Ice Trolls are crueler than their rocky kin. Though they use similar tactics in battle (tossing stones and swinging with their mighty fists) they are heartier and stronger than Rock Trolls and thus more dangerous. Rock Trolls, on the other hand, are quick to pummel and lob heavy rocks your way, but have been known to appreciate a conversation over bloodshed, and even help humans on occasion.
Rock Throwing (ranged): Running away from a Troll does not guarantee safety, as they can throw stones with alarming speed and accuracy. Fortunately, you can easily spot the Troll picking up a projectile. Simply dodge or roll to the side so you’re not struck (and possibly stunned) by it. There’s around a second of recovery time after a Troll throws, so if you can roll in and attack, this is a great time to do it.
Headbutt (melee):With a quick backstep before a launch forward, the Troll butts anyone standing in front of it with a staggering headbutt. Be sure you’ve employed Quen or sidestepped to avoid this.
Leaping Ground-Pound (melee):To close the distance, a Troll usually leaps in and pounds the ground with its pair of massive fists, which can stagger anyone in the area of effect. Dart backward, then step into melee range as the Troll recovers from completing this (missed) attack.
Pummeling Punches (melee):The power and weight behind every punch thrown by a Troll means that they cannot be parried. Expect single swings and sometimes a series of three punches in a combo. A Witcher must be adept at evasion, striking when the opportunities appear, then dodging the inevitable counter-attack. Another option is to retreat and avoid the swiping, then stepping in at the end of the attack to inflict damage of your own.
Defenses:Both Troll types have backs covered in thick protective armor, meaning one should never strike them from the rear. Meanwhile their mass means that the Aard Sign cannot move them. Lastly, never think of attacking Ice Trolls during a blizzard; they draw power from the surrounding cold and fight with increased strength.
The Best Battle Tactics
Trolls of both varieties are vicious fighters, and unfortunately must be fought head on. The armor of stone or ice on their backs protects them too well for flanking tactics. Axii stuns them, but only for a brief second (and is only really useful for interrupting their rock throwing), and Yrden slows an already-sluggish foe, though you’re still within the range of its massive fists and head.
Tactics for slaying Trolls are as simple as the beasts themselves. It is important to cast Quen and protect yourself from a Troll’s fists as you’re fighting them head-on. Time your (strong) attacks just after each of the Troll’s swipes, stepping (or rolling) in and hitting the Troll before backing up again. Igni can cause more constant damage while this occurs. Quen is there so you’re not stunned and pummeled after a misstep. If you’re attacking from range, a Samum or Dancing Star bomb can soften these lumbering idiots up a bit.