
The Witcher 3: Wild Hunt The Complete Edition Guide Appendices and Compendiums Bestiary
Draconids
The very mention of a dragon is enough to send a shiver of fear through even the most experienced Witchers. True dragons, however, are rarely seen these days, driven off by wars or slain by the mass-hunts of the past. It does not stop villagers from claiming that every small draconid they see is a dragon, though. Additionally, the ferocity of a basilisk or Forktail are no less threatening to human lives, for there is a good reason why Witcher Contracts for these monsters’ heads are written, and why Witchers are sought to claim them.
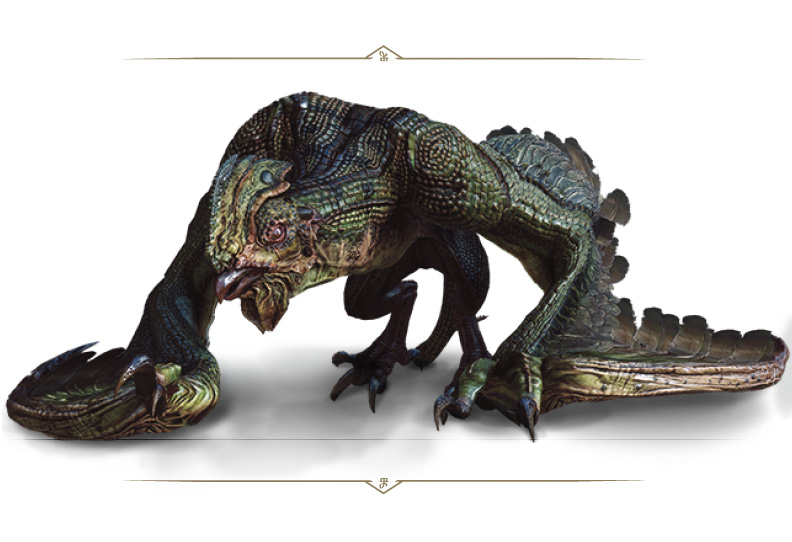
BASILISKS
Basilisk Danger Alert

Frequency

Silver Basilisk Danger Alert

Frequency

A Basilisk spits venom at its victim, weakening armor and causing damage over time. The Golden Oriole potion is essential.
|
Loot: Basilisk Plate, Basilisk Venom, Dragon Scales, Basilisk Mutagen |
|
Sub-Species or Named Variants: Basilisk, Iocaste (Silver Basilisk) |
|
Environments: Basilisks dwell within dark and damp locations – cellars, caves, and city sewers tend to be their preferred places. |
|
Specific Encounter (Basilisk): The marshland north of White Eagle Fort (Treasure Hunt: Dowry, see page 555). |
|
Specific Encounter (Silver Basilisk): The scrubland west of Trading Post, Toussaint (Secondary Quest: Mutual of Beauclairs Wild Kingdom, see page 536). |
Vulnerable Against

Enemy Attacks
The Silver Basilisk (known as Iocaste), is a toughened variant of the usual Basilisk you encounter (though you have additional support from Crinfrid Reavers during this quest.
Flying Talon Grab: While airborne, or after leaping into the air, Basilisks may attempt to land devastating overhead blows with their claws. These can be parried or quickly dodged; rolling is preferable as you duck away from the outstretched claws.
A Rough Landing: The Basilisk drops down with a heavy thud onto the ground, which can stagger you. Rolling or dodging to the side, timing this so you can roll into the beast’s flank to inflict sword damage afterward, is a good plan.
Wing Swipe (Left or Right): Basilisks are skilled at using their wing and foot talons in a fashion similar to Cockatrices; sweeping them with hard-hitting claw attacks in either direction, which can cover a huge distance if necessary, and can stun you. Having Quen active to absorb such a strike, or rolling under the wings to the torso of the draconid to inflict damage is worth planning for. They have been observed to react to Witchers in combat by parrying sword strikes with their wings.
Spitball: A Basilisk can leap into the air, hover momentarily, and spit acid at their opponents from above. This action happens extremely quickly, and a Witcher should always watch for it, and dodge or roll to the side just as you see the Basilisk start to hover.
The Best Battle Tactics
Despite appearances, Basilisks are highly vulnerable to Igni, or other means of fire-starting, such as the Dancing Star bombs. A well-timed Dancing Star or Igni burst can not only bring down a Basilisk from the sky, but the beast will be so pre-occupied from being set ablaze that it has difficulty defending itself. This is usually better than aiming a crossbow at it, as (though effective) you run a greater risk of being struck by its poisonous projectile attack. An automatically-aimed crossbow bolt, just as the Basilisk swoops in toward you, is usually easier to hit with compared to manually aiming at greater distances.
Otherwise, using Quen (particularly Active Shield) to wound a Basilisk and cause it to land, and then performing a variety of quick rolling and slicing fast attacks to the beast’s flanks, as well as stunning it temporarily with Aard, are all good choices.
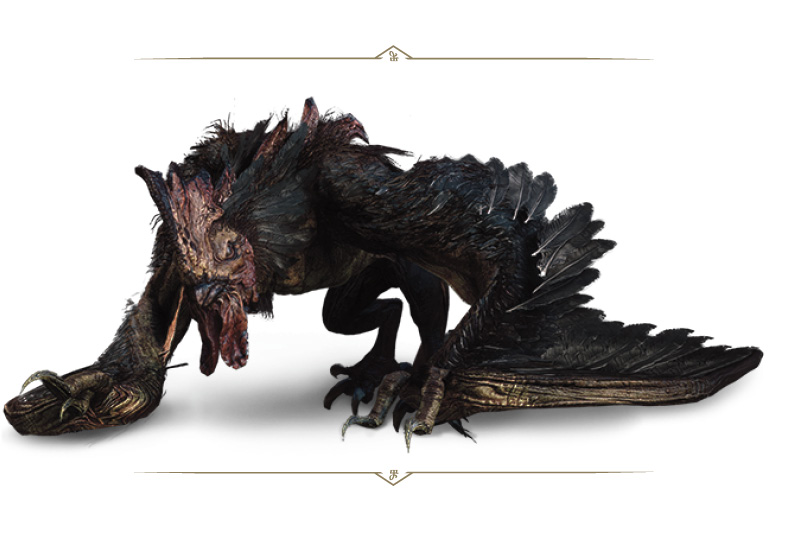
COCKATRICES
cockatrices Danger Alert

Frequency

Shrieker Danger Alert

Frequency

Of all the fearsome flying foes, none are as comfortable on the ground as the Cockatrice.
|
Loot: Cockatrice Maw, Cockatrice Egg, Raw Meat, Cockatrice Mutagen |
|
Sub-Species or Named Variants: Cockatrice, Shrieker |
|
Environments: Cockatrices prefer hiding in caves and abandoned structures to rest and recuperate, but are aggressive hunters, seeking prey caught in open fields. |
|
Specific Encounter:The sheep pasture land east of Cavern, and west of Yantra, in Gustfields territory. |
|
Specific Encounter (Shrieker): Secondary Quest: Shrieker (see page 515). |
Vulnerable Against

Enemy Attacks
The named Cockatrice (known as Shrieker), is a toughened variant of the usual Cockatrice you encounter.
Flying Talon Grab: While airborne, or after leaping into the air, a Cockatrice may attempt to land devastating overhead blows with their claws. These can be parried or quickly dodged; rolling is preferable as you duck away from the outstretched claws.
A Rough Landing: The Cockatrice drops down with a heavy thud onto the ground, which can stagger you. Rolling or dodging to the side, timing this so you can roll into the beast’s flank to inflict sword damage afterward, is a good plan.
Wing Swipe (Left or Right): Unlike the Basilisk, the Cockatrice has no projectile spit, but does have more skill at using its wings and feet talons in a sweeping and hard-hitting claw attack in either direction, which can cover a huge distance if necessary, and can stun you. In fact, Cockatrices seem to favor ground combat over airborne attacks. Having Quen active to absorb such a strike, or rolling under the wings to the torso of the draconid to inflict damage is worth planning for. They have been observed to react to Witchers in combat by parrying sword strikes with their wings.
The Best Battle Tactics
Cockatrices fight aggressively once a battle has begun. Take advantage of this aggression and ground them with Aard or Grapeshot. A crossbow can also bring them down to earth should they attempt to fly, but unlike a Basilisk or Griffin, Cockatrices tend to favor fighting on land.
A Cockatrice strikes with talon on its wings and feet, and its razor-sharp beak and tail tip. These blows almost always target vital regions on a victim, causing massive bleeding. A Witcher should have the Swallow potion on hand to counteract any wounds sustained in this manner.
Always try to flank a Cockatrice. Being in front of it exposes you to its beak and talons. It is possible, with excellent timing, to counter-attack blows from the wing talons or even from the beak, but you put yourself in grave danger when attempting this, without proper defensive protection. Add Quen while attacking the flanks or rear (usually after rolling out of the way as it lands), and really hammer your sword into this beast as often as you can, stopping to cast Quen again and retreating once it wears off or the Cockatrice is struck by it.
When grounded, a Cockatrice will try to remain close to its prey. Should you try to escape on foot, a Cockatrice can leap astonishing distances to tackle you. Another combat option is to employ Roach, and fight Cockatrices on horseback. Providing Roach doesn’t become too frightened and throw you off, you can gallop at a Cockatrice, swing at it, and speed off, before repeating the plan.
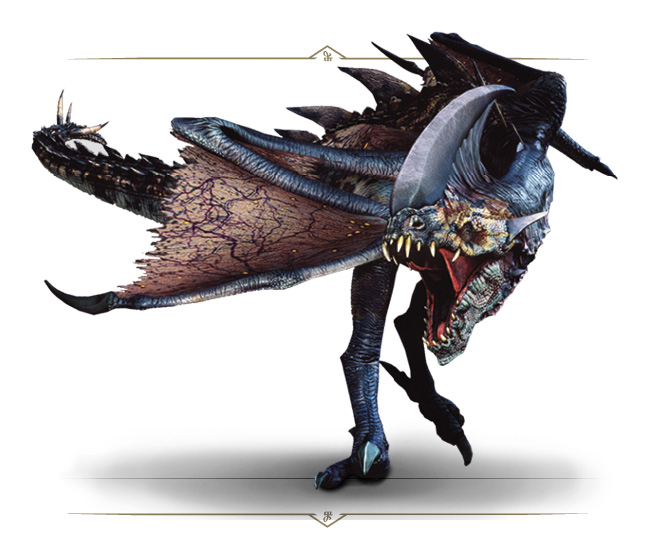
FORKTAILS
Forktails Danger Alert

Frequency

The Dragon of Fyresdal Danger Alert

Frequency

As one might expect from the name, Forktails employ their large whipping tails to deadly effect in combat.
|
Loot: Forktail Mutagen, Forktail Plate, Dragon Scales, Raw Meat |
|
Sub-Species or Named Variants: Forktail, Dragon of Fyresdal |
|
Environments: The wilderness of Velen and Skellige provide adequate hunting grounds for these creature. Villagers fear the presence of Forktails as far inland as White Orchard. Their nests are found in secluded areas, overlooking their hunting territory, and resemble a bird’s nest, though larger and accompanied by the occasional remains of humans or cattle. |
|
Specific Encounter:The Guarded Treasure along the river, northeast of Boatmaker’s Hut (Velen). |
|
Specific Encounter (The Dragon of Fyresdal): Secondary Quest: Dragon (see page 527). |
Vulnerable Against

Enemy Attacks
The named Forktail (known as The Dragon of Fyresdal), is a toughened variant of the usual Forktail you encounter.
A Rough Landing: The Forktail drops down with a heavy thud onto the ground, which can stagger you. Rolling or dodging to the side, timing this so you can roll into the beast’s flank to inflict sword damage afterward, is a good plan.
Charging Headbutt: After landing, and at medium or close distances, the Forktail sometimes executes a quick charge, leading with its head. This can knock you back and sometimes off your feet. It is relatively easy to dodge around it.
Rearing Bite: While close or in melee range and on the ground, the Forktail rears up slightly, before clamping its mouth down and snapping at you. This can sometimes stagger, and parrying or dodging prevents you from being wounded.
Leaping Talons: While in the air, but also sometimes on the ground, the Forktail launches forward and rakes you with its terrible talons. Avoid or parry this.
Tail Whip: Known for its prehensile tail, a Forktail can whip it around and batter you with it, which has a chance at poisoning you. Avoiding this by defending with Quen and fast dodging or rolls between sword strikes is the key to success here. The tail-tip stingers of a Forktail are highly poisonous, and as such, Golden Oriole is essential. Forktails will aggressively employ their tails in combat, and the only recourse is to simply evade these strikes.
The Best Battle Tactics
Like other draconids, the Forktail is a capable flyer. Bring it down to the ground with crossbow bolts or Grapeshot to start the real fight. Forktails are as aggressive as any Wyvern, making use of their foot talons to slash and kick at unfortunates they’re hunting down.
As with many other draconid fights, judicious use of Quen before wading into attack a downed Forktail, and then attempting some deft dodging to the flank before slicing with quick attacks and retreating again, is the best way to whittle down a Forktail’s vitality. The main difference between this and other draconid battles is the Forktail’s namesake attack; the whipping tail strike usually allows you to reach its flank and rear more quickly than with other draconids, though the tail swipe is highly dangerous.
Proper dodging can not only evade a tail swipe, but place you in a perfect position to strike at a Forktail’s vulnerable rear or flanks. But don’t be so preoccupied with the tail of a Forktail that you neglect to attack its head. Bites from a Forktail come at near-lightning speeds, but they can be parried or even countered.
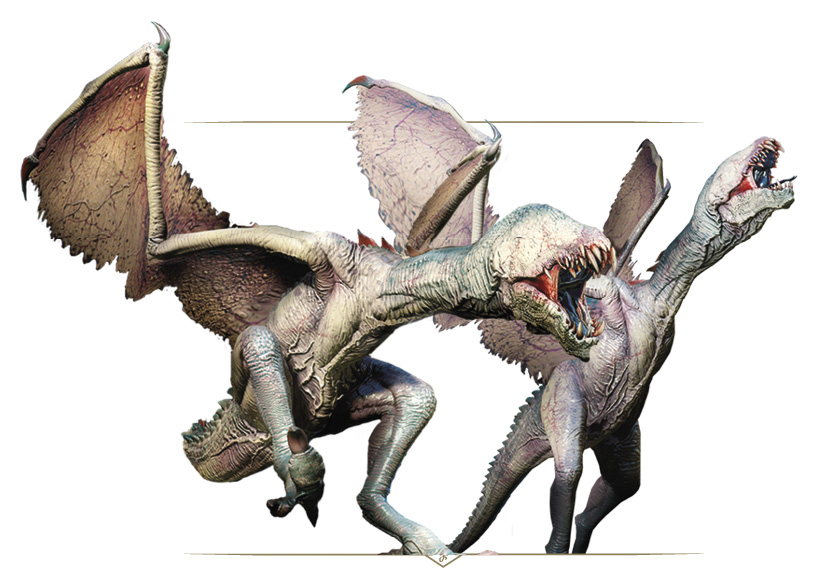
 SLYZARDS & MATRIARCHS

Danger Alert

Frequency

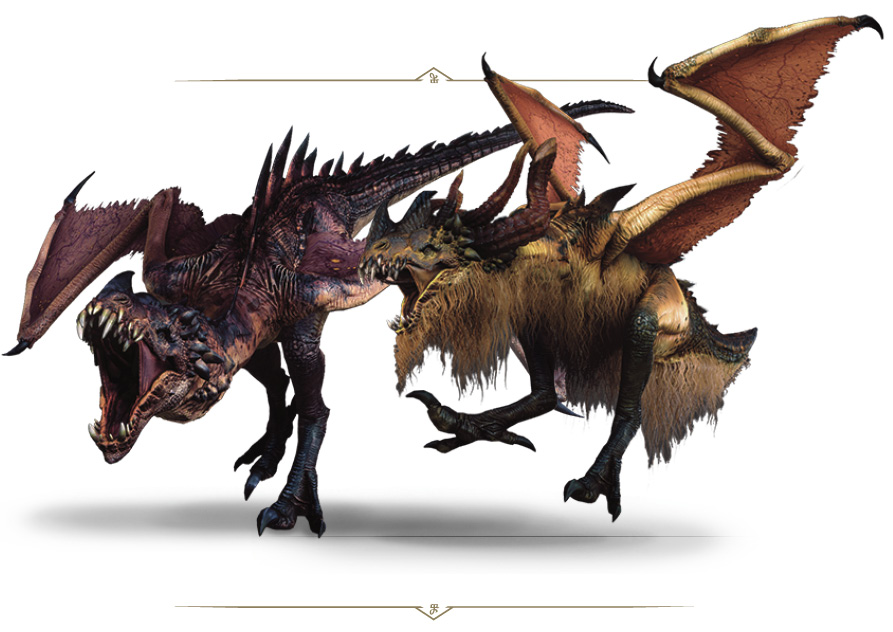
The toughest of all the draconids, face this fire-breathing draconid in its eyrie atop the ruins of Fort Ussar.
|
Loot: Greater Glyph of Igni, Monster Wing, Red Mutagens, Dragon Scale |
|
Sub-Species or Named Variants: Slyzard, Female Slyzard |
|
Environments: Only one nesting pair of Slyzards has been spotted, atop the Fort Ussar Ruins in eastern Toussaint. |
|
Specific Encounter:Contract: Bovine Blues (see page 542) |
Vulnerable Against

Enemy Attacks
Main Maneuvers and Charging Headbutt: The Slyzard mainly uses flight to close the distance between itself and you; expect most attacks to occur on the ground. When at middle range or close to you, the Slyzard sometimes executes a quick charge, leading with its head. This can knock you back and sometimes off your feet. It is relatively easy to dodge around it.
Fire Breath (Airborne): After its mouth lights up with heat that can melt metal, it flies to middle or close distances, lets forth a belching orb of flame, spitting this highly-damaging and flammable attack in your general direction. This ominous and dangerous projectile is shot while airborne; look for this, and time your dodge immediately afterward.
Flying Talon Grab (Airborne): Slyzards may attempt to land devastating overhead blows with their claws. These can be quickly dodged; rolling is preferable as you duck away from the outstretched claws.
Fire Breath (Ground): Look for fire in the mouth of the Slyzard when it lands; this can also occur at close range while engaging the beast in melee combat. It can severely roast you (with burning damage that hurts you after the initial fire), so once again, watch for the build-up of fire in the mouth of the Slyzard, and dodge around it so you’re not caught in the blaze.
Scream of Hot Air (Ground): While the Slyzard builds up its fire to breathe on you again, it can strike you with a screaming hot air attack. This can stagger you, after which it tends to bite or scrape at you with its talons or use its tail whip or headbutt, if you are farther away. Dodge or roll to the side to avoid this scream.
Rearing Bite (Ground): While close or in melee range and on the ground, the Slyzard rears up slightly, before clamping its mouth down and snapping at you. This can sometimes stagger, and parrying or dodging prevents you from being wounded.
Leaping Talons (Ground): While in the air, but also sometimes on the ground, the Slyzard launches forward and rakes you with its terrible talons. Avoid or parry this.
Tail Whip (Ground): Though not as deadly as a Forktail, the Slyzard has a tail whipping attack that cannot be parried, and this follows its Scream attack if you’re close enough. Otherwise, the Scream is followed by a charge and rearing bite.
Resistances and Defense: Slyzards are resistance to both burning and freezing attacks. It also tends to take to the sky to avoid your melee attacks.
The Best Battle Tactics
An almost-white colored aggressive draconid, sometimes mistaken for a dragon, this beast favors close-range combat where it can unleash its powerful fire breath and screaming attacks that can stun you, creating an opening for its unstoppable tail attack. When it takes to the skies, it tends to swoop in and belch fireballs from above. Think of the Slyzard as a more potent Forktail or Wyvern, but quicker and more aggressive.
The most fearsome of draconids (and the fact you must defeat two of these foes at once) means extra caution is required when facing a Slyzard. Begin by employing Aard or Grapeshots to down the Slyzard, so you need not worry about being bombarded by fire from above. Aard is great for confusing a Slyzard long enough to roll in and strike; dodging and counter-attacking any bites and then flanking and striking before retreating again is the order of combat here. Apply an initial protective Quen shield about you to absorb the first attack of the beast and interrupt both the fire and scream-based attacks with Aard.
WYVERNS
WYVERNS Danger Alert

Frequency

Royal Wyvern Danger Alert

Frequency

With venomous spittle, and more swiftness than a Basilisk or Cockatrice, Wyverns are mean and vicious airborne predators.
|
Loot: Wyvern Egg, Wyvern Plate, Dragon Scales, Wyvern Mutagen |
|
Sub-Species or Named Variants: Wyvern, Royal Wyvern |
|
Environments: Nesting Wyverns have been spotted across Velen, though these beasts are highly adaptable, and have been sighted across the entire Continent, and the Skellige Isles. |
|
Specific Encounter:The lighthouse at Lornruk, in northwest Velen. |
|
Specific Encounter (Royal Wyvern): Secondary Quest: Phantom of the Trade Route (see page 514). |
Vulnerable Against

Enemy Attacks
The larger specimen (known as The Royal Wyvern), is a toughened variant of the usual Wyvern you encounter, during Secondary Quest: Phantom of the Trade Route (see page 514). In addition, a regular Wyvern is hunted during Contract: Patrol Gone Missing (see page 513).
A Rough Landing: The Wyvern drops down with a heavy thud onto the ground, which can stagger you. Rolling or dodging to the side, timing this so you can roll into the beast’s flank to inflict sword damage afterward, is a good plan.
Charging Headbutt: After landing, and at medium or close distances, the Wyvern sometimes executes a quick charge, leading with its head. This can knock you back and sometimes off your feet. It is relatively easy to dodge around it.
Rearing Bite: While close or in melee range and on the ground, the Wyvern rears up slightly, before clamping its mouth down and snapping at you. This can sometimes stagger, and parrying or dodging prevents you from being wounded.
Leaping Talons: While in the air, but also sometimes on the ground, the Wyvern launches forward and rakes you with its terrible talons. Avoid or parry this.
Spitball: A Wyvern can spit acid at their opponents from above, or usually from a distance while prowling on the ground. This action happens extremely quickly, and a Witcher should always watch for it, and dodge or roll to the side just as you see the Basilisk start to cough up this poisonous attack.
The Best Battle Tactics
Wyverns are especially venomous, able to spit poison at their prey, or directly inject it from their tails. Golden Oriole potions are a must. Wyverns fly around their prey, well outside of crossbow range, before swooping in at great speeds to attempt clawing their target. Even a Witcher cannot stand their ground against that. It is best to get out of the way, though bolder Witchers can actually score crossbow hits as the Wyvern draws near.
Aard and Grapeshot can bring an airborne Wyvern to the ground (use these attacks just as the Wyvern begins to swoop it to strike you). Wyverns are tough enough to resist bolts from a crossbow, but more lethal munitions can still force the beast from the sky. After downing a Wyvern, additional grapeshots can stun this foe, allowing you to pile on the damage as the beast recovers. Such attacks should obviously occur at range. If you find a
Wyvern is reeling from a bomb strike, you may find running in and casting Yrden to slow it down, before hammering home some sword slashes, is a good tactic.
On the ground, a Wyvern prefers to strike with the talons on its feet, its tooth-filled maw, and its tail. It is possible to parry and counter-attack bites, but the consequences for bad timing are high. A better plan is to cast Quen, and wade into melee range; as the Wyvern slashes or bites you and Quen protects you, staggering the beast, press home with additional slashes. Also try to roll to the flanks or tail area and slash one or two more times before retreating out of its attack range (employing similar tactics to those if attacking a bear). Strong attacks are best timed when the Wyvern is reeling from a bomb explosion, or after it finishes an attack and is recovering.