
Tom Clancy's Ghost Recon: Wildlands Guide Welcome to Bolivia Villa Verde: El Wey
Laboratory 2

Objectives
- Destroy the lab’s generator
LOCATIONS
- Pyrolusite Laboratory Dos
REWARDS
- + 1,000 XP
Brief
Mined in Villa Verde, pyrolusite is processed in labs across the province for use in cocaine production. If we can locate and destroy these labs it will cut off the flow of pyrolusite to the cartel.
De-Generator X
Just over a kilometer north from Villa Verde Bravo is a base on a mountain promontory, with a main road wrapping around the west and north of the perimeter, and hillside jungle to the east and south. Sporting an annoying mortar, but otherwise lightly-guarded, your task is to locate the generator inside the facility, and destroy it. This is harder said than done.
Pyrolusite Laboratory Dos: Recon
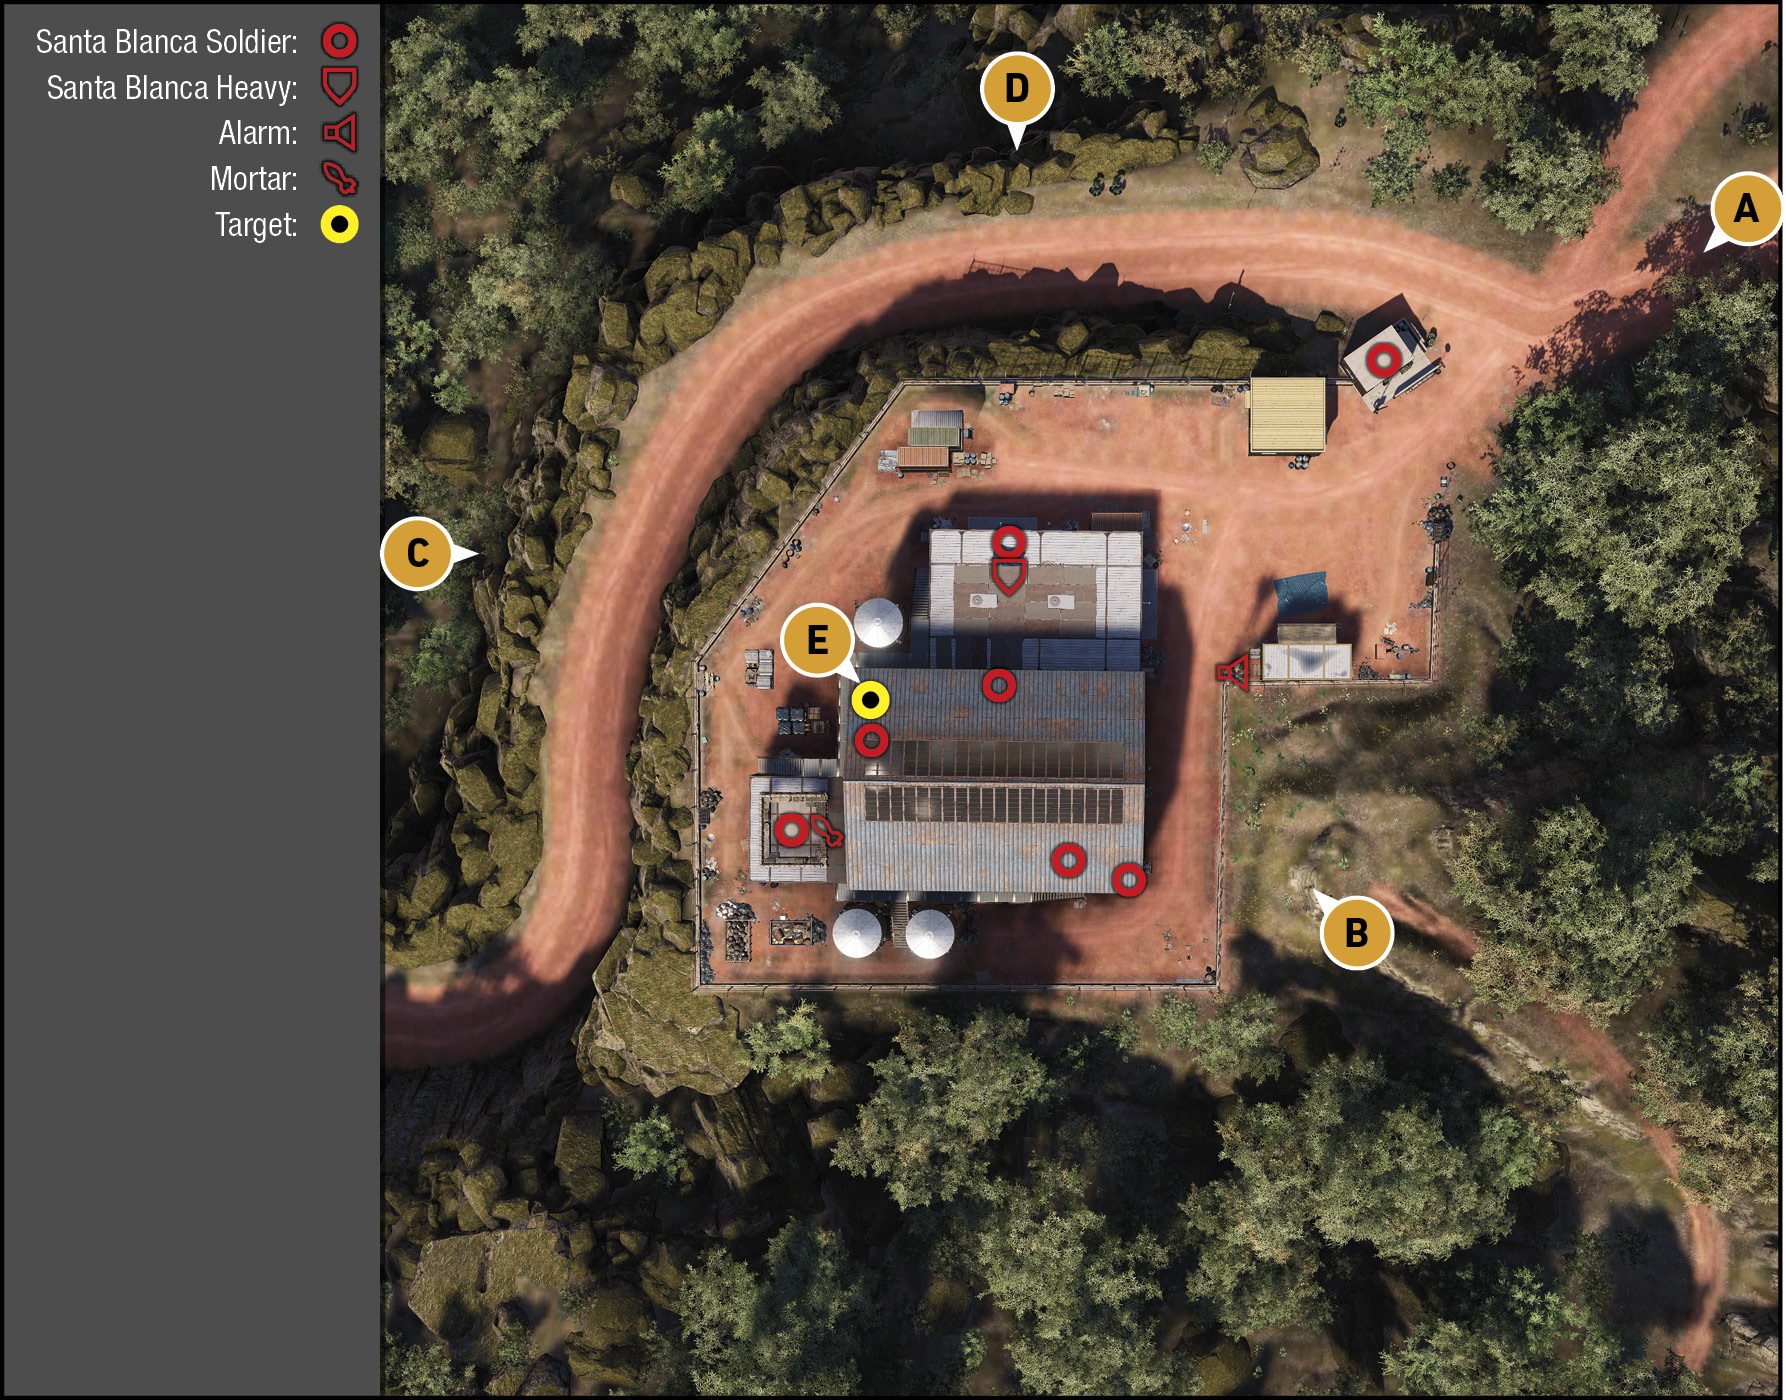
TACMAP
The cartel has done a reasonable job of keeping the perimeter of this base intact; the only way in and out is via the entrance to the northeast. Of course, you can fire from vantage points above the fence, or through it. Inside, there’s a small yard with two trucks, a storage area attached to the main laboratory warehouse, and a smaller rear laboratory with an exterior mortar atop it, in the southwest corner. Access that via the exterior gantry wrapping around much of the warehouse itself. The generator is on the inside of the west wall of the main structure. Note the cartel vehicle parked in a narrow south yard; good for escaping in.
Northeast: Warehouse Entrance And Yard
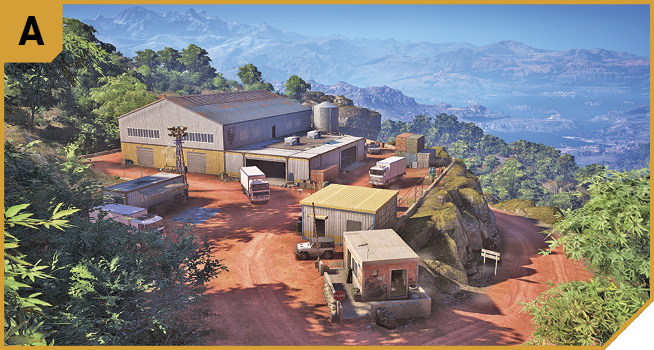
Outside of a chopper landing (and there’s a mortar to dissuade you from that), this is the only way into and out of this facility. This means that assuming you deal with the checkpoint guard, you can fan out and take the inside perimeter, and maneuver around the outside the warehouse, from outbuilding to cover opportunity, until you wish to enter the warehouse itself.
Familiarize yourself with all the window and door locations of the warehouse, so you can proficiently target the generator as early as possible. But always destroy the alarm pole panel in the front yard first.
Southeast: Hillside Overlook
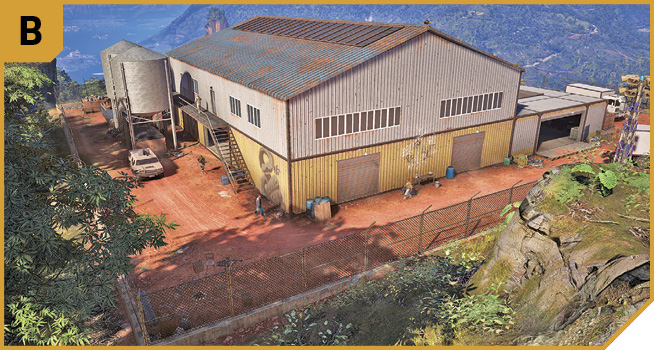
This is the other excellent location, as it’s one of few areas (the trailhead to the southeast) where you can see straight through the southern garage door entrance into the warehouse, and the generator itself. This allows you to lob in a grenade, fly an explosive drone, or shoot a high-powered round or two into the generator without having to set foot inside the facility. Otherwise, this perimeter is inaccessible, so remain at height, and tag foes below before or after the mission succeeds. Don’t forget your first shot should be to destroy the alarm panel.
West: Perimeter And West Yard
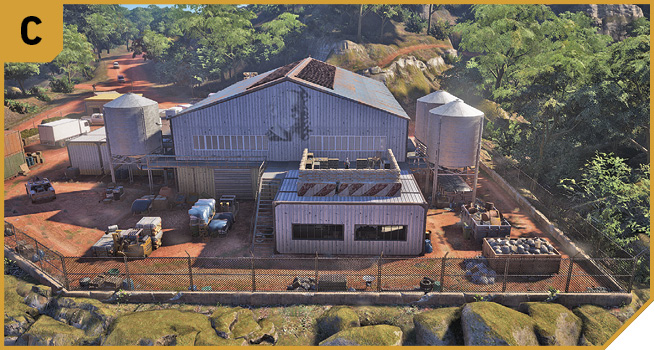
There’s no way into this part of the base from outside (unless you’re flying), but it’s important to note the gantry steps you can reach by scurrying in from A, and around the inside of the perimeter of the base. Head up there, neutralize the mortar foe, so a chopper can extricate you, and perhaps smash the windows of the small lab structure the mortar is resting on; you can vault through the windows and you’re very close to your target.
North: Perimeter And North Yard
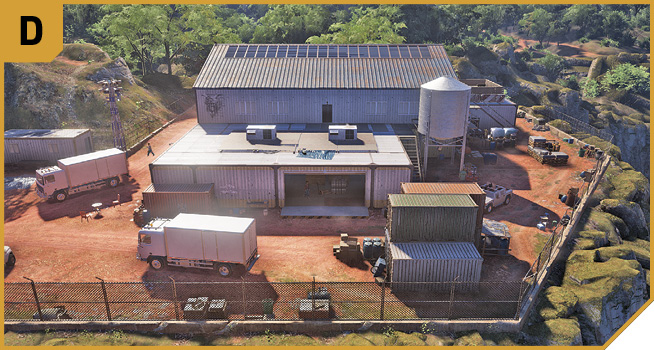
You cannot access the base from the perimeter wall, so once again you need to infiltrate from A (or the sky), and then learn the nuances of the scenery in this part of the yard. There are containers to climb up and use as cover and a height advantage. There’s a container at the northeast corner of the storage structure; climb onto the roof, and you can quickly overpower the mortar enemy around the corner, to the southwest. Or, you can use the gantry, or enter the warehouse at ground level.
|
 Target: Warehouse And Generator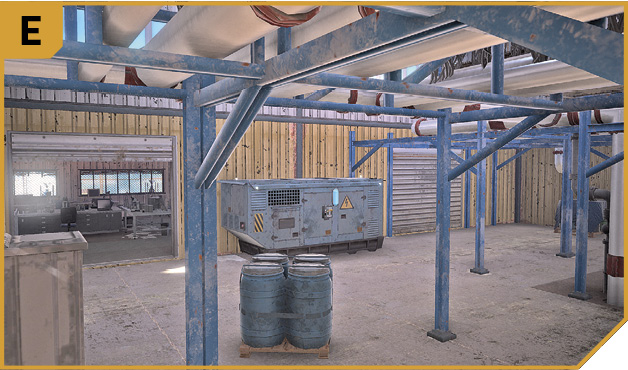
Pyrolusite Laboratory Dos: Other Tactical Advice
 The generator is on the interior west wall of the main warehouse room. It can be destroyed using a high-power weapon (like a shotgun or sniper rifle), or any explosive. It can also be shut down (as you would normally deactivate a generator), but this just wastes time. You need to blow this up, and get out. Achieve this by flying an explosive drone in from outside. Or, shoot at the generator with a high-damage weapon from the perimeter, through the south garage doorway near B. Or, standing on the rock on the southwest corner of the southern perimeter fence, shoot out one of the upper windows on the south wall of the warehouse between the two cooling cylinders, and lob a grenade over the fence, through the window, so it lands on the generator. This is difficult, but not impossible. Try this from an easier angle (the gantry around the warehouse by the mortar, for example). Alternatively, sneak in from A, onto the gantry steps, into the warehouse, and destroy the generator by any means you wish. Or, pick an armored vehicle, drive it through the entrance, get out and storm the building, lobbing in a grenade, and flee (using the same vehicle, one of the unloading trucks).
Yet another option is to tag the checkpoint foe from cover at A, moving into the base and removing the enemies and alarm panel as you go, then insert yourself and team into the storage room’s north entrance as well as spreading out to the gantry stairs near the mortar, and finish off the enemies before committing to the generator destruction. Or, drop from a helicopter onto the roof (or land the chopper on the roof), drop onto the gantry and blast the generator, or use an explosive drone. Choose the latter as you can’t get back onto the roof once you’ve dropped off it. It’s worth flying low and strafing the mortar foe first.
 There are better distraction opportunities in Co-op, allowing you and a friend to speed through the main entrance in a cartel vehicle, while a friend at B provides supporting fire, and a fourth Ghost locates a getaway vehicle, or concentrates on the installation takedowns (alarm and mortar).