
Tom Clancy's Ghost Recon: Wildlands Guide Welcome to Bolivia Libertad: Marcus Jensen
Chemical Trail
Objectives
- Locate the buchon’s house
- Search the buchon’s house
- Locate the chemical institute
- Locate the chemical institute’s boss
- Interrogate the chemical institute’s boss
LOCATIONS
REWARDS
- + 500 XP
Brief
Libertad’s buchon is rumored to be one of the cartel’s top chemists. His identity is still unknown, but we’ve recently learned the location of his residence. Searching the house might provide clues to the boss’s identity and help us track him down.
The Laptop in Libertad
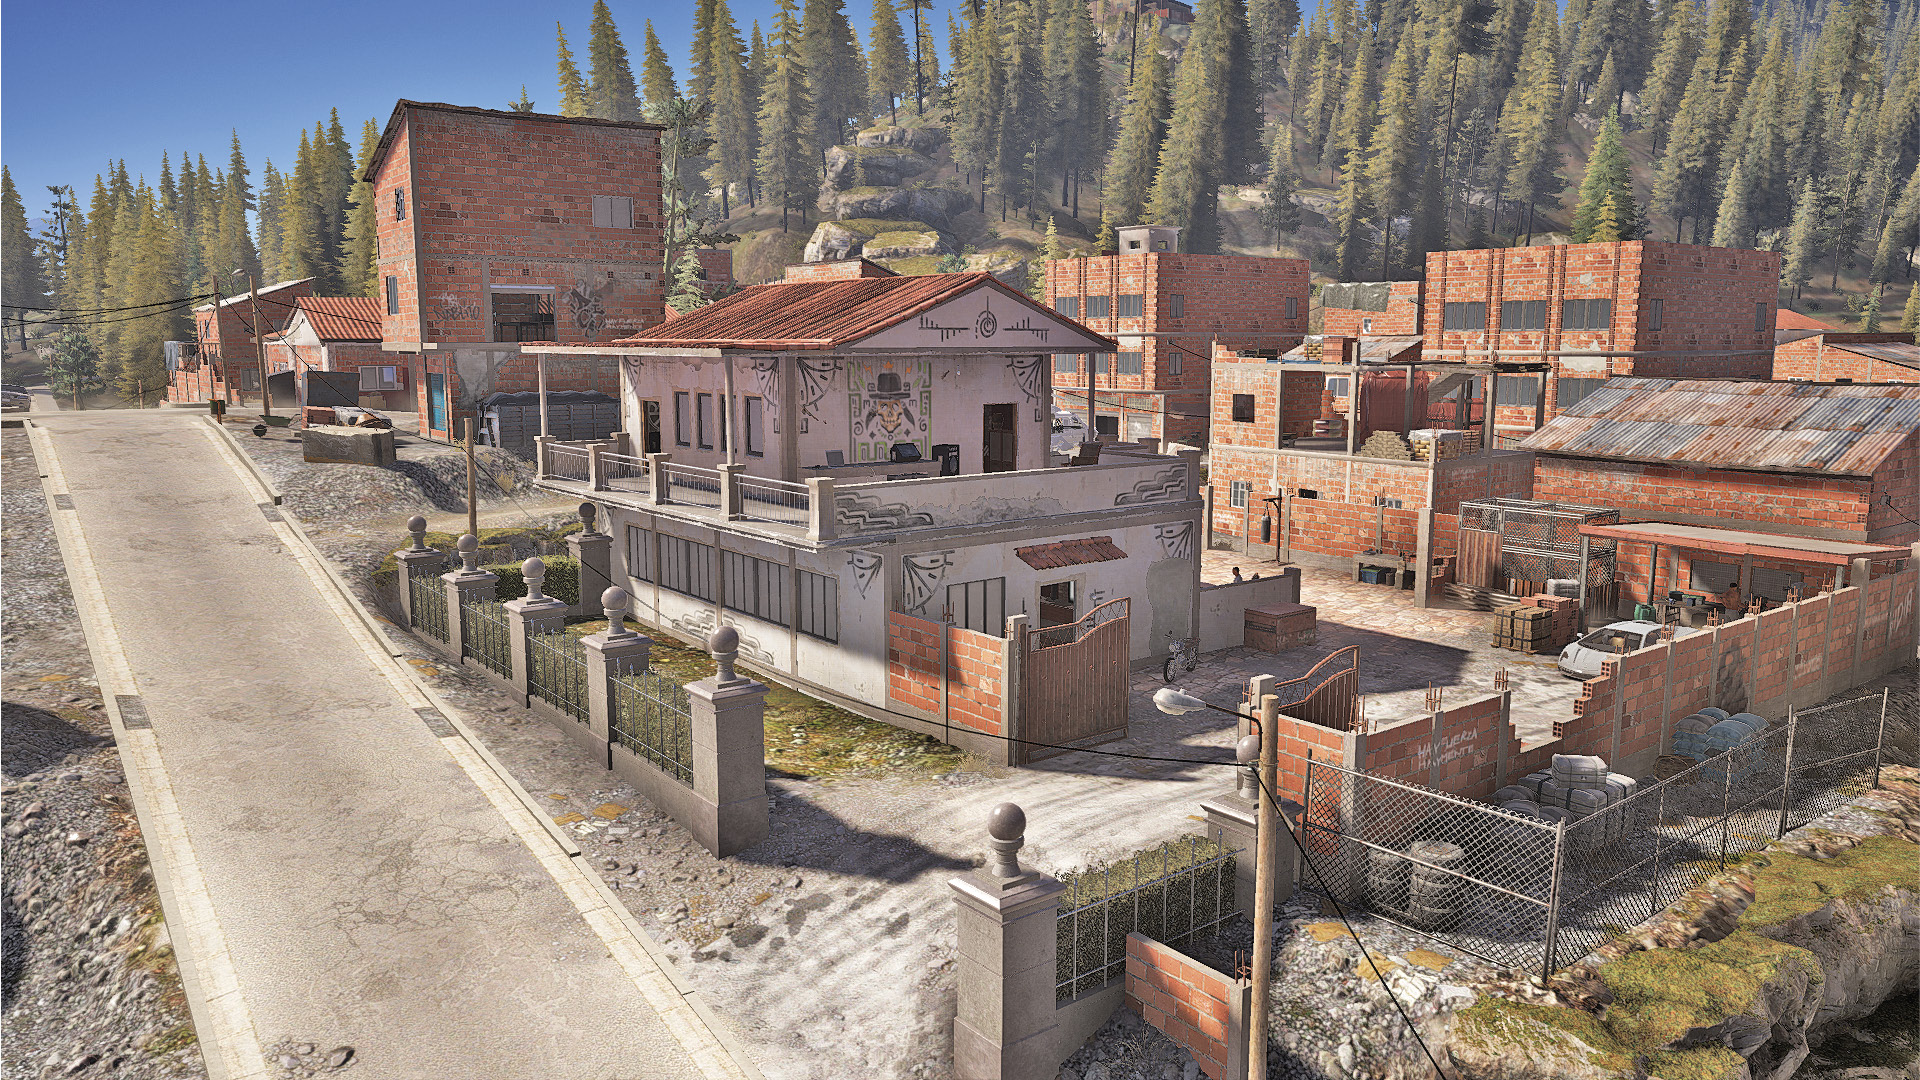
Around 1.2 kilometers west of Libertad Alpha is the town of Libertad, nestled in the woods with a heavy cartel presence. It’s wise not to engage every enemy in town, but concentrate your activities on the area in and around the buchon house itself.
Buchon House (Libertad): Recon
TACMAP
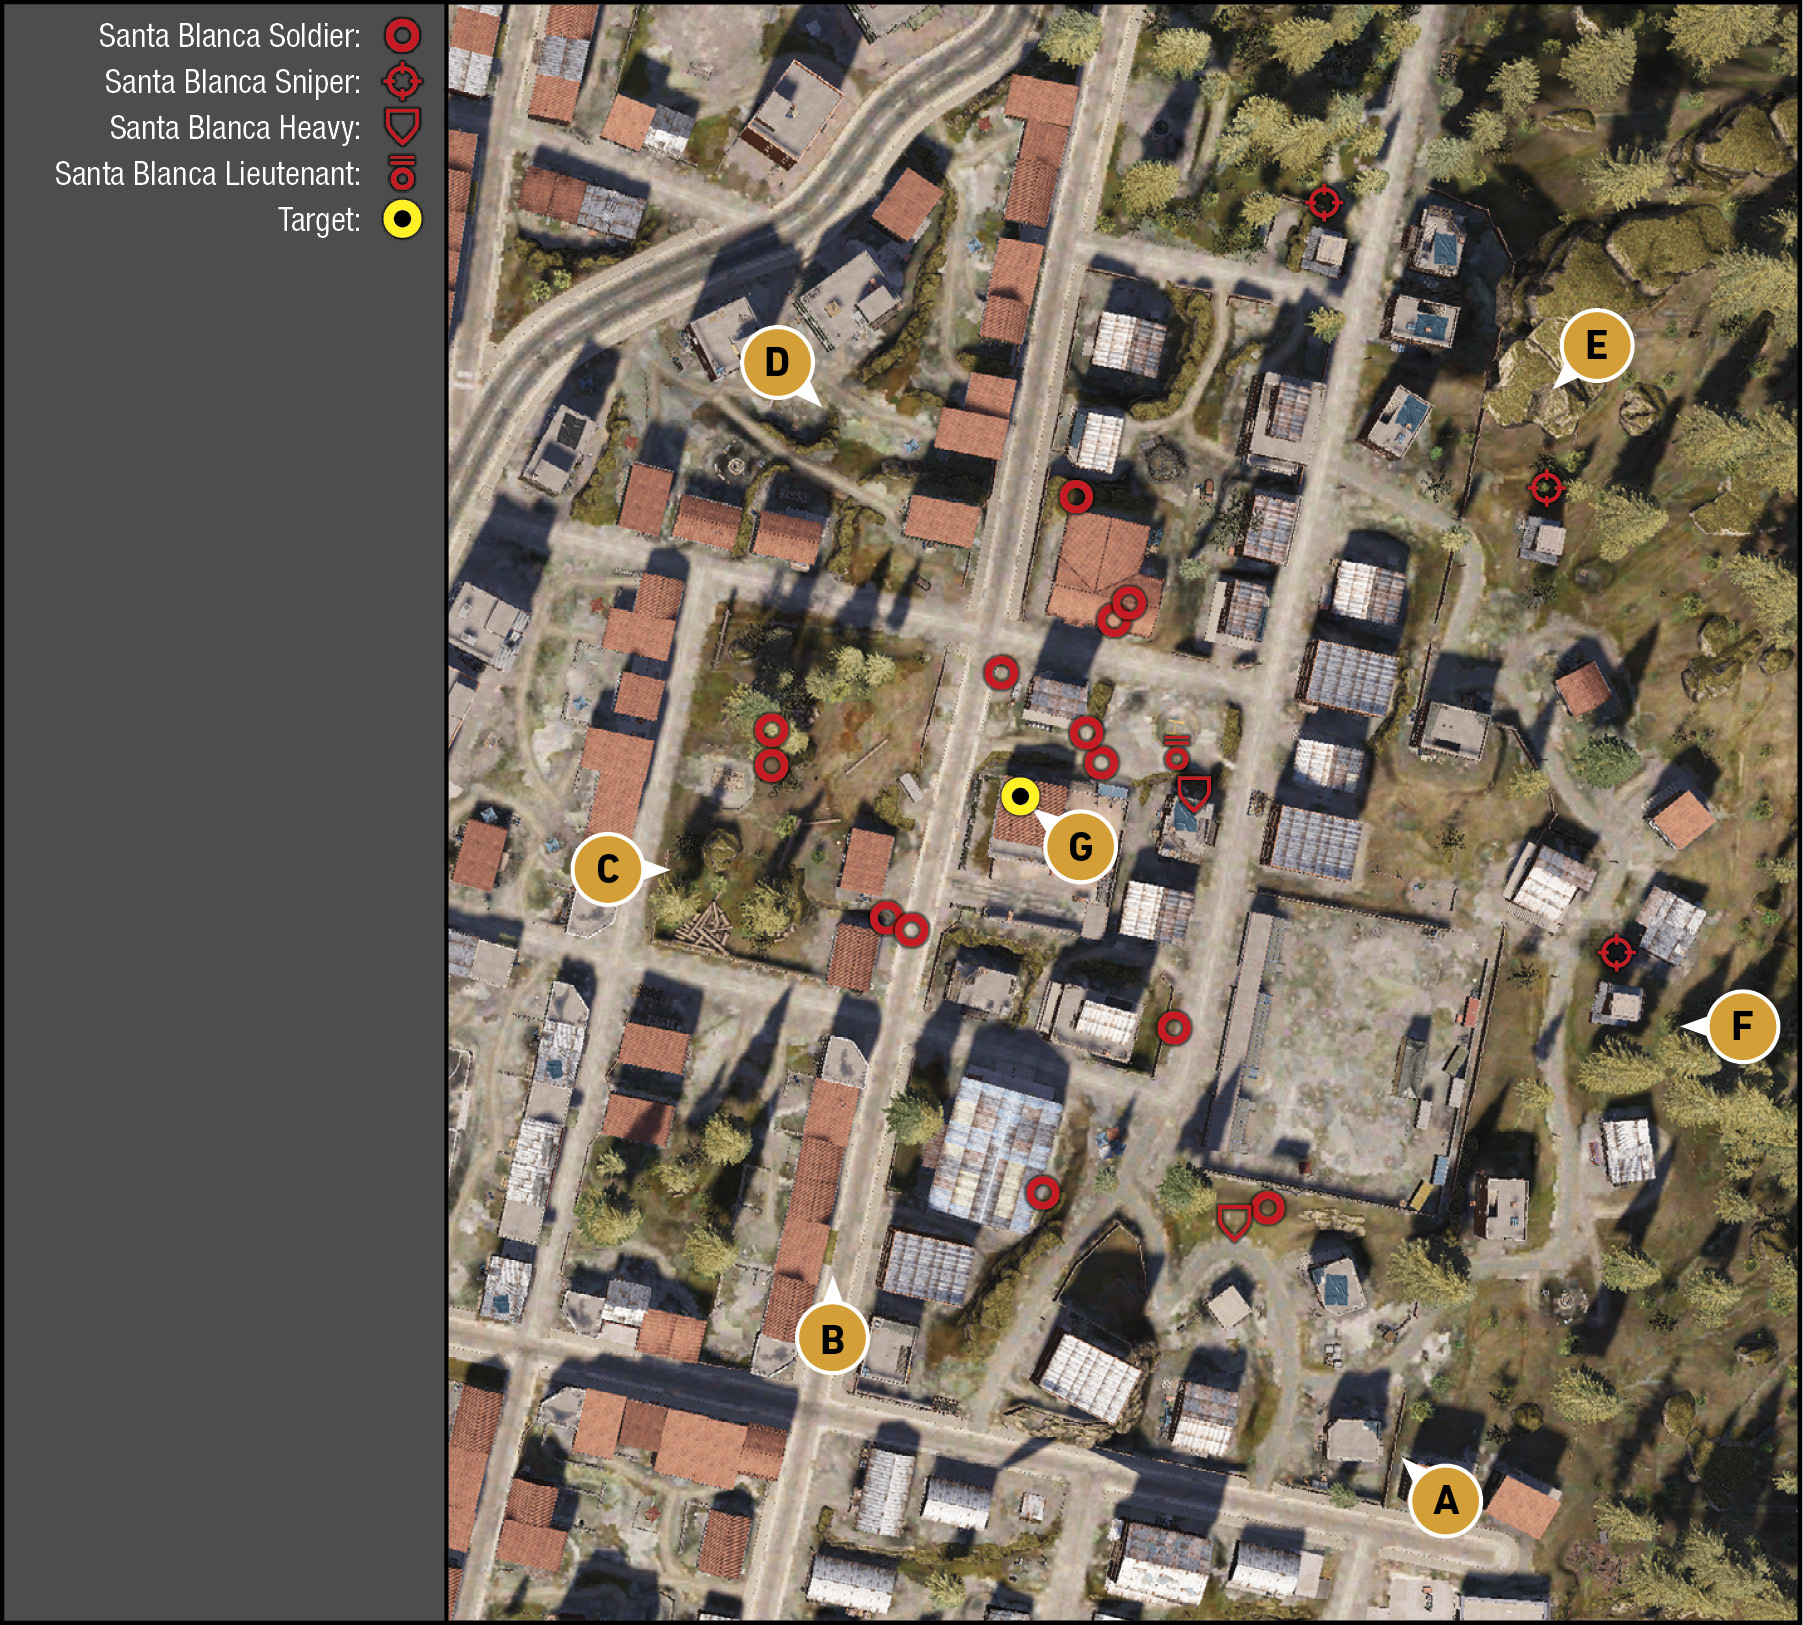
As this location is recently acquired by the cartel, security is tight but not overwhelming. Aside from the three sniper towers on the east side of town, the mission area only has enemy foot soldiers to worry about, and depending on the direction of the infiltration, they can be bypassed entirely. This is easier to accomplish once you realize the buchon house is the small compound comprising a white building, just east of the remains of a park one block in diameter. The laptop you need to check is on the upper balcony (south side).
Southeast: Uphill Gravel Path
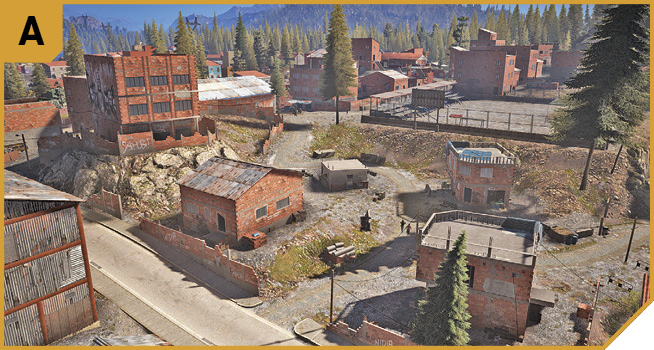
With the small soccer stadium to the north, this slightly uphill graveled area of half-built brick structures is reasonably safe to maneuver through. There’s enough cover for you to ignore the patrolling foes and defeat lone enemies without raising the alarm. There may be a couple of cartel vehicles parked here; escape in them if they’re there and you need an exit. Sneak northwest into the chapel for additional cover and a survey of the buchon house one block to the north. The only issue is moving uphill toward the compound, where far more foes reside.
South: Main Road
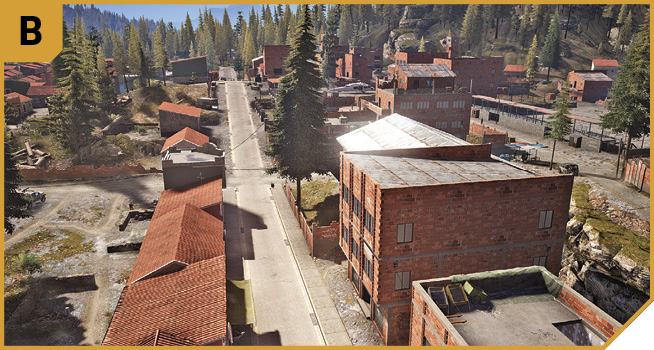
Head up this straight road, and you pass directly by the buchon house and can easily swerve into the compound via the open courtyard, into the house, and procure the laptop data while others guard the ground level. Then escape in the same vehicle or the sports car parked inside the compound. Or continue up the road and park away from the enemy, or create distractions by driving around the block.
West: Park
Approach from this direction for the fewest enemies to worry about, and with patience (after recon tagging of foes) you can creep into the compound to secure the data. There’s easy access through the park to the open container for cover, after which you can choose either entrance to head into. Just watch for the one or two foes patrolling the park. Note the hill at the north end of the park—good for covering fire.
Northwest: Green House and Log Pile
For fewer foes and an elevation advantage over the buchon house, head to the green-colored house on the corner of the block where the target is. Hide behind a nearby pile of logs, then sneak into the north compound entrance, or storm the place quickly and gather data before the foes know what’s going on.
Northeast: Sniper Tower and Woods
Though the snipers don’t really have the visual capacity to shoot you when you’re moving through the town buildings, the three towers along the east side of town are easily spotted and the enemy snipers neutralized, especially from the rock outcrop and woods to the northeast. Then you can drop down and assault the buchon house from the helipad and north area.
East: Sniper Tower and Soccer Pitch
Approach from the small outbuildings cluster and sniper tower with only one foe (the sniper), and you have a straight path along the perimeter of the small soccer stadium to the compound wall. Climb over the wall, assault the buchon house, and sprint inside and up for the data. This is the most direct path there is; no zigzagging is needed!
|
 Target: Buchon House Laptop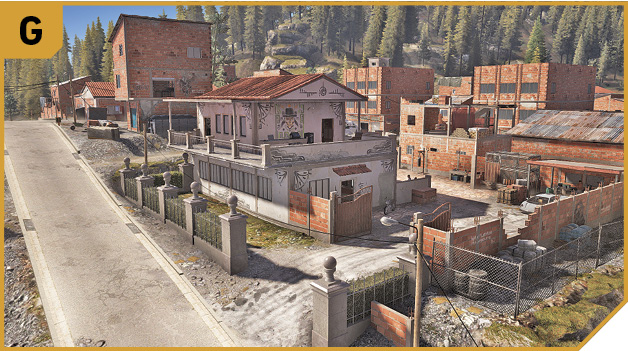
Buchon House (Libertad): Other Tactical Advice
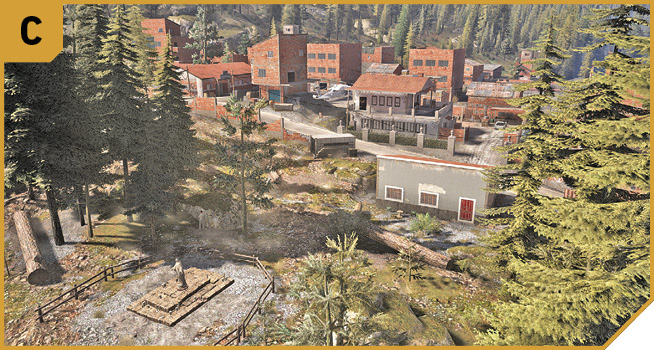
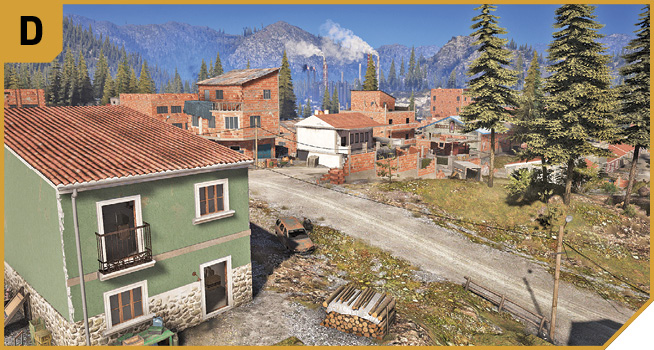
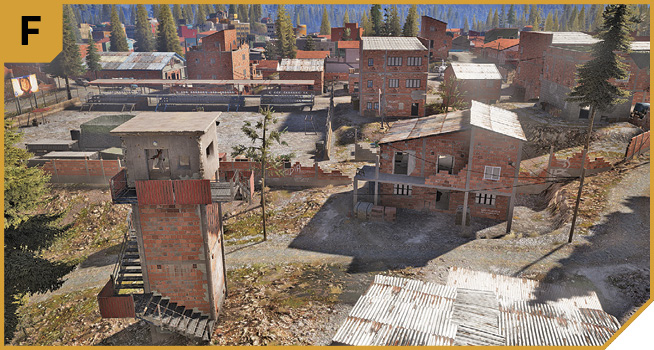
 For a quiet stealth attempt, wait until nightfall and approach from F, removing the sniper and creeping along the soccer stadium wall to the compound brick wall. Hop over, or head around to the northeast wall gap and scurry across and into the buchon house.
Or approach from C or D, then cross the main road and enter the compound via the small wooden steps and deck, hop the brick wall attached to the north part of the buchon house, and enter the northeast doorway into the residence.
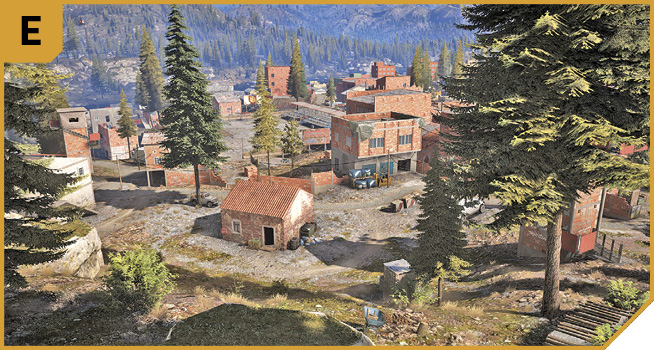
If you’re here to clear, approach from the north (D or E) and deal with the three snipers before going house to house, using the taller buildings north of and then around the buchon house. Pick the foes in the open, such as those patrolling the park and main road, or the gravel road near A, and drop both with a single sniper shot or rapid-fire takedowns. Lob in grenades when you reach the compound if you need to.
Or drive up the main road from B, C, or D and park at the side of the buchon house. Climb the wall, smash the windows on the west side of the house, and enter there. Return to the vehicle or flee to the nearby helicopter afterward.
Remember to come back here afterward to mop up foes and release rebels, as well as gather collectibles.
 The foes are spread throughout around four blocks with the buchon house at the epicenter. This allows your teammates to each approach from a different direction. Begin with a Ghost at E, removing all three snipers, then move to the taller structures surrounding the buchon house. Either cause distractions or cover the other Ghosts heading in from A, C, D, or F.
You could drop onto the exterior balcony from a helicopter, if you’re more daring than sensible.
Capture the Cartel Chemist
About three kilometers southeast of the buchon house is the chemical institute. Once you’re close to the mission area, you’re tasked with finding the boss inside the building. The place is heavily guarded, and to make matters worse, it’s adjacent to a small Libertad base to the south. Exercise extreme caution.
Via-B Gas Chemical Institute: Recon
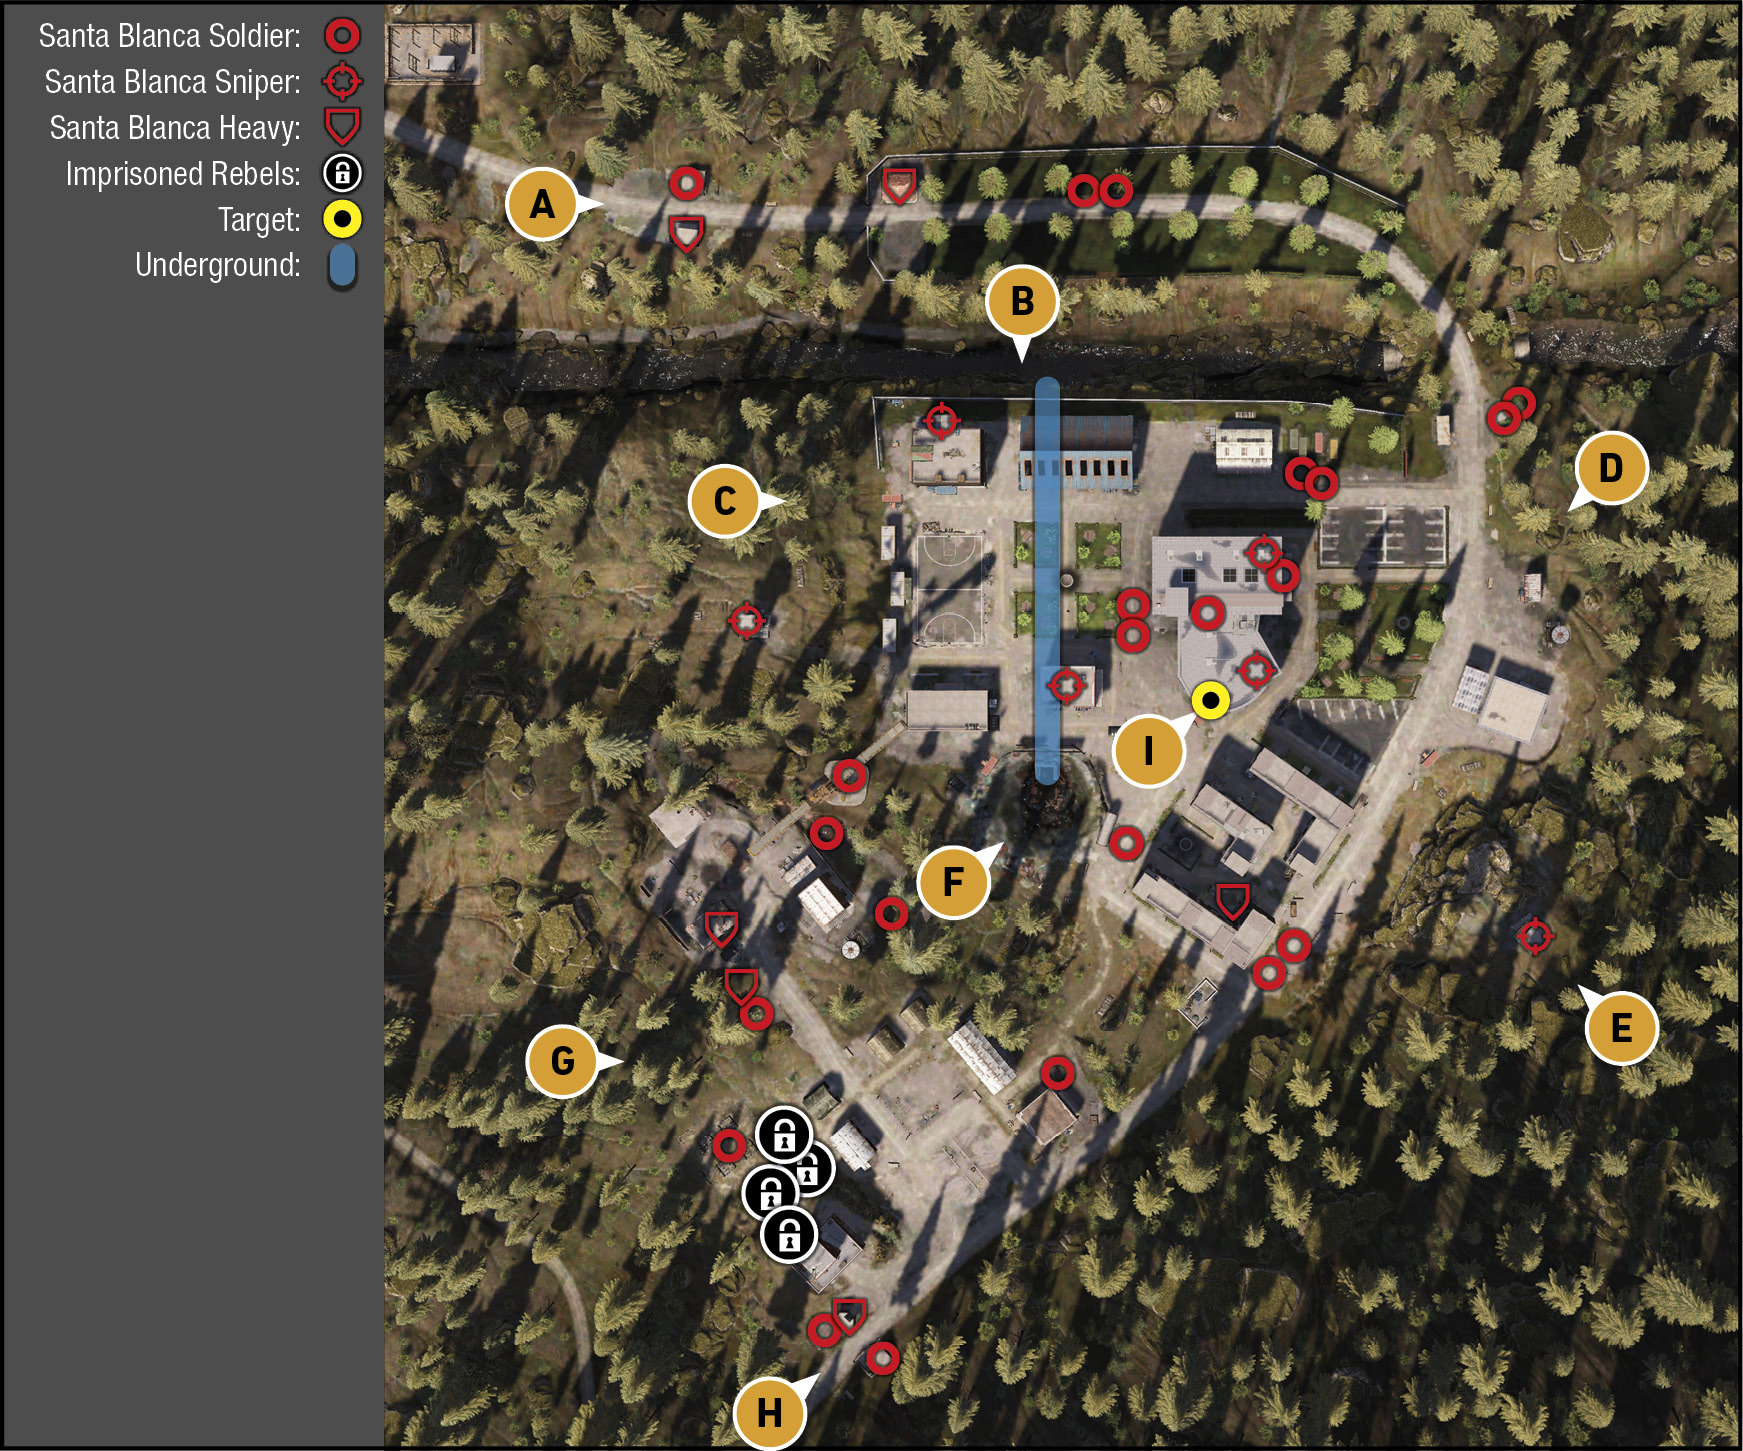
TACMAP
The chemical institute comprises a main entrance road, warehouses with an often-overlooked river ditch and underground pipe leading into the grounds, a basketball court doubling as a helipad, and snipers atop towers, warehouses, and the institute building itself. Farther south is a small Libertad base, which you can ignore—or focus on, if you’re here to set some rebels free, cause chaos, or completely remove cartel presence from this location. The tattooed, lab-coated boss is in the laboratory (south) building, on the middle of three floors.
Northwest: Entrance Road
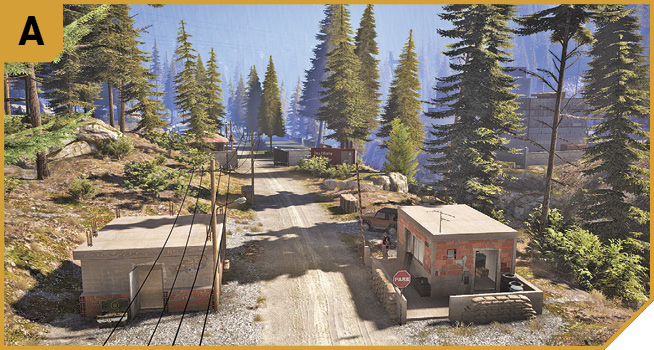
Approach from the northwest along the main road to find a couple of security hut areas and foot patrols to concern yourself with, or avoid completely. These are easy to tackle, especially if you head in from the slope to the north, or a different direction from A, and catch the enemies off guard. Just watch for the snipers on the roof to the southeast and the tower to the south.
You can also barrel through here in a vehicle with minimal problems, heading around to D and then parking close to the target building (I) if you’re intent on causing a commotion while quickly ascertaining where the target is and gathering intel from him.
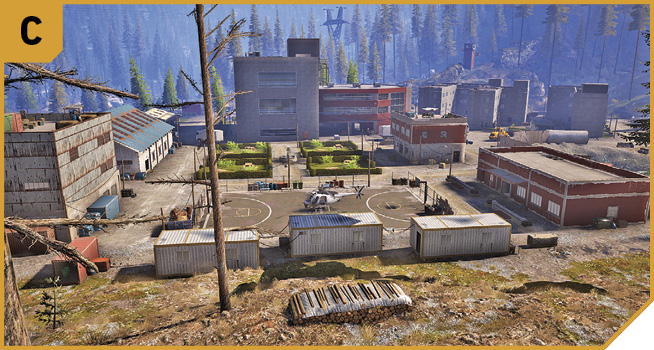
Sniper Tower and Log Pile
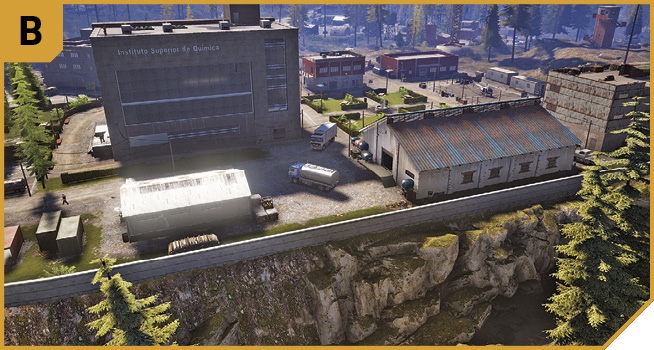
The higher ground overlooking the main helipad, warehouses, formal gardens, and target building has a sniper to remove. After that, it becomes an excellent spot for offering covering fire (due to the height advantage) or infiltration (due to the numerous cover opportunities). Make sure you’ve sniped all enemy sharpshooters so only ground foes need your attention; there are some on the red-brick buildings and the target institution building itself.
North: River and Underground Pipe
Don’t overlook this hidden entrance that brings you up into the middle of the institute grounds. Look for the debris-strewn riverbed and the large inlet tunnel. Follow it directly south to F. This gets you very close to the target building without the need to deal with any foes, save the ones you dodged or defeated between A and B.
Otherwise, you can ford the river, climb up to the concrete perimeter, and hop over into the grounds of the institute. Though some areas of the wall are too high to climb, most of it can be, and you’re able to reach the three main north buildings. These are:
A metal warehouse with a flat roof (northwest), and a sniper atop this roof. Use the exterior stairs on the north side to reach the roof, remove the sniper, and cover your team as they head to the building or up from the hole (F). You can quickly remove the sniper in the tower just south of C, too.
A large storage warehouse with a pitched roof (north), with breakable glass windows on each wall and the roof. From here you can sneak south into the helipad or formal gardens, or around to the front of the target building (across from D).
The small storage warehouse and metal containers (northeast), with easy access to the front of the target building (across from D). Watch for patrols. Head in from this direction for quick access to the institute building, though the target is in the secondary (red) building attached on the south side.
Northeast: Woods and Water Tower
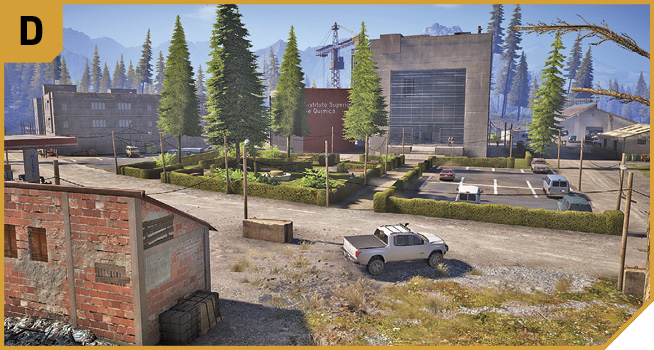
This offers views of the main building entrance and parking lot to the west, and the sniper tower near E to the south. Approach from here to stealthily target the sniper on the roof of the target building, foes in front and patrolling the grounds of the parking lot, and anyone else who appears if you’re discovered. From here you can also sneak to E or B, or straight into the target building, with few problems.
East: Sniper Tower Rocks
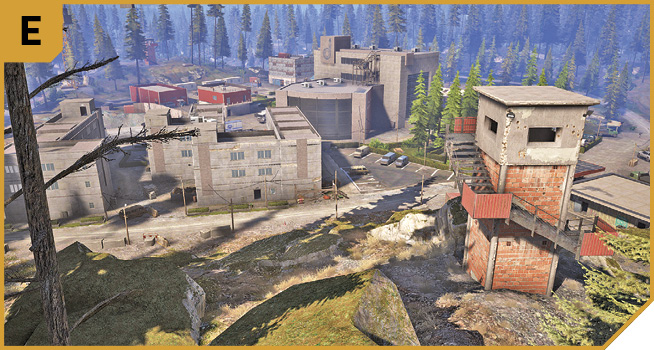
After tackling the sniper here, you have good views of the target building, as well as patrols of enemies moving in and around the three L-shaped apartment buildings at ground level. These apartment structures can be entered or hidden behind, and if you reach the roof, you can shoot across to enemies near B, C, and F, as well as the target building and southern parking lot near I.
The apartment roof is also great for gaining some height so you can take care of the various snipers to the northwest and north. Search them out and remove them so fellow teammates (ideally moving in from A, B, or C) have fewer problems getting across the formal gardens area or front (east) parking lots.
The Hole
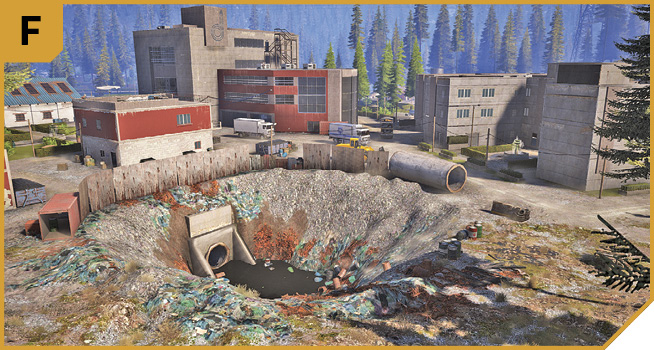
A large drainage hole with debris and a tunnel leading north to B is the place to exit during a clandestine maneuver straight into this institute; you’re close to the target building, and you circumvent the foes around the formal gardens and helipad you just moved under (such as the snipers). You can fan out to hide in any of the buildings above and around the hole, too. Well worth checking out.
Libertad Base: Rebel Prisoners
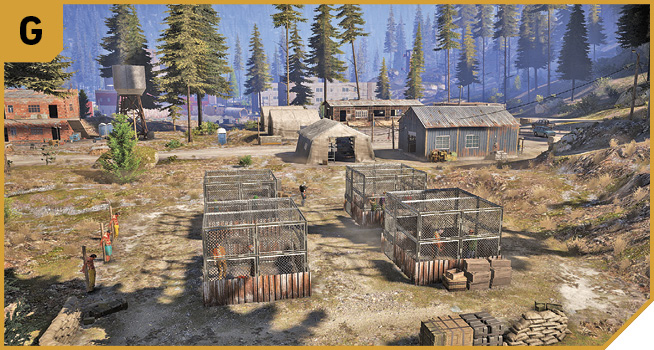
Though you don’t have to infiltrate this small base to the south of the main institute grounds, head here if you’re keen on defeating all cartel foes, or you want to create a huge distraction. Four cages hold rebels to free, and they can quickly overwhelm or distract the enemies in and around this base (ideally so you can quickly reach the target boss).
If you plan to attack the base too, note there isn’t a huge number of foes, and a few patrol the general area between here and F. The majority of them are in and around the barracks tents (east of G) or the security huts (H).
Libertad Base: Security Huts
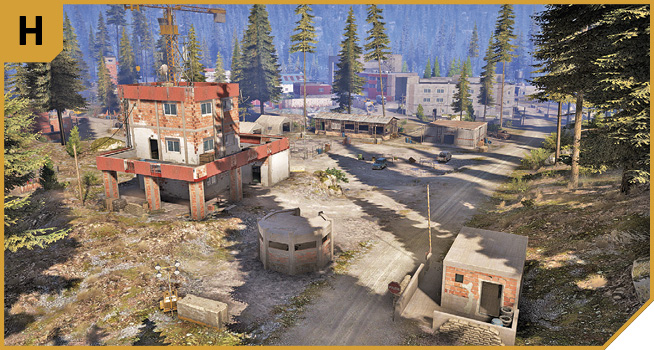
Approach along the main road, and there are a couple of huts to worry about, plus a captain in the base HQ building, just north of H. Either drive on through, park at a distance and snipe, or attack with an easy crossfire from multiple directions. You can then easily reach the parking lot just east of the target building, or drive to the underpass at the building and immediately storm the inside of the structure.
|
 Target: Institute Building and Boss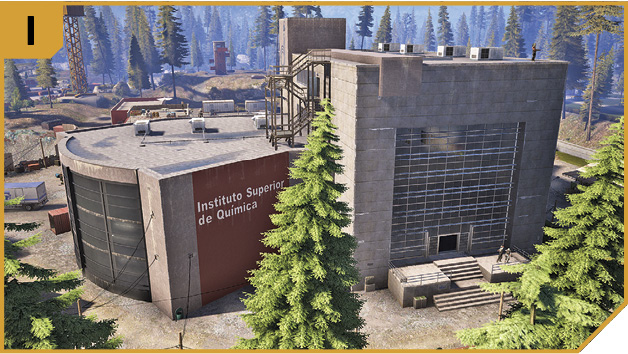
Via-B Gas Chemical Institute: Other Tactical Advice
 A completely silent infiltration with no enemy encounters is possible using this route: From B, head down to the underground pipe and move through southward, to the hole (F). Climb up into the surface pipe section, and move to I using the vehicles as cover. Enter the southern part of the building via the west doors, across the ground-floor lab to the east stairwell, and ascend one floor, heading south into the boss’s lab.
Another quick enter-and-exit option is to approach from B, hop the wall to the north warehouse, scoot across to the northwest corner of the institute building, and enter the doorway there. Move across the hall diagonally to the underpass doorway, across the underpass and into the ground-floor lab, then up to the target.
Or head in from D, through the main entrance, and take the steps immediately left (south). Move into the cafeteria and across into the target’s laboratory.
To remove every foe as you go, begin at A, clearing the entrance road between there and B. Maneuver around to D, sniping the sniper at E, along with patrolling enemies. Work your way toward C, around to F, then skirt the Libertad base and free the rebels. Finish off the remaining cartel foes in a firefight.
Driving here or taking a helicopter each offers great alternatives. Park your ground vehicle in the underpass (I) with quick access into the laboratories. Or land a chopper on the roof above the target’s laboratory and descend via the roof doorway (removing both roof snipers, of course).
Is the target under fire but you’ve grabbed him? Then drag him to a vehicle and escape before interrogating him.
 There are greater opportunities for distractions if you split up and attack the Libertad base after freeing the rebels at G. You also enable greater crossfire planning if you’re perched at C and atop the L-shaped apartments or the roof of the institute. You have the flexibility of giving one of your team the job of getaway driver, keeping the engine warm at the underpass (I) so you can dive into the passenger side and escape, or stow the boss for later interrogation.