
Tom Clancy's Ghost Recon: Wildlands Guide Welcome to Bolivia San Mateo: El Pozolero
La Carcel Del Pueblo

Objectives
- Locate the prison
- Deactivate the prison’s generator
- Talk to the rebel leader
LOCATIONS
- La Carcel Del Pueblo
REWARDS
- + 500 XP
Brief
La Carcel del Pueblo is a prison high up in the mountains where high-ranking rebel prisoners are taken for interrogation. Free the rebel prisoners and find one that can provide information about the disappearances.
Generating an Escape Plan
Around 1.4 kilometers southeast of San Mateo Alpha, “the town jail” is slightly more imposing than you might be expecting. This is a massive set of cliffside cells cut into a huge gorge, overlooking a brutal hangman’s square at the north end of the interior, with the ground heading up a series of ridges to the southwest, to a supply exit. You’re here to kill the lights, kill any guards you need to, and free rebels so they can help kill the cartel. Killing is definitely assured.
La Carcel Del Pueblo: Recon
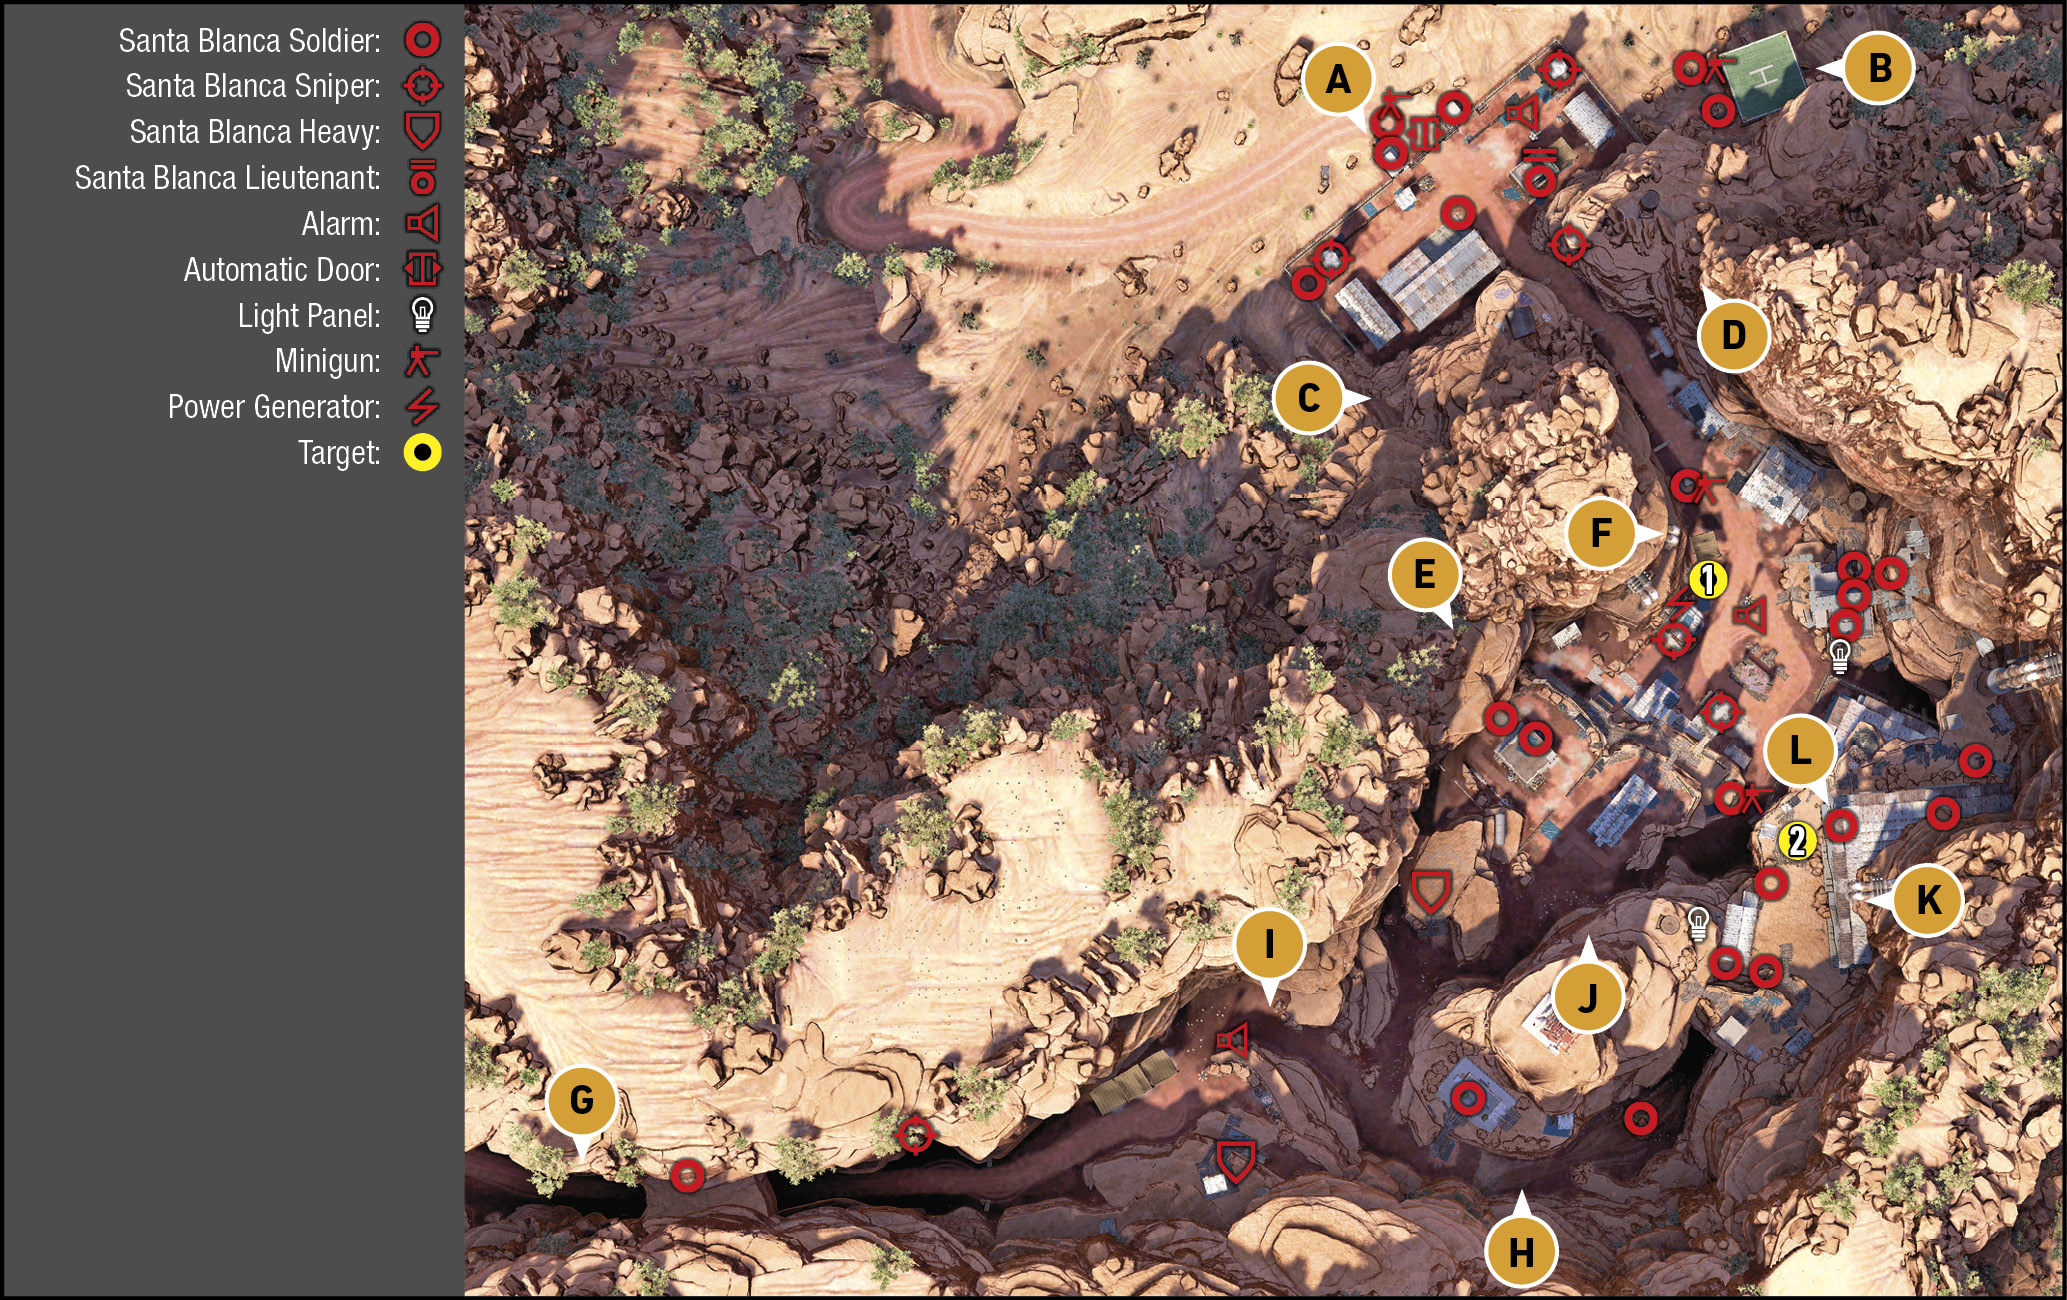
TACMAP
Starting in the northern area, there’s a fortified base structure that’s reasonably easy to infiltrate, but leads to a gorge and the massive prison complex. There’s a hangman’s yard near a generator, across from an HQ building and gantry ways across to the two cellblocks carved into the huge cliffs that tower on either side of you. Farther south and west, the prison continues up a series of rock plateaus, to a supply entrance in the southwest.
North: Compound Entrance
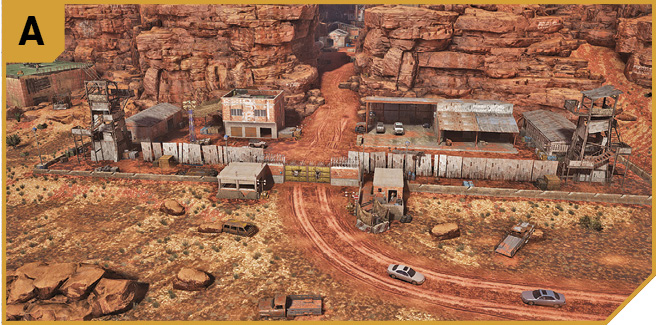
This is the well-defended entrance to the prison, which isn’t anywhere nearly as easy to infiltrate as the supply entrance (G) or the cliffs (D, E, H, I, or K), so if you’re having problems getting into this stronghold, your “head-on” approach is likely the problem.
There’s a minigun nest at this entrance, another just to the side of the elevated helipad at B, and two sniper towers flanking the front gates (which also have a minigun nest to worry about). Ignore this area if you’re on foot, and only venture here if you’re tackling enemies, or you’re driving a cartel-approved vehicle through the gate, past the two security huts. Remember there’s a third sniper up on the rocks that’s even more troubling to neutralize.
Northeast: Helipad, Fence Gap, and Rock Wall
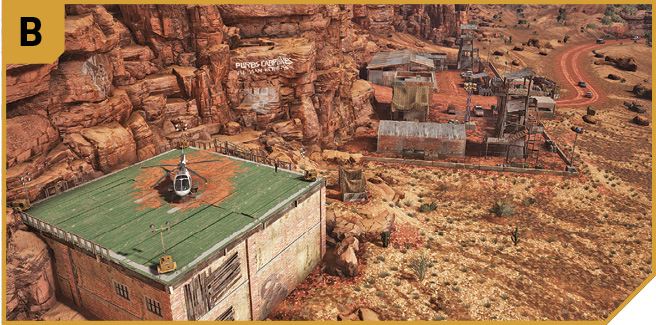
Approach from this direction if you’d like to remove the minigun operator from behind, then either enter the base at ground level via the small gap in between the side fence and the rock wall, or climb that rock wall to the promontory with the water tower and a sniper behind sand bags. You can take the place of the sniper after defeating him, allowing good aiming options down to A, the minigun inside the base near F, and the generator (F) itself, which you can snipe from this range, completing the second objective without having to step through into the prison.
Northwest: Fence Gap, and Rock Wall
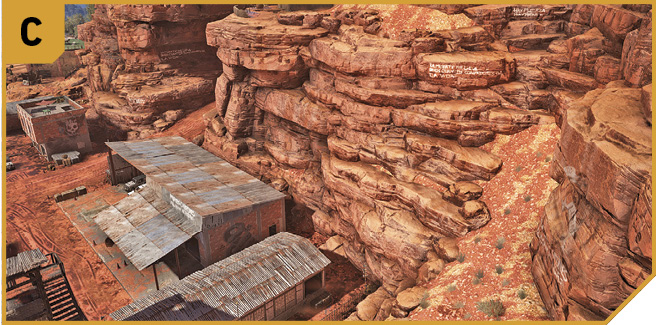
This offers similar options to heading in from B; breach the gap in the perimeter fence and rock wall, and you can enter the base and check the mess hall for foes, working from west to east. Or, you can climb the rock wall to a promontory on the opposite side to the sniper’s overlook. This side doesn’t have a good view into the gorge, and the main part of the base though, so only head up here if you want to snipe the sniper, and the foes down below at A.
Clifftop: Supreme Overlook
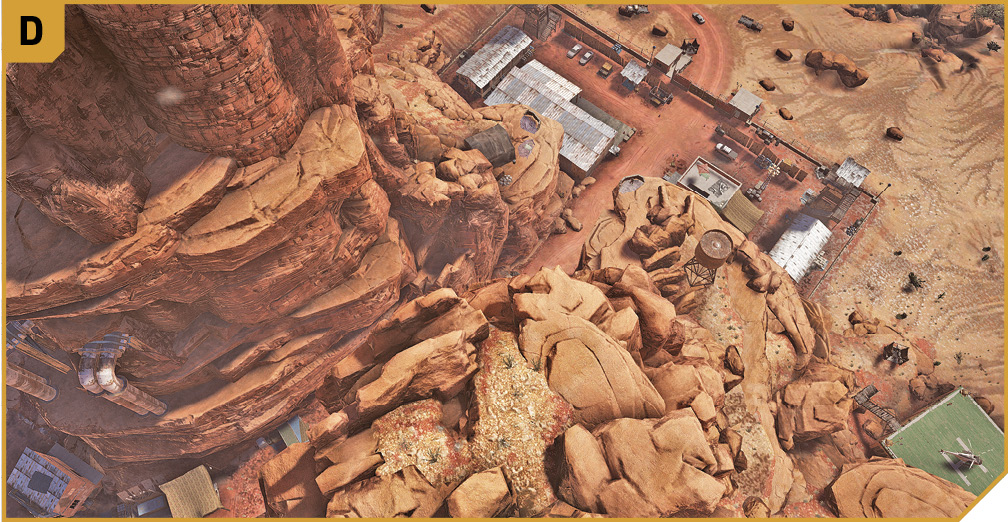
Take a chopper, or work your way in a giant counter-clockwise arc from G, past H and K, to this location high above the action. You can look down on the sniper at his sandbag overlook, at the ant-like enemies down at the base below (A).
You also, more importantly, have sniping views of almost the entire base from extreme range, and can even see all three alarm poles if you move slightly (though the one near I is too far to destroy). Even better, you can snipe the generator, then work your way to K, carefully drop to the cells, and speak with the rebel leader, all without stepping onto the ground.
Northwest Clifftop: Lower Overlook
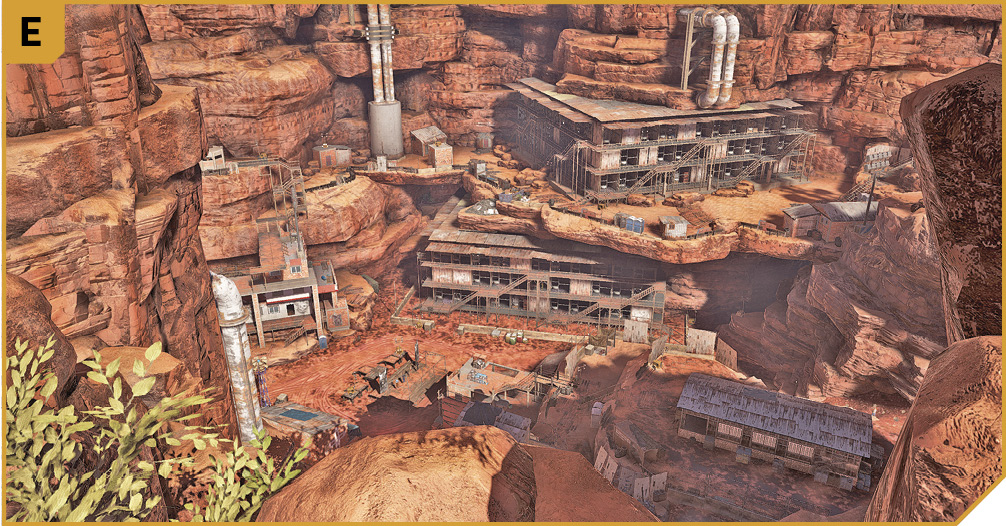
Head here by landing a helicopter on the flat rock outcrop, or descend after hiking here from I. Though you’ll die if you try descending down to the main prison area from here (though you can easily head down to C, but can’t get here from C), this offers an excellent sniping view of much of the prison. More useful during Co-op, you can create crossfire opportunities from here, firing at foes to distract them from others on the gorge floor. You can just about fire at the very edge of the generator from here, too (completing the second objective).
|
 Target #1: Generator and Hangman’s Square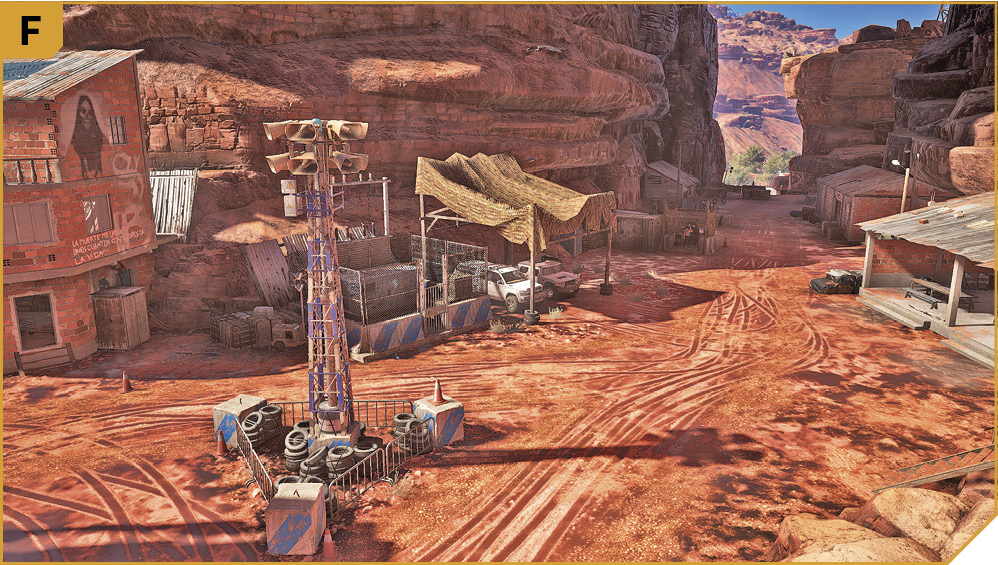
Southwest: Supply Entrance
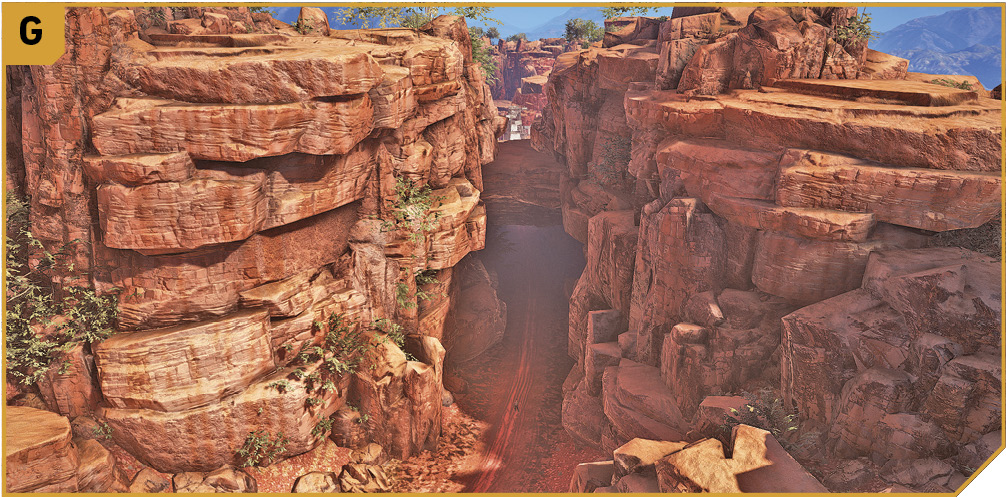
This is the recommended infiltration point for ground-level insertions (but usually once the generator is offline, so reinforcements don’t arrive if you’re seen and the alarms sound). There are few enemies here, especially compared to A, and the few that are here are spaced out enough for you to defeat them silently. You can also drive vehicles in through here, then stop near H or I, or continue and cause havoc as you tumble down the ridges to reach the generator (which isn’t a wise plan).
South Clifftop: Supreme Overlook
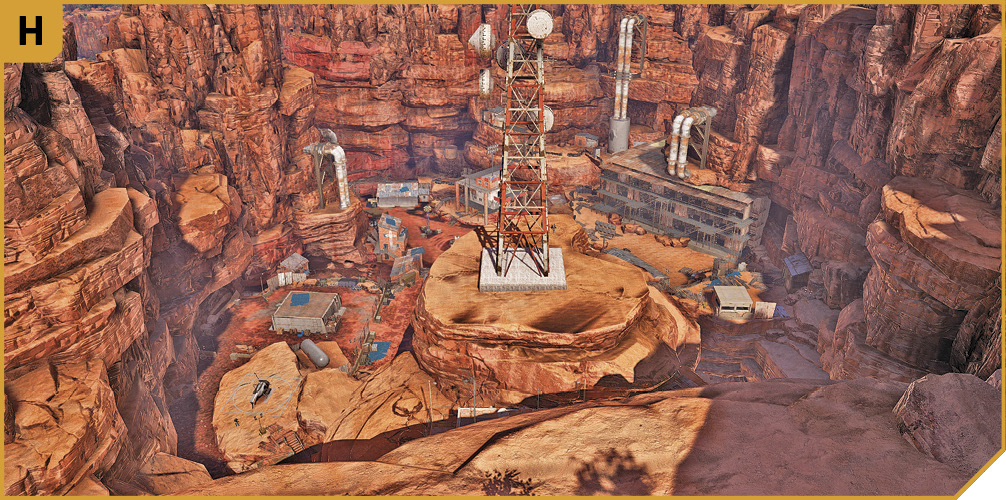
Get here by helicopter, then use this as the ultimate in safe recon locations, allowing you to see almost all of the base, and snipe from extreme distances. It isn’t as useful as the location at K (as you can’t drop down to the ground without killing yourself) but it offers great covering fire opportunities, and if you move northeast a little, you can see and shoot the generator.
West Clifftop: Supreme Overlook
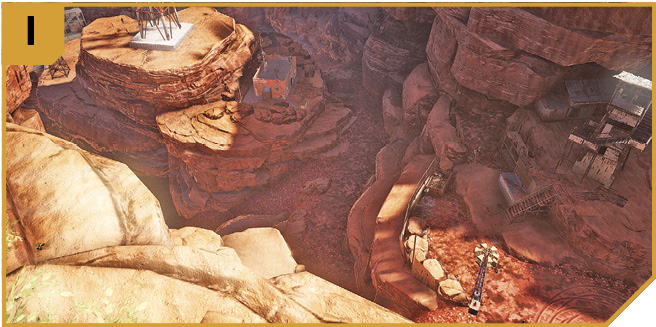
Get here by chopper. This offers views directly over the alarm pole at the supply truck parking area, which give you sniping opportunities to clear this side of the prison. This area is unique in that with careful dropping, you can land on lower ledges without killing yourself, and onto the ground, if you need to follow other Ghosts in. The dropping needs to be exceedingly precise so you don’t overshoot a ledge and kill yourself, however.
Comms Tower Radio Mast Plateau
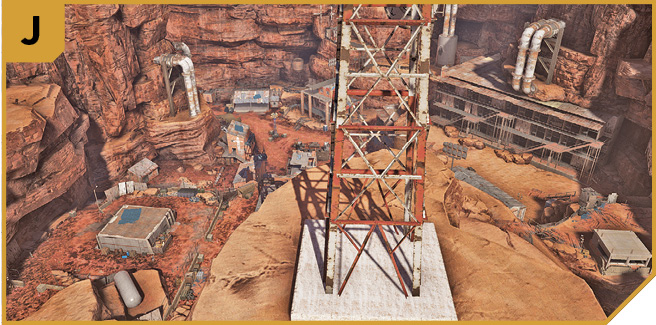
Though you can infiltrate each side of the rock island moving up or down between both prison entrances, heading here (ideally from G), and climbing up to the base of the radio mast allows you great sniping and covering options as the rebels assault the rest of the base.
East Clifftop: Supreme Overlook
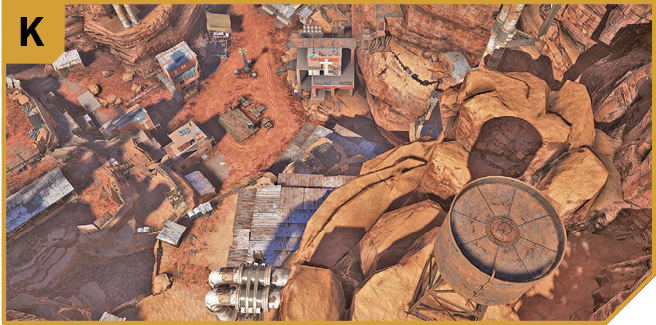
This is the optimal location for completing this mission with skill: Chopper in and move to the rusty water tower at this point which is directly above the prison. Snipe the generator, either before or after you (carefully) drop down the rock wall below you, landing on the metal roof of the cell block itself. You need to descend further to reach the rebel leader, but you’re able to get to him, and launch the insurgency, without using either of the road entrances.
|
 Target #2: Prison Block and Rebel Leader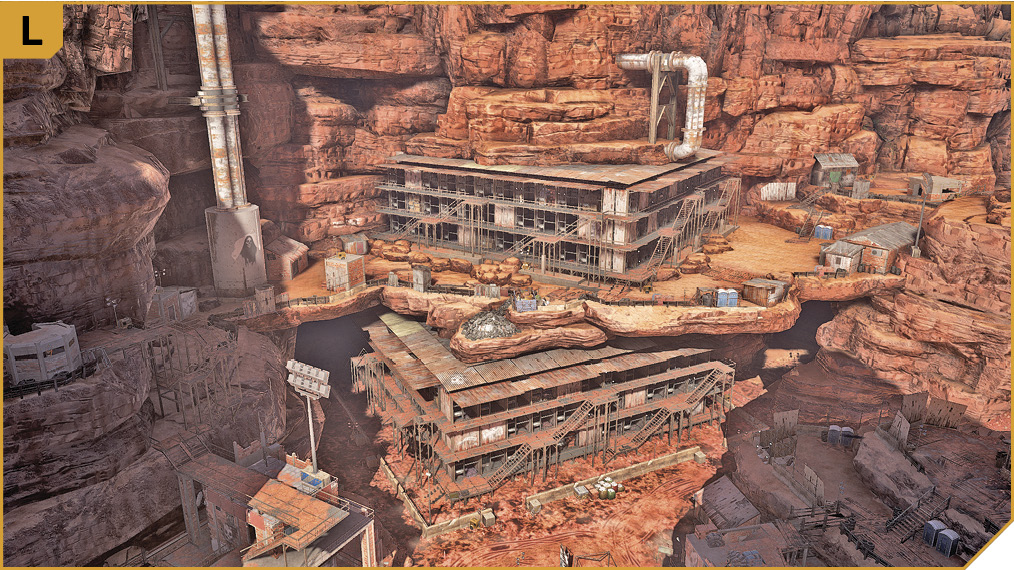
La Carcel Del Pueblo: Other Tactical Advice
 Remember that you need to physically reach the rebel leader, and then escape the prison, so you must be prepared with the knowledge of how to exit this place at the very least. The easiest way to reach the leader is to chopper in to K, drop down to the roof of the cellblock, then down to where the leader is, watching for patrols. Lob a grenade and destroy the generator (you can do this from very close to the leader’s cell), and then quickly speak to the leader. After the chat, sprint up toward J, locate a vehicle (there’s usually a bike) and drive out of the base, toward G. Or, you can push on with the assault if you wish to clear the prison entirely. Or, you can fly an explosive drone to the generator and destroy it remotely.
Another option is to start at G, and silently shoot down or melee strike the individual foes along the narrow supply road gorge, working down the ridges from G to J, until there’s only the foes across from the hangman’s yard left, as well as enemies at the base at A. Then you can storm the rest of the place. It’s obviously wise to do this with 16 additional troops helping you. It’s always easier to face the foes at A last rather than first; and if they try to head down to the generator, booby-trap the road with mines. Once you’ve removed the generator, you can attack with whatever additional forces you wish. How about a helicopter?
If you’re after a bit of biking fun, drive in from G, speeding down the ridges to the generator, which you can quickly destroy before biking to the leader. Ditch the bike when it becomes more of a curse than a blessing to your progress. Or, you can try this supply route with an armored vehicle, parking it above the hangman’s yard and using it as cover.
 Use a Solo plan, or split up your crew with one on the clifftop at D, another at K, and two in a vehicle approaching from G. That way you have great coverage of the map, and can gradually work your way through the spread-out foes, with the clustered ones to the north and in the base at A left for last, or kept in check by your snipers. Feel free to call in a mortar strike, or even more rebels, once the prisoners are set free.