
Tom Clancy's Ghost Recon: Wildlands Guide Welcome to Bolivia Pucara: DJ Perico
DJ Perico

Objectives
- Locate DJ Perico
- Interrogate DJ Perico
LOCATIONS
- Pucara Base
- Sueño Mausoleum
REWARDS
- + 500 XP
- + 5 Skill Points
- Assault Rifle: Ritmo
- Right Arm Tattoo: DJ Perico
Brief
The intel we’ve obtained from Perico’s home, his radio station, and his ex-bodyguard have given us enough information to narrow down his general location. Find Perico, capture him, and force him to give up the encryption key for the station’s master control.
Tomb Raiders
DJ Perico is broadcasting from the highest point in the Province, the frankly ludicrously ostentatious mausoleum El Sueño is building for himself. Who does he think he is, a Navy SEAL? You need to find Perico (he’s in his broadcast tent by the radio mast at the zenith of the mountain), grab and interrogate him, and get out of here in one piece. This can be a laborious or stealthy climb, or an airborne assault. If you go the airborne route, be aware that there are a few SAM launchers in the area.

Pucara Base And Sueño Mausoleum: Recon
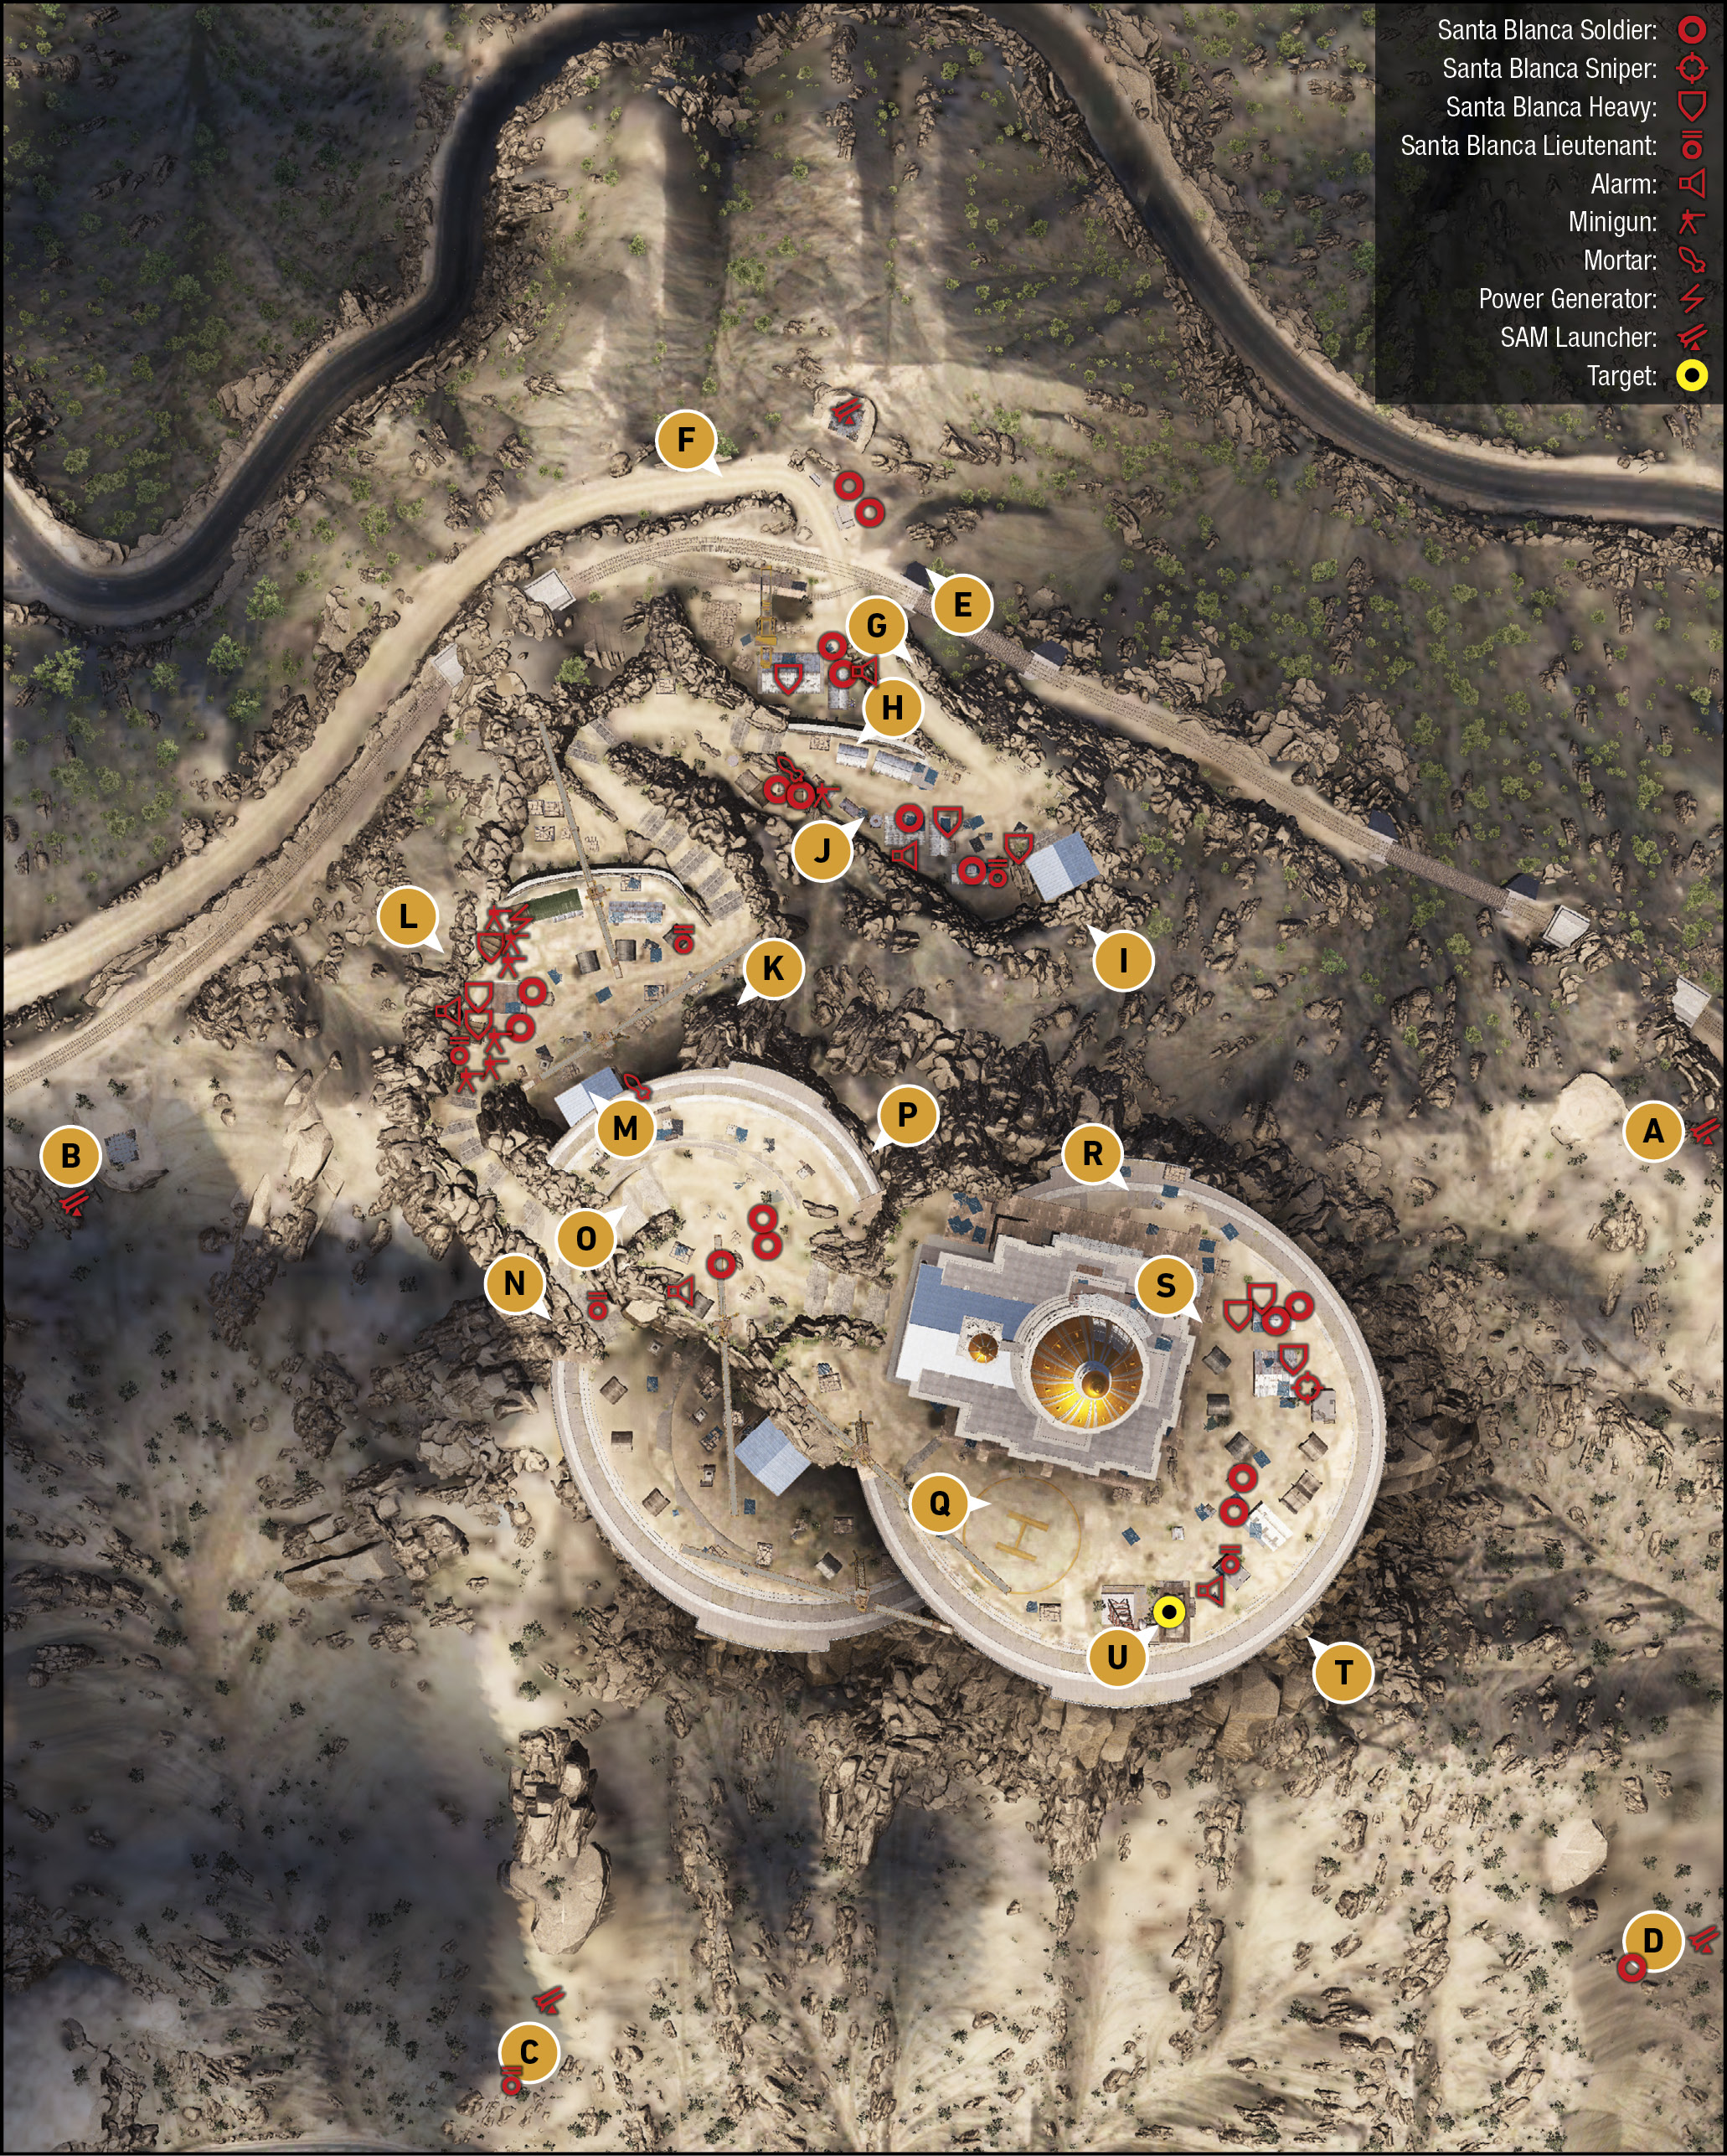
TACMAP
Think about the Base and Mausoleum as a single, gigantic location you need to ascend to the top of. Separate this into five locations (which are detailed below), as well as the four remote SAM sites (the fifth is near F). There are around 30 total enemies, but nearly a third are armored foes, so extreme care must be taken. As the alarm poles are dotted throughout the area, you may find sniping each individual panel is impossible, but find the single generator (near L) and you can remove all possibilities of reinforcements in a single fell swoop.
Remote Locations: Sam Sites
TACMAP
These are four remote sites, with few to no enemies guarding them. They can only be destroyed with explosives, but the detonation is usually at a far enough distance not to alert the enemies within the main area. Or, deactivate the generator first so all alarms are neutralized, so reinforcements cannot be called, before attempting to destroy the SAM sites.
East Sam Site
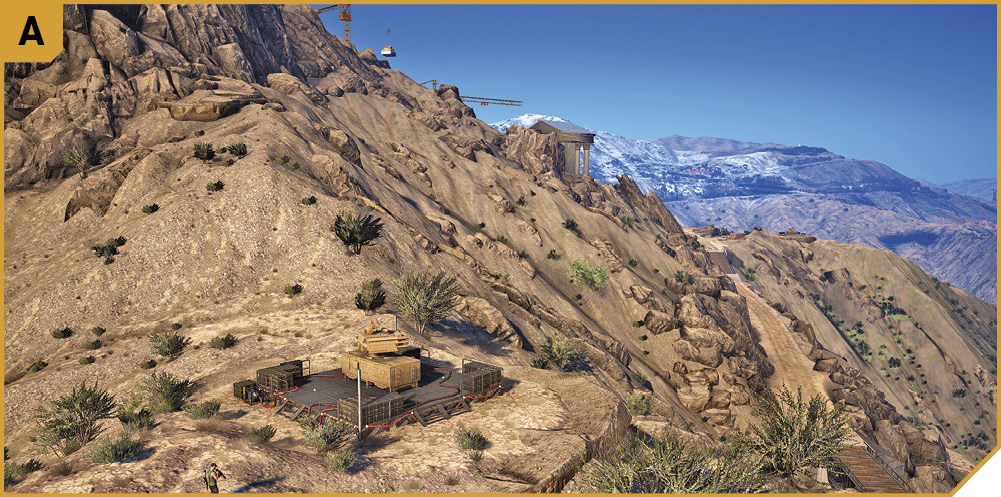
Access by bike from Pucara Charlie, after traveling on the railroad track.
West Sam Site
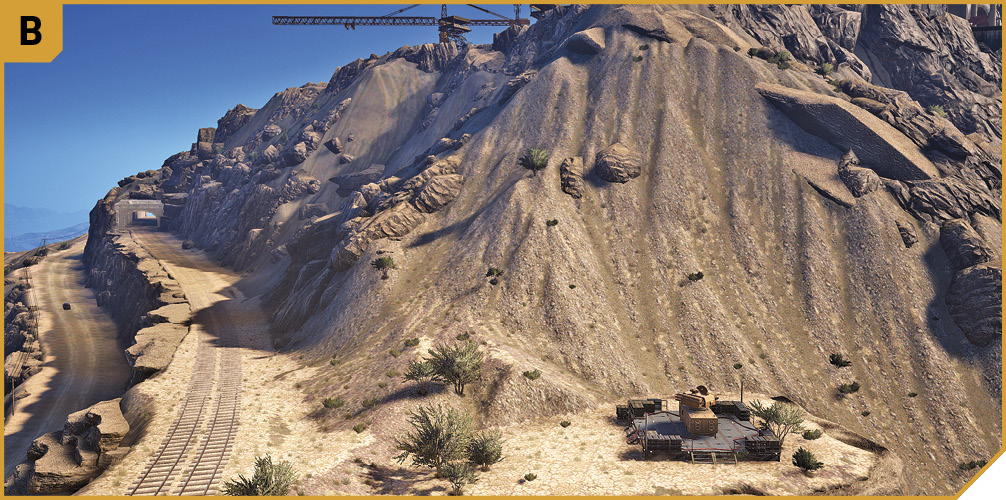
Access by bike, or hiking, or by helicopter (landing nearby and avoiding missiles), after you remove the SAM site at F or C. Note you can move up the slope between here and L for an alternate route up to the yard with the generator.
Southwest Sam Site
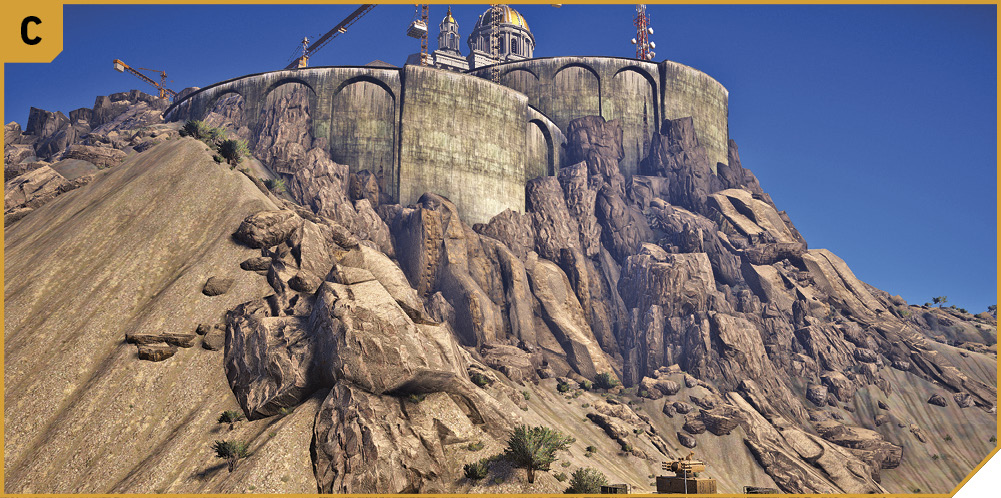
Access by bike, or hiking, or by helicopter (landing nearby and avoiding missiles), after you remove the SAM site at B or D.
Southeast Sam Site
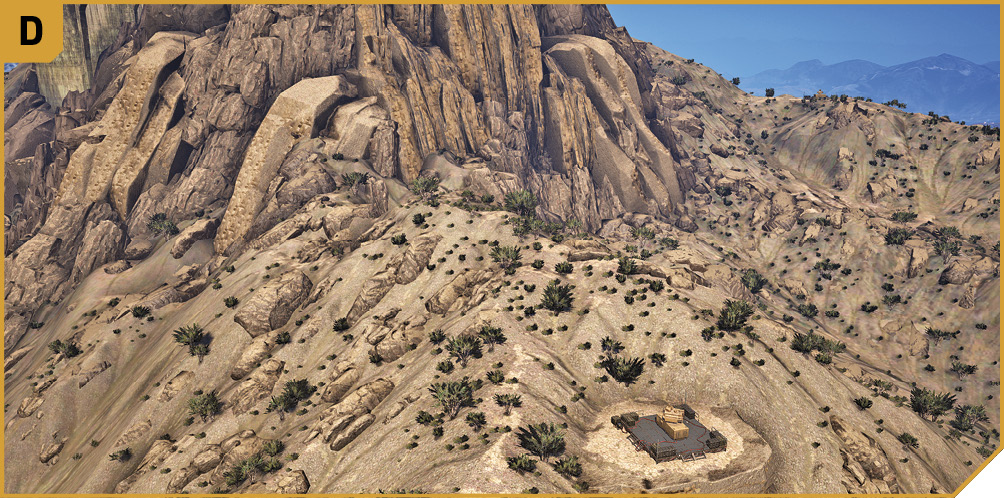
Access by bike, or hiking, or by helicopter (landing nearby and avoiding missiles), after you remove the SAM site at A or C.
Pucara Base (North)
TACMAP
To avoid possibly triggering the alarms elsewhere in the combat area, you may wish to deactivate the generator near L, first. This is a small crane yard with a few enemies, a SAM site on the north cliff, and the junction of the road and rail lines. The main dirt road up to the mausoleum begins here. Note the alarm pole near this dirt road (shoot it with a silenced weapon so foes within this area don’t raise the alarm).
Railroad Line
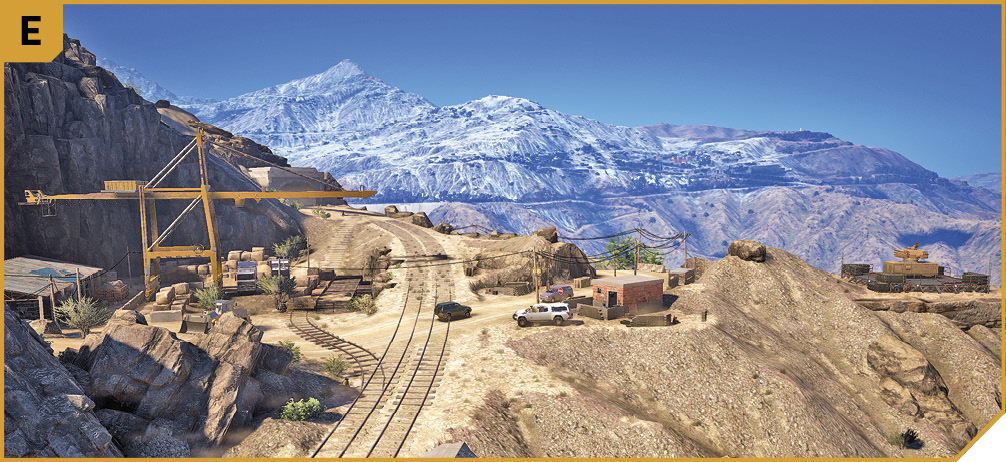
Remember this is a working railroad, so if you approach from this direction, watch for trains. Head here from the rally point to the east, and either drive up the main dirt path (southeast) if stealth means nothing to you, or get out and appropriate the armor-plated digger and trundle up to the subsequent locations, as far as you can get.
Alternatively, spread out and remove foes at the security hut, then clear the enemies at the warehouse.
Main Road and Railroad Tunnel
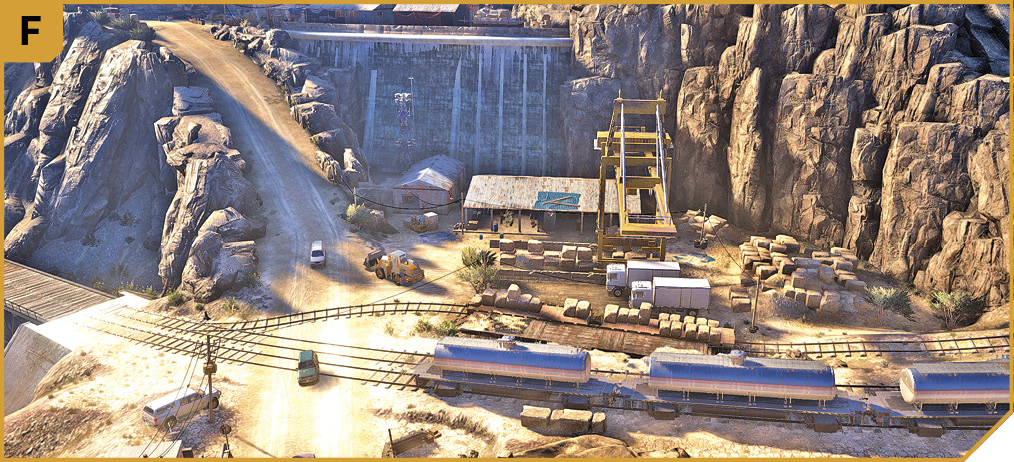
You’re able to head into the main yard from the road, though it’s a good idea to stop your vehicle early, perhaps by the railroad tunnel entrance on the west side, and attempt some stealth takedowns. Go for the foes at the security hut.
You can also climb the rocks directly south of this point, eventually allowing you up to the steps between this yard, and the next area (Pucara Base South). You can now attack foes in the upper yard from this angle, using your height as an advantage. This doesn’t help clearing the lower yard, but you can cover teammates heading up from G.
You may want to stop at F, then head up the scree slope to L, and infiltrate the Mausoleum (north) area to shut down the generator, stopping any reinforcements, prior to combat.
Pucara Base (South)
TACMAP
This long and thin yard with warehouses on either side starts with a giant temple statue, has storage buildings as you continue west, and as you reach the first steps, there’s a mortar and minigun firing post on your left (south) side. Treat this as a small, separate area to be cleared. Note the alarm pole by the water tower (shoot it to remove the chances of foes calling for reinforcements in this immediate area).
Yard Entrance
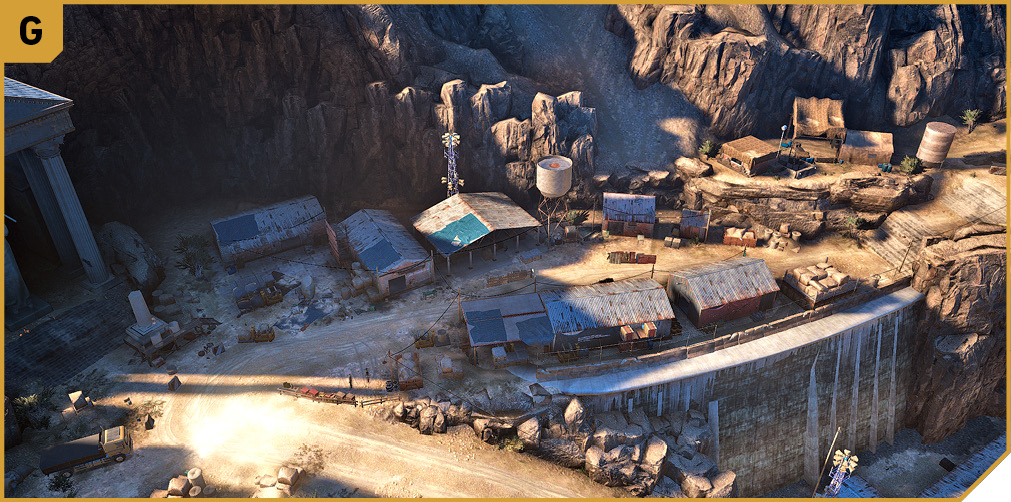
Head up the dirt hill (usually on foot, though you could use the digger in the yard below, or attempt to reach the target atop the mausoleum route using bikes), and make a sharp right, so you’re facing west.
This yard has numerous buildings to dart behind as you gradually push westward, starting with the shooting of the alarm pole panel, then clearing the area, working your way along the south edge (the rock wall) behind the sheds and alarm pole itself, as the main road is too open. Just be aware of the mortar and minigun turret in the firing post up ahead on the left (south); instead of running up the road to it, creep and climb the rock outcrop at J to surprise the enemies.
Concrete Lip
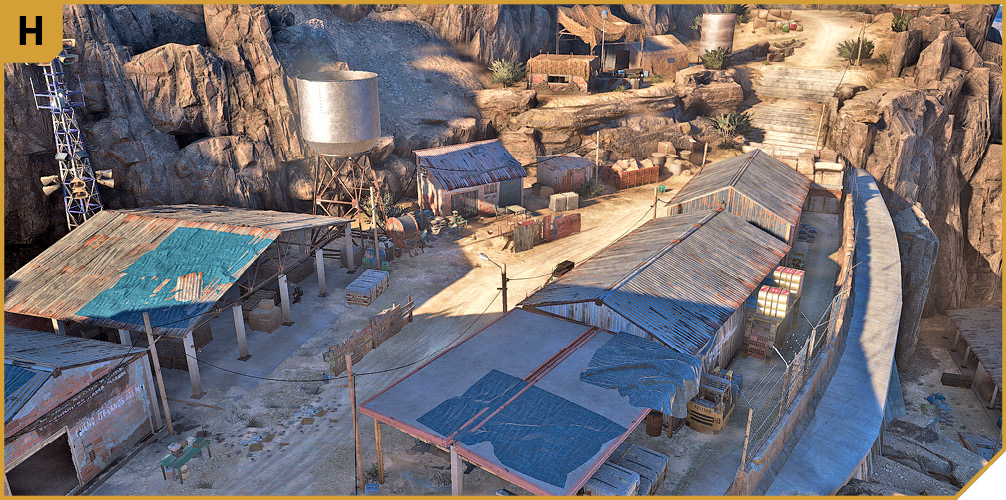
You can reach this concrete edge by climbing the rocks from G, but you need to be inside the wire fencing in order to continue farther up the mountain. Creep between the warehouses and fence, as this allows you to know you’re not being surrounded by foes. You can quickly dart into and out of buildings, and even climb on the center warehouse roof, with a good sniping view of the firing post and mortar. Or you can use this to completely pass the area, creeping to the stone stairs and circumventing this area (especially after dark).
Temple Roof
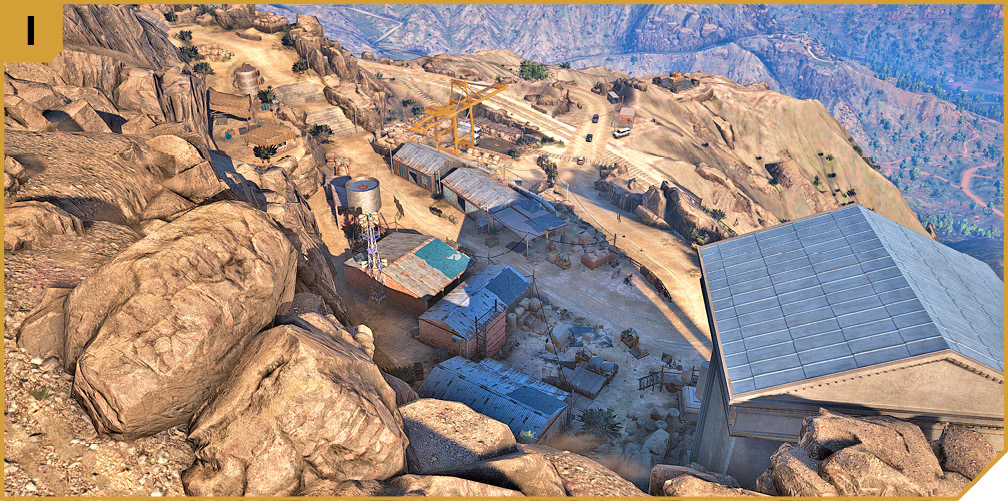
Hike or bike up here all the way from A or up from E, then maneuver around the cliff edge near the temple-shaped roof. You can’t stand on the roof (the gap is too wide, unless you drop here from an aircraft). Once you’re here, move past the temple roof, looking down and covering teammates below, sniping foes and lobbing grenades if you wish.
You can also head southwest, further up the steep scree slope to P, and almost the top of the mausoleum mountain itself, shortcutting the route considerably.
Scree Slope
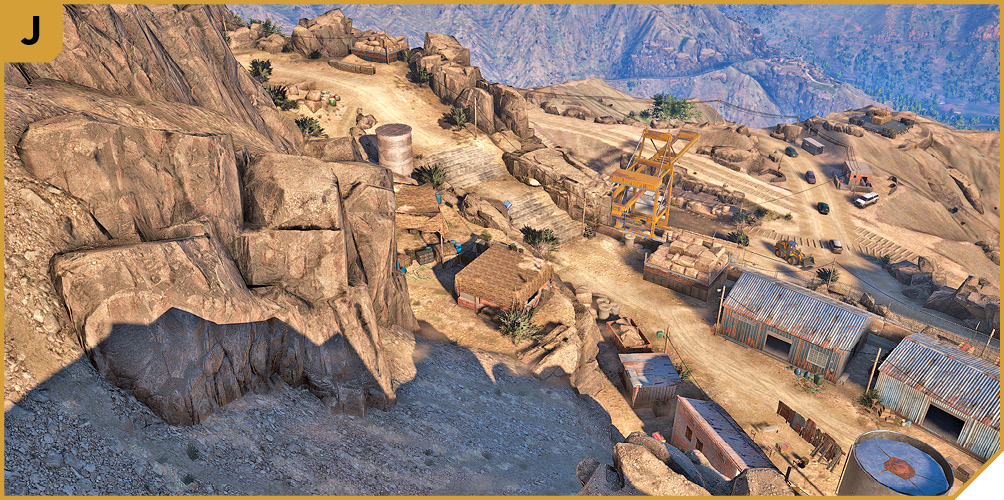
Head down here from I, or if you hugged the south cliff wall when maneuvering along the yard below. This slope has a good view of the yard, the water tower area, the alarm pole, and the minigun and mortar emplacements. You can creep down here and strangle or shoot both foes with little resistance.
Mausoleum (North): Barracks And Mess Hall
TACMAP
From Pucara Base (south), the main route is up some winding stone steps, and a small yard empty of foes, but with huge pallets of stones attached to a crane. There’s nothing of note here, so continue to climb up into this north mausoleum yard, which has the highest density of foes and installations you’ll encounter on this mission.
This location consists of three barracks tents, two mess halls, a generator, and an armory with an alarm pole, flanked by two minigun towers. Each tower has occupants, and three miniguns in each (meaning there are no more further up the mountain). The only exit is the set of steps on the opposite (southwest) side.
Yard Entrance
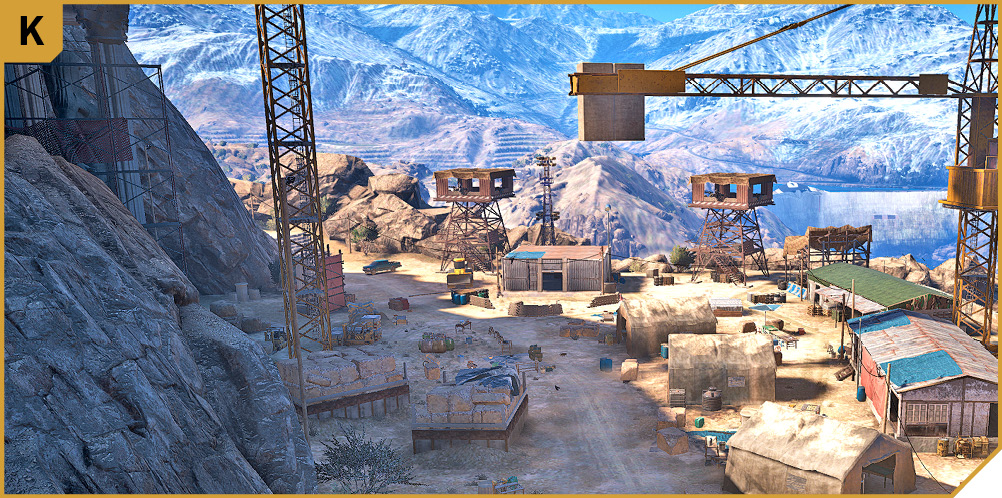
The main yard has a number of foes, many of them with heavy weapons. If you’re here at night, check the barracks and sneak past, or commit a tactical slaughter to ease progress. The alarm pole is easy to shoot out from anywhere in the vicinity of the yard.
Instead of maneuvering straight through the yard, which is only the plan if you’re assaulting the base on a bike or vehicle and don’t care how many enemies see you, choose to creep around either perimeter. To the south is a temple statue, and the ground is littered with masonry; which is reasonably easy to use as cover before escaping via the steps. Lob a distraction grenade if you need to.
To the north is a concrete lip with a wire fence atop. Unlike the lower base, you can run along the outside of this fence, as there’s a gap allowing you to squeeze in by the generator (which is great for shutting down all the alarms). Or, you can run along the inside of the fence, enabling you to take cover at the side of the mess halls, or even climb onto the roof of the mess hall nearest the generator.
The minigun towers are tricky as there’s at least one foe atop each of them. Lob up a grenade, or throw a distraction grenade to thwart them. Or snipe from a distance before you reach the towers. Or sneak around them.
Perimeter Infiltration Point
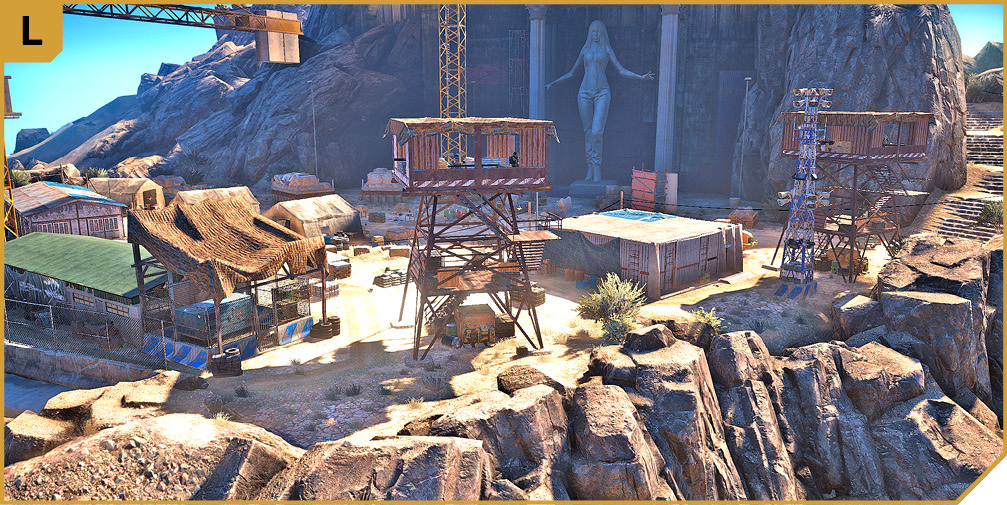
This location is key to an epic stealth maneuvering! Head up here from B, and you can climb the rocks and head across to N, completely ignoring this yard. Or, you can creep to the area by the generator, and lob in a grenade (or even smash the lock and deactivate the generator), thus enabling you to navigate the base without fear of reinforcements. Just make sure you save a grenade or some sharpshooting for the foes in or below the minigun towers.
Temple Roof
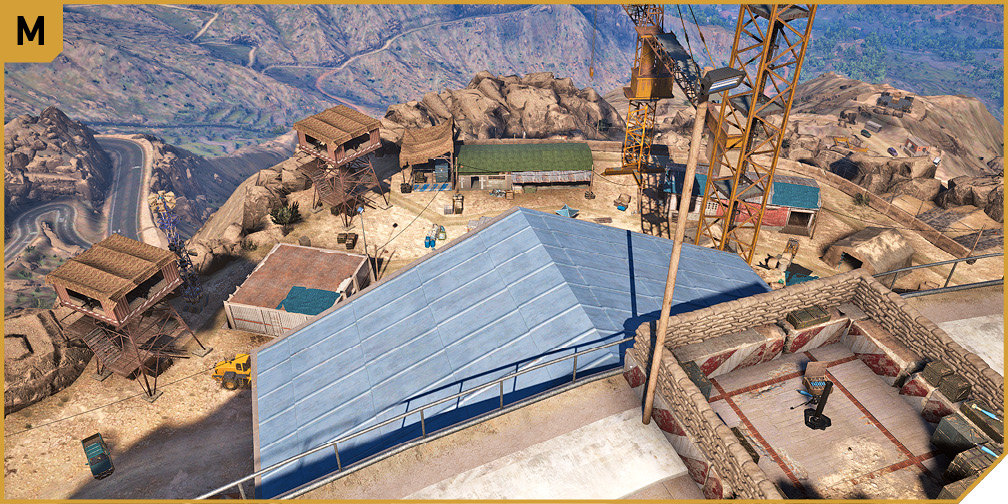
This is accessed if you climb up from I or K to P, and then across to the mortar by this roof. Unlike the other roof, this is able to be easily stood on. This gives you excellent views of the yard below, allowing projectiles to be bombed, the alarm panel (and minigun towers) sniped, and covering fire given to your team.
Mausoleum (Southwest Plateau)
TACMAP
From the north mausoleum barracks and minigun towers, head up the steps, then bear right at the junction on the steps, heading down into a side plateau. This offers terrifying and deadly drops if you hop over the perimeter railing, and no access to the entrance plateau.
Plateau Barracks
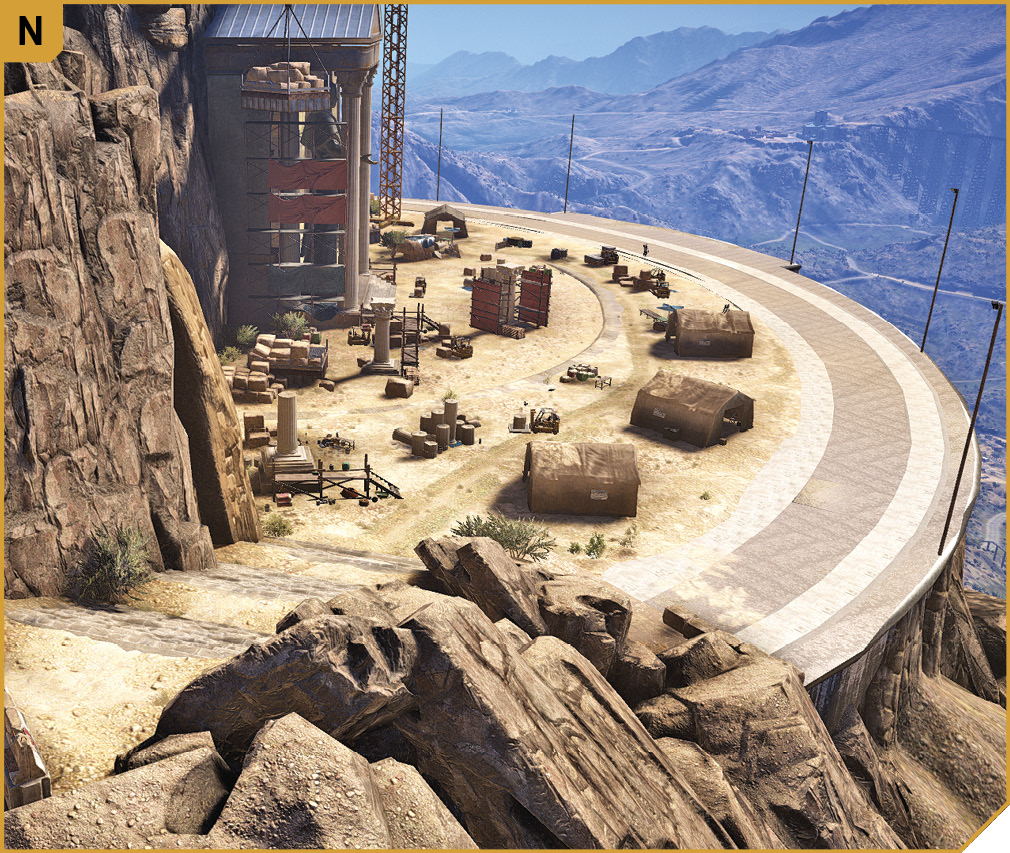
However, there are tents here, and the possibility that the enemy may be sleeping in these quarters after dark. In addition, you can easily land a helicopter here, if you want some cover while your teammates take out SAM sites or complete the mission, before you airlift them to safety.
Mausoleum (Entrance Plateau)
TACMAP
Continue further up the stone steps from N and there is a plateau with an entrance to the mausoleum structure. The interior is off-limits, but access to DJ Perico’s location is available to the southeast. As you’d expect, this is a construction yard, with a mortar to the northwest (usually unmanned), an alarm pole to the south, a small barracks tent, and a few foes (if you’re still being stealthy).
Construction Yard
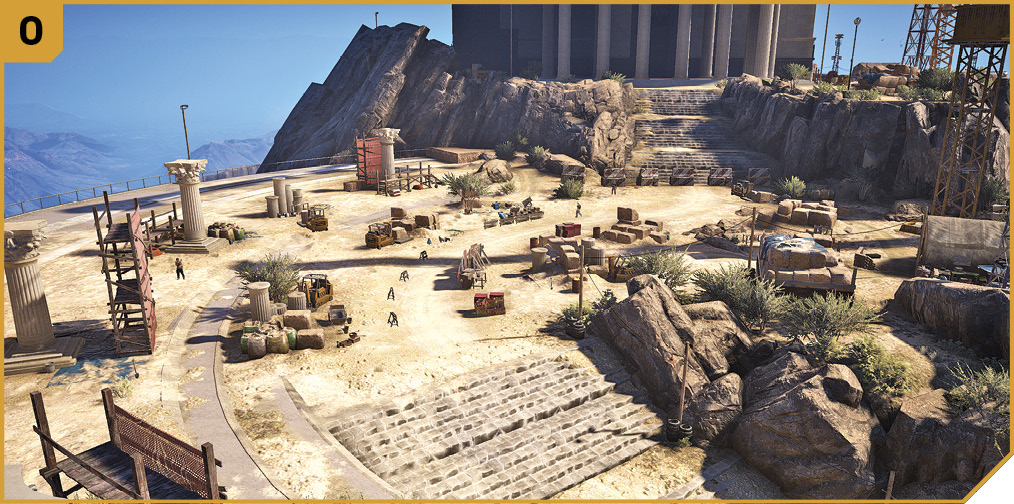
Utilize this yard to get to the objective. If this involves stealth, creep around in a clockwise direction, heading northeast, around the perimeter, over the mausoleum steps to the east, and down to Q. Or, engage the enemy and use the scenery as cover.
Alternate Yard Entrance
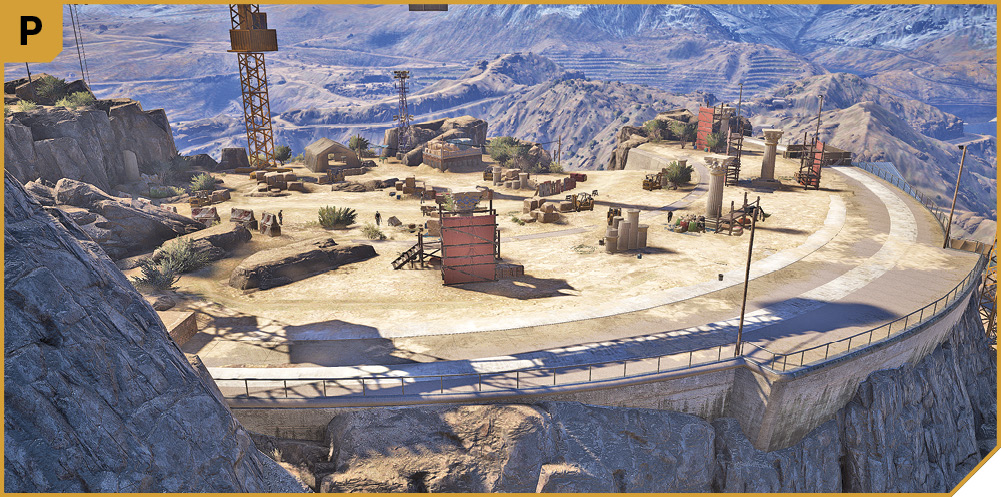
If you’ve been steadfastly refusing to take the steps, you can hike or bike all the way from A or E, up to I, and from I up to here. It isn’t easy, but it’s doable, and allows you to approach the enemy from two different angles with your teammates (from O and P), or sneak past the enemy by staying near the temple wall and columns to the southeast.
Mausoleum (Main Plateau)
TACMAP
Finally! This is the location where DJ Perico is broadcasting from. Access this from Q, passing the massive grand entrance, which isn’t open. This leads to DJ Perico’s broadcast tent, across on the far side of the helipad. Farther around to the northeast is the main base; it is reasonably small but with a number of foes to concern yourself with, including the only sniper on this map. Note the easily-spotted alarm pole; don’t ignore that if you don’t want last-minute reinforcements!
Main Infiltration Point
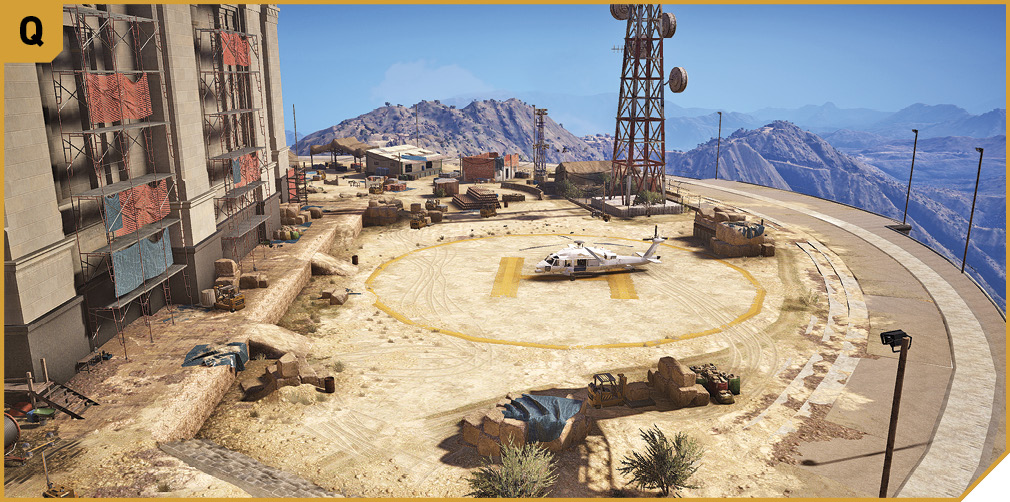
Either hug the gigantic wall of the mausoleum on your left (north), or cross the helipad to the radio mast and use the piles of cube-like stones as cover, and then send up your drone to pinpoint Perico.
North Area (Inaccessible Via Ground)
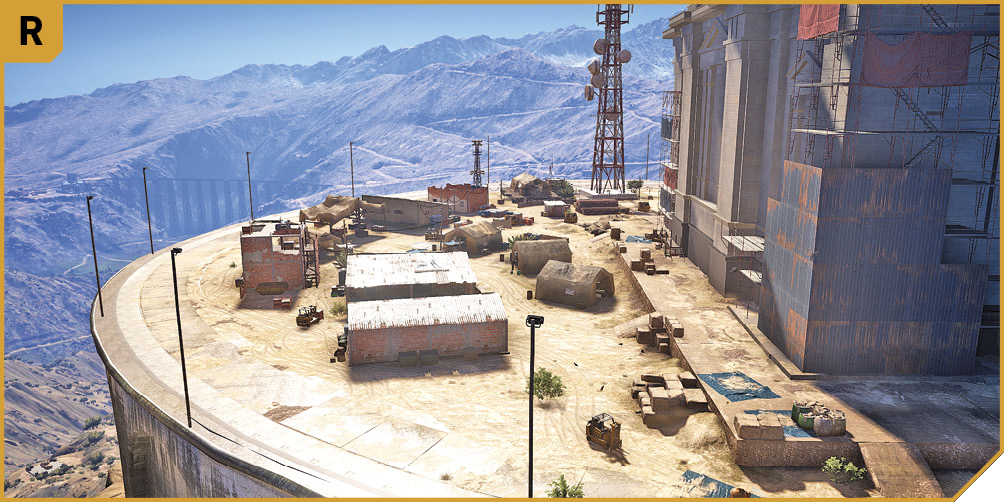
Though this north area is inaccessible via the ground, you can fly here and drop off teammates during Co-op, which allows you to clear the base from the opposite direction.
Mausoleum Walls
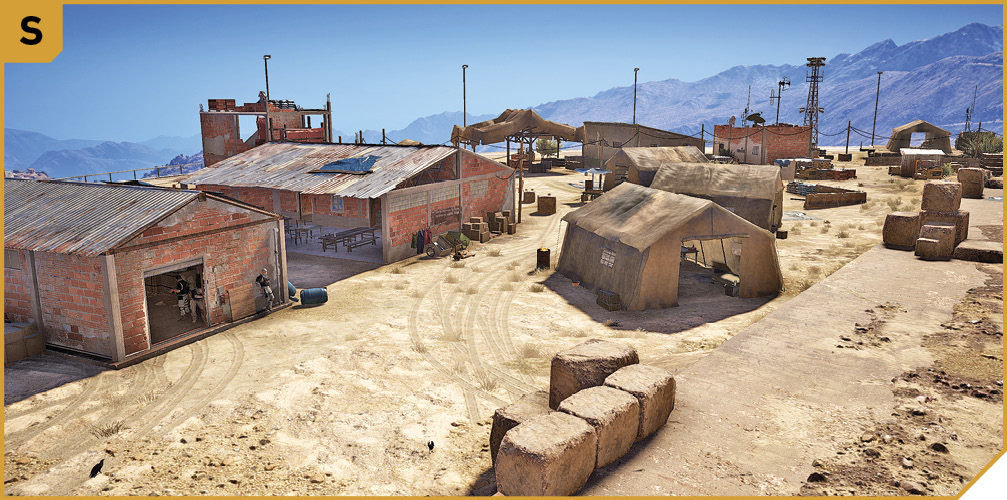
The walls around the base of the mausoleum building have numerous cover options, but none of the scaffolding can be climbed. However, heading north from U, up to the north end of the area, and then outflanking the foe from this location, is a good plan in Co-op, if you’re trying to remove all enemies.
Helicopter Access
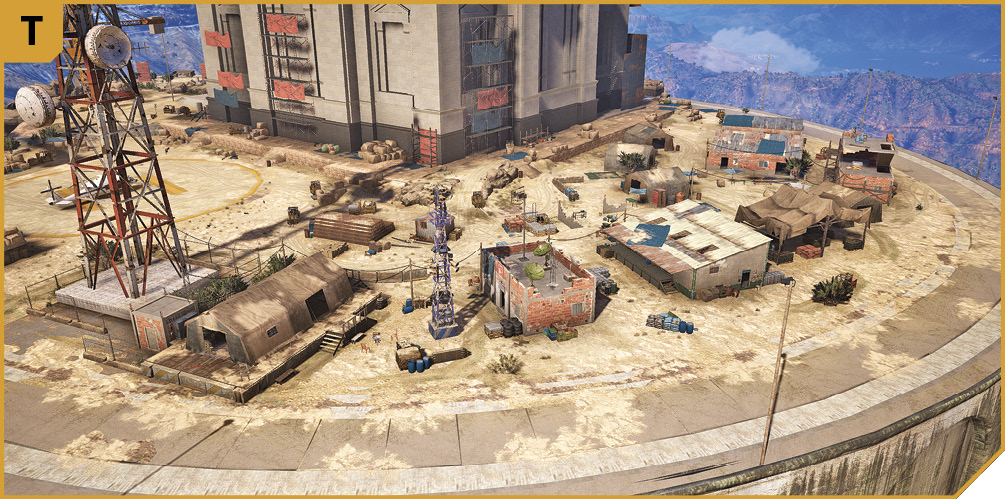
If you’ve removed all (or the majority of) the SAM sites, you don’t need to do any climbing at all, and can land a helicopter (heck, even a light plane!) near the helipad between Q and U. You may come under fire, and there will be reinforcements, so balance this threat with the speed you can disembark, grab and interrogate DJ Perico, and leave.
Or, you can drag Perico into your waiting aircraft, and interrogate him anywhere you wish.
|
 Target: DJ Perico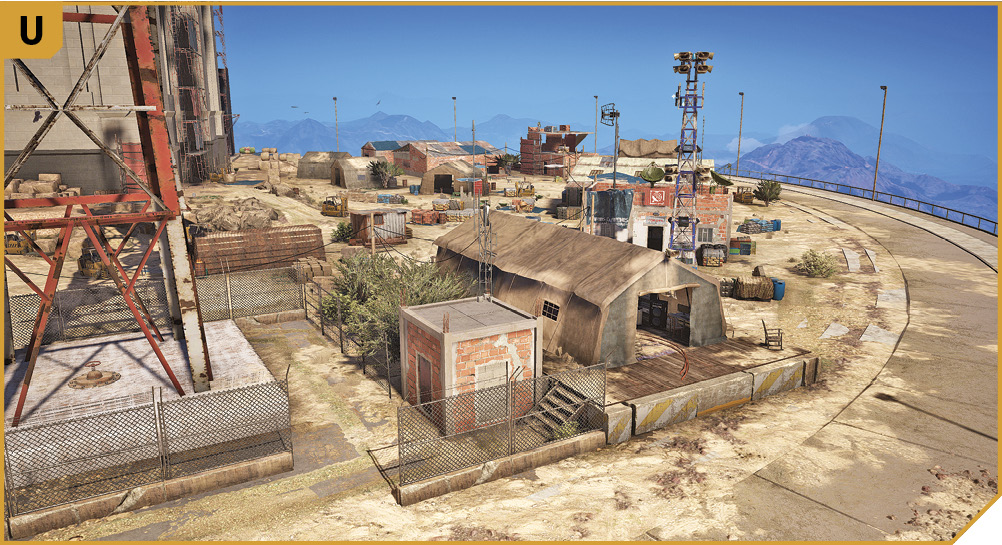
Sueño Mausoleum: Other Tactical Advice
 Should you favor a complete stealth, no-kill option, start at the railroad tracks near the SAM site at B, and climb the scree slope toward L. Instead of hopping over to deactivate the generator, just shoot out the alarm panel with a silenced shot, climb the rocks to the south of L, and creep up the stone steps to O. At this plateau, head around the north curved perimeter near the mortar (M), to the main mausoleum steps, then down to Q. Shoot the alarm panel out near DJ Perico’s tent, then creep toward it (U) and interrogate him. Leave the way you came, or by the nearby helicopter. No mess. Little fuss.
Or, you can gradually make your way from E, all the way up the various yards and construction sites, attempting the different maneuvers detailed previously, in order to reach U. Either remove all foes in each location along the way, or sneak past them. Either way, you need to shoot the alarm pole in each location, or shut the generator down before any enemies are engaged.
Or, you can all ride up in the metal-plated digger parked at the foot of the mountain near F. Just watch the concrete barriers, which are hard to navigate around. You usually end up ditching the digger just before the steps to N. You can also shrug off enemy attacks and take a motorbike all the way to the top of the mausoleum mountain. Is it possible? Yes! Is it entertaining? Definitely! Is it recommended? No! Or, you can visit each SAM site (by hike or bike), destroy all five of them, return to a waiting helicopter, and fly up to land near U.
 The biggest advantage human teammates have is their ability to easily attack from opposite directions at each construction yard en route up the mountain. So, while one Ghost is heading into the barracks and mess halls area, a second can be storming the minigun towers and armory. Employ these outflanking techniques all the way up the mountain.
Take two helicopters, and while one plays dodge with the enemy SAM sites on the south side of the mission area (B and C), the other lands at Q, grabs Perico, stows him, and flees to a safer location for the interrogation. Easy!
A mixture of vehicles is also entertaining to try: Have all four of you racing bikes to the top. The winner gets to interrogate DJ Perico!