
Tom Clancy's Ghost Recon: Wildlands Guide Welcome to Bolivia Tabacal: Madre Coca
Stock Drop

Objectives
- Destroy the coca stocks (3)
LOCATIONS
- Tabacal Base
REWARDS
- + 500 XP
Brief
Coca leaves gathered by Madre Coca’s enforcers are taken to an old freight yard where they are placed under guard prior to shipment out of the province. Locating and destroying those stockpiles would be a major setback to Madre Coca’s operation.
Taking STock of the Situation
In the far north of the province, just south of Death Road, is a large Tabacal Base with the main road to the north, a railroad splitting the base from west to east, and a main road bisecting the north-south middle. With around 30 cartel members, and the possibility of reinforcements, assaulting this base with guns blazing isn’t as proficient as sneaking in, setting timed charges at three coca stockpile locations, and leaving as your namesake “Ghost” would do. Scaring the enemy is optional.
TAbacal Base: Recon
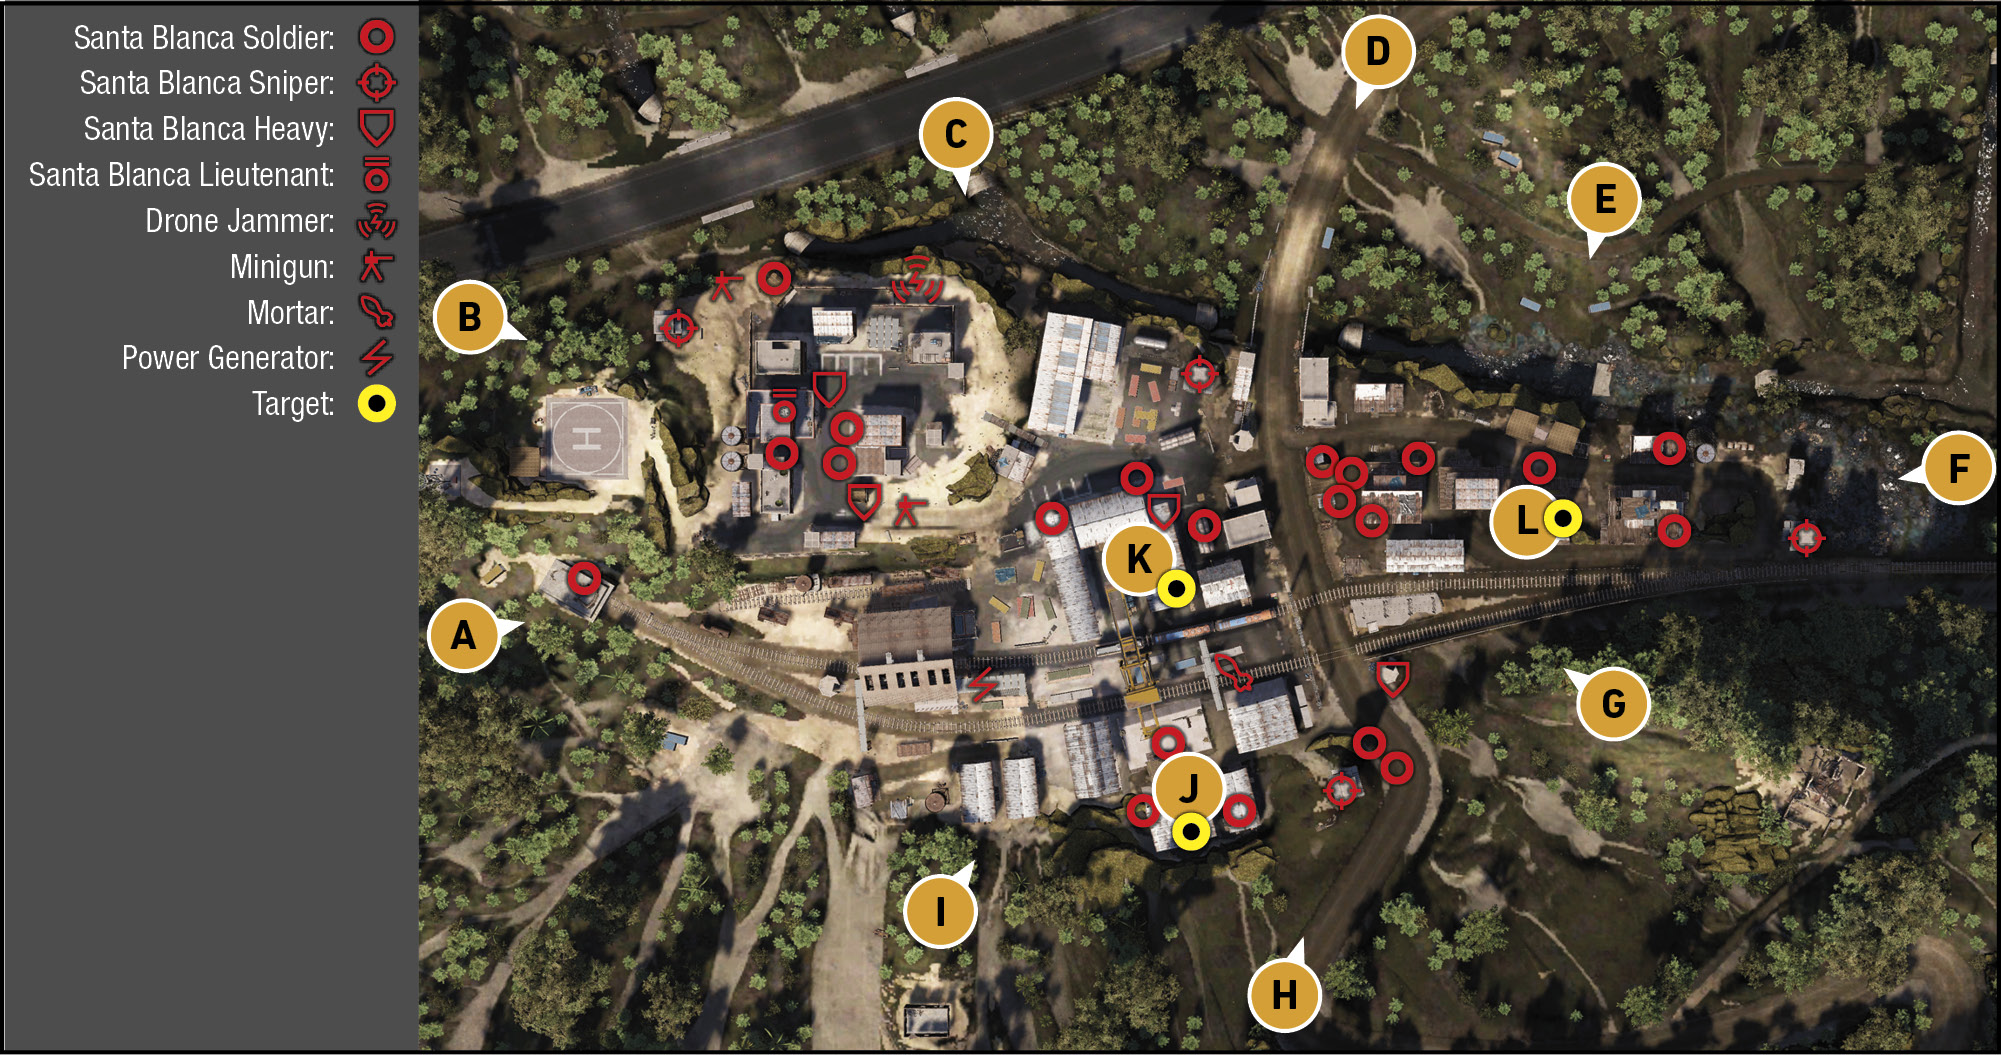
TACMAP
This is a large base with numerous buildings of varying heights and interiors. It is extremely well guarded, but as the object is to destroy the stashes of cocaine in the southwestern part of the area, there’s no real need to face down every single foe, though the following tactics reveal the best places to attempt this.
Railroad Tunnel
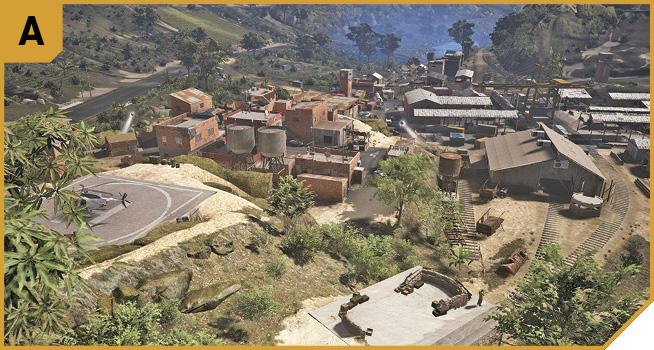
The single thug atop the tunnel entrance is an easy kill, and you can assault using vehicles from this under-utilized area, or flee to a parked vehicle and use it as an extraction point. You could also provoke enemies into charging at the sandbag defenses here, which are easily defended thanks to the height advantage you have.
Helipad and Northwest Road
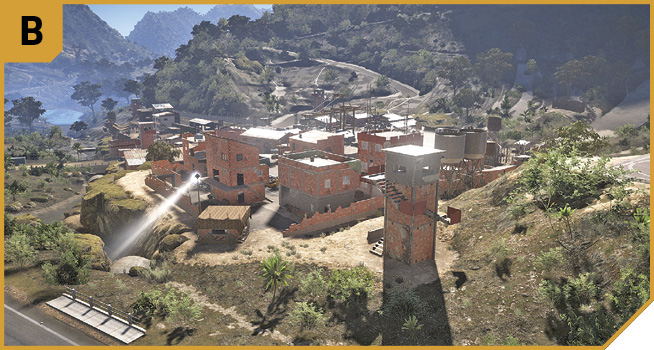
Climb to the radio mast area overlooking the helipad, and you have a reasonable sniping area to start removing the sharpshooter in the tower by the road. You can also storm the minigun nest near the tower, lob grenades over the brick wall, and enter the northwest building cluster from the helipad. This is far better than driving along the main road, where you’re easily spotted.
North Undergrowth
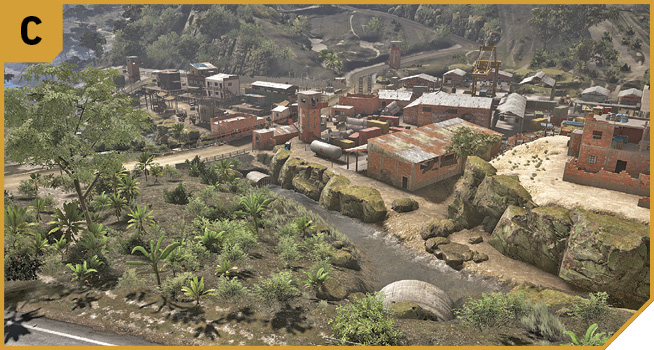
Though you can snipe from extreme range by heading north to the dirt thoroughfare called “Death Road”, shooting the sniper at the main entrance tower on the north side of the base, if stealth is a plan, involves using the undergrowth near the inlet stream. Note the large propane tank just begging to be exploded with C4, to create a disturbance and drawing the enemy to you, while others secure objectives.
Main Entrance Road (North)
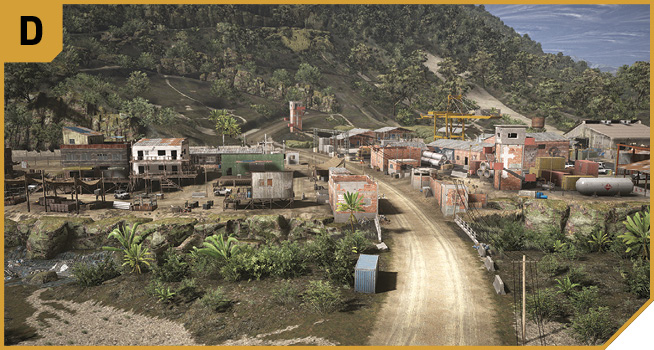
This bisects the base from north to south, and you should expect heavy gunfire and retaliation if you saunter along this dirt road. An armored SUV with minigun can cause havoc, and there’s an easy escape to the south, but there are much better stealth infiltration points than here.
Inlet Stream and Tire Dump (Northeast)
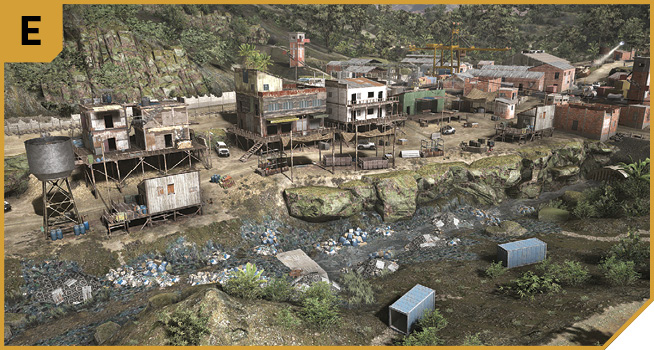
The foes in the east-central part of the base can be circumvented if you approach from here and have plans to deal with the sniper in the tower by F. Though you lack the height advantage, the rocks on the north side of the stream can be used as cover, before you quickly head up and into the target building (L). There are rebel prisoners to free en route, too.
East Railroad Tracks
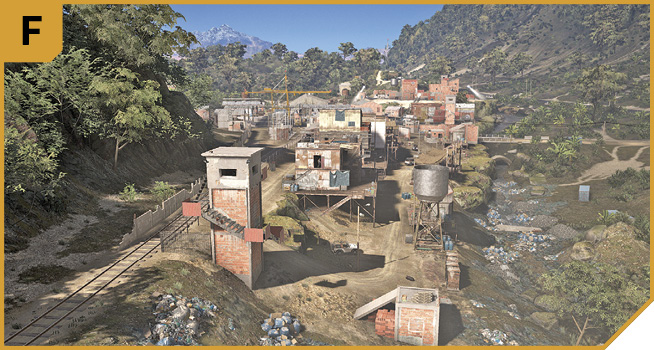
Make sure you have eyes on the sniper in the tower at the eastern edge of the base, if you’re heading along the railroad tracks. Note the straight-shot through the base to A, in case you’re planning on a vehicle assault and need a looping attack and escape route. For stealthier operatives, take the sniper tower, and use it to drop foes below or guard over a teammate who’s securing the stock at L.
Hillside Ruins
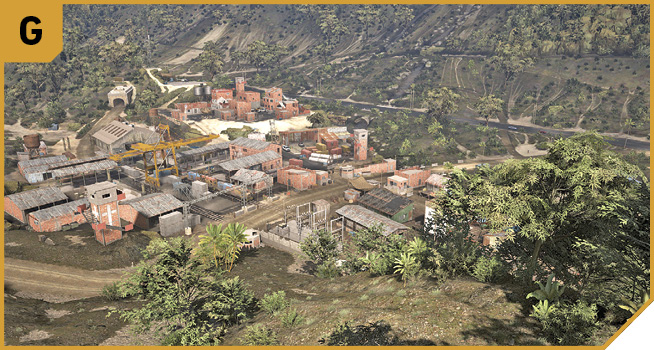
A sniper’s paradise, offering exceptional views of the entire base and, with powerful-enough ranged weaponry, a chance to tag each sniper in a tower without needing to close in on them. Though the view over L is partly obscured, you can easily cover friendlies detonating the coca at J and K, including the removal of the mortar. An excellent sniper’s camp.
Main Entrance Road (South)
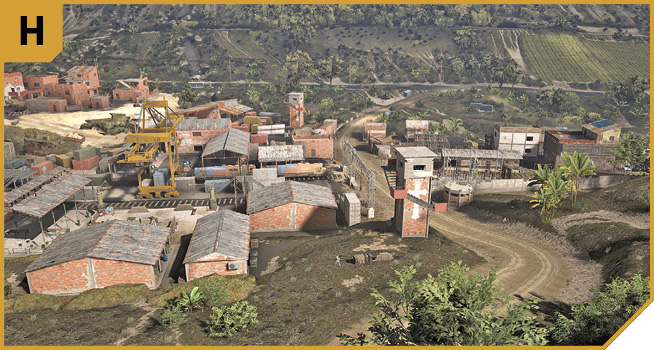
Though you have the height advantage if you stay at range, driving into the base from south to north is hazardous thanks to the sniper and armored foe in the nest, on either side of the entrance. Deal with the sniper at range, and the armored foe by heading through the steps behind him after sneaking along the main perimeter fence from F or G. Otherwise, the area isn’t as well-guarded, and a competent team can whittle down the enemies without waking up everyone else.
Mess Hall and Mortar (Southwest)
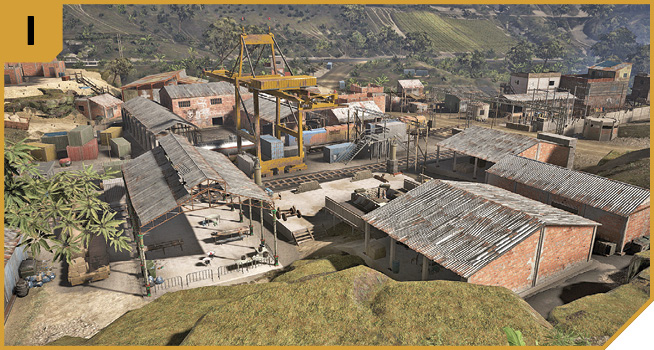
Another good spot for an incursion, and depending on the time of day, a group of enemies may be lunching in the open-air mess hall, just west of the mortar. Locate both areas, and lob in grenades, or use heavy weapons or a grenade launcher to flatten these foes. Or, if there’s only the four enemies around J to contend with, commandeer the mortar as you send explosives at J.
|
 Coca Stock Pile (Southwest)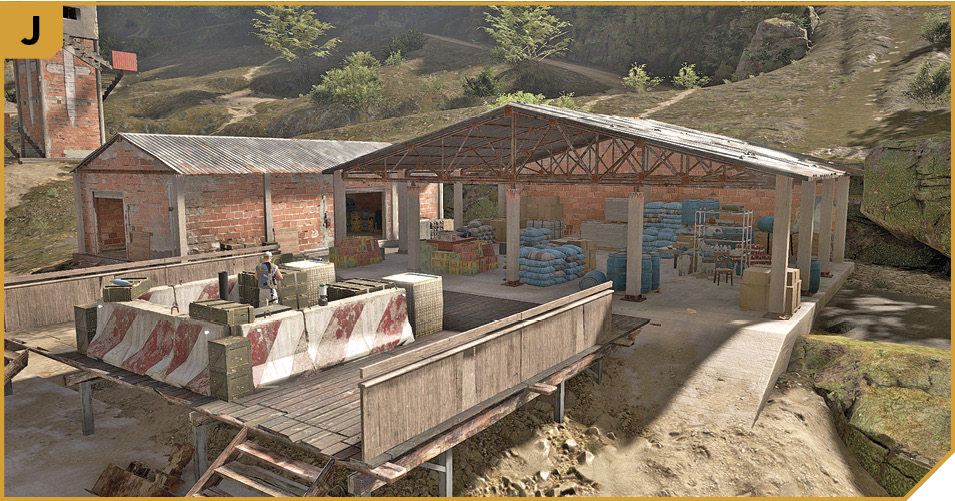
|
 Coca Stock Pile (Center)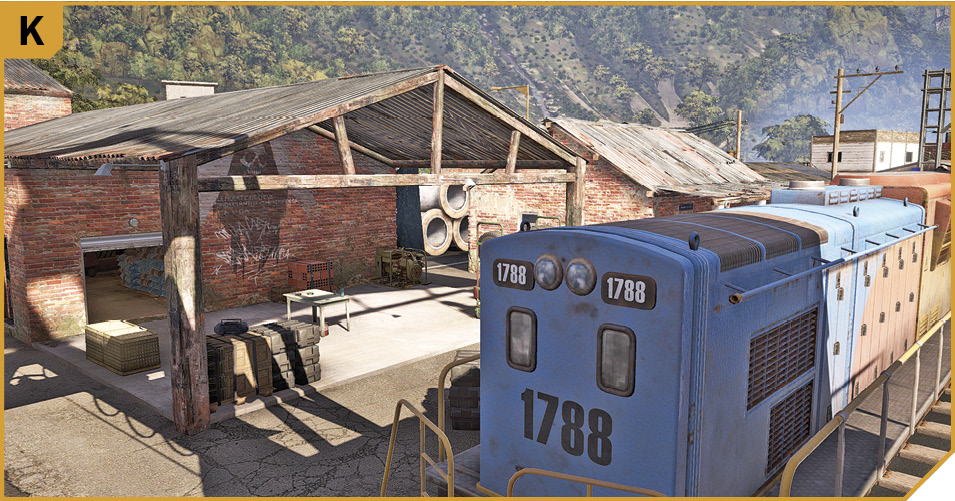
|
 Coca Stock Pile (East)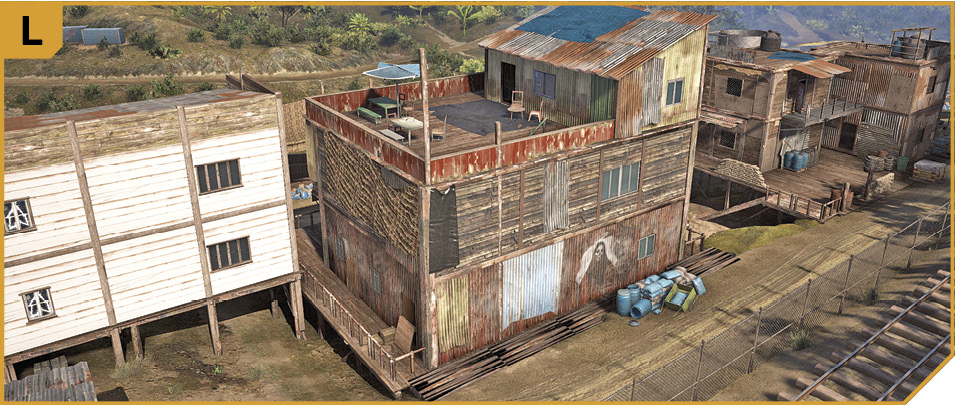
Tabacal Base: Other Tactical Advice
 The direction you infiltrate from, and the minimal number of enemies you need to neutralize in order to complete this mission, are the most important points to remember when reconnoitering this base. Notice the predominance of foes in the central and northwest areas of the map, indicating that a push from the south would be safer, especially as you have the height advantage, there are fewer snipers and minigun nests, and you can remove the mortar close to J.
This means you can place your teammates (or allies) to the north, having them create a disturbance (such as attacking, or placing C4 on the huge propane tank near the sniper tower between C and D) and engage the enemy so they move northward from their positions, and then infiltrate each stock location to prime C4 on each of them, detonating at a minimum safe distance.
Assuming you can prime C4, approach the stock piles in any order you like, though L, J, then K is preferable. If you’re unable to complete a timed explosive (you only have grenades, for example), head to K first (as it’s the most difficult to reach) after removing threats at J. Then sprint south, destroy the stock at J before disappearing to the south. Then loop around to G, down to L, and finish the job.
 It’s usually best to assign a single Ghost for each stock pile. If you fancy your team as a professional squad, destroy each stock pile in unison. The fourth Ghost can act as a driver, provide sniper support from G, or use a chopper to harry the enemy and otherwise engage them in distraction techniques while the other three get the job done.
The trick (unless you’re here for bloodletting) is to destroy the three stock piles without engaging the majority of the foes in the center and northwest parts of the base. This is easily achievable.