
Tom Clancy's Ghost Recon: Wildlands Guide Welcome to Bolivia Special Missions
El Cardenal

Objectives
- Meet Bowman
- Hack the broadcast station without being detected
- Extract El Cardenal to Pucara Bravo
LOCATIONS (Malca)
REWARDS
- + 1,000 XP
- +10 Skill Points
- +15,000 Comms Tools
Difficulty

Brief
The evidence obtained from Ramon Feliz’s hard drive is the weapon we need to expose El Cardenal’s hypocrisy. Proceed to the RV in Malca for details on the operation.
Unholy Communion
Head to a small shack on the southern outskirts of Uma Marca town, around 700 meters downhill from Malca Bravo. Then head west about two clicks to the town of Holy Malca Base, and the huge church at this location. Enter without being seen, hack the broadcast station to show some video that’ll have the congregation up in arms, and leave after a job well done.
Holy Malca Base: Recon
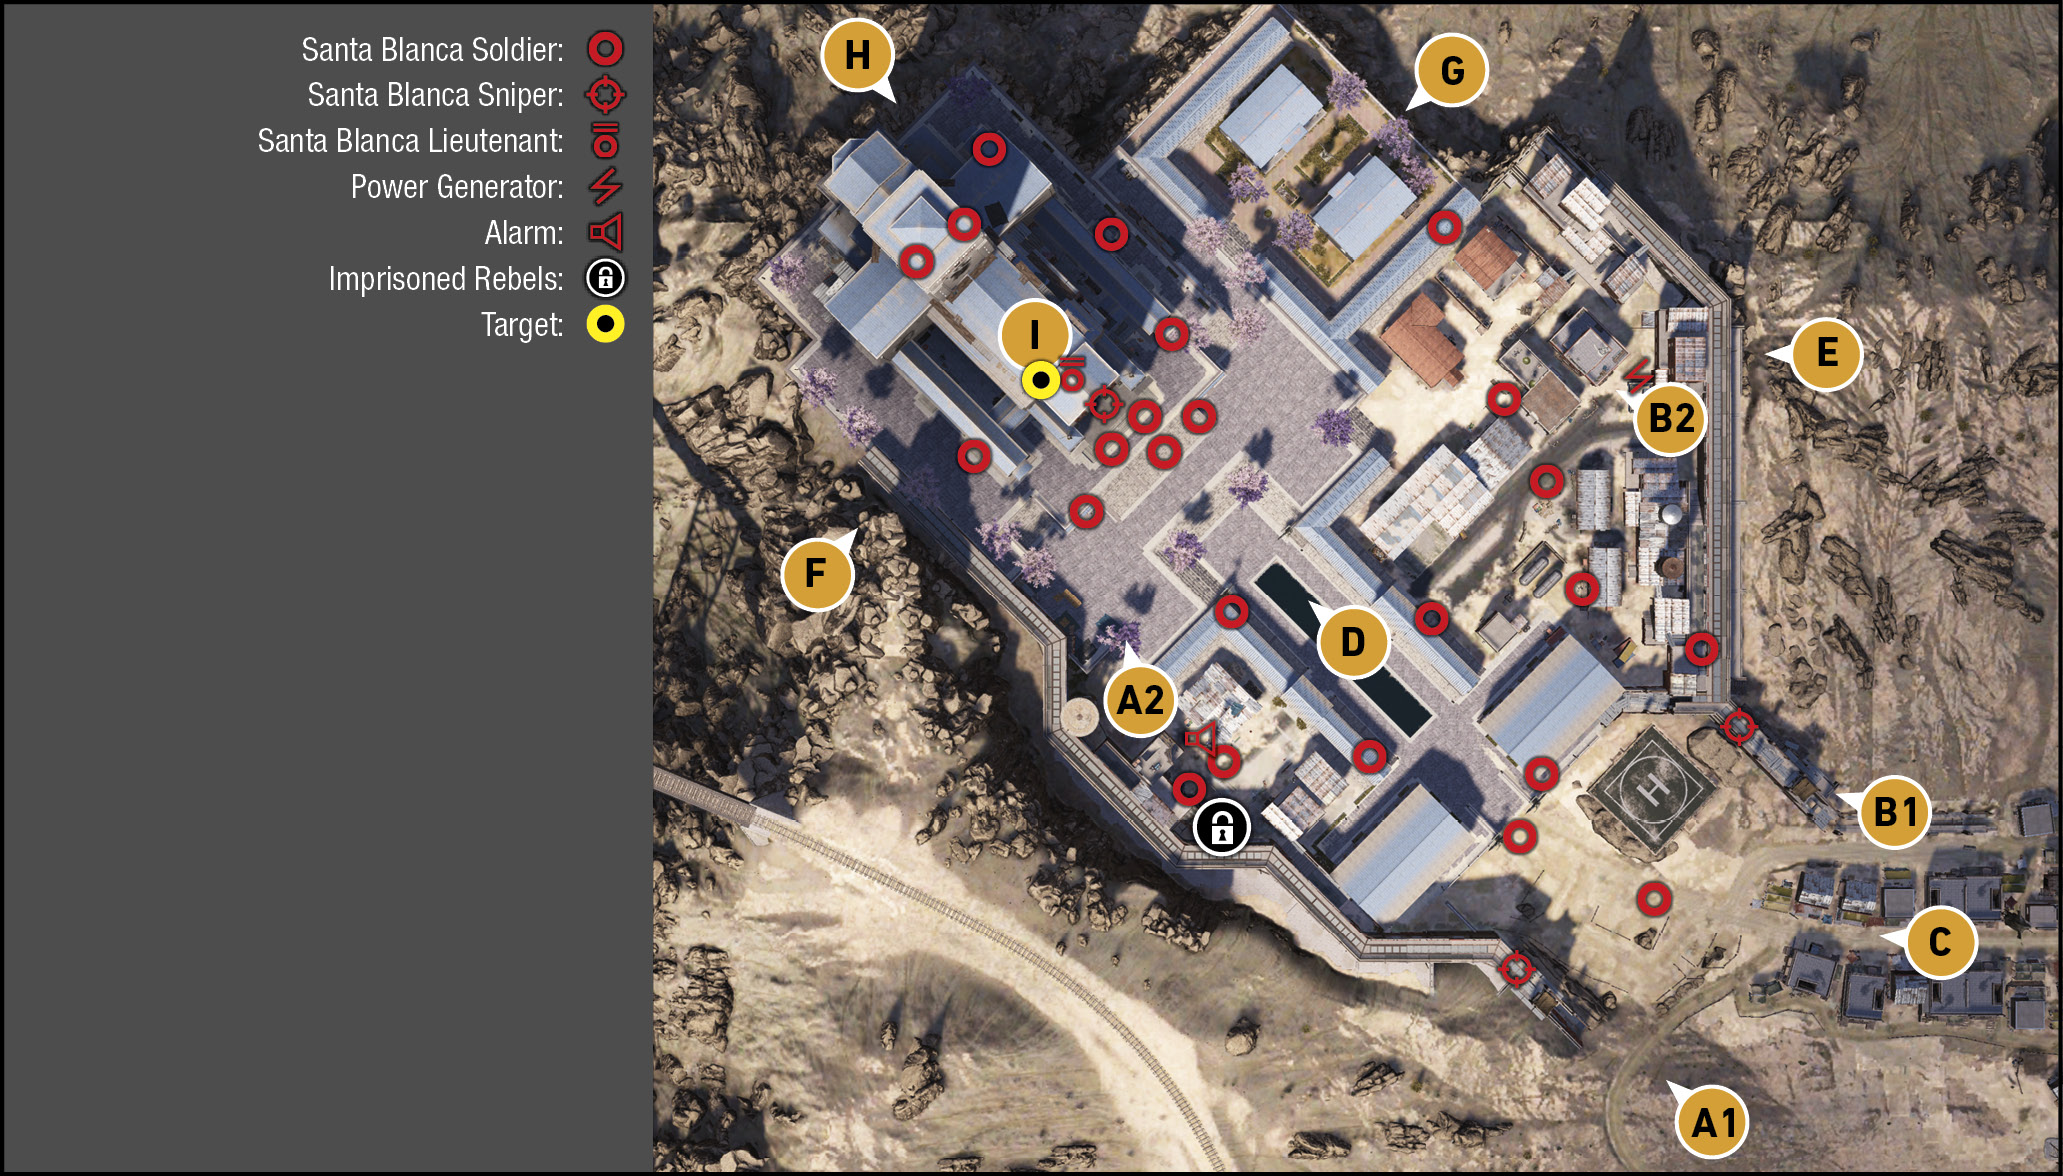
TACMAP
The base is large, with an impressive church in the northwest corner. East of it is a monastery area with purple trees, and south of the church is a marble-lined courtyard. A more industrial area is to the east, with a large parking lot to the south, and an old village to the southeast. The place looks pretty impenetrable, until you spot an opening in either of the huge exterior walls.
South: Wall Interior (Insertion Point)
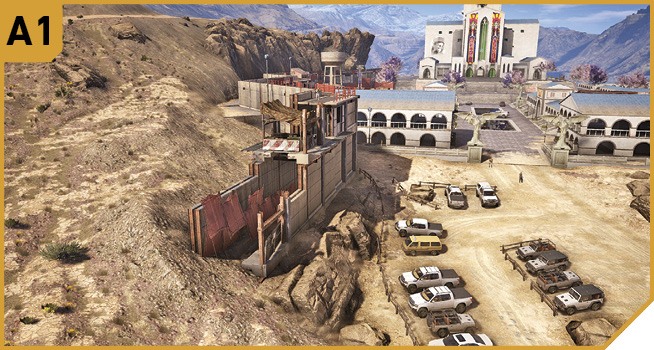
Head around the main road buildings at C, parking to the side of the huge concrete wall, ideally on the southwest side so the sniper doesn’t see you, and infiltrate under the minigun nest and sniper, so you’re running through the outer and inner parts of the wall itself. Note the openings on your right, which eventually lead to A2 (make sure you head around the empty cages, and back into the wall to reach A2). This allows you to circumvent the main courtyard at D, and a number of enemies.
West: Church Entrance
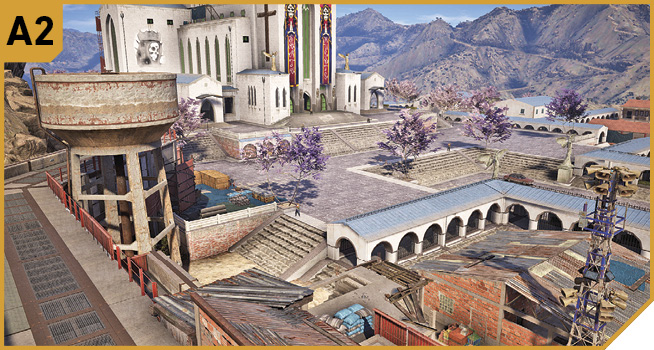
Head out from the wall by climbing the fence, staying as far west as you can while you head up some steps, cross the courtyard by the construction bags, and climb up the metal ramp to the small wooden walkway and over to the upper side courtyard of the church. From here (F), you can enter the church and head up to the balcony. Take the second side archway entrance from the front (ignore the three archways making a cube shape, though check that area for a vehicle you may wish to use later).
Note you can ride a bike from A1 to A2, park it, and then head back to it if you need a vehicle to chase down El Cardenal in, once he tries to escape.
Southeast: Wall Interior (Insertion Point)
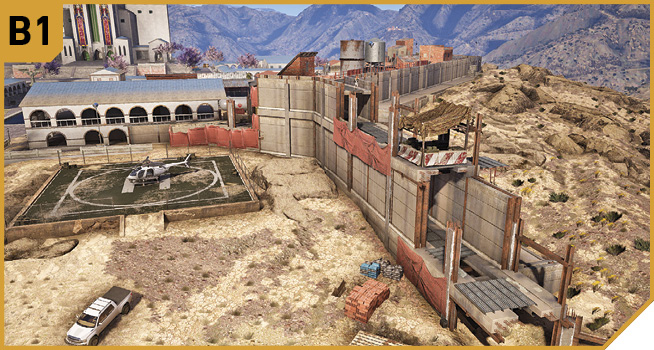
Park up a vehicle; you may wish to position it on the rocky ground to the northeast of the wall, avoiding the gaze of the sniper. Then run between the outer and inner parts of the wall, under the minigun nest and sniper, and work your way along the wall interior to B2. This is the other main infiltration point, and much safer than moving through the buildings (especially due to your time constraints).
As soon as you run in, at the first corner (where the wall turns from northwest to north), there’s a metal ramp on your left; take it. This allows you to reach an upper wall interior running above the ground wall interior. The only difference is that the upper wall takes you all the way to the end of the wall; head out of the last opening on your left, cross the metal roof, and drop down an alley north of a metal gangplank. You can reach the archways of the two large monastery buildings with the purple trees (G).
East: Wall Opening (Ground Level)
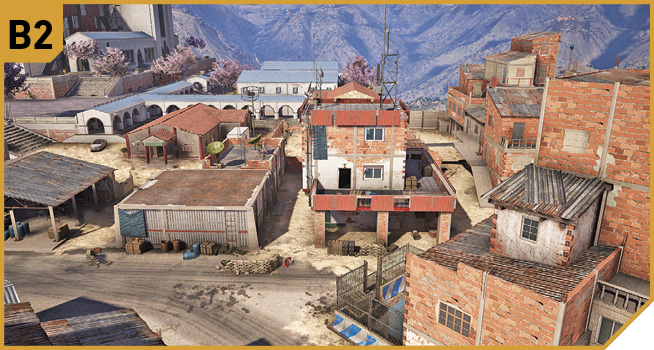
If you followed the ground route within the perimeter wall, it ends here, with an opening to your left. Double-back (watching for foes heading down the steps to the south), then head northwest, passing the generator, around the right side of the HQ building, and move northwest until you reach the monastery buildings with the purple trees (G).
South East: Main Road
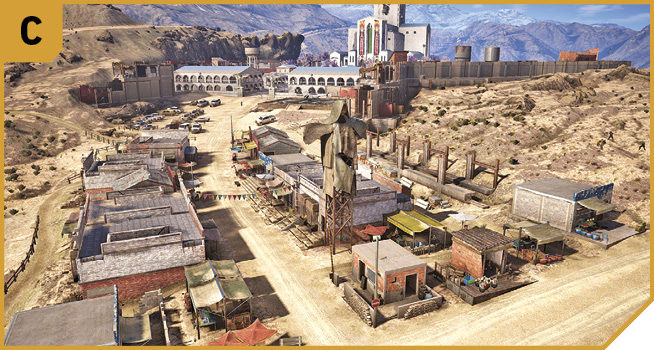
With stores on either side of the road entrance to the base, there are few foes here. They start at the parking lot to the northwest at the end of the road. It’s worth having a Ghost parked here in a vehicle in Co-op mode, ready to tail El Cardenal, so the mission goes smoothly. Otherwise, this is an unwise infiltration point as you’re easily spotted.
Center: Main Courtyard
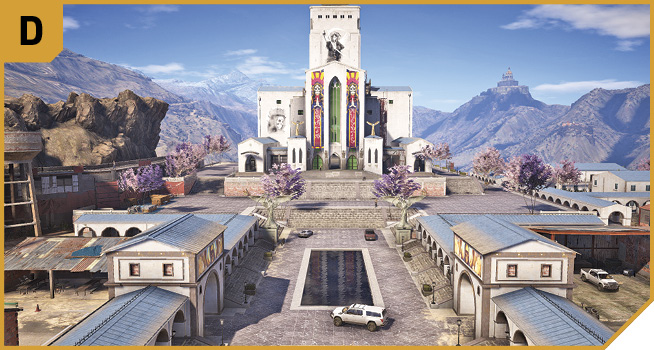
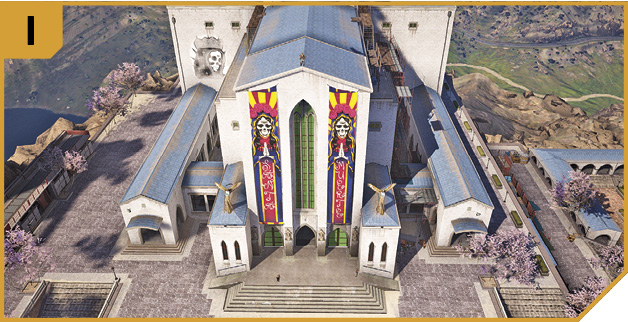
Flanked by two winged statues at each end, the shallow reflecting pools of the main courtyard are a real danger to those trying to infiltrate here without being seen. So keep away from this area, and the warehouse buildings to the east, and take the previously-detailed routes. This area is of importance as El Cardenal escapes in a sedan parked by the northeast statue. It’s worth checking the area (with a drone) prior to hacking the laptop, and finding a vehicle you can pursue El Cardenal in; don’t try booby-trapping his car, as you want him alive, and apprehended in a remote location, away from all these enemies.
East: Exterior Infiltration Point
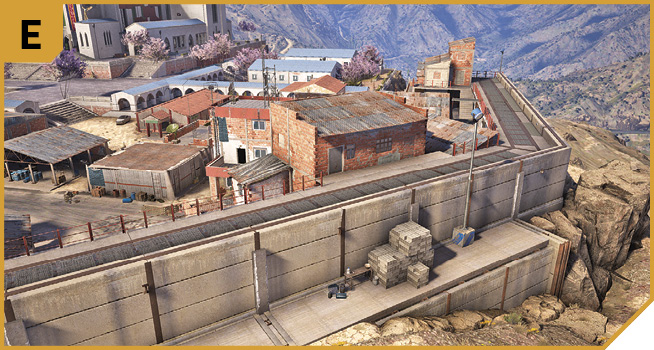
The concrete blocks on the outside of the perimeter wall is the only other recommended infiltration route to take. It’s slightly quicker, you can reach here faster than parking up at A1 or B1, and you can easily drop down to B2, and complete progress to G.
If you take the concrete steps at B2, which lead all the way to the top of the wall (outside), you can also escape to a waiting vehicle using this route, which is most helpful when chasing El Cardenal.
Northwest: Church Side Courtyard
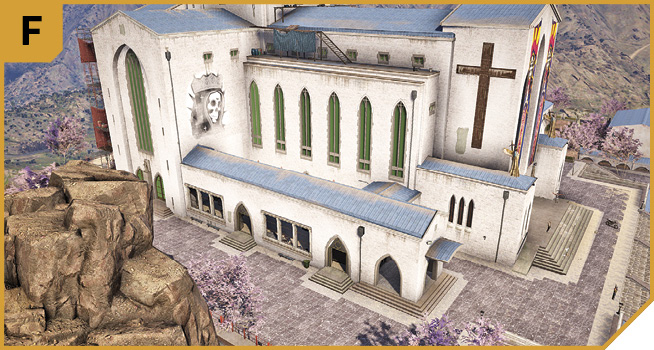
The cliffs on the outer side of the wall are great sniping positions when you’re attempting to remove foes from this base, but under these mission conditions, you need to have entered the base from A1, then reached the side courtyard from A2, to reach this courtyard.
This side of the church is comprised of (working from front to back) three arches in a cube shape, with a possible vehicle parked nearby (glance to see if it’s there en route to the laptop, so you can use it afterward). There’s two side arches to a linked passage, both leading into the church interior. Take the farther one, in the middle of the wall. Pass through a small vestibule, and turn right, into the church itself. You can now head up a metal ramp to the balcony where the target laptop is.
At the north end of the side courtyard is scaffolding, allowing you to reach the roof of the church. This is only helpful if your team (in Co-op mode) decides to remove all hostiles once El Cardenal has bolted, and someone is already chasing him.
North: Monastery Buildings and Church Side Courtyard
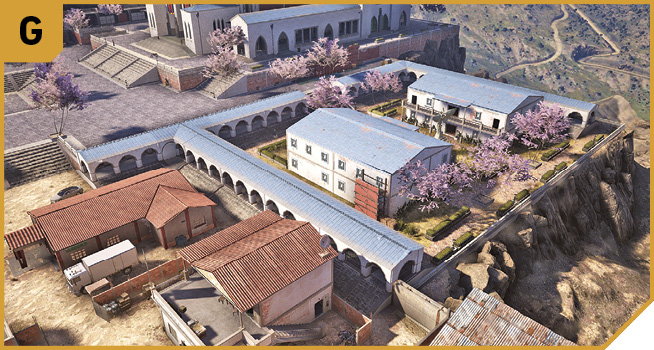
If you’re taking the infiltration route from B2 or E, you may encounter your first foe here, surrounded by purple jacaranda trees. It’s easy to navigate around him, then head southwest toward the side of the church. Here, you must climb up the wooden scaffolding to the concrete bush planter, and hide by the side archways. The two side archways are of interest.
The archway to the front of the church allows access through the trio of archways in a “cube” at the front, to a metal ramp, leading up to an outside opening directly northeast of the balcony, and it’s a short hop in to reach the laptop. The archway in the middle of the side of the church allows you to head into the church hall, but make a right before you do. Climb the exterior metal ramp and scaffolding, ascend one floor, then move to the same balcony entrance. Use either infiltration point depending on where foes are when you reach the base of the church.
Northeast: Back Of The Church
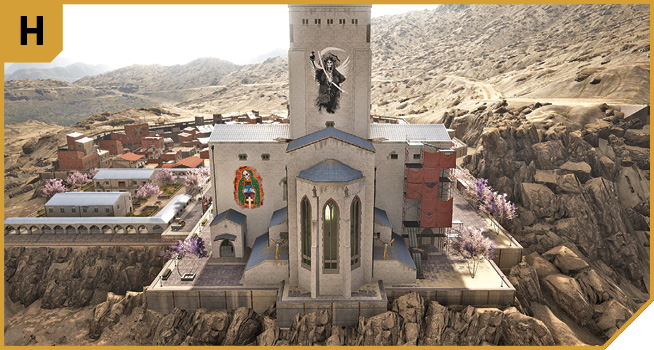
The steep rocks the church’s foundations are built on are too steep to climb, meaning access from this direction is via air (parachuting or chopper), and this type of insertion is easily detected.
|


Holy Malca Base: Tactical Advice
 From Bowman’s shack, travel to the outskirts of the church, park up outside the wall at E, using the concrete blocks to climb to the top of the wall. Drop down, move to G, enter via the east side of the church (either route previously specified), throttle the captain, and complete the objective. You shouldn’t have attracted any attention whatsoever.
From Bowman’s shack, travel to B1, enter there, head to B2, to G, and enter the church from the east side.
Or, travel to A1, enter the wall here, emerge at A2, to F, and enter from the west side.
 Entertain any of the previous routes, with one Ghost taking each of them,ensuring the teammate who makes it the farthest in the quickest time completes the objective. Or, hang back and let your most seasoned Ghost do the job.
Meanwhile, as it’s not necessary for all Ghosts to head into this mission area,have one, two, or all three wait a safe distance outside in a suitable vehicle (truck, bike, or helicopter), so when El Cardenal escapes, he’s easily tailed.
El Cardenal Extraction To Pucara Bravo
Once the broadcast starts, your weapons are live, and you can tactically bring down any cartel foe you wish (except for El Cardenal; he needs to be taken alive). Your target runs out of the church heading southeast, and locates a brown sedan (usually) at the bottom of the steps, then drives out of the mission area, leaving at C. Learning this route, and preparing for it, is the first step in capturing this buchon, before extraction over the border to the north, into Pucara Province.
Keep El Cardenal within 300 meters of you until he’s left the enemies inside this area, then run him off the road, as you would during a normal vehicle chase. Then drive him (carefully, switching to a helicopter for a quicker extraction if you wish) to Pucara Bravo.
El Cardenal Capture: Tactical Advice
 With no one in a vehicle chasing El Cardenal down for you, it’s time to utilize the element of surprise, and pre-mission planning. From the balcony, figure out the best route to reach a vehicle. Remember enemies will take a few seconds to react to you, so engaging them in gunfire is only recommended if they’re standing between you and a vehicle. Your target can easily escape if you’re bogged down by a sniper. So use a shotgun or close-assault weapon, and keep moving! Find a vehicle at the following locations:
Parked in the “cube” archway area at the side courtyard, front of the church, at F.
Parked across from the brown sedan El Cardenal uses, at D.
A bike parked at A2, if you used one to reach there (or anywhere inside the base if you used one).
A truck parked outside at E, if you used one, and this route, to get to the balcony.
Or reach the parking lot between A1 and B1, and choose any vehicle (or the waiting helicopter) you like.
With other teammates hopefully exhibiting a degree of competency, they should already be waiting in one or more vehicles, ready to give chase. Whether they are or not, the Ghost at the balcony should attempt Solo tactics and leave the premises.
If you’re confident one Ghost can finish the mission, have three stay to mop up enemies here.