
Tom Clancy's Ghost Recon: Wildlands Guide Welcome to Bolivia Special Missions
La Plaga

Objectives
- Locate La Plaga
- Kill La Plaga
LOCATIONS (La Cruz)
- Buchon House
- Outpost
REWARDS
- + 350 XP
- + 7 Skill Points
- +10,000 Medication
- Headwear: La Plaga’s Hat
Difficulty

Brief
El Sueño has given El Muro a chance to atone for his failure by killing La Plaga. But El Muro can’t bring himself to murder his brother. Instead, he plans on sneaking out of the country and taking La Plaga with him. Kill La Plaga before he gets away.
A Plague on Both Your Houses
This is a seemingly straightforward mission. You’re to study La Plaga’s buchon house, then clear it, killing La Plaga in the process. No miniguns, SAM launchers, or other installations hinder you. Though there are party-goers who should not be killed, by now you should know the difference between an unarmed reveler and a machine-gun-toting sicario. It’s only when you battle down to the basement that you realize La Plaga has an escape route—a tunnel leading to an outpost north of here, where the final part of the battle concludes.
Buchon House: Recon
Buchon House Northwest: Checkpoint
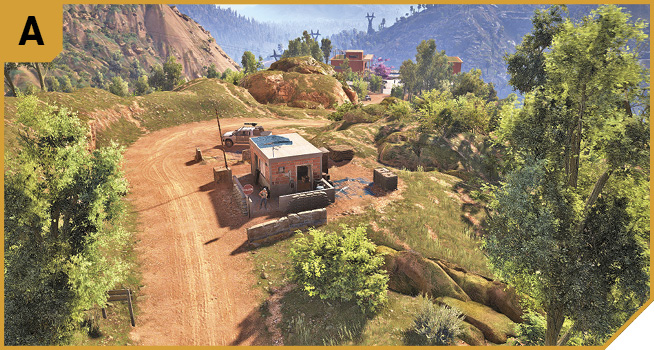
A couple of foes and a truck greet you if you take the main road to the buchon house. Dealing with these isn’t a problem, though if you’re caught by surprise, the main force of foes inside the compound may hear you, preventing a more clandestine approach.
Buchon House West: Entrance and Grounds
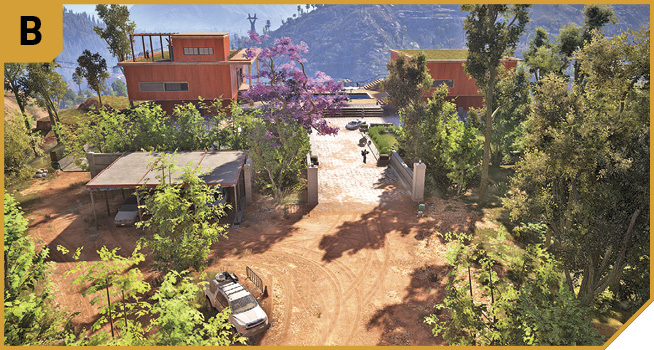
There’s a stone-paved entrance with a parking area to the left (north) and underground to the right (south). Head straight for the house if you want a firefight. Creep north or south to reach E or C respectively, if you’d like to recon the place or try a stealthier approach.
The grounds sport a low hedge and formal gardens on each side. Creep in and crouch to hide; aside from this, there are few obstacles to use for protection. The north building contains foes who can see you from windows. There’s a ground-floor open door on the northwest wall (facing the garden), near a basement garage slope. The garage door is sealed, and behind it is La Plaga; there’s just the matter of needing to weave your way through the south section to get there.
The door leads into a ground-floor gym and stairs up to a main living area, which is also accessible from the main pool courtyard. A smaller living room includes stairs up to a roof office and helipad. This is a good place from which to fly to the outpost, as opposed to taking the tunnel, but the lip of the building prevents you from accurately tagging foes below (though grenades can work, despite the innocents you may kill).
The south building is your entrance to the basement and contains numerous foes. The only access to the living room and bedroom floor is via the pool courtyard. Head downstairs from here to a dining room (with windows you can smash from C) and a small barrel-storage room, then more stairs. These lead down to a recording studio, a concrete corridor linking to the foundations of the north building, and tunnel access. Head there to spot La Plaga, who drives off down the tunnel on a bike.
Buchon House: Recon
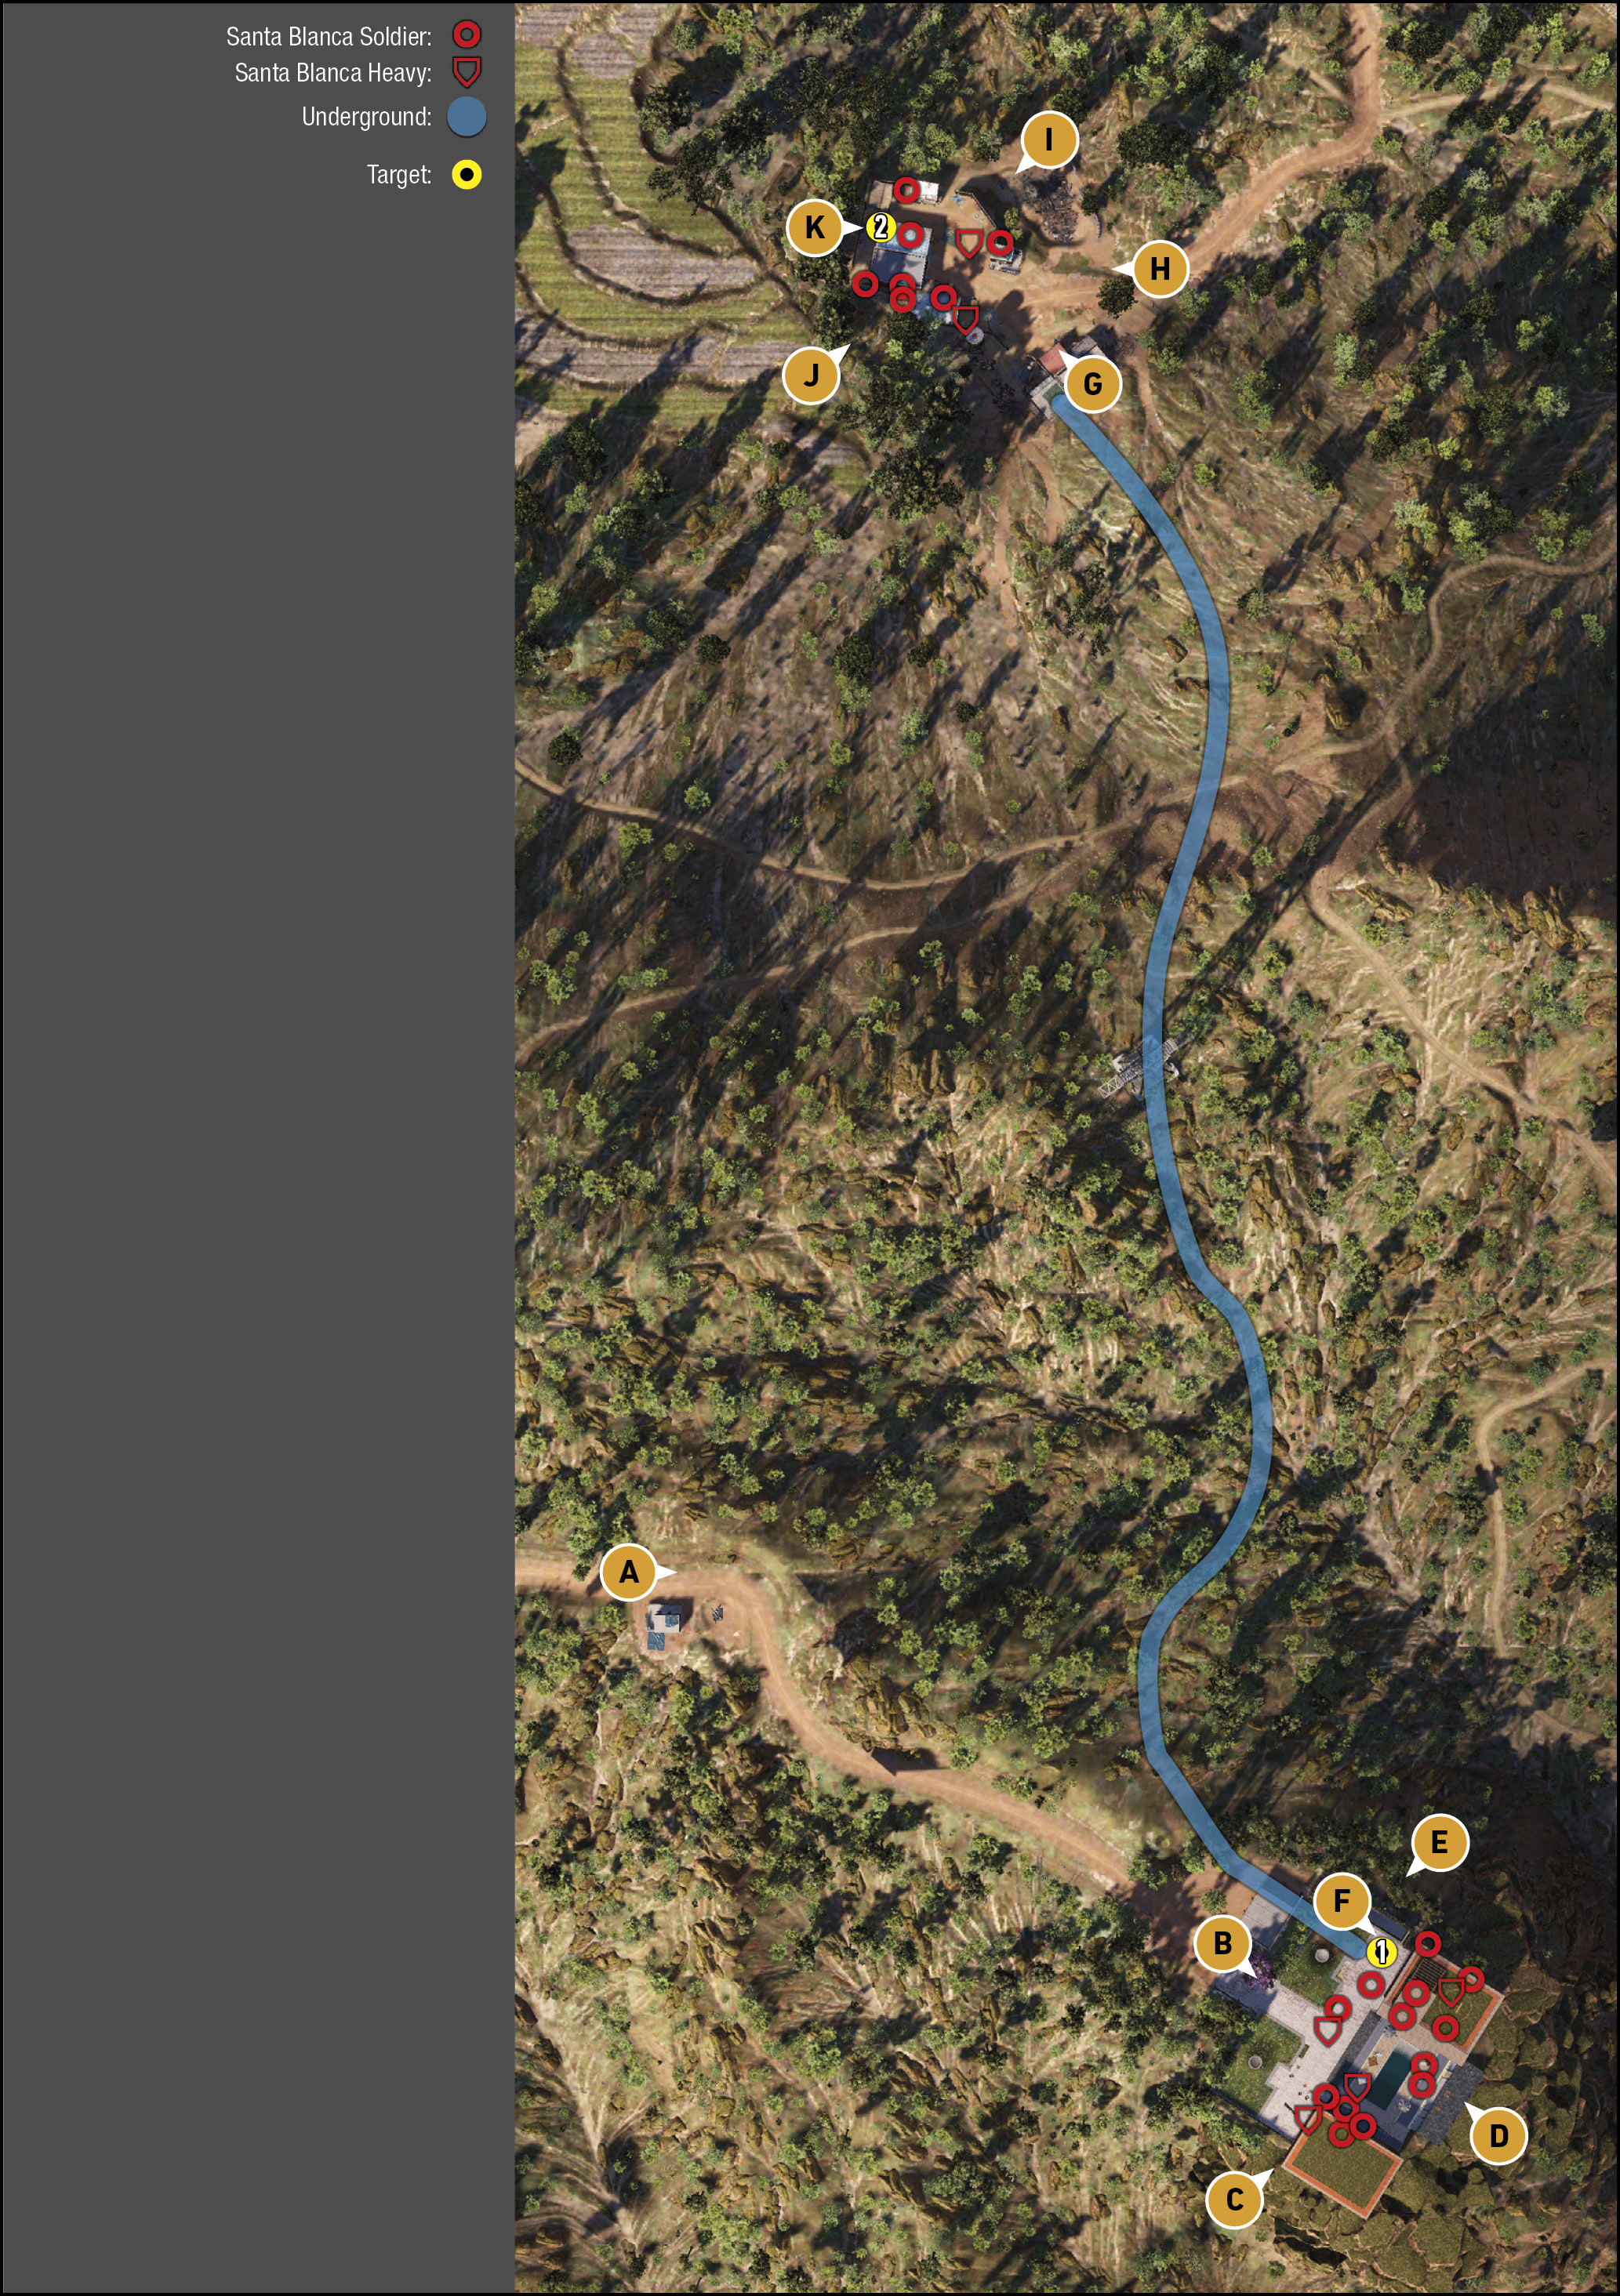
TACMAP
There are two entrances to this house, though one is just under a kilometer north of the main compound and only accessible via a tunnel from the basement of the buchon house. The mansion itself has around 16 foes, mainly located inside the multiple floors of each side of the house. The north section has three floors, as does the south section, but the south side has an additional basement that goes underneath the north section but doesn’t link to it. So even though the guide map indicates that La Plaga’s location is under the north section of the house at the start of the tunnel, you need to descend through the south section to get to it.
The tunnel is winding, usually traversed on a bike, and ends at the outpost to the north, which has its own cluster of foes to worry about (about nine of them). The tunnel is gated until La Plaga makes his escape, so although you can head here first, you can’t infiltrate the tunnel from north to south (though you can divide your team in Co-op to tackle either end).
Buchon House South: Perimeter
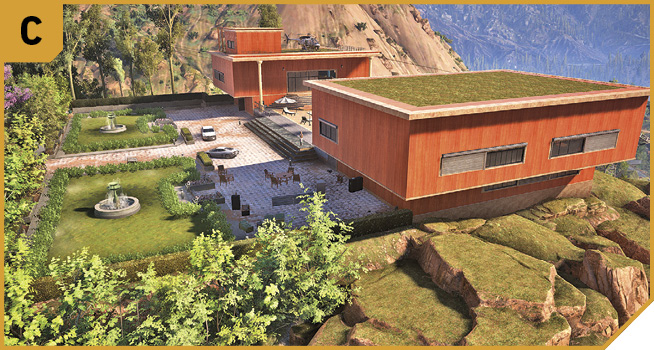
Sneak around to here from C, or through the formal garden. This offers quicker access down into the basement if you shoot out the windows on this side and climb through into the ground-floor dining room. You can also snipe foes looking out of windows on both floors from here.
Buchon House East: Perimeter
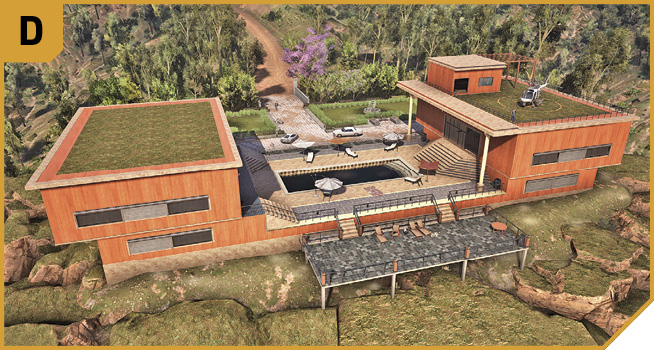
This offers an alternate route (via C or E) to the pool courtyard area. This creates crossfire and outflanking possibilities during Co-op, and also allows you to shoot foes atop the helipad roof to the north from a different angle. It’s another way into either building too.
Buchon House North: Perimeter
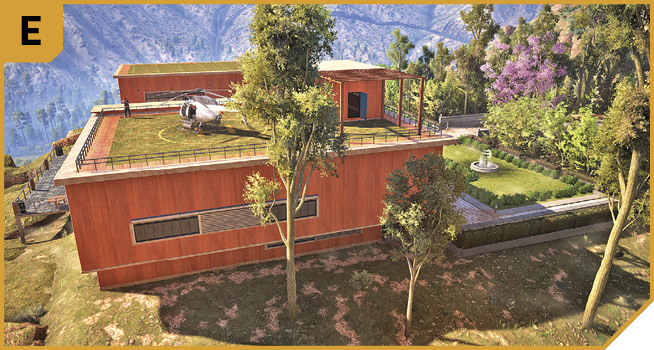
Head around here from B or D. There’s a gym room window on this side you can smash but can’t climb through due to the treadmills on the other side. Ignore this area unless you want a stealthy way to reach the open door on the northwest wall of the north building; hop over the hedge here to reach it.
|

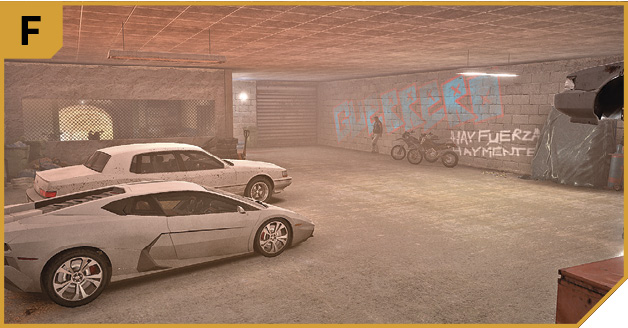
Outpost South: Tunnel Exit
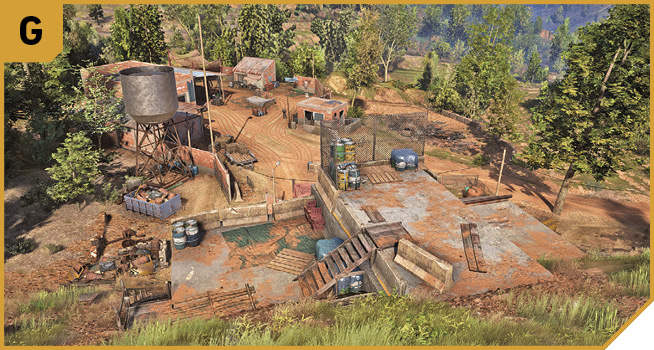
The exit from the buchon house tunnel brings you straight into the outpost, so use the concrete barriers as immediate cover. If you’ve traveled over the hill past the radio mast instead, you can use the top of the concrete tunnel exit as a sniping point, or run there after exiting. This offers cover and a view of most of the foes, enabling you to whittle down the enemies until only La Plaga is left. This can be done before or after you assault the buchon house.
Outpost East: Main Road
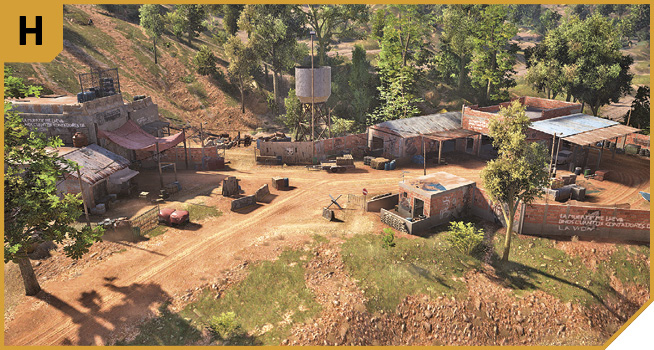
Just north of here along this road is a small checkpoint with a couple of foes, but as you normally approach this location after clearing the buchon house, the road likely isn’t used. If you’re attacking here first (or simultaneously), you can drive here and cause havoc, or better yet, peel off and sneak up to G or I and start removing foes from cover.
Outpost North: Infiltration Point
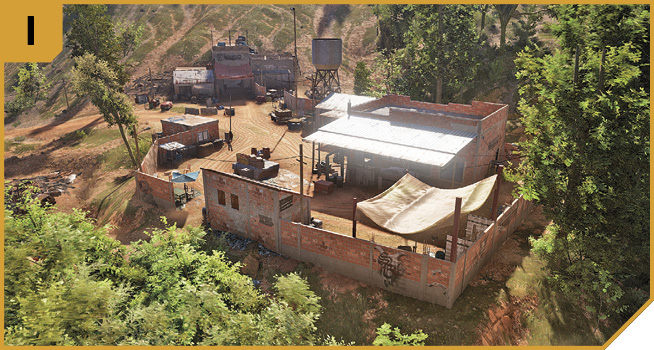
A small dirt path allows access into the main yard of the outpost, and the brick wall and brick shack enable you to seek cover if there’s heavy returning fire. It’s not a spectacular way to infiltrate, but it’s good if you’re trying to outflank while teammates attack from a different direction. Note the northwest corner of the yard has an impenetrable barbed-wire brick wall, but it makes good sneaking cover.
Outpost Southwest: Infiltration Point
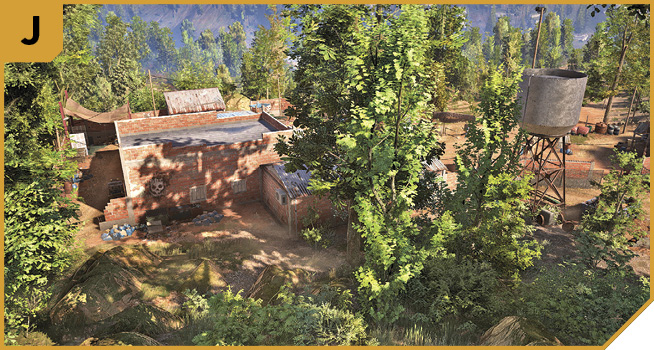
The southwest side of the outpost features a rusty water tower and a copse of trees you encounter before you reach the brick wall at the edge of the mechanic’s garage where La Plaga makes his last stand. A break in the west-corner wall enables you to attack the yard and outflank the enemy. Or you can attack to the east of the water tower, around the open gate. There’s good access to G here, too.
|

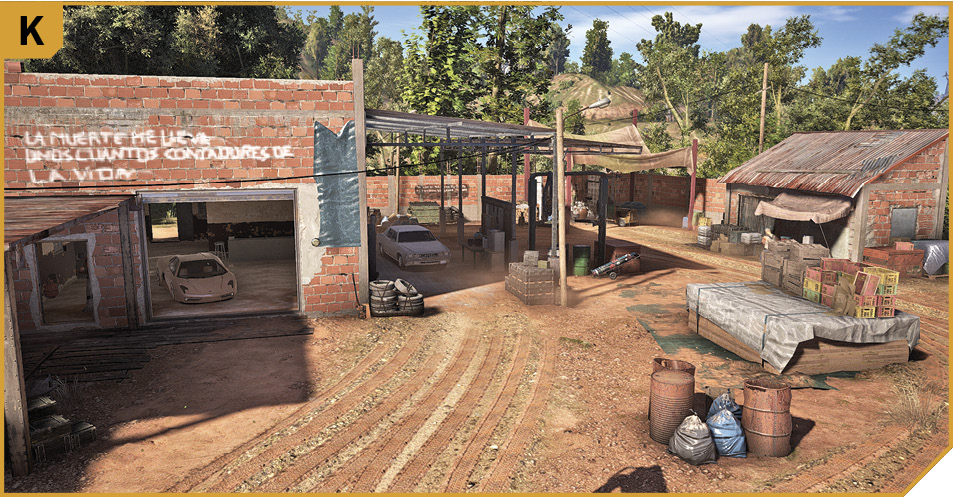
Buchon House: Other Tactical Advice

 For the most clandestine approach, start at B, creep around to C, shoot out the window and hop over into the dining room, then scurry down to the basement. At this point, it’s time to progress using shotguns and mayhem. Bring out flashbangs as you storm the basement, clearing the area, and then follow La Plaga to the outpost. Scramble up to G and shoot the foes in the vicinity before dealing with the buchon himself.
Alternatively, back out of the residence and drive a vehicle over the hill to the north and down to the outpost. Or use the helicopter atop the north building to reach the outpost.
For greater mayhem, move from B across the formal garden and into the north building at the gym level, and work your way up the building to clear it. Flashbangs and close-assault weaponry are advised. Cross the pool courtyard and bring the pain to all foes until the buchon house is completely cleared. Then follow La Plaga to the outpost and kill him and the enemies there.
Or land your own helicopter on the roof of the south building, which allows you to shoot foes across at the north building before dropping down and forcing your way into the south structure.
Or send in an explosive drone via the rear of the outpost, and detonate it as close to La Plaga as you can.
 At both locations, it’s helpful if you attack from multiple directions, though the plans to reach the basement of the buchon house are the same.
You should also attack from multiple directions when ridding the outpost of enemies. Note you can kill La Plaga and finish this mission at any time; you don’t need to massacre everyone.
The biggest advantage of Co-op, coupled with the knowledge that La Plaga escapes to the outpost, is the ability to split your team into two forces. Send the first to the outpost to clear it, perhaps placing mines at the tunnel exit (G), while the other duo clears the buchon house. La Plaga won’t even get into the outpost if you’ve already removed all foes and train your weapons at the tunnel.