
Tom Clancy's Ghost Recon: Wildlands Guide Welcome to Bolivia Espiritu Santo: La Santera
Gold Rush North

Objectives
- Locate the northern gold cache
- Destroy the cache
- Escape the mine before it collapses (00:30)
LOCATIONS
- Akta Gracia Mine
- Outpost (Northeast)
REWARDS
- + 1,000 XP
Brief
The cartel is funding La Santera’s efforts with gold stored in caches across Espiritu Santo. Destroying these gold caches will be a major blow to the cult’s finances and cause tension between El Sueño and La Santera.
There’s Gold in Them Thar Hills!
This mission does not initially appear on your Tacmap, forcing you to search this Province for a possible mine entrance. Find it northeast of Alta Gracia, a town just north of Espiritu Santo Alpha. Head to the mine, watching for encroaching enemies from the adjacent Outpost, and ascertain the location of three gold caches. Then destroy them with explosives. You may wish to have a clear exit route prior to the detonation, as the mine collapses around 28 seconds later.
Alta Gracia Mine: Recon
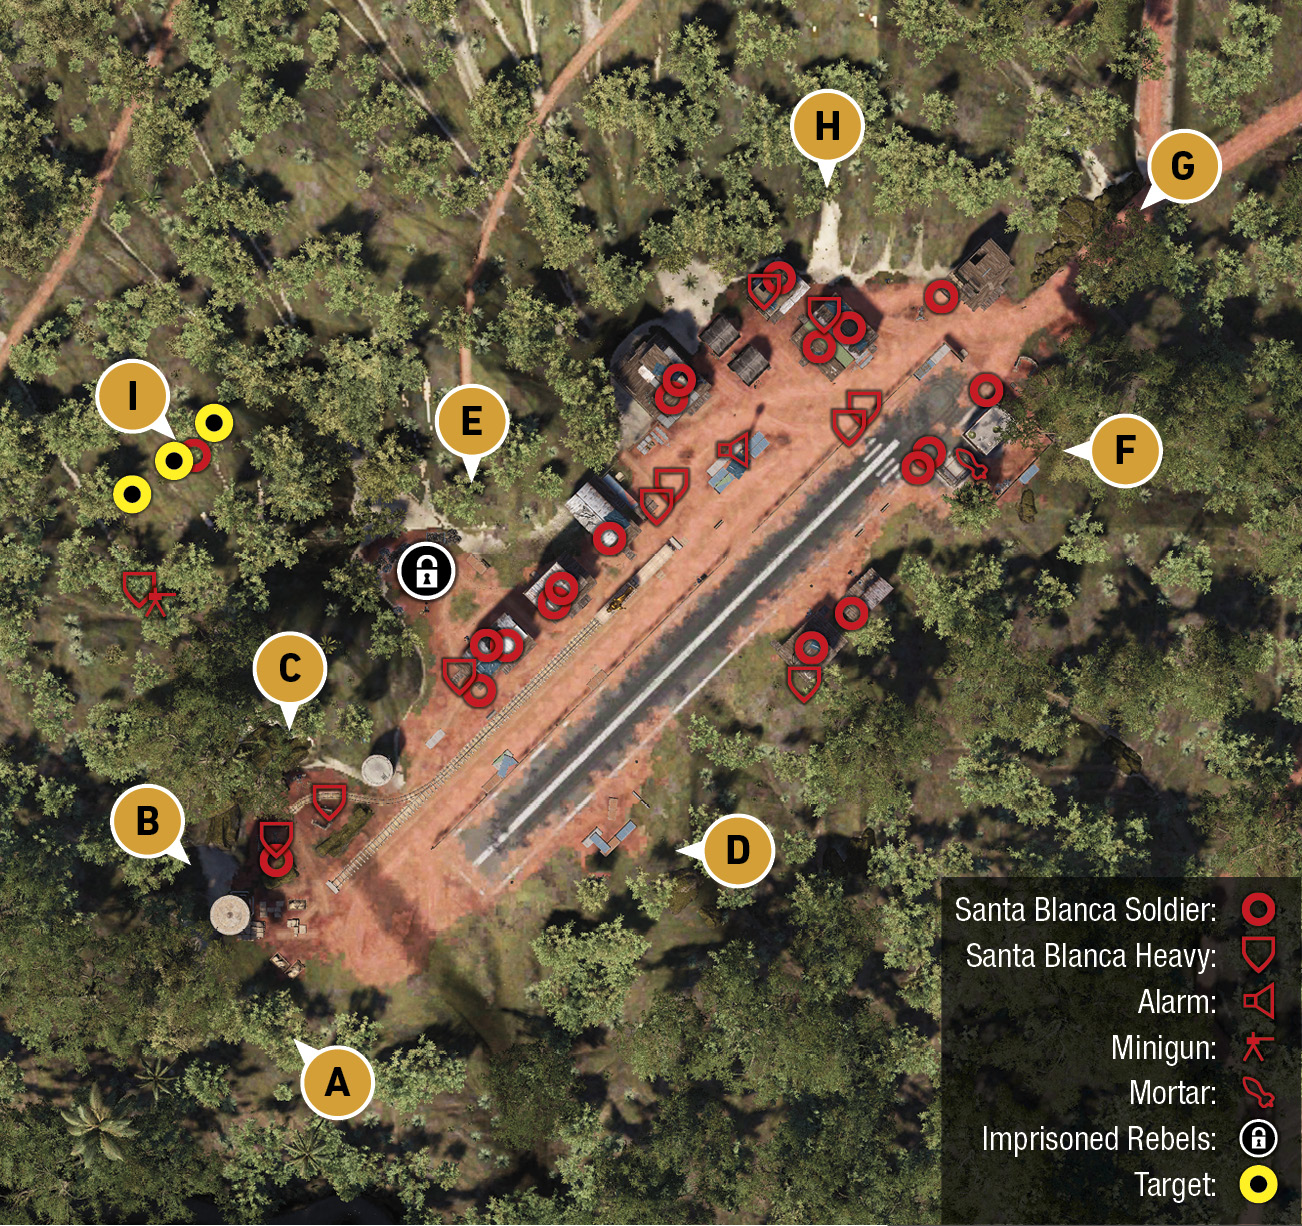
TACMAP
There are two adjacent locations on this Tacmap for a very good reason; when noise is heard at the mine, the enemies at the Outpost to the northeast take notice, and this can cause reinforcements to arrive. Therefore, treat this entire area as one location to be neutralized, especially as there’s an alarm that sends in reinforcements! Note there are around 30 enemies to contend with, if you decide to clear the Outpost and Mine, and around a third of them are armored.
The Outpost has the majority of the enemies, and is separated down the middle with a long wooden fence. Northwest of the fence is a railroad, with a giant gold statue waiting to be shipped. To the southeast is a makeshift runway (and road), along with a mortar at the far end. The majority of the enemies are on, in, or around the structures along the northwest side of the tracks.
The tunnel itself has a single main shaft, with a minigun emplacement two-thirds of the way down. Through that and a little to the right, is the location of the three gold caches. Destroy them with explosives, then flee the mine within 30 seconds or face being buried alive.
Southwest: Lower Jungle
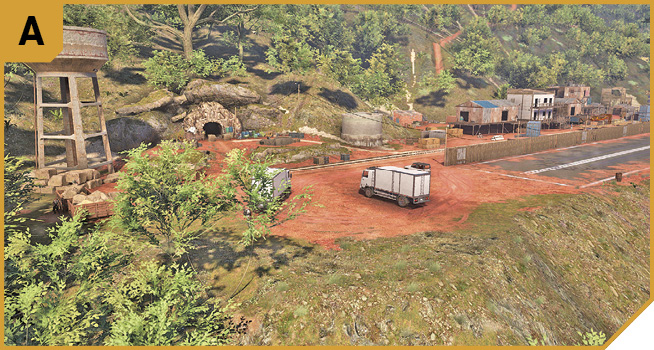
Enter from here and you don’t have the advantage of higher ground, and you need to charge or creep to the tunnel entrance to get to the tunnel. The rocks and water tower are good to hide behind as the assault begins, and you’re within grenade range to take down foes near B and C. You can also use one of the parked trucks and drive it at the Outpost, creating a distraction while teammates assault the mine. But there are safer ways to complete this mission.
West: Hillside Jungle
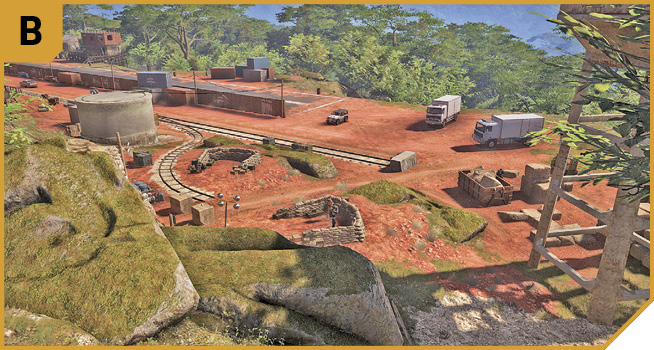
Enter from here to sneak in behind the foes guarding the mine, or watch their patrol patterns and drop them with suppressed fire before venturing inside, keeping the foes at the Outpost unaware of your actions. This is also a good spot to launch an explosive drone from, flying it into the mine.
West: Hillside (Outpost Perimeter)
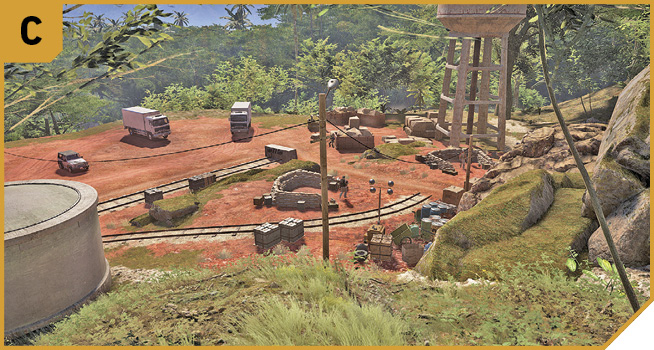
The initial foes at the outpost building closest to you are available to shoot from this position. You can move northeast, back and forth to tackle foes from range, but not before you’ve shot the alarm pole panel, which is visible, and around 190 meters from this point.
South: Container Cluster
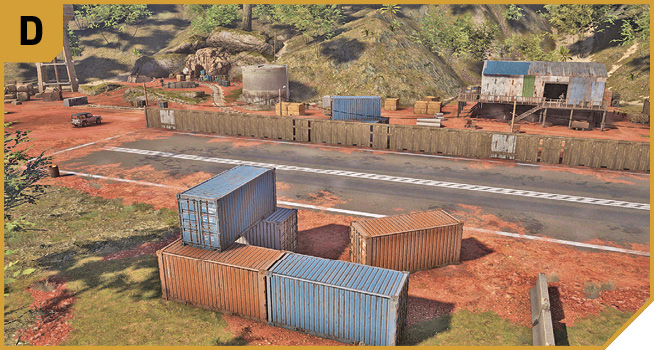
If you don’t feel like venturing all the way into the outpost, and want to take down the alarm pole panel easily, lurk in this cluster of metal cargo containers and shoot the panel from range. You can then use the tops of the containers, climbing up and down for elevation and cover, and start shooting foes across from you, on the building balconies. Try for an armored foe to start with. Then you (or a pair of Ghosts) can drop foes pretty much across the area, from B to F; the enemies can’t charge across the long fence separating them from you. And if you’re in danger of being overwhelmed, retreat southeast into the jungle.
Northwest: Trail Head
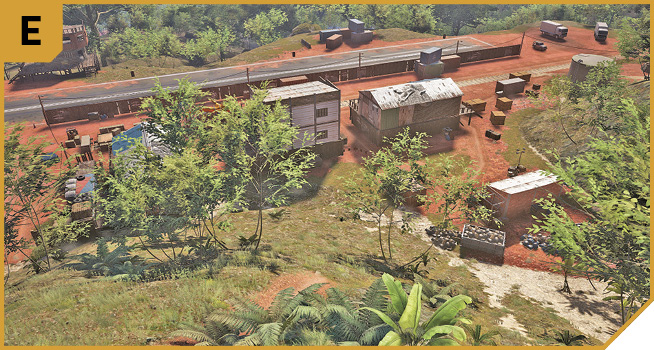
You can spot the barracks and alarm pole in the northern part of the outpost, as well as the mortar across at F, from this elevated position with trees and plants to hide behind, and the hill to retreat up if matters get a little too problematic. Cover teammates working their way up the road as they clear foes, create distractions, or head into one of the buildings and create havoc (lobbing grenades for example). Just be aware you’re easily swamped from two directions, as you’re attacking from the middle, so ensure other teammates are doing their job if you decide to engage at ground level.
East: Mortar And Comms Center
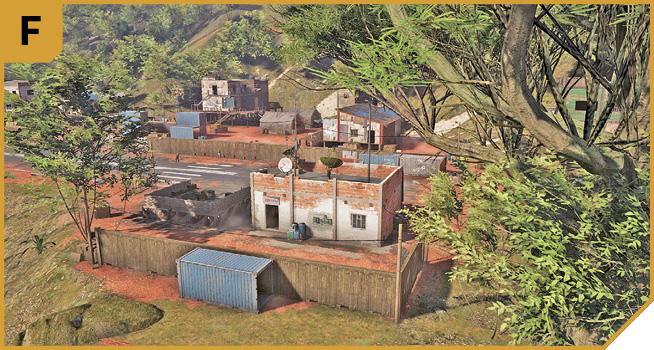
Close to a plane (the only way to escape if literally every other extraction plan has failed), this mortar is an annoyance you can easily remove by offing the foe from the jungle, and then starting to sweep from G heading southwest, toward the mine entrance.
Northeast: End Of The Road
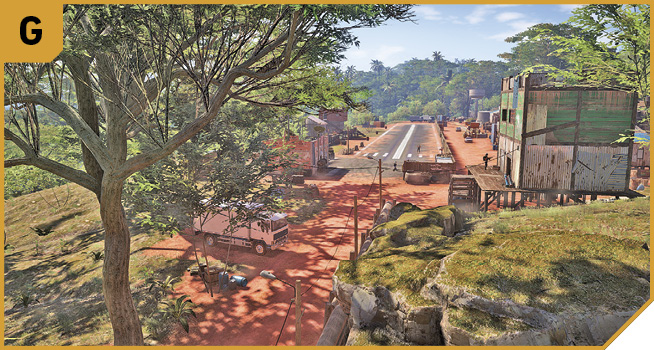
A parked truck, and the entrance to the Outpost allows you to stealthily head above the log wall, to the tall green tower, climb it, take out the alarm panel, and start laying waste to foes down below. Just make sure you mine the stairs behind you to stop enemies attacking from behind. Or, you can remain behind the building, but at elevation, and start removing the foes from here, heading toward A.
North: Hills
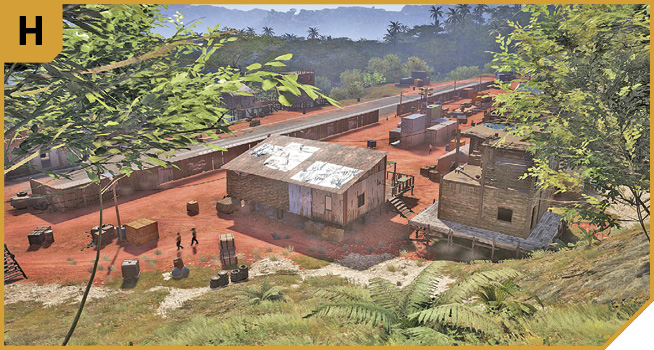
The steep terrain above the outpost allows you to sneak around to where the enemies have the largest concentration of troops, and destroy them with carefully-laid mines, shoot the alarm pole panel, or start sniping and moving around to E or G.
|
 Target: Mine Tunnel And Gold Caches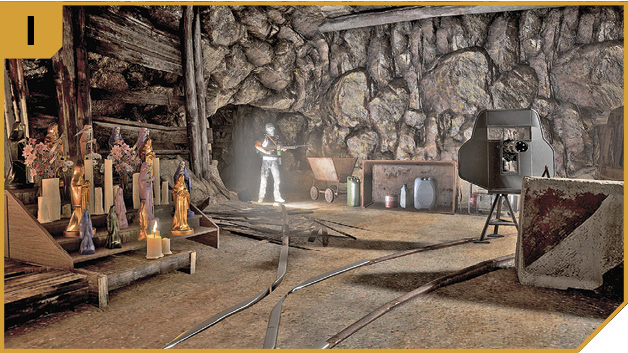
Alta Gracia Mine: Other Tactical Advice
 If you’re not wanting to risk burying yourself in a mine, why not move in over the target on the hillside at B or C, hide behind some rocks, and send in an explosive drone? Not only will you discover the exact position of the minigun halfway down the tunnel, but you can detonate the drone, removing one (or two) of the targets. Then wait for the cooldown period to expire and do it again! Make sure you position the drone correctly; placing it between the left and middle target removes both of them. Then head over to the right target to finish the job. Retreat as the mine crumbles.
Or, ignore the foes at the mine entrance, and creep in behind them. Use suppressed fire on the two enemies (perhaps with a flashbang), so you stay silent. Prep the three caches with C4, leave the way you came, retreating up the hill at B or C. Then trigger the C4.
Or, start at A or D, and begin a tactical sweep and removal of all foes, working from southwest to northeast. Ensure the first thing you hit is the alarm panel, so only the enemies here are encountered. Alternatively, do the same sweep but work from northeast to southwest (G to A).
 Co-op planning is a little easier. As a single Ghost can handle the mine infiltration, enemy takedowns, and return to the surface, you can make as much noise as you need to (though stealth tactics are obviously helpful). Meanwhile, the three Ghosts on the surface can guard the mine entrance, and push the enemy back, before beginning to clear the Outpost from southwest to northeast. Or, have two Ghosts each fly in an explosive drone, detonating them both in unison.