
Tom Clancy's Ghost Recon: Wildlands Guide Welcome to Bolivia Tabacal: Madre Coca
Freedom of Speech

Objectives
- Locate the Cocalero Union leader
- Talk to the union leader
- Protect the union leader (1%+)
LOCATIONS
- Barrientos Co-op
REWARDS
- + 500 XP
Brief
Madre Coca runs Tabacal like a medieval fiefdom, terrorizing the local peasants into farming coca for her. An older cocalero, named Chavez, is trying to convince the people to revolt against the cartel. We need to keep him alive at all costs.
Turning over a new leaf
Just west of Bella Selva is a small coca washing facility close to a small lake (north), railroad (west), and plantations (south). A local union leader aims to rile up the workers here, and it’s up to you to defend him from cartel incursions, once his speech commences. His health (shown in percentage terms) cannot fall from 100 percent to zero. Expect three enemy incursions once you’ve found and talked to the union leader.
Barrientos Co-Op: Recon
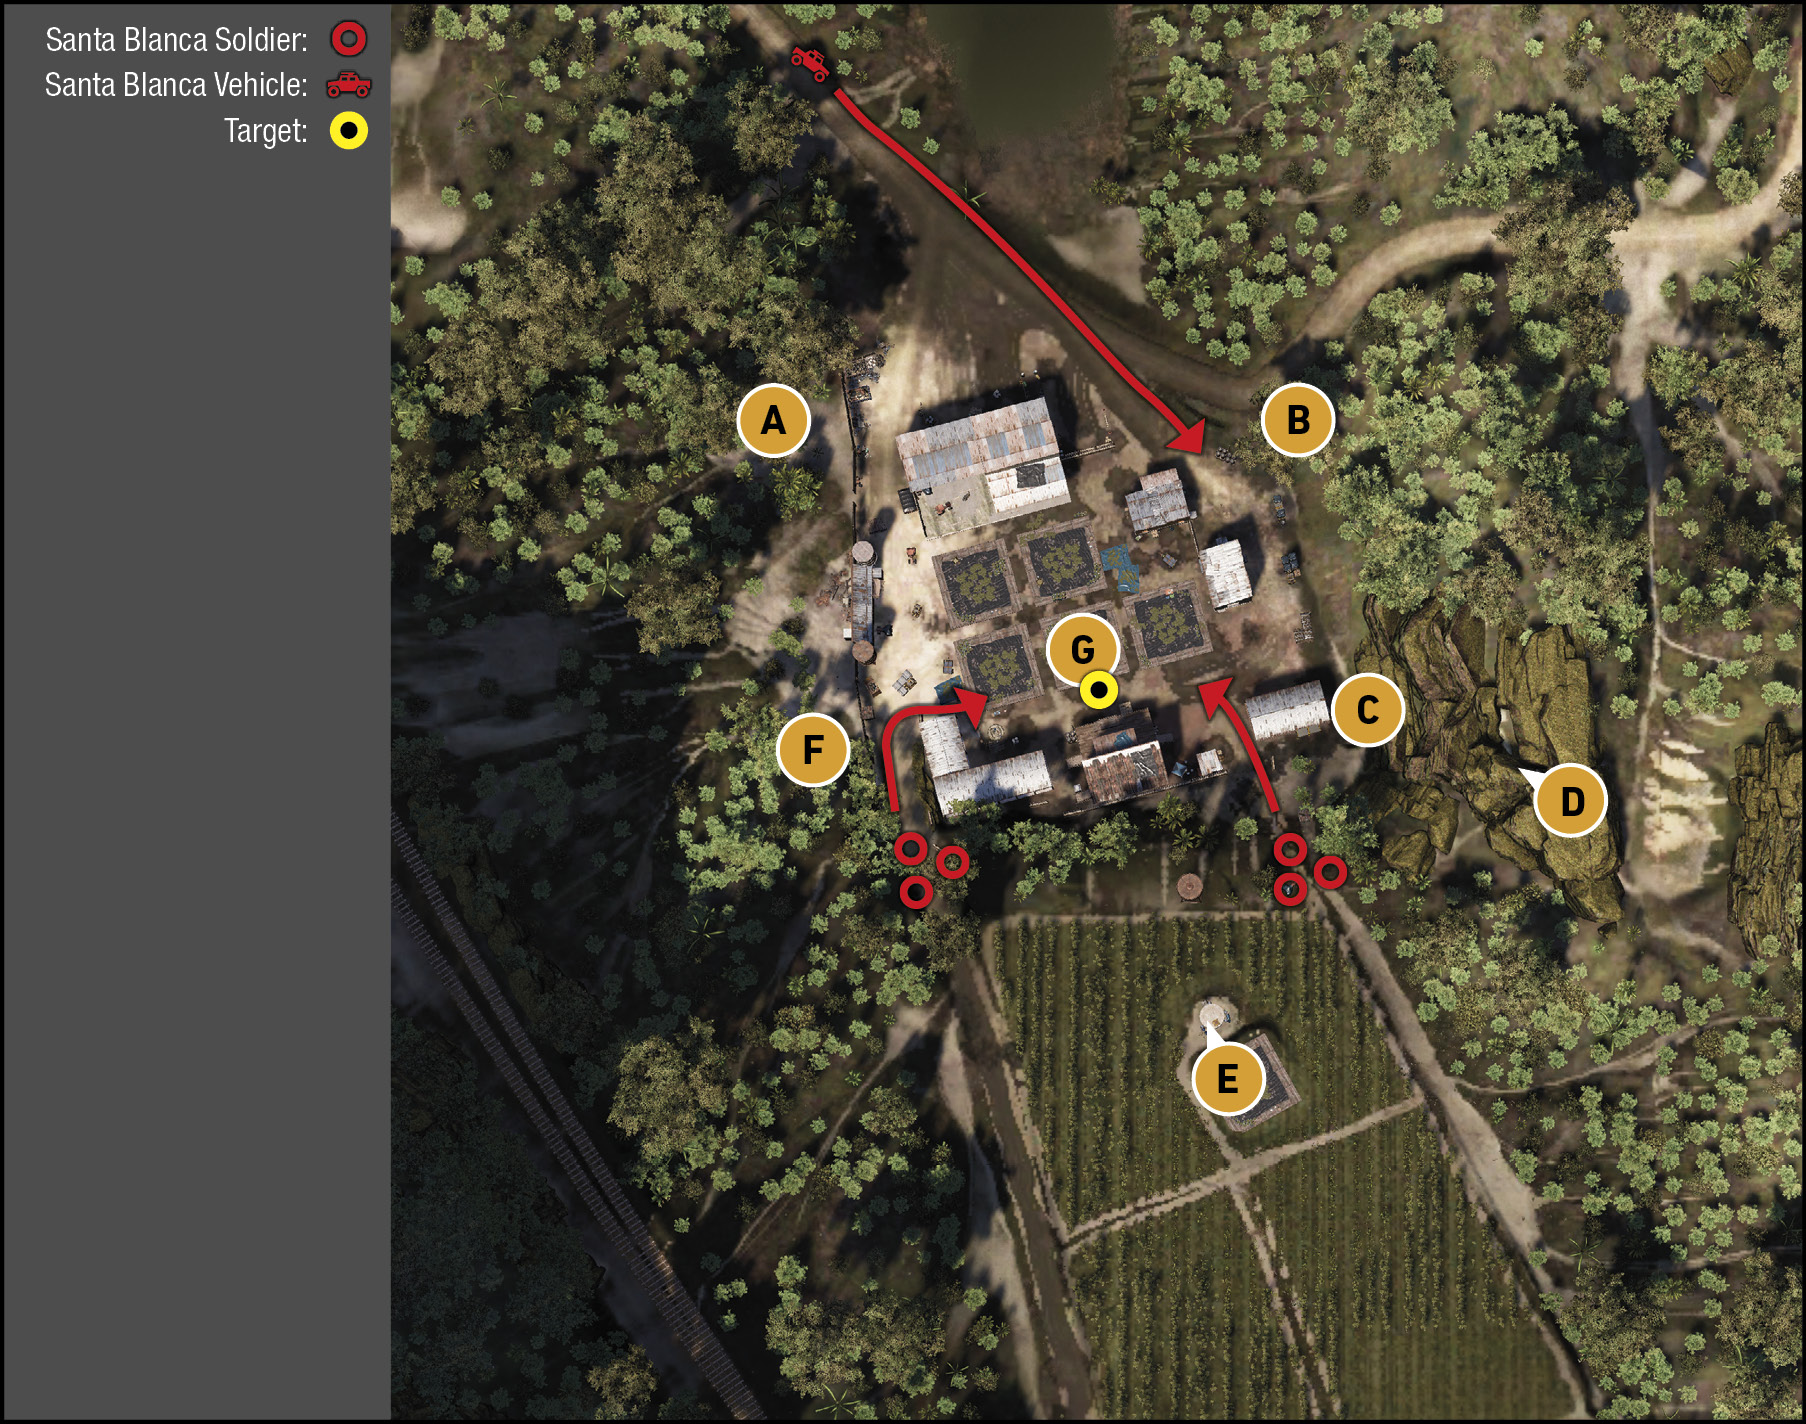
TACMAP
As the cartel doesn’t attack until after the union leader speaks, you have additional time to plan defensive strategies and learn the layout of this Cooperative, prior to combat. The place is exceedingly open, with a scattering of buildings around the perimeter, and not much in the way of defenses. However, once you study the guide map, and learn the expected locations of enemy intrusions, you can plan your positioning accordingly.
First Wave: A pickup with a minigun approaching from the north road, with three or four foes inside. It parks close to B.
Second Wave: Four machinegun-toting foes approaching from the southeast, attacking the main stage where the union leader is (G), coming in from C.
Third Wave: Four machinegun foes heading down the hill from the railroad, and entering at F, making a beeline for G.
Northwest Corner (Mechanic’s Garage)
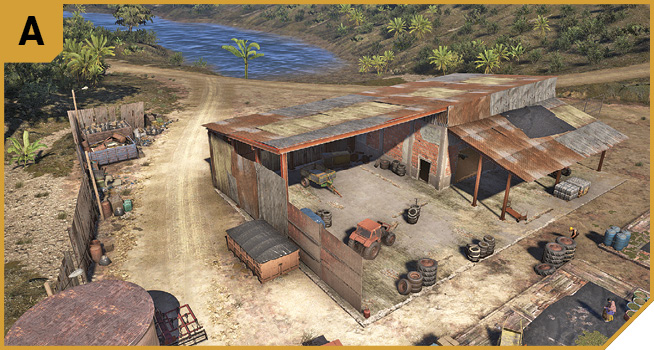
This offers good protection from a large building, and the dumpster and debris by the perimeter fence here is also good to hide behind, when the enemy vehicle approaches from the north. You have long-range sniping opportunities when the foot soldiers approach (third wave) too. However, you’re a little too far from the main action, and the leader you’re here to protect.
Northeast Corner (Tire Stacks)
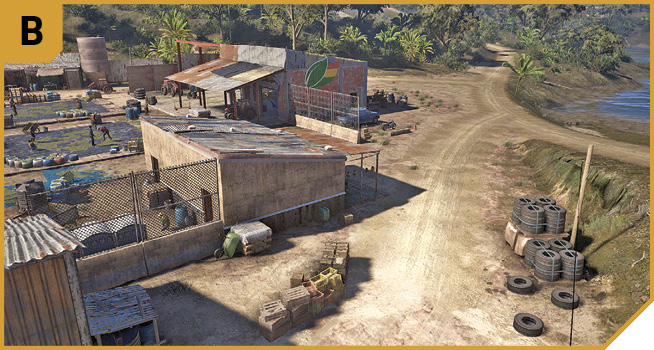
The small mechanic’s shed and stacks of tires offer good protection and excellent aiming at the incoming pickup, and you can back up from the tires during your grenade-lobbing.
Southeast Corner (Shed)
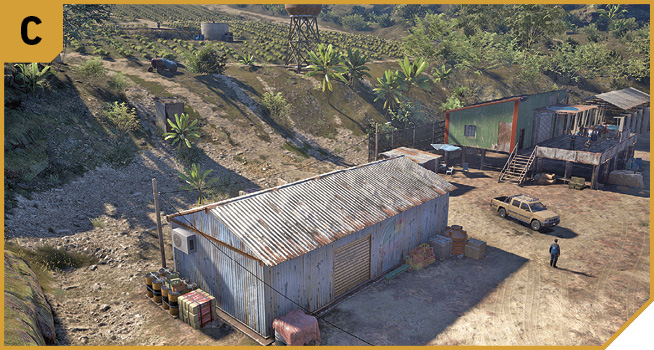
The roof of the shed closest to the slope where the second wave of foes come in from can be climbed onto, giving you a good amount of protection during this set of attacks. Otherwise, stay behind the shed and nearby pickup as foes infiltrate this area, moving to other places offering better views of the incoming enemies afterward.
Sniper’s Mount
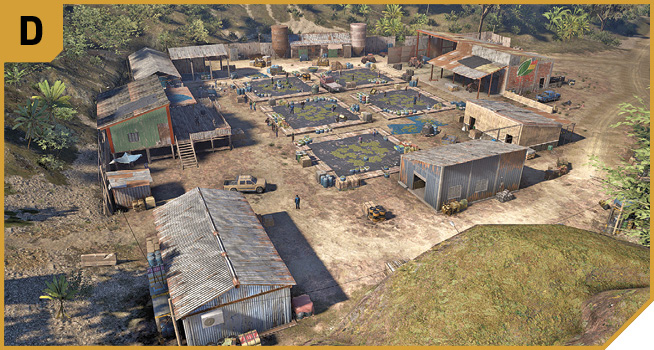
The plate-like upper hills above C offer amazing views, and a Co-op sniper can sit up here and provide additional fire support when each of the waves attacks, as there are reasonably unobstructed views of everything.
Coca Fields (South)
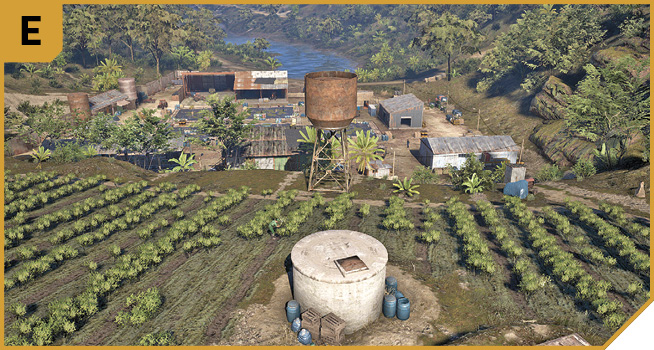
The giant water cylinder and crop of coca is just on the edge of the area, and it’s a great place for a single Co-op Ghost to wait, so the second and third waves of foes can be engaged from multiple positions.
Southwest Corner (Open Warehouse)
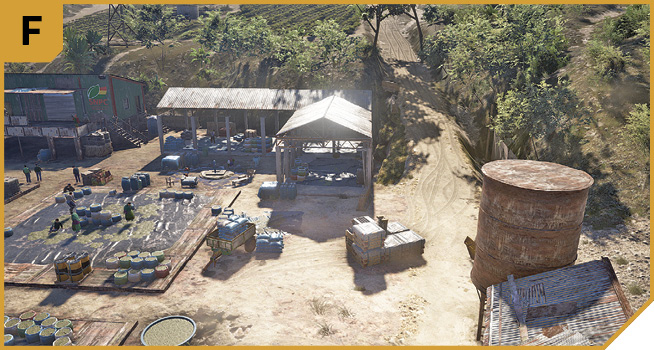
The third and final wave of enemies heads through this area to reach G, and the open warehouse can be too close to the machineguns of these foes, so back up a little to the crates, barrels, or wagon in the vicinity. Keep most of your crew close to the leader—in front of him if you can.
Union Leader and South Stage
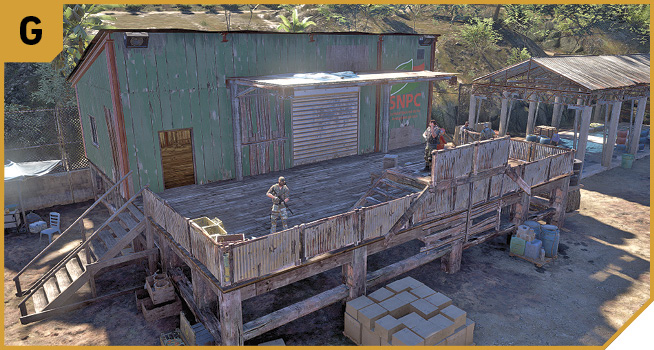
The union leader stays at this structure, moving in and out of the building once the attacks start, and it’s critical he remains alive. Co-op teams should station at least one Ghost here at all times to act as a bullet-sponge and bodyguard. However, falling back here isn’t a cunning plan as you want to draw enemy fire away from the leader, so retreat to other locations if the mission starts going south.
Barrientos Co-Op: Other Tactical Advice
 Make a thorough search of the entire area, noting the perimeter (yellow) circle on your Tacmap so you know where you can stand to defend. Feel free to drop explosives at expended infiltration points, maneuver vehicles to block incoming foes, and study the adjacent buildings and scenery for hiding places. Then talk to the union leader.
When the enemies attack, the first wave is usually the pickup truck along the north road. A simple grenade thrown at the stopping place of the vehicle neutralizes the four enemies at once, or engage them in a firefight.
Move your team to C, and wait for the second wave. Engage them as they head down the hill, using the parked pickup or nearby buildings as cover. This is a relatively straightforward takedown.
The last wave comes in from the southwest, through the undergrowth and dirt track, and through the large open warehouse. The machineguns can hurt the union leader quickly, so order your men to engage before softening up the targets with long-range fire and explosives before they reach the perimeter. Then stand to the west of G, or behind scenery at F, and finish the final wave.
 The same plan of attack as a Solo player is optimal here, but for an additional punch, station one Ghost at B to remove the pickup truck threat, with backup from a sniper at D.
When the second wave of foes approaches at C, have two teammates stand in front of the leader at G, one on the roof of the corner building at C, and one creeping around in a clockwise loop at D to strafe them from behind.
Quickly move to wait for the final wave. Though you can have one Ghost loop around from F to the train tracks to the west, it’s better to keep two Ghosts in front of the leader at the stage, one for close combat takedowns at F, and a sniper at A, possibly E, or B.
Vehicular carnage is also possible, though keeping your vehicle out of the perimeter reduces civilian casualties. A chopper to rake the incoming enemies before they even reach the perimeter, and provide early warning of enemy locations, is also a good plan.