
Tom Clancy's Ghost Recon: Wildlands Guide Welcome to Bolivia Montuyoc: Carl Bookhart
The Outpost
Objectives
- Search the communications outpost
- Hack Montuyoc comms
LOCATIONS
- Outpost (North)
REWARDS
- + 350 XP
Brief
A Santa Blanca communications center in Montuyoc could contain message logs identifying the cartel’s senior military instructor. Enter the communications center and hack its message logs.
Communications Breakdown
Along the northern edge of Montuyoc, under a click away from the Barvechos Bravo Rally Point (to the east), is a small communications outpost atop a mountain. Around 16 enemies wait within the walls of the compound, plus another two outside manning a SAM launcher. You need to intrude, locate the HQ building, and reach the laptop on the upper floor. This is straightforward, once you work around the compound’s defenses.
Outpost (North): Recon
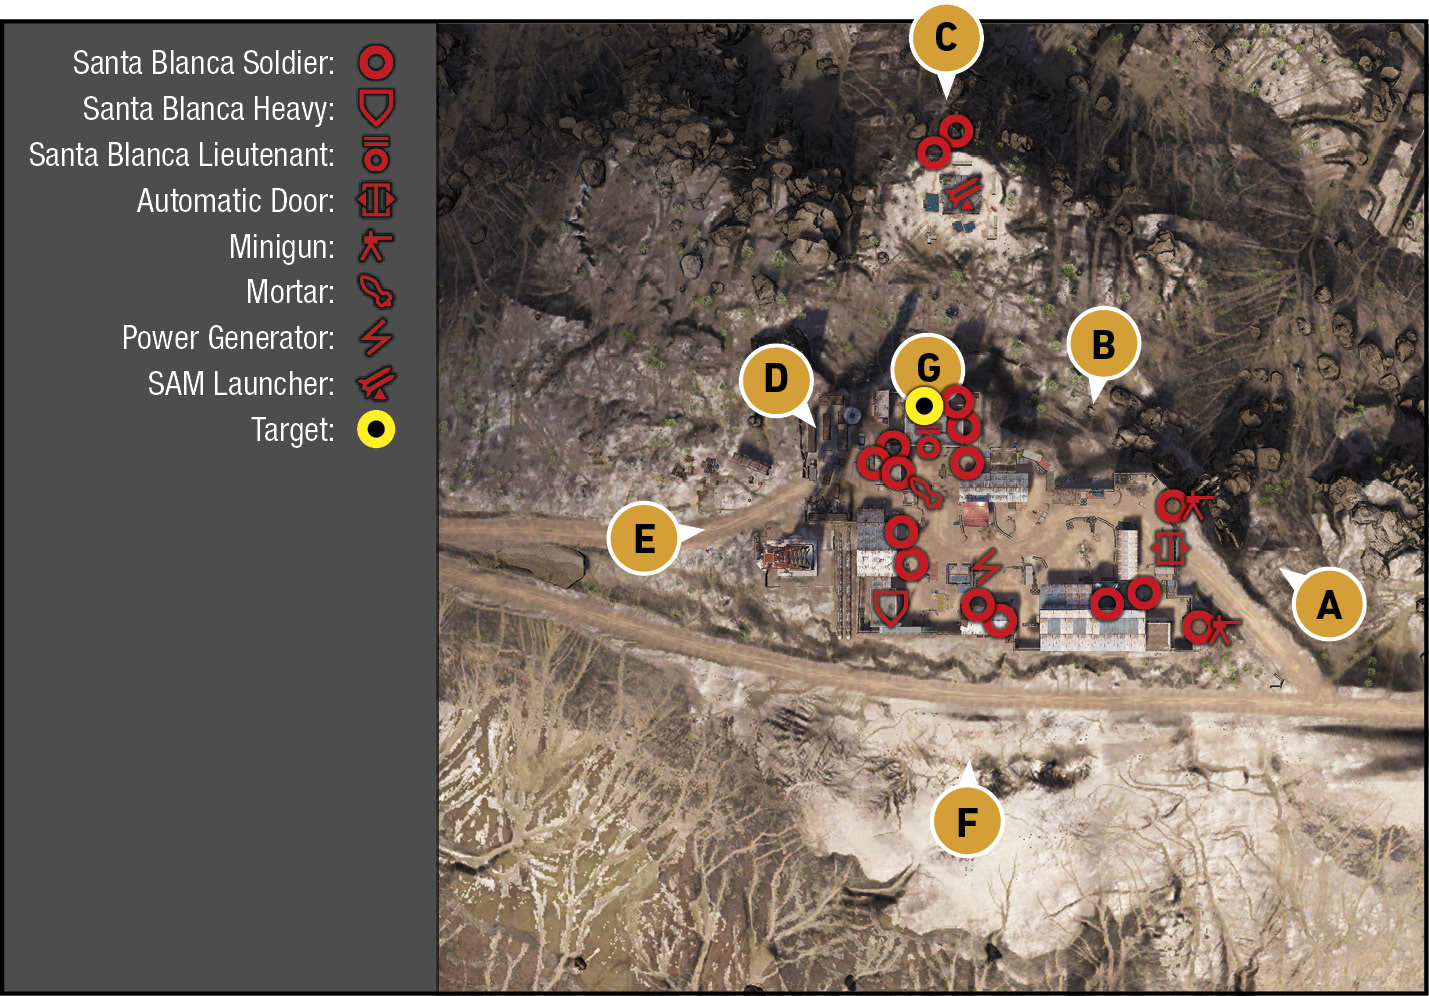
TACMAP
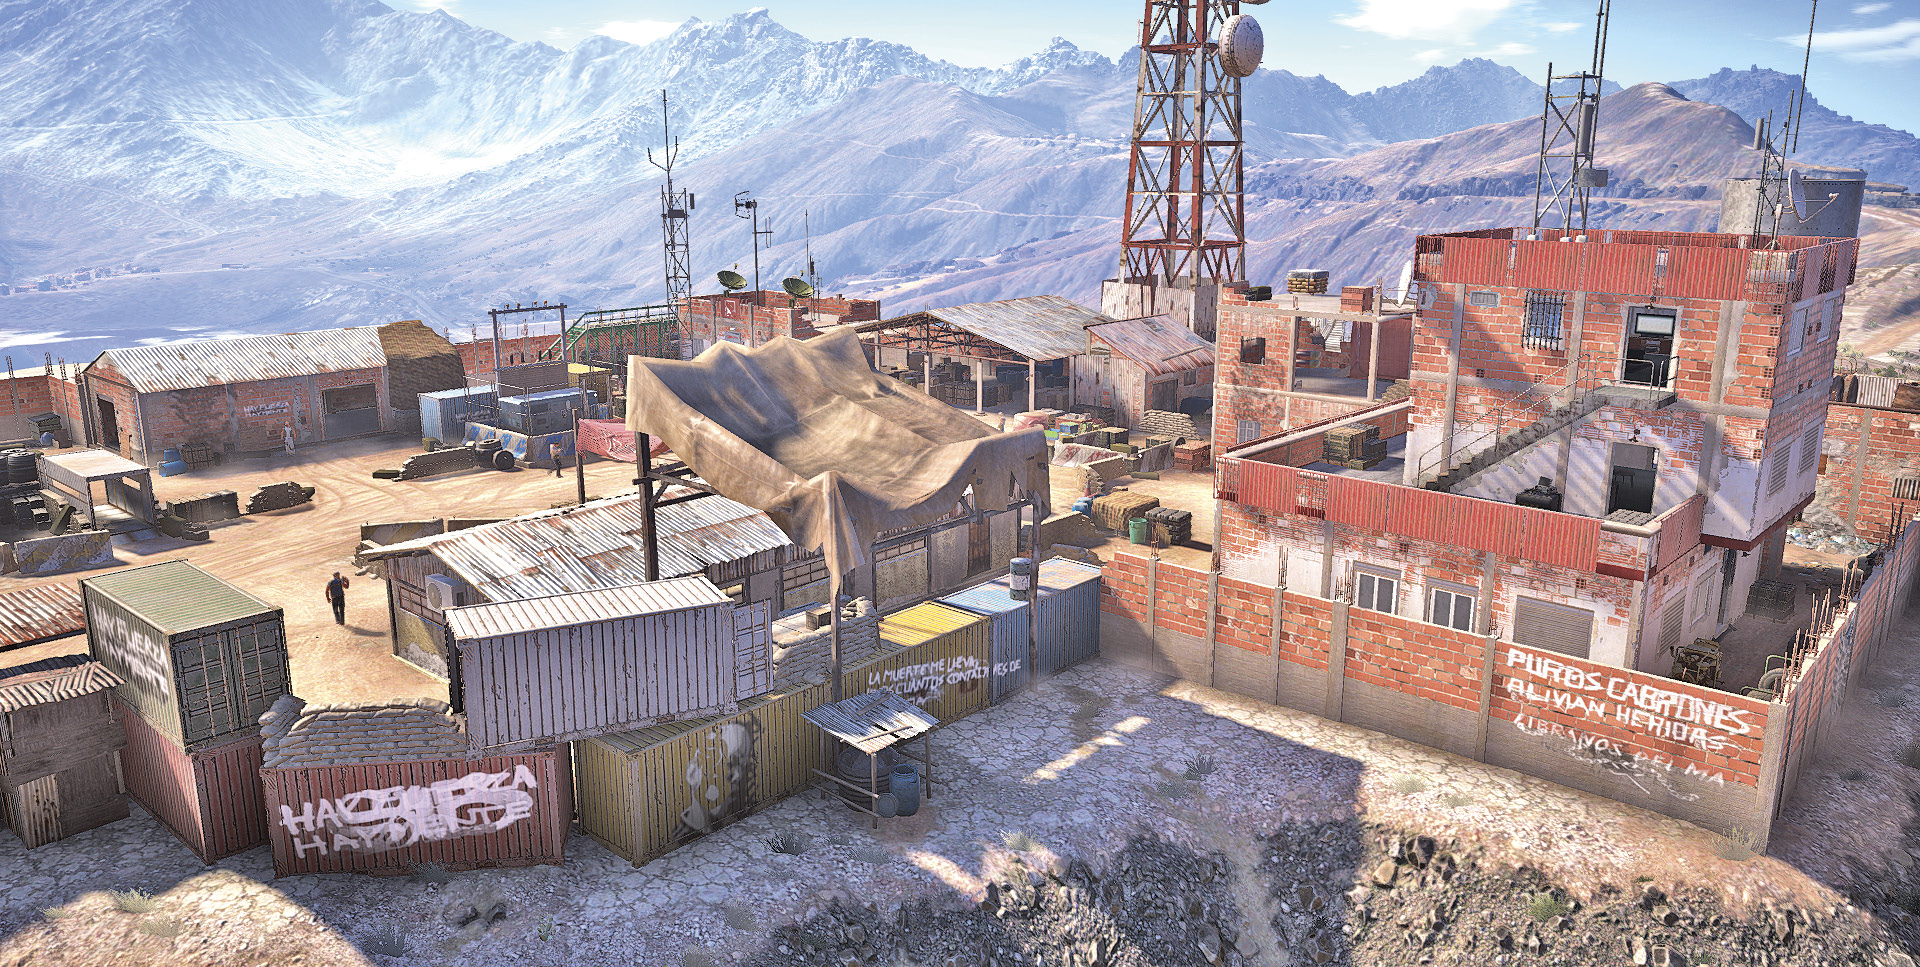
This is a relatively small mountaintop outpost with effective defenses along its southern perimeter (by the road), and main entrance to the east (where the gate is). The west perimeter around a small scrapyard and giant radio mast is much more porous, and there’s a place to hop over the north wall. Inside are a couple of warehouses, scattered sheds and equipment, as well as a comms building in the southwest corner and barracks just southeast of the HQ building. Of more importance is the generator, since shutting it down removes the SAM launcher threat outside the base to the north (though you can destroy the launcher or deactivate it independently of shutting down the generator). Note finally the HQ building itself, which is the tallest structure in the northern area of the base. The laptop is on the top (third) floor. Watch for 18 foes as you clear this location.
East: Main Gate and Minigun Nests
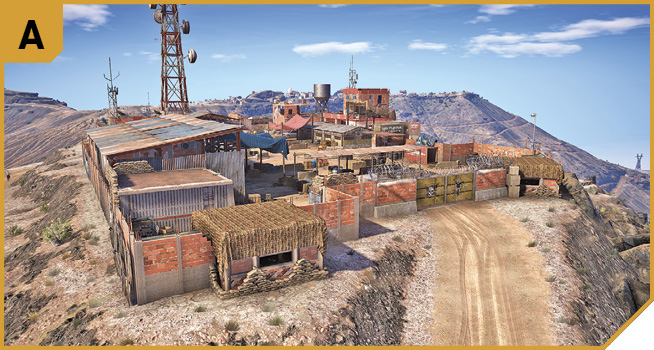
The two firing posts on either side of the gate make this a tough place to infiltrate from this direction, unless you drive in using a Santa Blanca vehicle, in which case the gates open automatically. Use this plan with or without tackling the foes manning each minigun:
Creep directly under the slit window where the minigun is poking out (to remain stealthy while moving to B, for example). Or lob in grenades. Or, once you’re inside the base, creep up and tag each minigun operator with a suppressed-fire or melee takedown (strangle).
So, enter the base with a Santa Blanca vehicle, exit the vehicle, and work your way from east to west, neutralizing foes. You can get all the way to the HQ before you’re spotted (and true Ghosts can defeat all foes without any foe firing a shot).
North: Perimeter Intrusion Point
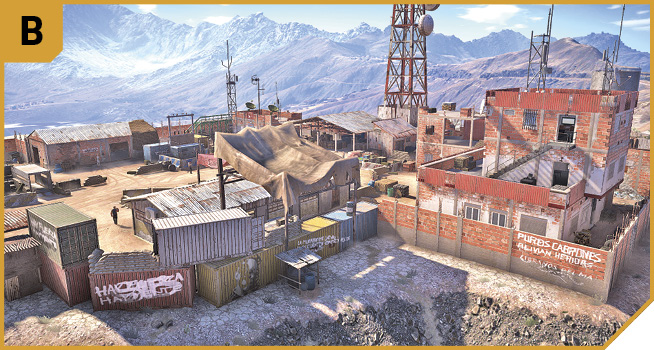
Though you need to be careful of foes spotting you from the SAM launcher (C) or the balcony of the HQ building, the cluster of large metal containers can be accessed at this point. From here, watch for foes to the west and drop down to the HQ building (east side). Or head south into the barracks if you climb here at night time or need to use it as cover before sprinting to shut down the generator (or while firing at the mortar enemy). These options make this a great infiltration point.
North: SAM Launcher
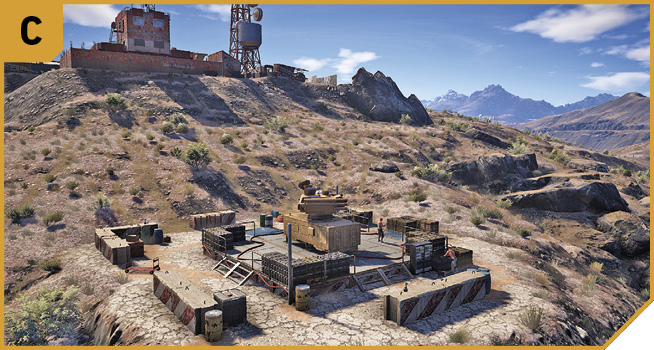
It’s worth tackling these two guards and the SAM launcher before entering the outpost itself, but only if you want to remove all enemies, you’re happy to make some noise (via C4 to detonate the SAM launcher), and you intend to use a helicopter. Or you can shut down the outpost generator and remove the SAM launcher’s effectiveness without blowing your cover. The launcher is on an open platform, and the two foes are easily spotted. Snipe them from range so foes at the HQ building aren’t disturbed.
Northwest: Scrapyard and Brick Construction
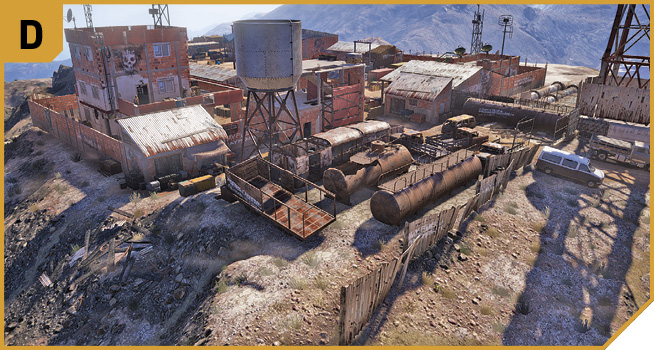
The rusting tanks and carriages, as well as vehicles in the northwestern corner of the outpost, make sound infiltration spots. Plus, you have a good view of the mortar and access into the half-built brick building adjacent to the HQ (use the doorway near the old car with its hood up). You can then creep through, around to the north behind the HQ building and perimeter, and enter the HQ building without being seen (or, at the very least, with minimal combat exposure). Rushing here is good. In Co-op, a teammate can sneak or dash south instead of north, clear the comms building, and shut down the generator.
West: Scrapyard and Radio Mast
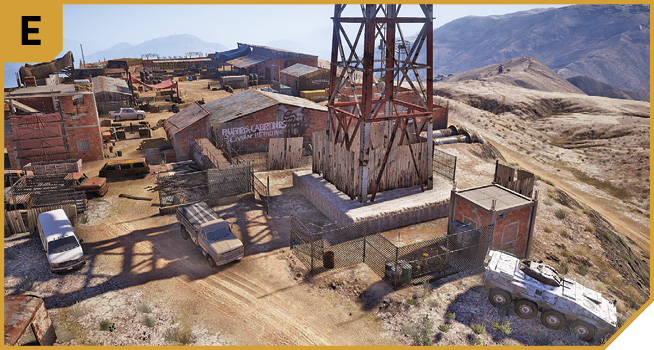
A road in from the west to the scrapyard allows direct access (after some maneuvers around rusty vehicles) to the mortar and inside the base, so driving in here is possible but not subtle, and can cause you to be overwhelmed by the enemy. A better plan is to infiltrate from here, climbing onto the brick lean-to shed (right of the entrance if facing south) and then onto the metal roof of the open warehouse. You can sneak to the comms building’s low roof and down to the generator from here, too.
Once inside the outpost, the roof of the comms building in the southeast corner provides a good covering position. Using the green stairs south of the generator, head up and onto the low roof of the comms building and, optionally, the metal roof of the open warehouse just north of it. You can take out the foe at the mortar and pretty much anyone else across the base.
Don’t forget the couple of Santa Blanca vehicles, usually including an APC, parked in this area. Using the APC is particularly handy, either to create a distraction, to get the east gates open, or to use as movable protection when storming the HQ building or extracting your team.
South: Main Road
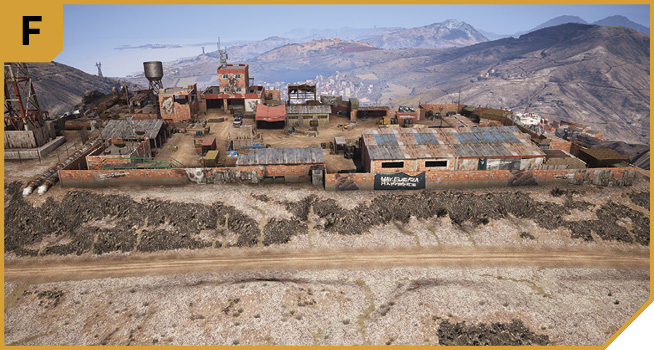
The southern perimeter is completely impenetrable and follows the route of the road adjacent to it. Use it to quickly move between the more accessible east and west sides of the outpost.
|
 Target: HQ Building and Laptop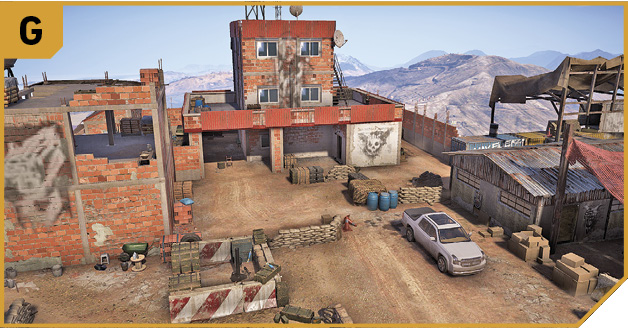
Outpost (North): Other Tactical Advice
 Enter via B at night time, dispatching the foes in the barracks, or ignoring them if for a pure stealth completion. Sneak around to the north side of the HQ building, enter while avoiding enemies (or strangle them from behind), and ascend to the laptop. Hack it and leave the way you came. Or use the route in from D.
Or drive in through A using a cartel-approved vehicle, which is usually discovered once you reach the mortar area. Disembark, storm the HQ, and remain here to use the height advantage, placing mines on the stairs and removing foes until the coast is clear.
 You have the added luxury of being able to create a disturbance while teammates access other areas of the base at the same time. One such plan involves blowing up the SAM launcher with C4 while a second Ghost enters via A using a cartel vehicle. While mayhem ensues, a third and fourth Ghost can quickly drop foes and storm the HQ building, before being optionally picked up by a chopper pilot (the Ghost responsible for the SAM launcher takedown on foot) on the yard, the roof of the half-built brick building (northwest).