
Tom Clancy's Ghost Recon: Wildlands Guide Welcome to Bolivia Barvechos: El Pulpo
The Money Truck

Objectives
- Hijack a cartel money truck
- Take the money truck to Pulpo’s hideout, remain undetected
- Leave Pulpo’s hideout without being detected
LOCATIONS
- Money Truck (Convoy)
- Outpost (East)
REWARDS
- + 500 XP
Brief
Nidia Flores launders the cartel’s profits through the Banco de Barvechos. Convoys carrying large amounts of cash roll in from Brazil every week. If we can seize one of those trucks and plant it at Pulpo’s hideout, Flores will blame him for the theft.
Bang On The Money
Head to a vehicle and locate the truck convoy, which is driving the roads in the northern part of this province. You’re here to steal the truck. Whatever you wish to do to the cartel thugs inside the vehicle, and the two SUVs bringing up the rear of the convoy, is up to you.
Cartel Money Truck: Recon

The convoy consists of a truck full of money, and two SUVs. Sometimes the truck is the lead vehicle, and sometimes it’s in the middle, between the two small Landrock SUVs. Each vehicle usually has two occupants, and the SUVs give chase if you don’t deal with all hostiles before fleeing in the truck itself.
Cartel Money Truck: Tactical Advice
 All the previous convoy-stopping tactics you’ve used apply here, with the exception of mines, though those can be used to halt the lead and rear SUVs. To prevent the money truck from becoming too battered, and due to the fact that the SUVs aren’t bristling with miniguns, the best plan is to get ahead of the convoy, park across a narrow stretch of road (ideally one with a drop to the side that’s difficult to move around), and use your vehicle as cover.
Aim at the truck driver and shoot him. Quickly aim at the SUV drivers, so all vehicles come to a halt. Then mow down the other occupants as they exit their vehicles. It’s important to hit the truck driver first, so he doesn’t escape and require a chasing, which can result in the truck taking too much damage.
 The same technique is recommended here too, though splitting up your team into multiple vehicles, and dividing up Ghosts to take out each SUV, with two Ghosts on the truck, ensures the convoy is halted with minimum damage and fuss.
Next Stop, The Accountant’s Garage
With the convoy neutralized, you’re to take the truck to the Outpost just south of Barvechos Mine. With no time to recon the area, you must drive it (carefully) down the dirt track off the main road, park it inside the walled area at the west end of the compound, and extricate yourself from the Outpost without being detected.
Outpost (East): Recon
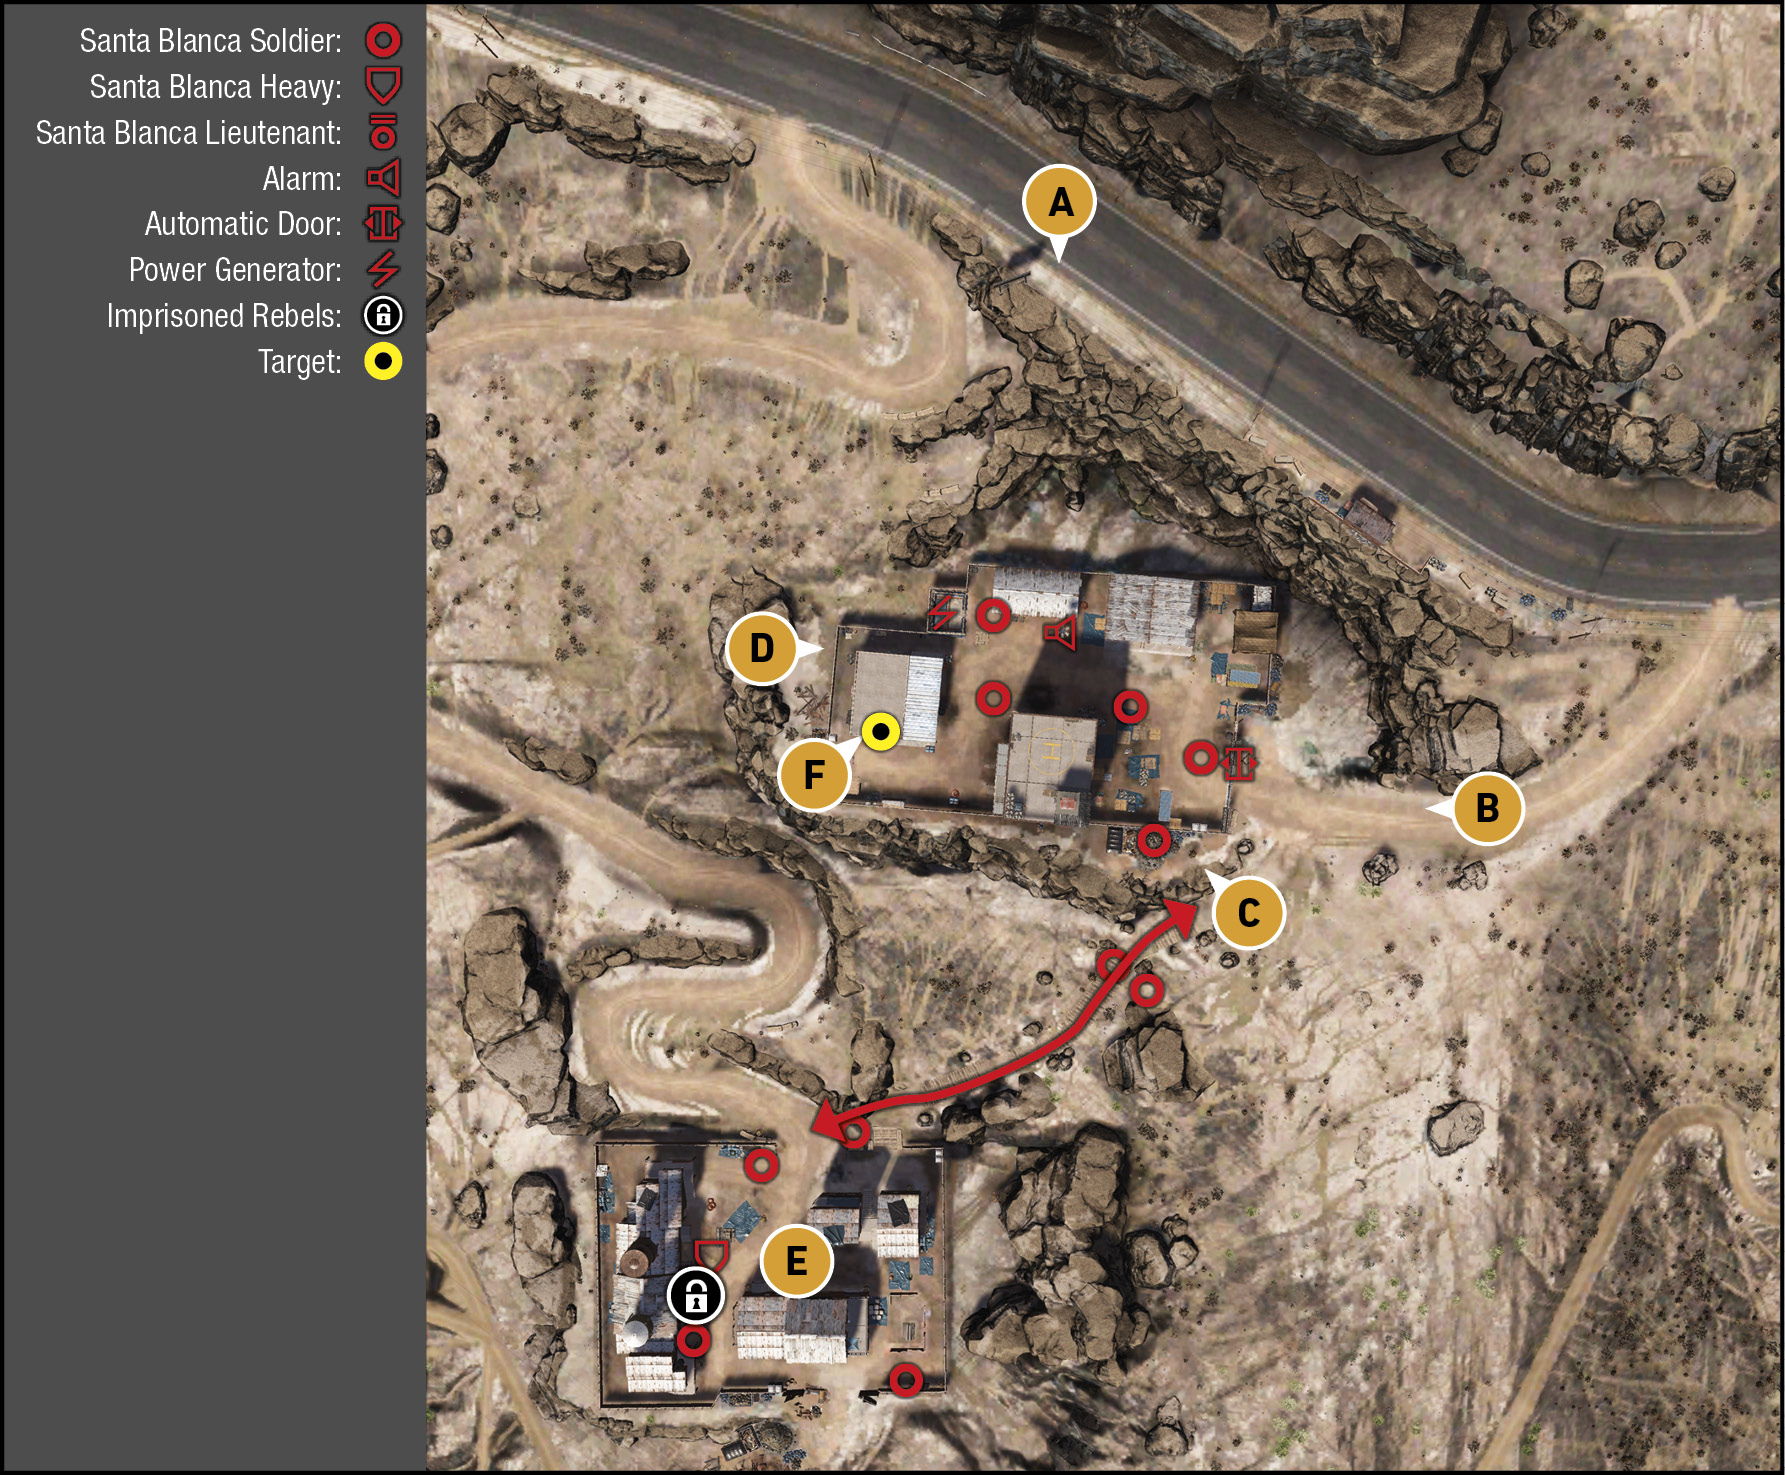
TACMAP:
The Outpost is lightly-guarded with well-armed goons in bullet-proof vests, but without any structured leader. Aside from them seeing you (and mission failure), the biggest concern is the alarm in the middle of the base; shoot that or deactivate the generator. If the alarm sounds, your mission fails (if you aren’t attempting Plan #2). If the alarm sounds during Plan #2, prior to dropping off the truck, at least two attack helicopters arrive, and ground troops move north, up the slope from the Lieutenant House. Is the extra hostile-removal worthwhile? Not really, but it’s entertaining to try! The following recon locations show what to expect, if you’re trying Plan #2:
North: Main Road
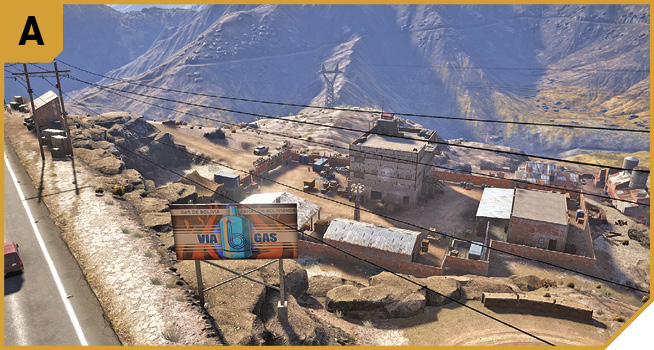
This offers excellent visuals of the entire Outpost, so you can plot an escape route, shoot out the alarm, or start sniping foes depending on your plan preference.
East: Main Gate
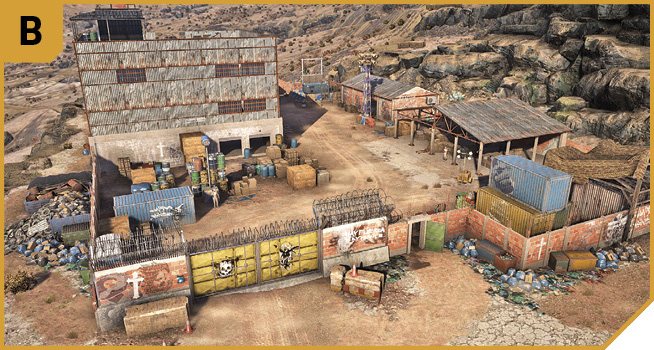
Drive the truck toward this gate, which opens automatically. When you’re exiting this Outpost, use the open doorway just to the side of the gate. This is the only exit (unless you’re wanting to climb the south warehouse and have a fellow Ghost land a chopper on the roof, which is almost impossible to complete without being seen).
Southeast: Tire Pile
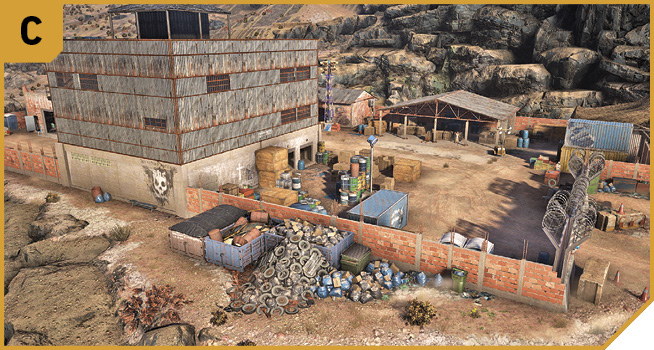
The walls of this Outpost can’t be leapt over or breached, but you can climb this refuse container and pile of tires to shoot over the walls from the outside.
West: Tire Pile
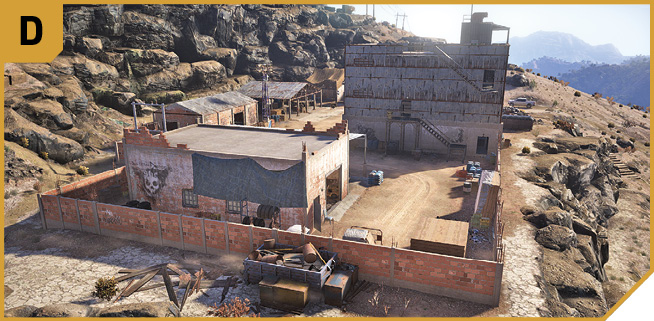
The western perimeter wall also features a tire pile and refuse container to fire from, into the base from the outside, though this is rarely used.
Lieutenant’s House
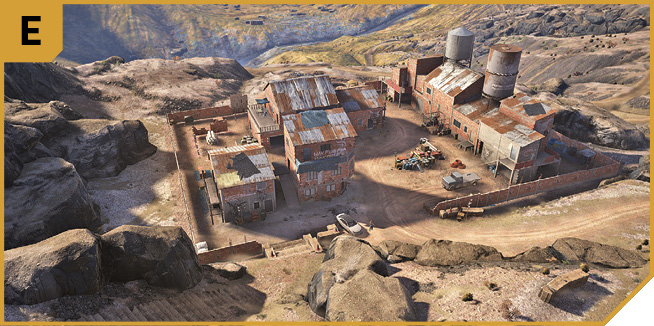
South of the Outpost is a small compound with around six foes (one armored). You have no reason to engage these hostiles, though it’s worth knowing they are there; you don’t want to run south after escaping the Outpost, and tumble into them. Check their location if you’re employing Plan #2, and your incompetence has resulted in the alarm being raised; these enemies will ascend to help.
|
 Target: Outpost Parking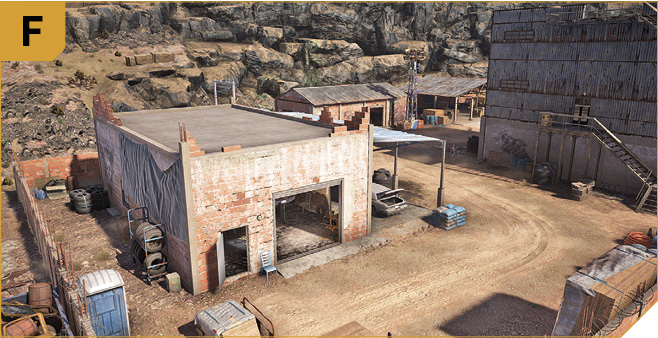
Outpost (East): Other Tactical Advice
 Plan #1: Drive the truck into the Outpost, as the mission objective indicates. Park up at the indicated spot, turning the truck so the driver’s door opens close to the west perimeter wall, offering you cover. Ignore your teammates, or keep them out of the mission area. Then sneak north through the open warehouse, turn right (east), hugging the inside of the perimeter brick wall, passing through another warehouse, to the pedestrian opening just left (north) of the automatic gates, on the east wall. Then head east (ideally southeast down the hill and out of the mission area, as you can be spotted if you climb the hill or steal the pickup truck parked near the entrance).
Plan #2: Stop the truck on the main road before the right (south) turn into the base. After a spot of recon, shoot out the electrical box just below the sirens on the floodlight alarm to stop helicopter reinforcements. Remain on the upper main road, and start to tag the foes in the base from this vantage point. Keep this up until they all fall. Enter the base (on foot) and flush out any stragglers, then check the Lieutenant’s House to see if those enemies have been alerted. If they have, head slowly down the hill and engage them. If they haven’t, stop the enemy takedowns. When all is clear, drive the truck into the base, and simply walk out again—like a Boss.
 Plan #1: There’s only the need for one Ghost to drive into the Outpost base; why jeopardize the mission by having all four hanging onto the truck and attempting to sneak out? The single Ghost driver should sneak out using the inside of the north perimeter to guide them, exiting from the pedestrian doorway just as a Solo player would.
Plan #2: This is essentially the same plan as for Solo players, though you have more vantage points to attack from, and more elaborate schemes to try, like parachuting onto the highest warehouse in the Outpost, and descending to mow down foes while another Ghost snipes from a different direction. The biggest concern is still the alarm; shoot it at once so no reinforcements are called, and try to remove threats with a semblance of stealth.