
Tom Clancy's Ghost Recon: Wildlands Guide Welcome to Bolivia P.N. De Agua Verde: Carzita
Carzita’s VIP List
Objectives
- Locate the server
- Hack the server to obtain the VIP list
- Defend the position until the hack is complete (03:00)
- Retrieve the VIP list
LOCATIONS
- Agua Verde Base
REWARDS
- + 350 XP
- Assault Rifle: Llamativo
- Gold Sunglasses
Brief
We’ve got a location on the server containing a detailed list of every VIP that has been a guest of the cartel at Agua Verde. We need to hack the server and obtain that list.
Violent Infiltrations On The Peninsula
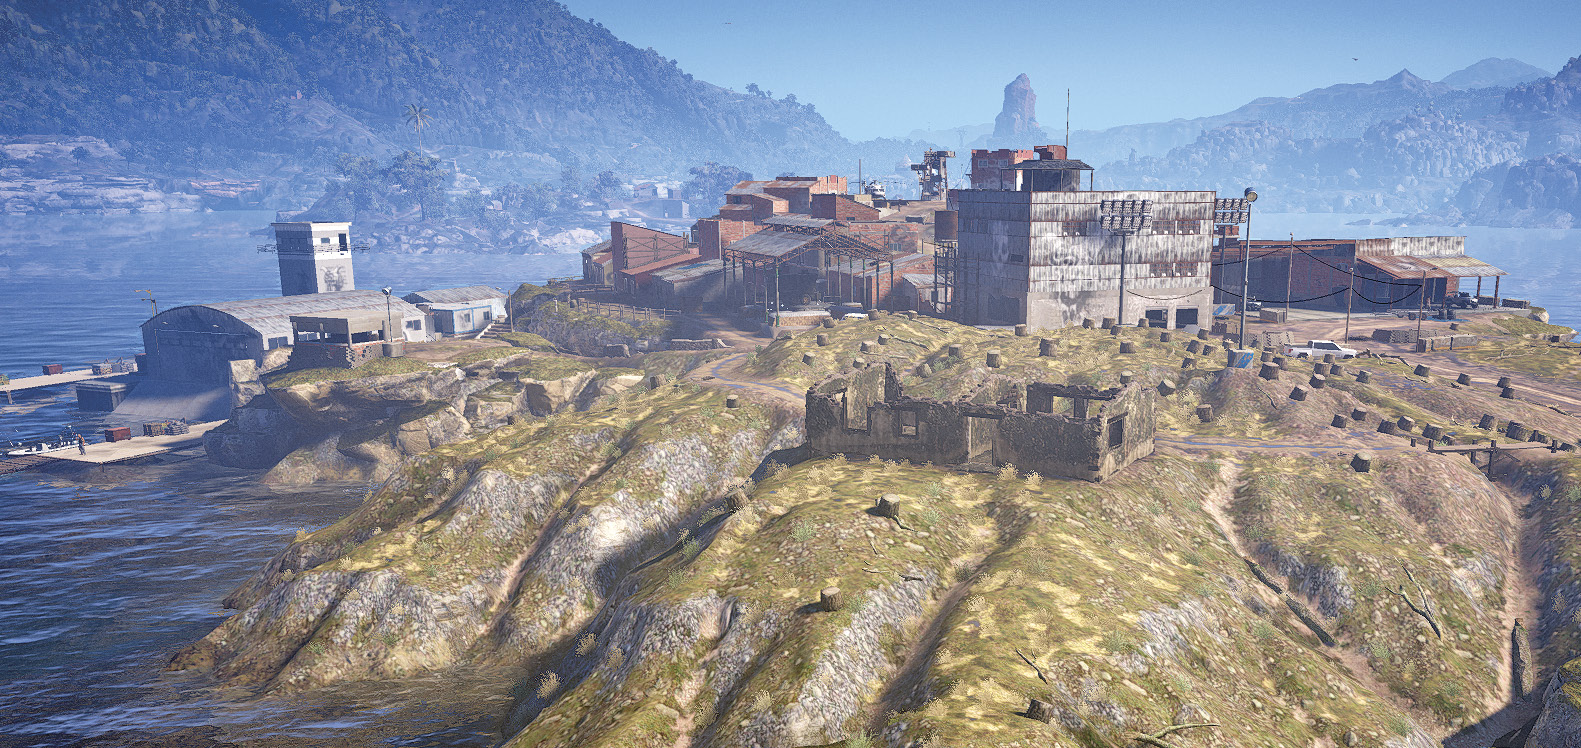
The VIP intel list is on a laptop in the server building on this partially-dilapidated base. The building itself is a partly-constructed brick tower. It’s vital you don’t overly rush the completion of the first two objectives, as you have an additional three minutes to wait, defending the server building from attackers, while the VIP list downloads. So plan a water or airborne assault, and take out major threats (enemy vehicles, mortar, the alarm, snipers, and lieutenants) as you encounter them.
Agua Verde Base: Recon
TACMAP
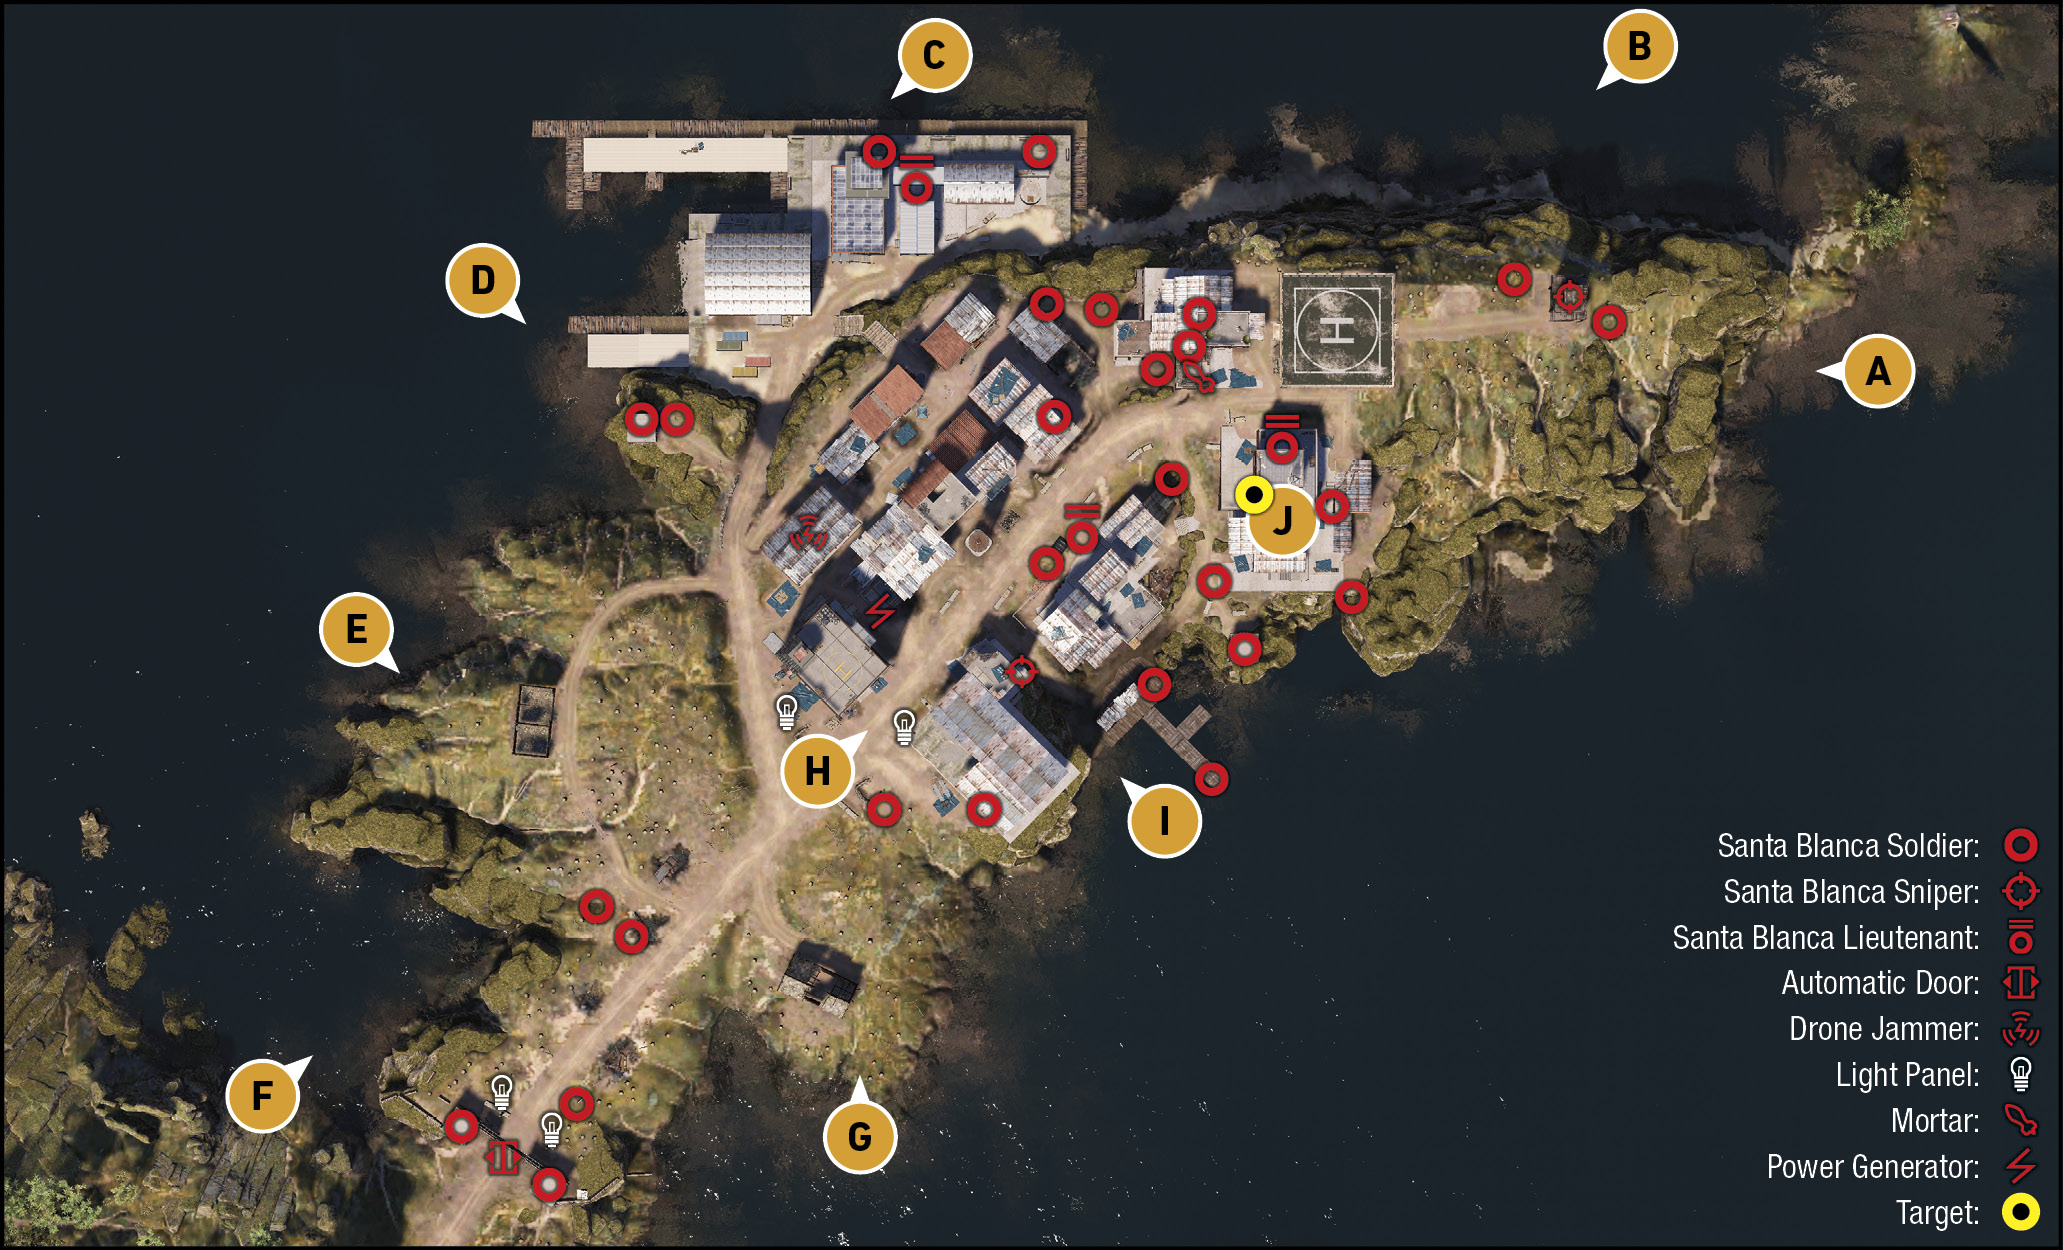
Though there’s a road to the Agua Verde base, it’s guarded by three enemies behind substantial cover, and it’s much easier to simply ignore this area and attempt an airborne or water assault. Find the server building on the south side of the peninsula, at the far end of the main thoroughfare, just south of a comms building (where the mortar is) and a helipad. The base is teeming with cartel enemies, and the going is especially tough along the main road. Gain height, skirt the interior of this base, and prepare for defending the server building before accessing the laptop for best results.
Beach Landing (EAST)
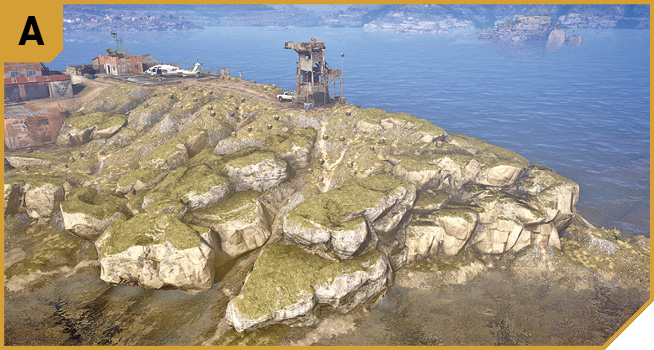
Access the base from this optimal location, and circumvent any battles you may be expecting (at least initially) with the majority of the cartel members on this peninsula. There’s a sniper in the wooden tower and two guards on the rocks. Providing you silently take them down, you can move across to the helipad, to route B, or to J itself. The inlet path between the outcrops is better to ascend than frantic rock climbing farther to the west.
North Cliffs
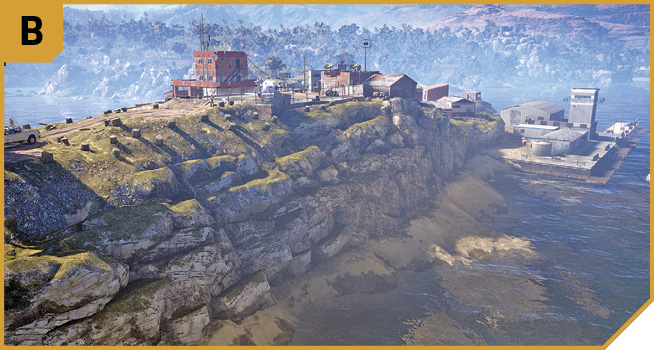
Once you’ve tackled the sniper tower on the western tip of this peninsula, use the cliffs to the north to skirt the helipad (keep the wire fence on your left), and then access the comms building to neutralize the mortar. This enables you to hold the north end of town on the higher ground, and it’s simply a matter of crossing the road to the objective building, and holding it.
North Docks
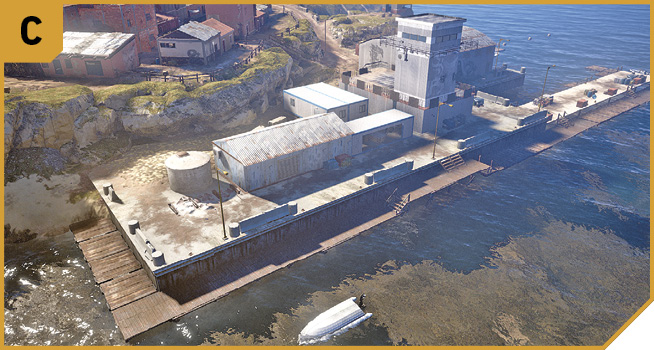
The concrete platform and wooden decks stretching along the north side of the mission area aren’t necessary to access, unless you’re wanting to make a long counterclockwise sweep of the entire area and clear all foes before entering the server building. There are a few enemies here, but not an overwhelming number (around three), meaning you can keep the element of surprise intact for as long as possible. Have one of your lone wolf teammates creep down from B to clear the area out. Because the area is lower than the rest of the base, it isn’t advantageous to hold, though the main tower is a good sniping point as it offers direct views of the objective building (look southeast).
Pill Box and Drone Jammer
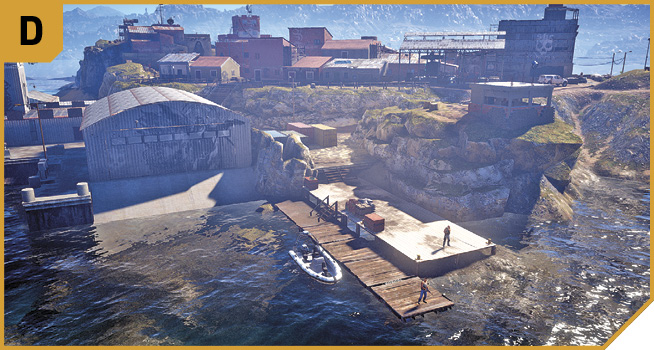
The northwest shoreline has few foes, but a couple are dug in at the pill box overlooking the harbor. Heading under, around, or attacking from C is the best plan to remove them (or a long-range sniper shot from a boat out of view of your foes). Then venture towards H and the drone jammer radar to deactivate it (assuming you want to use your drones), as well as the electrical generator (after you smash the lock).
Low Logged Hills (West)
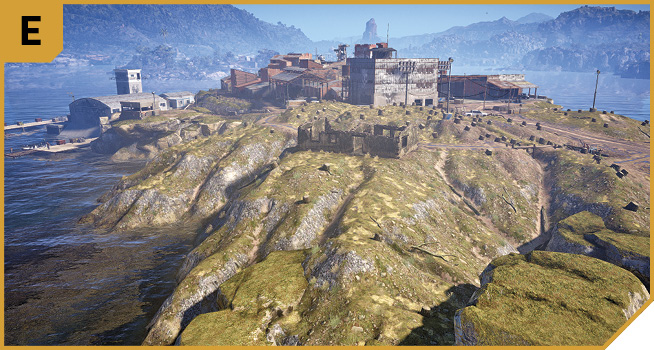
This is another relatively safe disembarking place if you’re assaulting from the water, as the remains of the old house and hill of cut-down trees offer reasonable cover with few foes to tackle. You can quickly remove enemies at the checkpoint (F) too, before heading to H and working your way through the streets, as well as removing the sirens.
Southwest Checkpoint
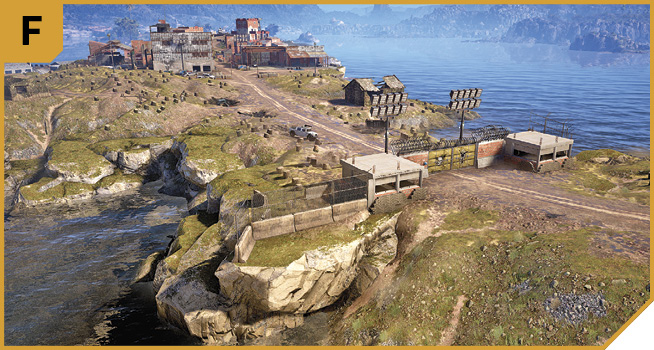
There’s only around five foes (two near the burned building at E, and three at the checkpoint) here, so assaulting the base outside the mission area, at the checkpoint, makes more sense if you can hit them behind their defenses (which isn’t possible if you approach on the main road). Climb up the inlet beach and tackle the checkpoint foes from behind. There’s likely to be an armored vehicle to cause havoc with, if you’re wanting to drive up the main thoroughfare with a minigun blazing.
Don’t forget to shoot the electrical box on both the floodlights to plunge the area into darkness during a night assault.
South Beach Assault Point
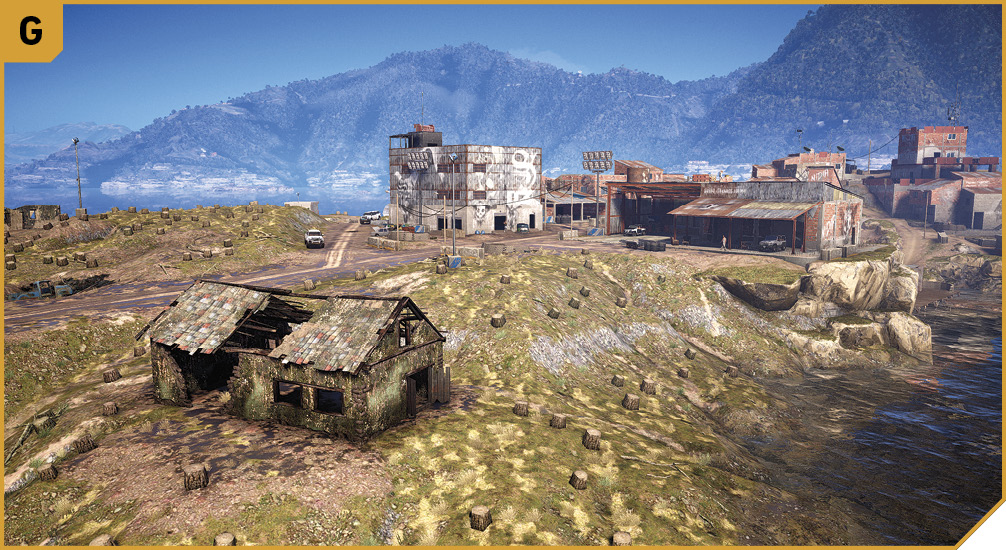
The low beach and gently sloping ground around the other shell of an old building makes this a good assault point to try, though you’re exposed between G and H if you try to reach the main thoroughfare. Instead, sneak along the eastern shore, up into the large open garage, and conduct building sweeps as you gradually tackle enemies en route to the target building.
Main Thoroughfare and Helipad Building
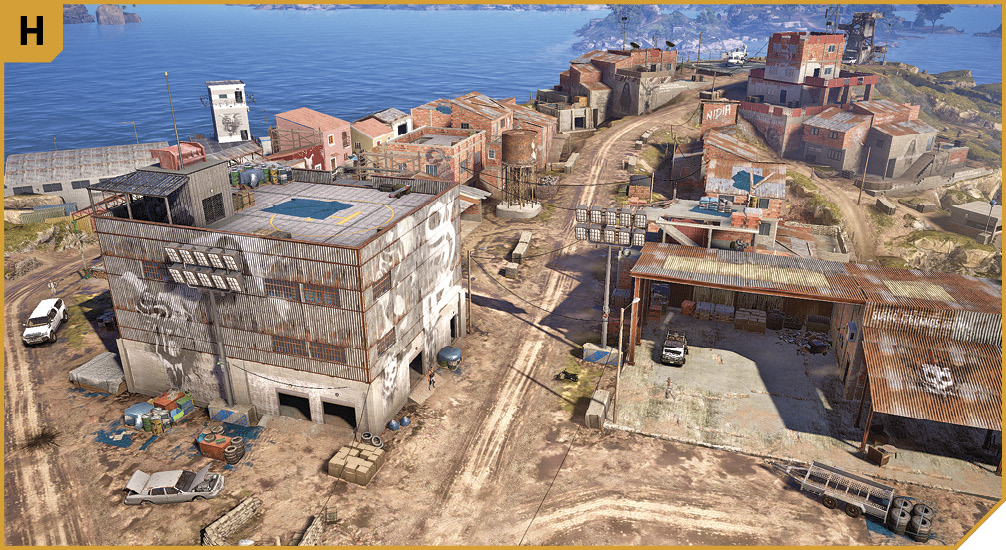
The largest and tallest building in the base is the cube-shaped warehouse tower with a helipad on top, and two floodlights to shoot on the ground nearby. It’s at the start of the main thoroughfare, and it’s a key building to hold. This is due to the exceptional views from the roof. You can remove the troublesome sniper on the partly-built structure to the east, see foes both on and below the remaining buildings on the street, and completely cover the target building. Furthermore, landing a chopper here offers an alternate extraction point.
The street to the left (northwest) has the electrical generator to power down, the drone jammer radar to deactivate under a large open warehouse, and various brick buildings to stay out of (they can offer sniping opportunities, but nothing as good as the helipad or target buildings).
Western Shore and Jetty
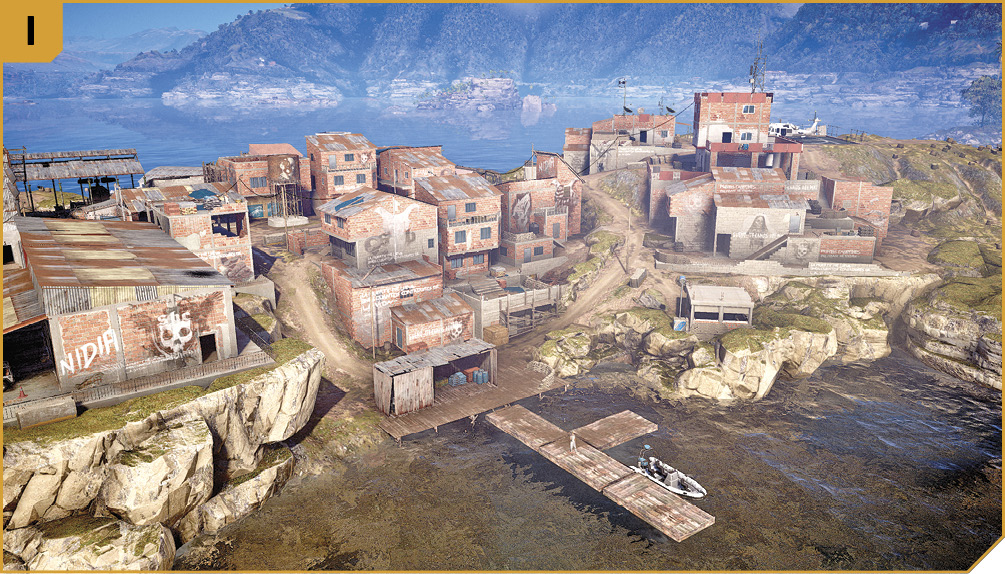
There’s a majority of enemies on the right (southeast) side of the main thoroughfare, so assaulting from this area of water means you’re likely to engage hostiles and not have the advantage of higher ground. Plus, there’s a pill box just south of the target building, and a sniper on the partly-built structure just left of the jetty. Save this for an extraction point rather than an infiltration one.
|
 Target: Server Building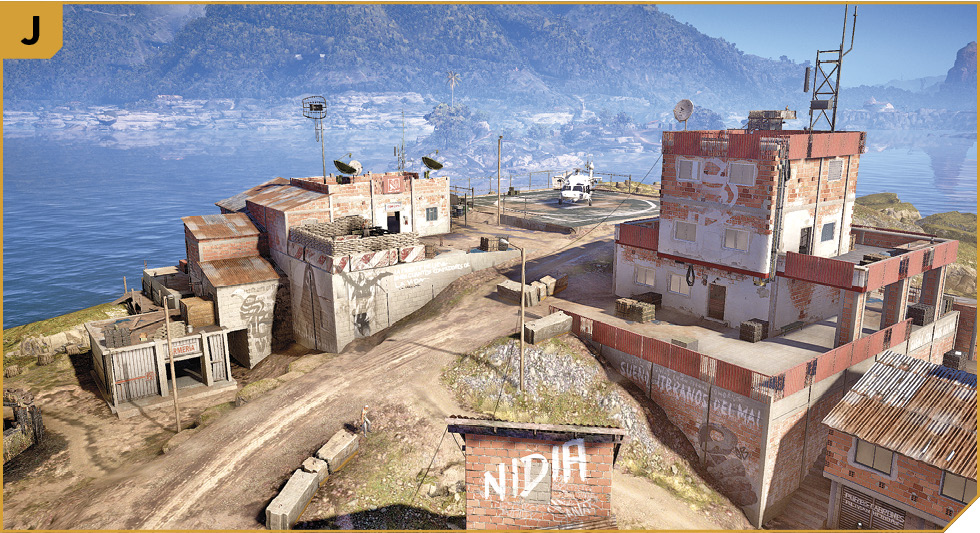
Agua Verde Base: Tactical Advice (To Server Building)
 There’s no real need to methodically engage every single enemy on the peninsula, as this impedes on ammunition, safety, and time. Instead, maintain and defend the northeastern part of the island, from the end of the main road to the helipad. Simply infiltrate from A, and move to J immediately after securing the comms building just north of J, and the mortar. Going in guns blazing is only helpful if you want to knock out the enemy’s generator, drone jammer, and floodlights.
Or, you can work your way slowly and methodically in a counterclockwise loop, while your foes engage the enemy in the streets as soon as your cover is blown. Head in from A, then to B, C, and across to H.
 Correct preparation for the three-minute defense of the server building is the key. While one Ghost knocks out the sniper and foes at A, and cleans up around the mortar and comms tower, a second Ghost should focus on foes at C and D, with the eventual plan of deactivating the drone jammer and generator. A third Ghost approaches from E, F, or G, takes out the floodlights and foes at the checkpoint to the southwest, then moves to ascend H and offer sniping support from the roof. The final Ghost can strafe using a chopper, remain active on a boat, or aid in street-to-street sweeps between H and J.
While your teammates cause a disturbance elsewhere, two of you can pilot a plane and drop in via parachute, aiming to land as close to the server building as possible. Doing this at night allows this to occur with fewer foes spotting you, though your teammates should have tagged the snipers on the rooftops first.
Agua Verde Base: Tactical Advice (Defending Server Building)
 Holding the server building for three minutes is fraught, but not impossible. Move your teammates to advantageous positions with good views over the main thoroughfare to the southwest before the hack begins. The majority of the foes are heading from that direction, so mines, vehicle blockades, and using the mortar (and Rebel Support) is key.
Flit from the server building up to the mortar and comms building. Feel free to climb atop the corrugated metal roof of the comms building for extra views and height as you neutralize threats below (southwest of) you.
 Have two Ghosts inside the server building; one at ground level, and the second on the balcony. Optionally move one to the mortar if necessary, or to widen the scope of your long-range takedowns. A third (and fourth) Ghost should offer fire support from the tower at C, or the helipad roof at H.
Extract at I, where there’s already a boat, or the main helipad north or J. Or have a Ghost land a chopper close to J to make your escape competent, rather than chaotic.
See that attack helicopter on the helipad close to the server building? Perhaps flying it around, raking the enemies with rocket fire, and slaughtering everyone in a fiery maelstrom who isn’t defending the server building would be a great idea!