
Tom Clancy's Ghost Recon: Wildlands Guide Welcome to Bolivia Special Missions
La Gringa

Objectives
- Locate La Gringa
- Talk to La Gringa
- Take La Gringa to the Rebel doctor (4:00)
- Protect La Gringa and the Rebel doctor (2:00)
- Extract La Gringa to Caimanes Bravo
REWARDS
- + 350 XP
- +7 Skill Points
- Food Parcels: +10,000
LOCATIONS (Ocoro)
Difficulty

Brief
To keep up with demand, La Gringa has been forced to cut the purity of Santa Blanca’s cocaine. El Sueño found out, and now he wants her dead. A crew is on the way to La Gringa’s house to kill her. We need to get there first and extract her.
Getting La Gringa Out
La Gringa is holed up inside a mansion on the southern outskirts of the cattle village of Pujio, on the upper slopes, but below a large and steep scree slope, making infiltration more difficult. This is further exacerbated by the pickup truckloads of cartel thugs intermittently arriving at the compound to attack the defending Rebel forces. This situation is likely to become untenable shortly; so try for a swift extraction plan.
La Gringa’s House: Recon
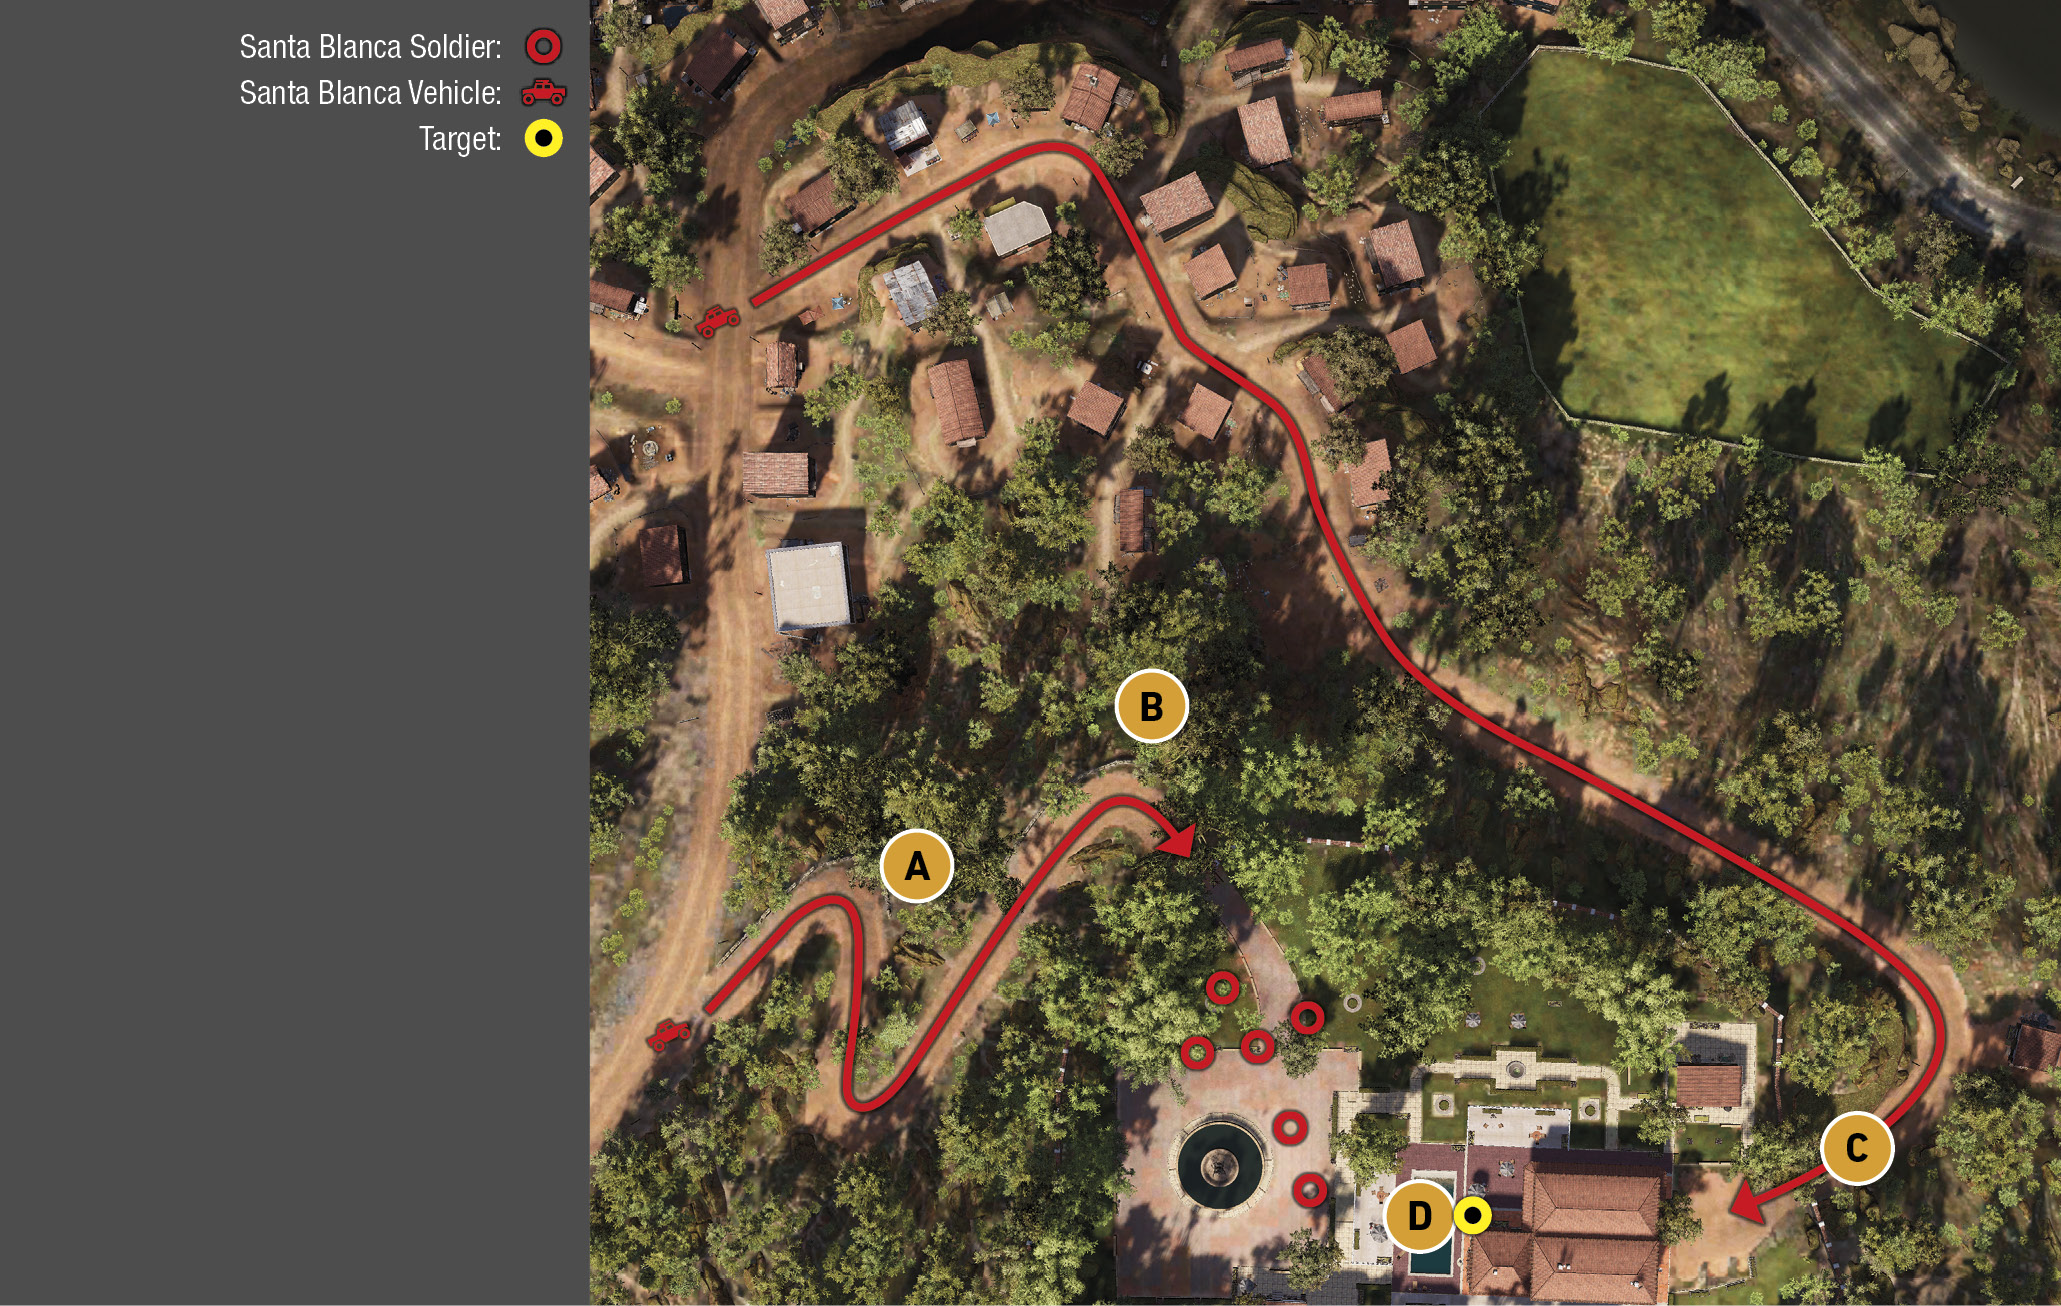
TACMAP
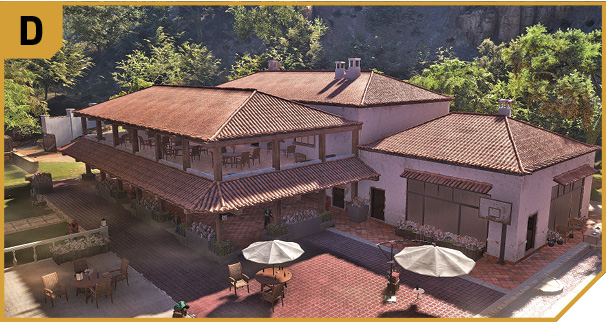
The mansion is under attack as you arrive, with the bulk of the aggressors attacking from the northwest gate (B), though expect foes to drive up along both roads (B and C). The rest of the perimeter features a high white-washed wall running the entire length of the compound, with only one area short enough to hop over (the wall to the left of B, if you’re facing southeast). La Gringa herself is down in the basement.
Northwest Road and Northwest Entrance
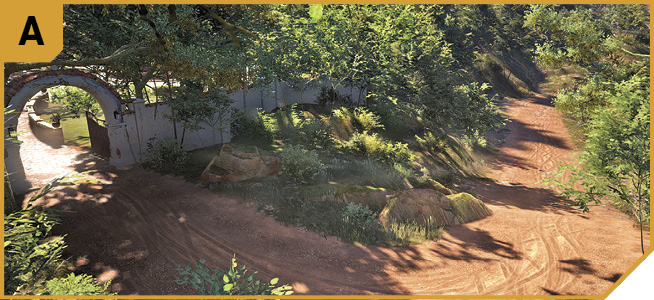
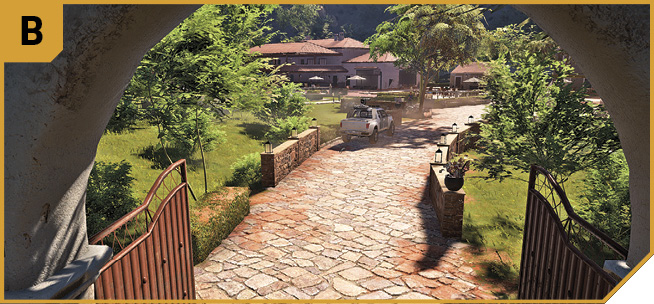
When entering from this direction, expect the highest proportion of enemies, making this the less optimal of the two entrance gates. Note the lowest area of wall, which you can scramble over, and head south into the interior fountain area. Otherwise, it’s best to drive in with guns blazing, attempting to knock down any foes and cull the rest with rapid-fire takedowns. Park near the swimming pool.
During the time one of you rescues La Gringa, have a Ghost place mines along the entrance road to impede incoming foes, but ensure you don’t drive over them yourself!
This is one of two possible exits out from the compound. You can drive across the hill, ignoring the winding road, until you reach the main thoroughfare into Pujio.
East Road and Entrance
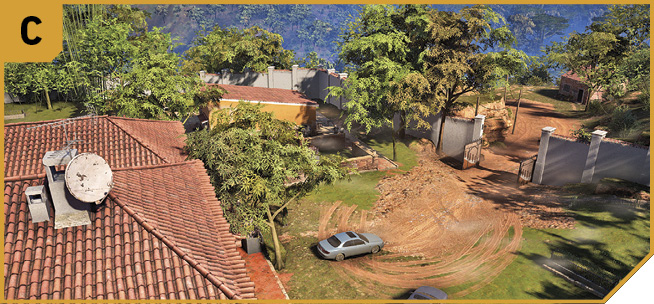
This is the preferred entrance of the two to head through, as the highest concentration of friendly Rebel forces are in this area. That’s not to say your vehicle won’t get destroyed by incoming foes if you leave it unattended while you enter the mansion, so make sure your squad is defending the gates as soon as you enter them.
The road out of here is the preferable of the two as there are fewer foes to avoid, and you can quickly drive north, off the road just as you exit, down the hill, and join the main road heading right (east), along the river, to the second objective point.
|

La Gringa’s House: Other Tactical Advice
 Choose a well-armored truck (or call one in using the Rebel Support), and drive it to C. Have the rest of your squad guard it, so it’s not a burning wreck when you exit. Dash to the basement interior of the mansion, find La Gringa, bring her back to the vehicle, and accelerate away. An alternative option is to bring a small helicopter and land it at C (this can be destroyed easily by the enemy, so ensure your squad is ready to defend it). Use the chopper to escape.
If you forego the helicopter, and if the vehicle you used to arrive in is destroyed, simply use one of the vehicles parked inside the mansion grounds. There’s an SUV in the southwest corner near the fountain, or two cars just outside the east side of the mansion at C. All will do in a pinch.
 Solo plans work well here, though only one Ghost needs to find and rescue La Gringa, and bring her to the extraction vehicle. This allows the remaining three teammates to: defend the extraction vehicle from threats, or move it to a safer space, keep a helicopter airborne, and attack the enemies, or locate a second vehicle, and use it when driving to the campsite to attack any foes in vehicles following you.
Perhaps the best plan of all is for each Ghost to bring a separate vehicle in a convoy quartet, which don’t all need to be driven in unison to the campsite. That way, you have additional spare vehicles to use in the forthcoming battle.
Getting La Gringa Out
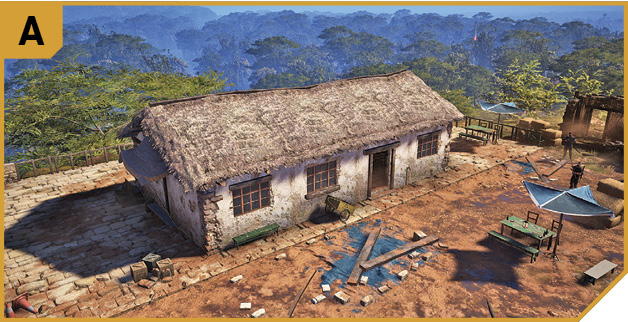
Drive along the main road using GPS and a spot of off-roading to quickly reach the Rebel Campsite within the four minute timer. If you don’t, she dies and the mission fails. If you make it, move into the stone building atop the small hill on the east side of the camp, where a Rebel doctor begins treating La Gringa. You now have two minutes to defend this camp from cartel attacks.
Rebel Campsite: Recon
TACMAP
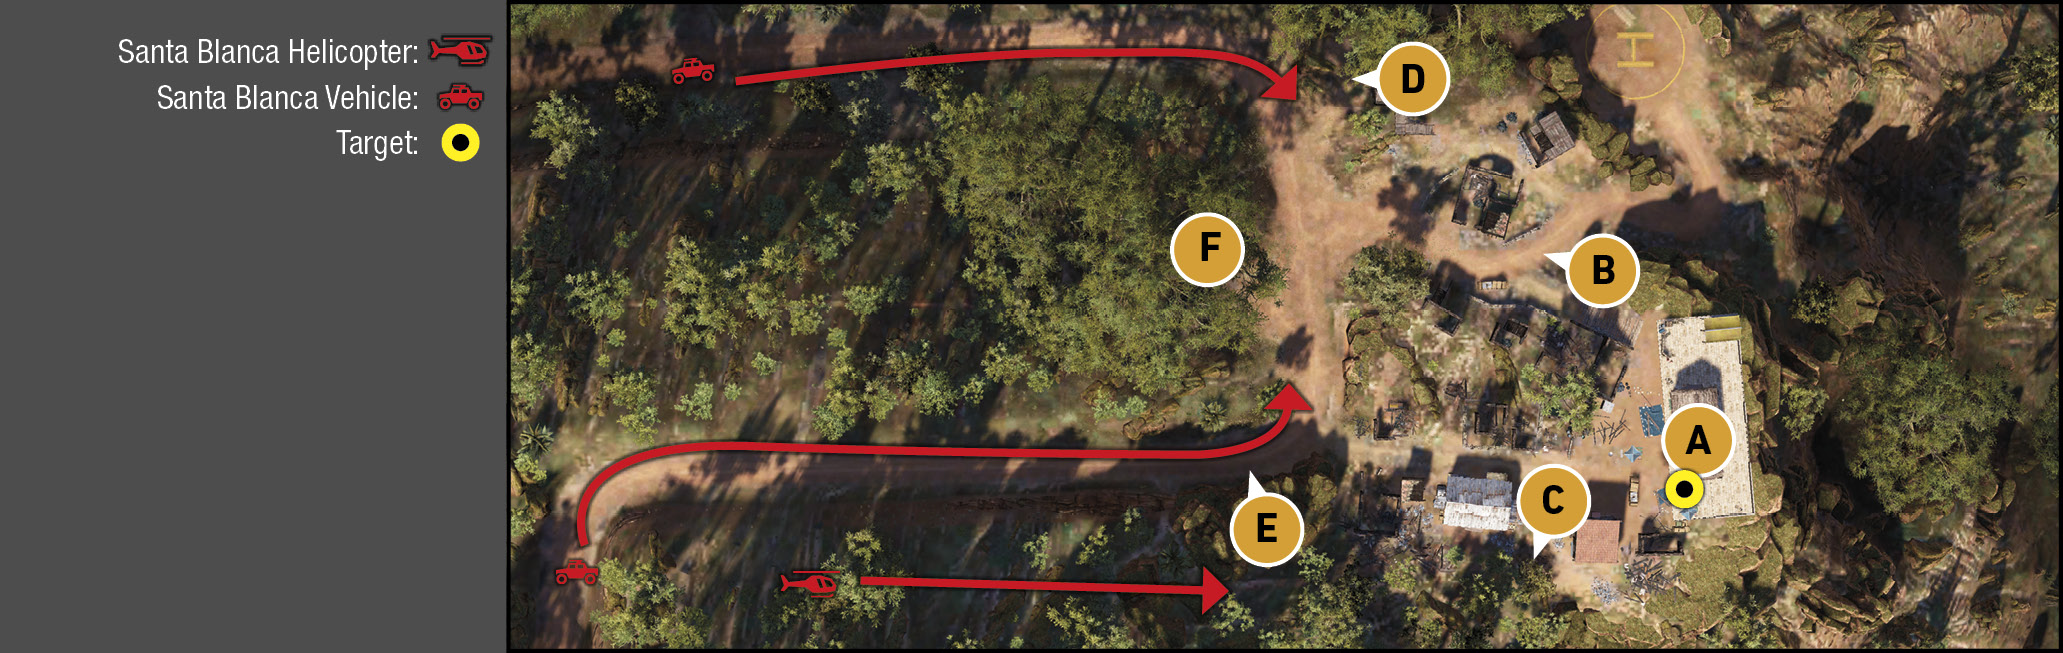
The enemy forces aren’t insurmountable, and the base is reasonably secure, at least from foes attacking from the east (which is very steep). You also have great views of the roads where the enemy vehicles are driving in from, and can prepare for them accordingly. Note the minigun nest just northwest of the target building if you need to rake the foes’ vehicles as they come in.
|

North: Minigun Nest
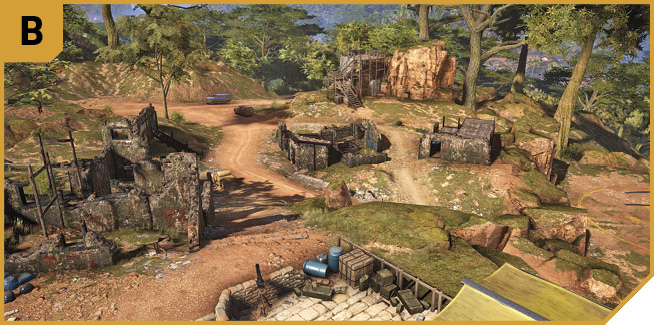
The north end of the camp features sandbags and a minigun. The gun is optional, as you may find your own Loadout more effective. Train your weapons on the vehicles coming up the road that the rebels or your teammates haven’t removed at D. Also check the helicopter parked here; this is a possible extraction vehicle, but can also be used to strafe the enemy thanks to the weaponry aboard.
South: Gorge Edge
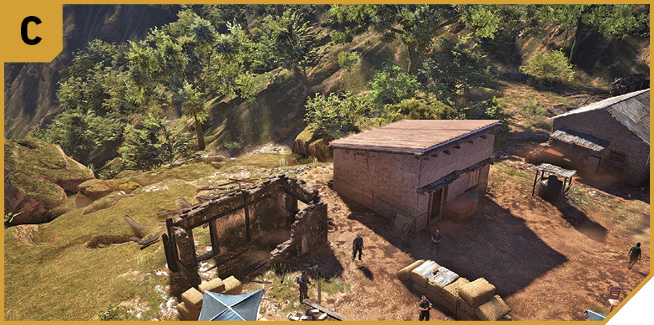
There’s a steep gorge to the south, which usually means no foes ascend in this area. Use the remains of the buildings as cover, perhaps moving to the rock outcrop south of A, and drop foes as they appear along the road to the west.
Northwest: Wooden Platforms
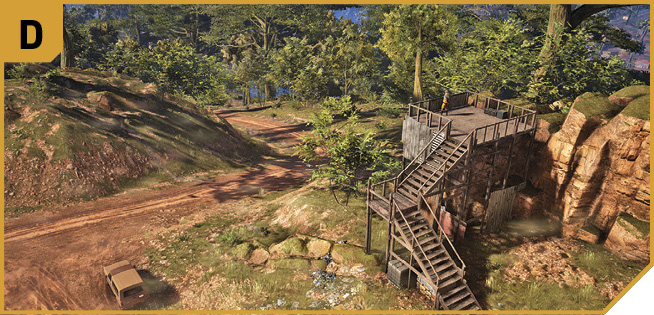
Quickly sprint to this area and cover the incoming road with mines. Then defend from atop this scaffold, which offers great views and cover, and you can also watch for enemies heading in along the other road to the southwest.
Southwest: Rock Outcrop
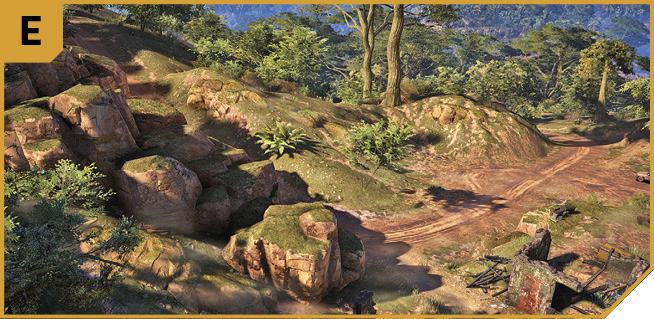
The rocks above the south road enable you to lob grenades or mines and generally lay waste to incoming enemy vehicles before they even have the chance to park. Just be careful dropping too many mines as you’ll be using this road as an escape route!
The Big Tree
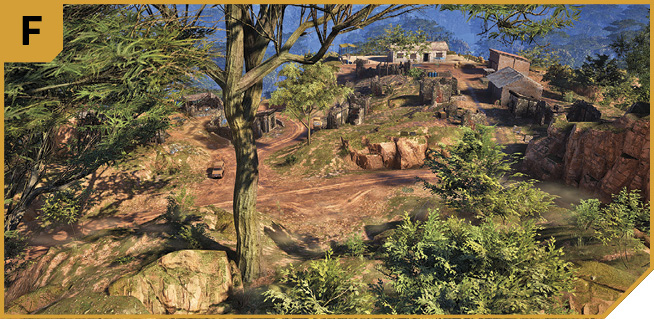
Between the two roads is an area of high ground under a big tree, where you can quickly move to engage any foes approaching by either road. This offers flexibility, as well as attacking enemies who are parking up and trying to storm the campsite.
Rebel Campsite: Other Tactical Advice
 Call on Rebel Support for mortars and additional troops as the two minutes begin. Send your team to C while you cover from B, or vice versa. When enemies park up, lob grenades and rake them with heavy weapons. Don’t venture too far from the target building in case you need to race up to defend it. Give them everything you’ve got! One option is to use the nearby helicopter and have your team strafe enemies from the air. Extract La Gringa in any ground vehicle in good shape, a vehicle the Rebels supply you (after requesting it), or via chopper.
 Solo plans apply, but you can spread out to the previously-indicated areas to ensure the enemy is caught in a hail of crossfire. Having Ghosts covering between B and C, one at D, one at E, and one flying a chopper, ensures all ground is covered. Then land and pick up La Gringa and fly her to the Rally Point.
Tactical Field Care at Caimanes Bravo
As soon as the two minutes are up, talk to La Gringa, allow her to follow you from her bed to a waiting vehicle, and extract her southwest, to Caimanes Bravo. Assuming you’ve done your job during the previous defending of the campsite, and you don’t drive erratically (over a mine you previously placed or off a cliff side along the road) or pilot a chopper into a mountain, you should be able to rendezvous with Bowman unscathed. Then watch as she applies some tactical field care with a novel bedside manner.