
Tom Clancy's Ghost Recon: Wildlands Guide Welcome to Bolivia Remanzo: El Gato
El Gato

Objectives
- Kill El Gato
- Identify body
LOCATIONS
- Outpost (North)
REWARDS
- + 350 XP
Brief
We have intel on a possible location for El Gato, the so-called “unkillable” boss of Remanzo province. Locate El Gato, kill him, and collect his biometrics for a positive ID.
A Perfect Match?
Bowman believes a cartel member with a giant forehead is likely to be the fabled El Gato, and the dude is currently holed up in an outpost along the rocky northern edge of this province. When you get there, the place has some fortifications to overcome, but doesn’t quite have the caliber of enemies you’re used to, especially those guarding a buchon. Quickly eliminate El Gato, and take a photograph of the corpse so Bowman can get a positive ID.
Outpost (North): Recon
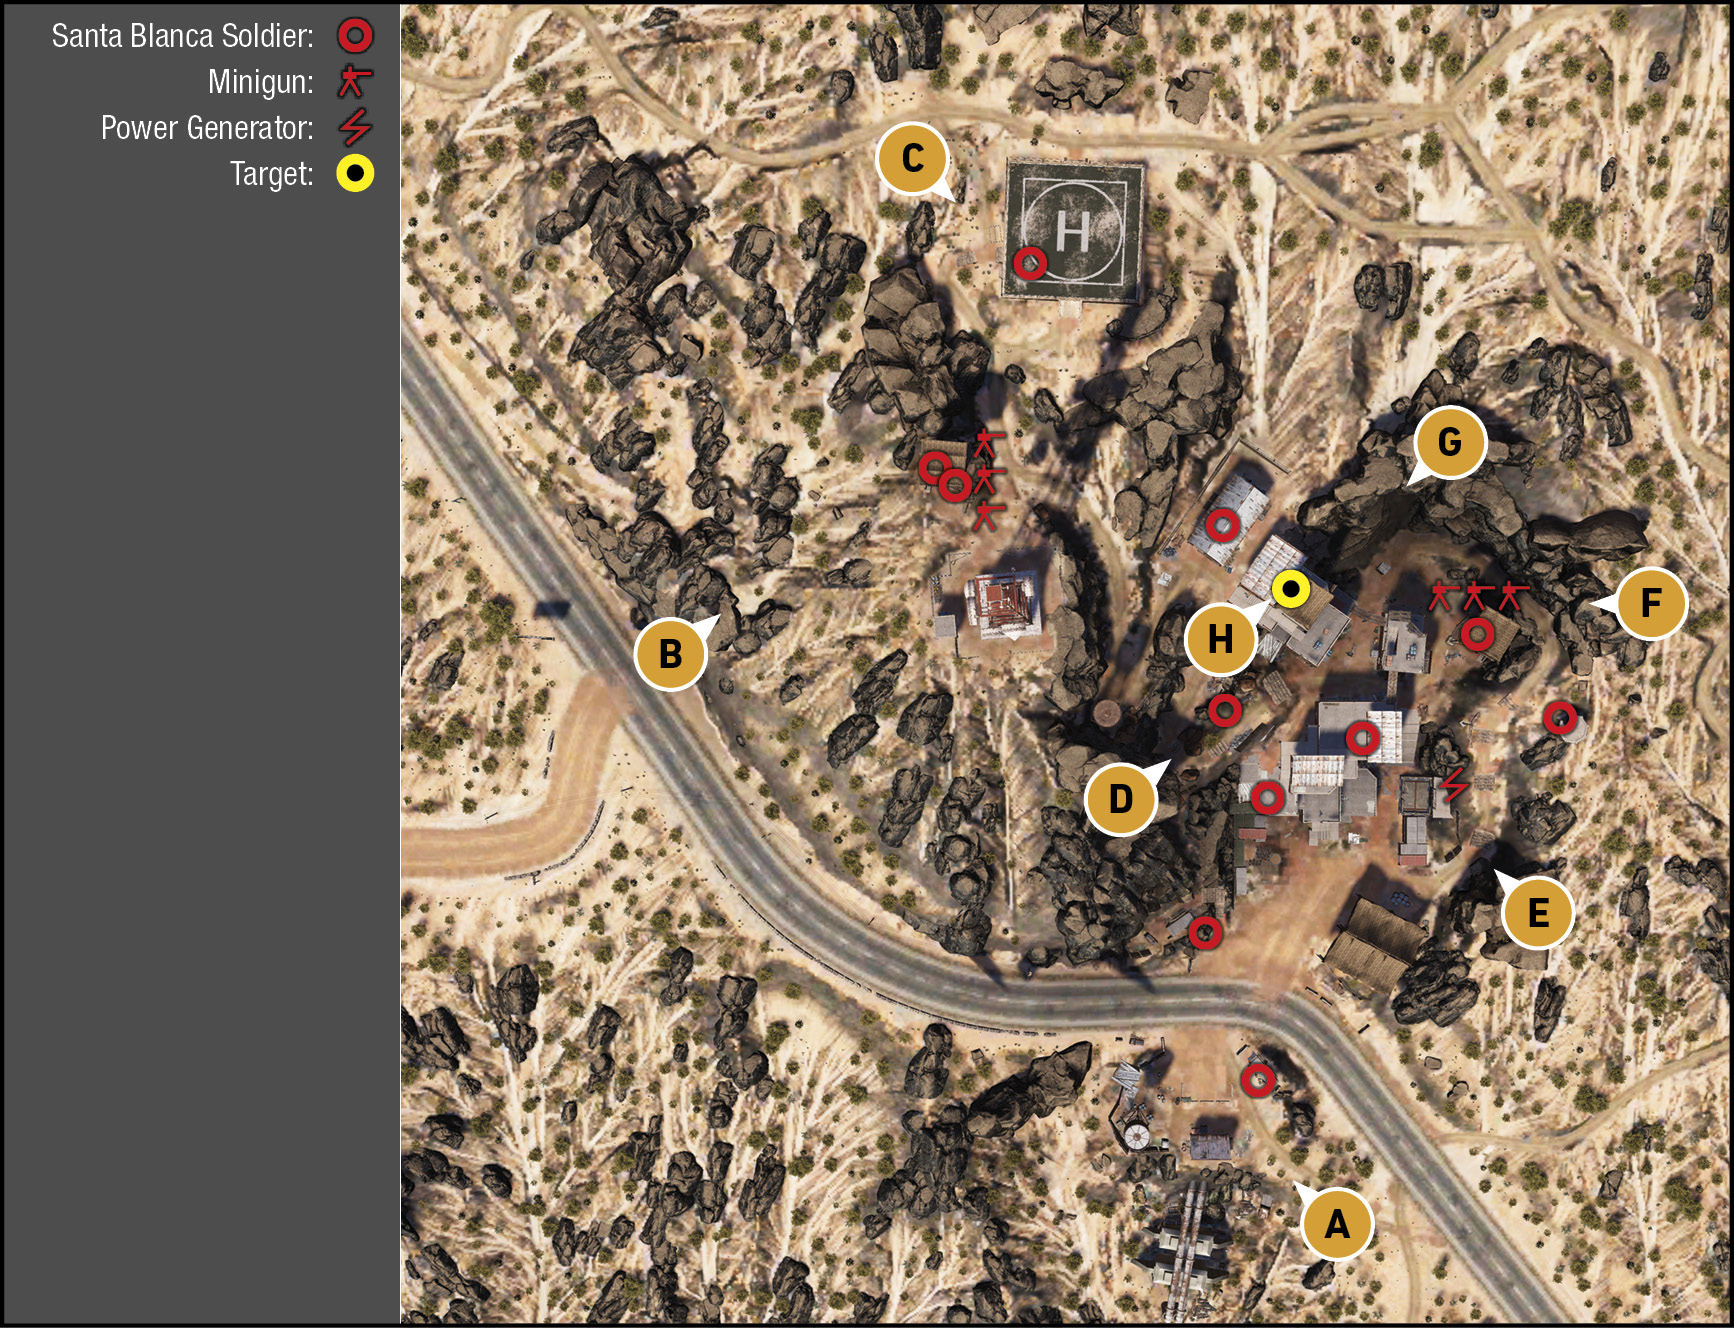
TACMAP
Dug into the rocky desert outcrops by a main road, this outpost is small, steep, and is tricky to navigate from the bottom up. So instead, tackle it from the higher elevations (east and west). If you’re attacking at night time, and want to kill the lights, look for the generator in the southeast corner of the compound, close to the road. Watch for two minigun towers, each with multiple weapons, with one of them farther up the hill, close to a helipad to the north, away from most of the action.
South: Road Checkpoint
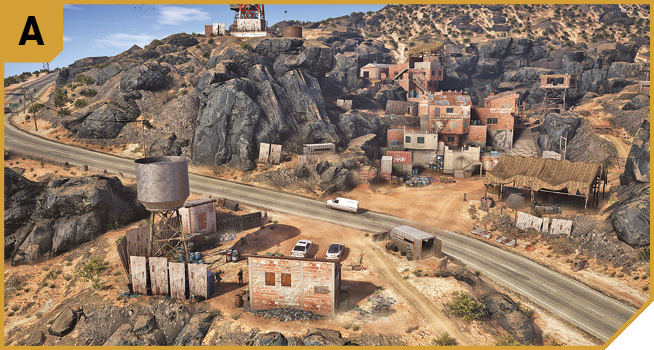
Approaching from the south, heading uphill, isn’t recommended as the foes in this outpost have good hiding positions behind cover, and a height advantage if you attack from this angle. It’s good to position a Ghost here to start the chase with El Gato if he escapes on his bike, or mop up a few foes down here, but otherwise there are better ways into the base. Use this as a distraction point, or sniping position.
West: Rocky Slope to Minigun Tower
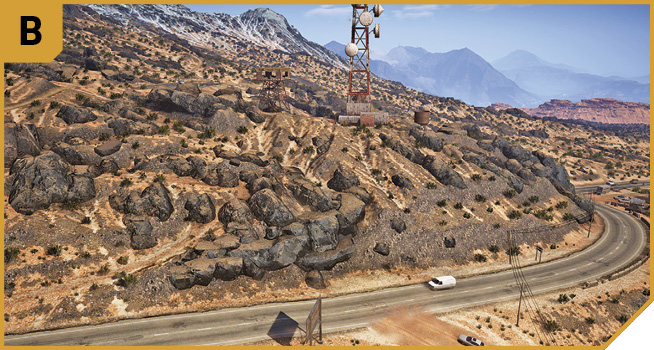
This is primarily an excellent spot to disembark from a vehicle (keeping a Ghost here to go after El Gato if he escapes on his bike, as he usually takes the west road at this junction), and climb up the rocky slope the outpost is built on. Loop around to the north (toward C) until you get a mark on the one (or two) guards at the minigun tower, and defeat them. With the foe at the helipad (C) removed, you can then creep southeast, down the hill and take up positions on the rocks, surrounding the outpost—the preferred method of neutralizing all enemies and securing your high-value kill.
Northwest: Helipad
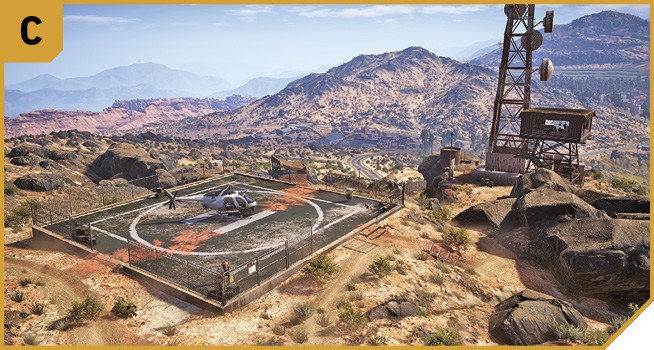
If you need a quick escape, a vehicle to catch up to the fleeing El Gato, or you want to strafe the base from above to cause El Gato to flee, pick up the chopper parked here. Otherwise, there’s usually a single foe to drop while you outflank the enemy and attack from the north, and above.
Southwest: Rocky Bluff
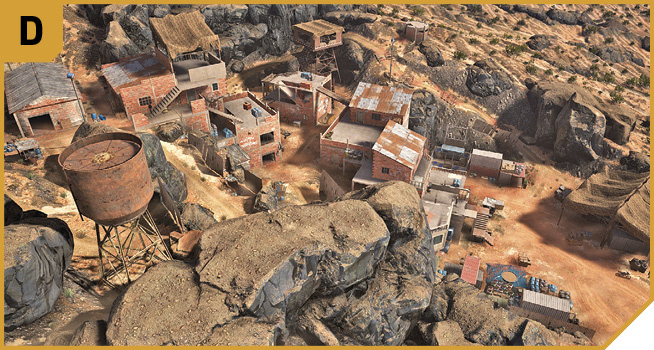
This is a fantastic place to sneak to and provide covering fire from, heading down from the large radio mast, to the flat rock near the rusty water tower, and lie down for a snipe. You can see almost the entire base (except directly below you, which isn’t anywhere important). You can quickly tag the minigun operator, the foe in the pillbox near F, foes on the rooftops, and most importantly, El Gato himself. Or you can shoot near him, so he escapes and you don’t need to assault the actual base to ID him. However, as the foes aren’t the most competent, and there’s only a few, sniping them all is relatively easy, meaning reaching El Gato’s corpse isn’t too much of a headache.
Southeast: Low Rocky Bluff
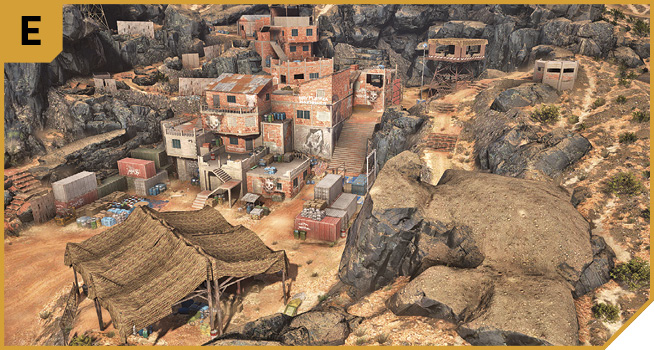
Above the lowest level of the base, but below the east minigun tower and pillbox (which you should target first before you’re spotted), this area of reasonably flat rock with a human-sized vertical protrusion to hide behind is another good spot to snipe from, gain recon, and use as a hiding spot before you head down to shut down the generator below you. Remove the majority of the lower-level foes in the structures, as you don’t have a visual on the HQ building where the target is.
If you’re moving into the compound, it is a small, mainly exterior clambering maze of scenery and rooftops, with connecting planks between structures leading to the HQ building. You’re exposed to foes along the way, so shoot them from cover first, or cover a second Ghost who is infiltrating uphill. The quickest route is up the long cement steps on the east side, then into the HQ building via the garage doorway.
East: Boulder Outcrop
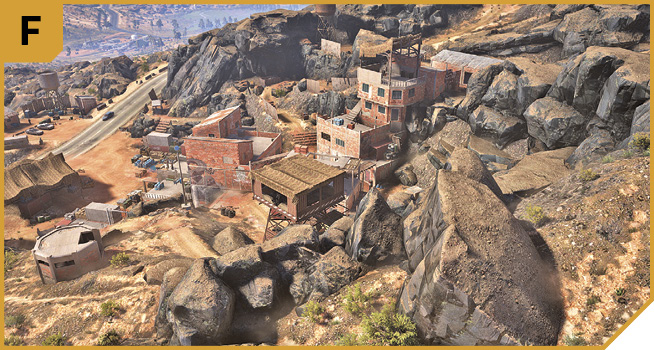
As long as you aren’t spotted heading in from lower down (so creep here from G or loop out from E so you aren’t seen), this collection of rocky boulders can serve as good cover. You aren’t likely to be outflanked, you can duck behind the rocks, and can easily remove the minigun operators and foe in the pillbox from here. You also have a good sniping view of the northwest minigun tower near the radio mast (near B); shoot the foes there to aid Ghosts who are heading in from the opposite side of the base. Then train your sights on the HQ building and attempt a shot. This position is good if you’re trying to wing El Gato when he runs down to his bike (near A) and tries to escape.
Northeast: Flat Top
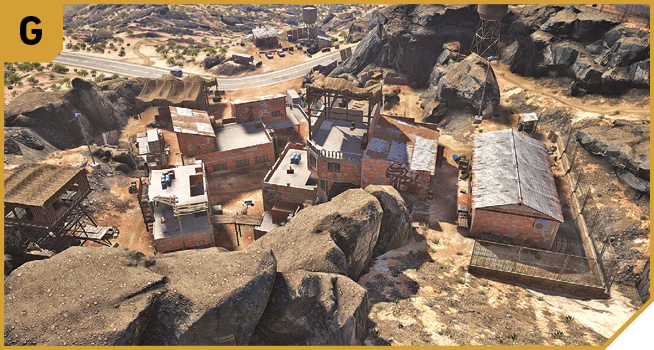
The flat rock above the majority of the base is an excellent spot to recon, providing the minigun operators and helipad foe near B and C are defeated first. Then train your sights on the HQ building. You can quickly sneak in from here to engage El Gato in close combat (meaning the ID takes no time at all).
|
 Target: HQ Building and “El Gato”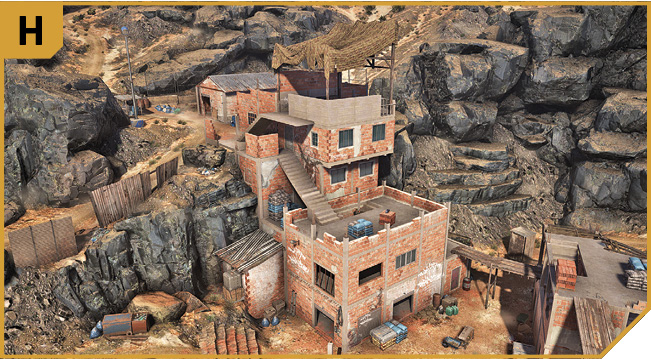
Outpost (North): Other Tactical Advice
 As heading up through the base can be tricky given the foes above you, try parking up at B, removing the minigun operators and helipad foe as you reach C, sneak down to G, removing the east minigun tower foe and pillbox enemy. Then start tagging any other foes with suppressed fire until there’s either no one left, or El Gato is spooked and flees. If you position your teammates near A, but out of enemy sight, they can stop El Gato before he gets away.
Otherwise, head in to F or G, or better yet, D, and kill El Gato first. Rush in before the enemies realize, ID the body, then flee. Or, try parachuting onto the roof near the tarp of the HQ building, and shoot El Gato as soon as you can. That’s dangerous and tricky, but doable and quick.
Don’t want to remove all threats from this base? Then lob in a grenade from D to spook El Gato into running to his bike. As he flees the base, retreat from D to B, where you should have parked your favorite “bike-demolishing” truck, and follow El Gato until he’s away from any other enemies. Then run him over. This has the added benefit of allowing you to quickly ID him and finish the mission.
 As long as you remember the pre-planning for apprehending El Gato should he run, this is a straightforward sortie. Station a Ghost in a truck to chase El Gato and kill him away from his guards. Then have a Ghost enter from B, D, and E to remove the enemies closest to them. Do this silently if you want to keep El Gato in the HQ building, or noisily if you want him to escape. While the three Ghosts then converge on H, dropping all foes along the way to completely clear the base, they can concentrate on cartel member takedowns, confident that the fourth Ghost is after the escaping El Gato.