
Tom Clancy's Ghost Recon: Wildlands Guide Welcome to Bolivia Itacua: La Yuri Y El Polito
Culta’s Prisoner

Objectives
- Reach Culta Village
- Talk to the rebel prisoner
LOCATIONS
- Culta
REWARDS
- +350 XP
Brief
A rebel with knowledge about La Yuri and El Polito has been imprisoned by the cartel in the village of Culta. Get to Culta, rescue the prisoner, and find out what he knows.
The Culta Personality
A radio message from Pac Katari requires you to locate and talk to a prisoner held at the burned-out remains of the hilltop village of Culta, in northwest Itacua. The rebel should be extracted after he reveals the location of the two underbosses of this region. Take either a chopper or vehicles to the outskirts of the village.
Culta: Recon
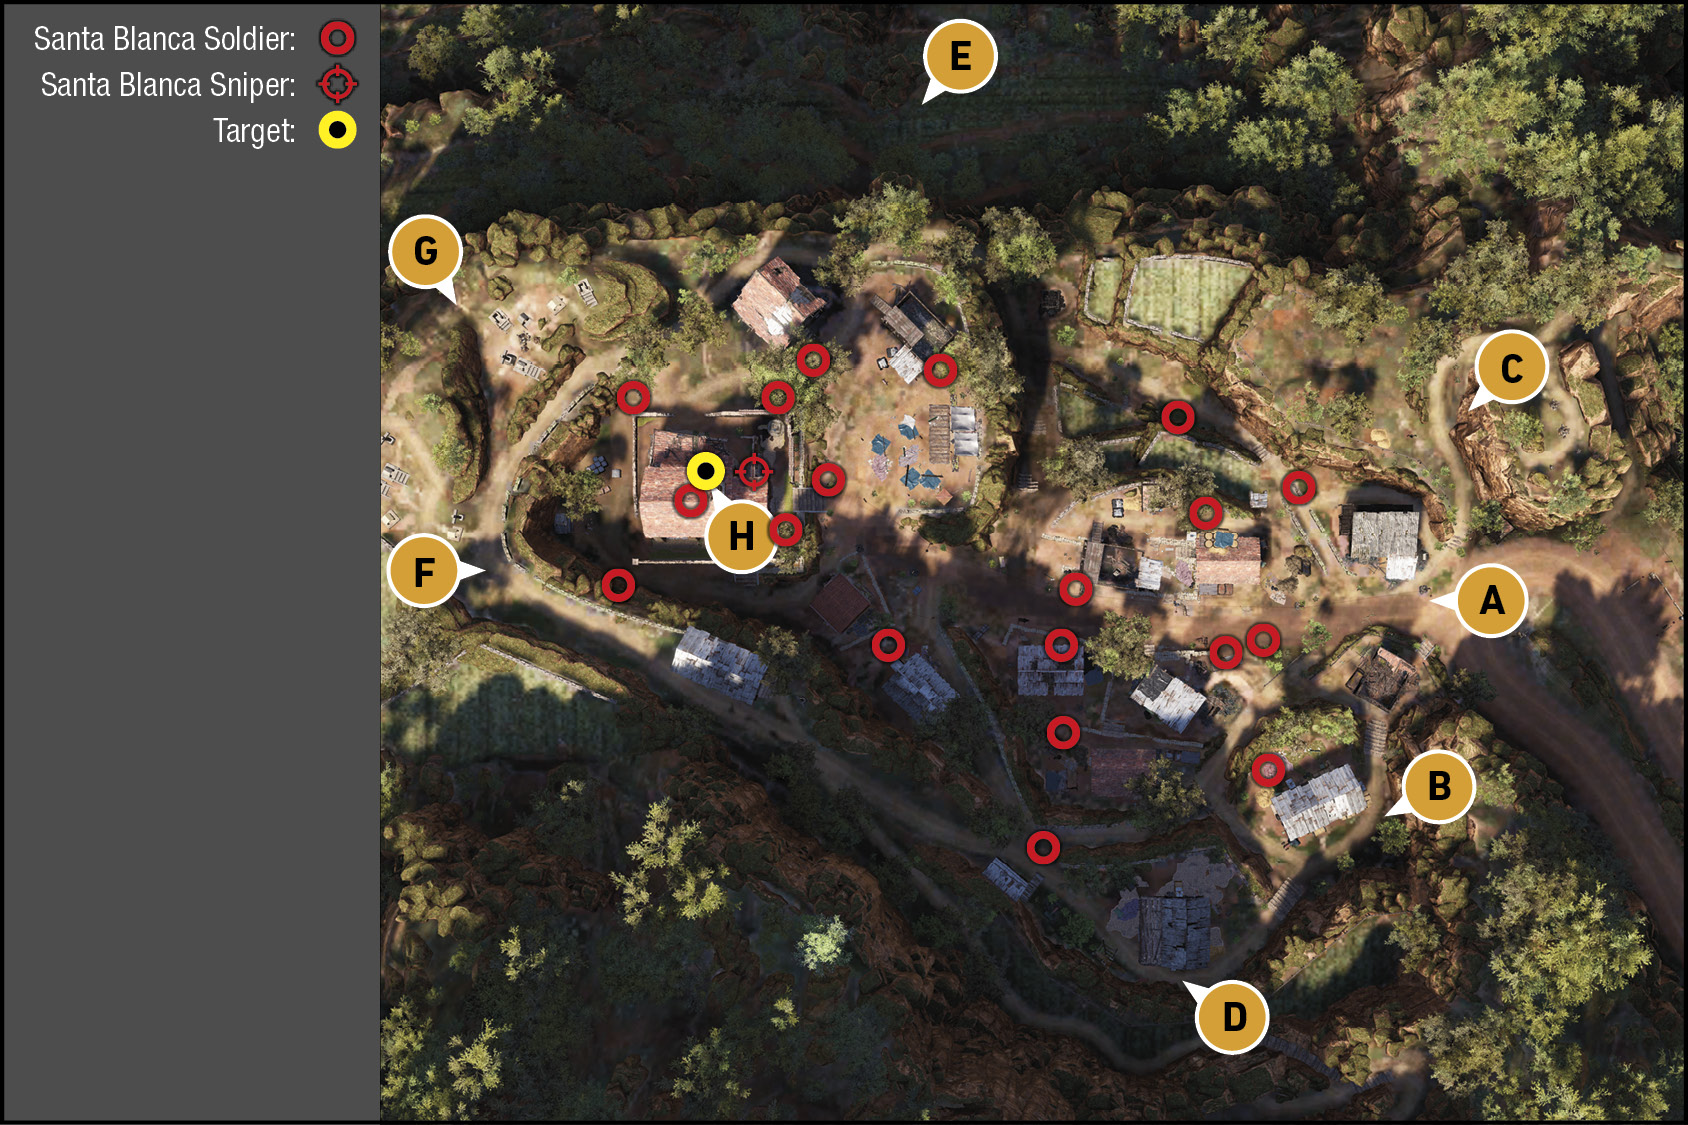
TACMAP
Culta is perched precariously on a rocky outcrop which is mostly impenetrable from the south, west, and north. Access is available via helicopter (though this simply causes the hostiles to be fully aware of your presence), or at the switchback curve in the mountain on the eastern edge of the village. The settlement itself has been partly razed by cartel forces, and a sizable presence (around 20, including a sniper on the church roof to the west) are dug in. Fortunately, you need not worry about civilian casualties.
Main Thoroughfare (East To West)
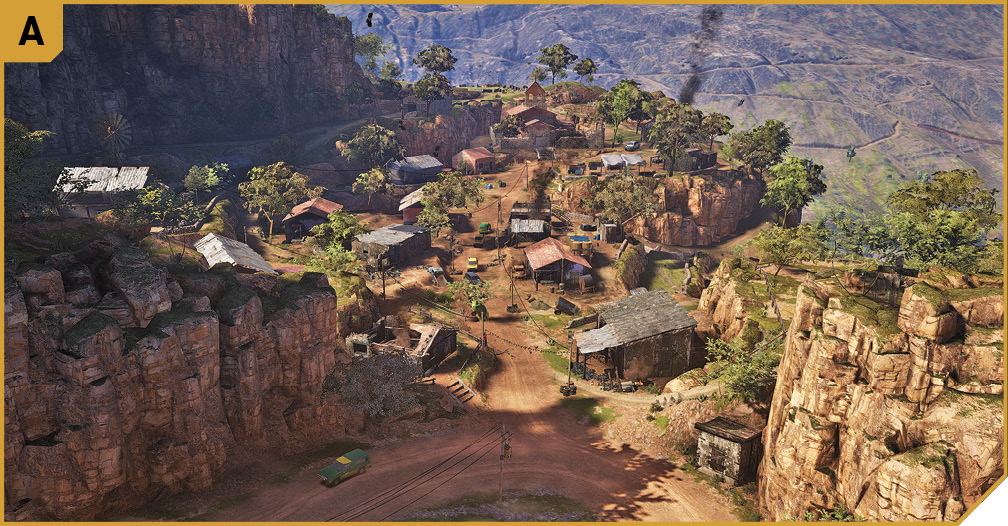
The main street through Culta leads directly from the mountain road to the church at the west end of the village. The only problem being there’s a sizable cartel presence, and wandering up this street gets you killed. It’s far better to choose one of the paths around the outskirts of the village, even though these are slim pickings.
South Path (East To West)
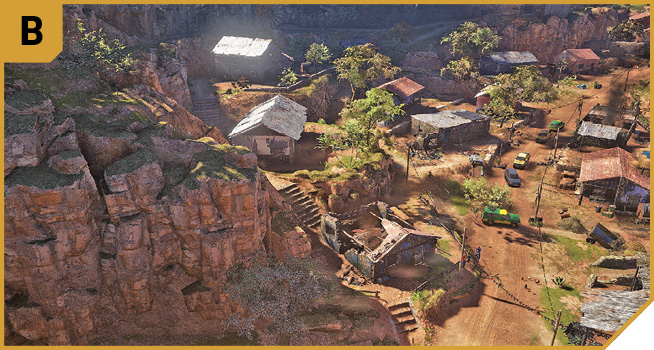
This is an excellent choice in Solo mode, or for one Ghost to take, providing you have the wherewithal to drop the enemies standing around the various cottages as you skirt the southern side of the village, at the base of the mountain. Stealth kills are mandatory, and you can (and should) head from B to F without anyone raising the alarm. Use the upper paths rather than dropping into the main street, or you may be overwhelmed.
Sniper’s Hill (Northeast)
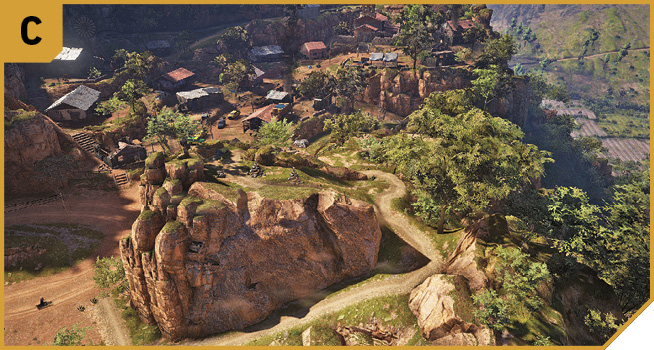
Have one of your team hoof it up the trail on the east side of the north hill overlooking the village. The vista is more than worth it, as you have good protection and a view of the main clusters of forces, and are able to provide excellent fire support, drone recon, and other information. You can also head down the hill and continue west to E, skirting the north side of the village, to wrap around and surround the enemy (ideally while a teammate does this to the south).
Sniper’s Hill (South)
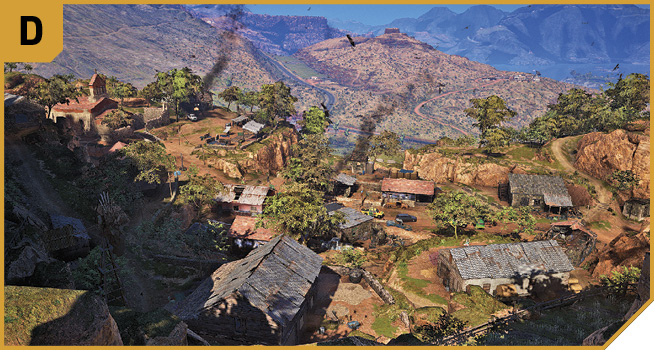
Approach from B, locating the stepped mountain trail leading south, that winds to this vantage point. If you have a team that is patient enough to wait for you to get to this position, you have excellent views of the entire settlement, and can tag the sniper on the church roof, as well as foes in the central part of town.
Northwest Defenses
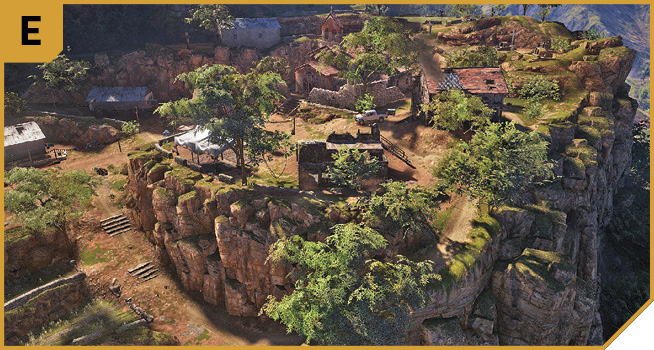
Navigation along the north edge of the village allows you to reach this narrow hill path up to a burning building close to the church, and a cluster of around three nearby foes. The “open air” building near the smoking barn offers defensive positions, and views across to the church, where you can back up your colleagues sweeping the area behind the church. Or, use this as a defensive spot before venturing into the church itself.
Southwest Cemetery Grounds
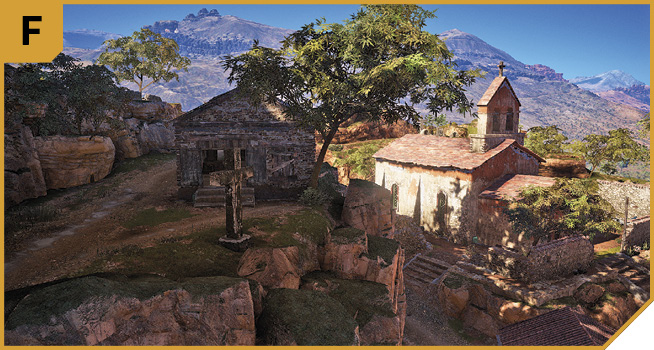
There’s a path running from B to here, and using the south outskirts of the village, and the vantage points along the way, enables stealth kills of almost everyone except those in the church grounds. Continue your clockwise route into the cemetery at this point. This is also notable as the field with the scarecrow in it can be used to land a chopper, if you’re raining death down from above to cause extra chaos.
Northwest Cemetery Grounds
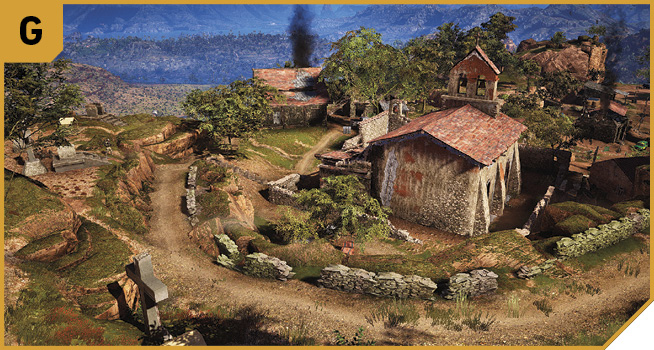
Moving either from E or F to here allows you to remain in cover and drop the cluster of foes near the pickup, parked close to the church. This part of the cemetery also allows excellent views and takedown opportunities of enemies around the church (especially the sniper), as well as a path into the church that avoids running up along the main, open thoroughfare to the east.
|
 Target: Church and Target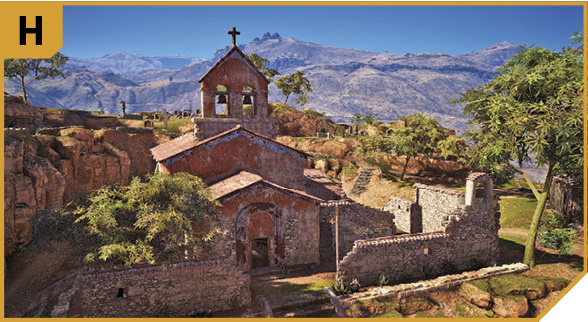
Culta: Other Tactical Advice
 It’s usually best to take either the north or south outskirts path around the perimeter of the village, heading west, and position your brethren on the opposite side before encouraging them to slowly advance through the village after you take care of the sniper, and around half the foes (or more if you’re feeling like a one-man army). Heading around the rear of the church enables you to methodically cull cartel forces, and ending up on the church roof to tag stragglers is a great way to prove your mettle.
Sync Shots and the use of the Rebel’s Mortar Strike are both excellent methods of softening the targets in this village; you should have practiced the former, and the latter should be done using the drone. Tag the location where you want the mortar to land (where a group of foes are congregating, at the front of the church, or to take out the sniper) and let the rebels drop in a nasty surprise. Do this once you’ve lost the element of surprise.
 Although dropping a chopper in here for a spot of mayhem is always entertaining, it can be saved until only a few foes are left. In the mean-time, have one Ghost take the route from B to F, and around and into the church, stealth-tagging foes along the way. A second Ghost can hole up at D, covering the town. A third Ghost should set up camp atop the hill at C, while the fourth uses the north outskirts route to the church. Two snipers and two assault Ghosts make short work of the cartel thugs.
Lodging a Formal Complaint
After you enter the church and free the prisoner, he gives a vague but helpful description of where he was tortured, and the mission concludes.