
Tom Clancy's Ghost Recon: Wildlands Guide Welcome to Bolivia San Mateo: El Pozolero
Sandoval’s Remains (Spoiler/Optional)

Objectives
- Locate Sandoval’s body
- Identify the body
LOCATIONS
- Outpost (South)
REWARDS
- + 350 XP
Brief
We’ve received intel pointing to the possible location of DEA Special Agent Sandoval’s body. The intel is unconfirmed, but if there’s even a chance it’s correct, we owe it to Sandoval to check it out. Search the site and locate Special Agent Sandoval’s body.
Sandoval, Out
The mission you’ve been dreading is finally upon you; a possible identification of Agent Sandoval has been uploaded to your Tacmap. A small, but extremely defendable Outpost in the south of San Mateo has a number of corpses strewn across its grounds, all confined to large metal cargo containers. Insert your team into this location, and make a positive ID of Sandoval once and for all.
Outpost (South): Recon
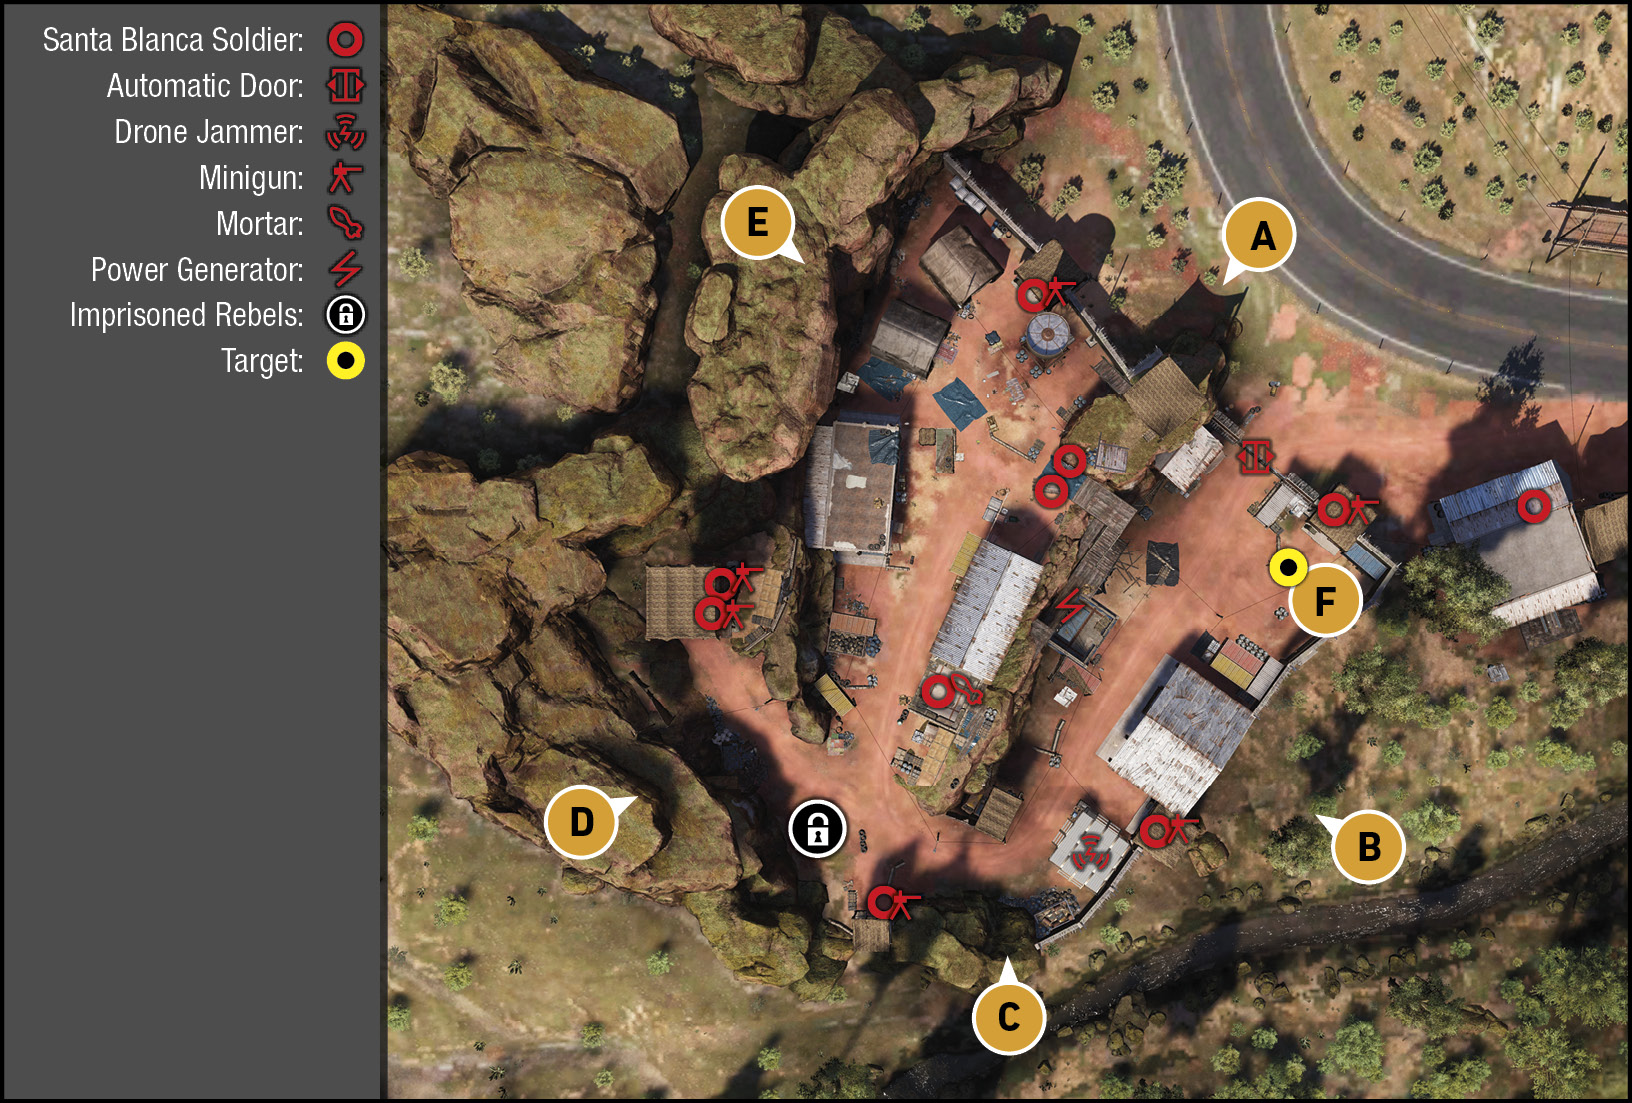
TACMAP
Despite the impressive defenses this location has, there are no alarms, no snipers, and the cartel members aren’t the brightest bunch. Don’t underestimate them though; make the removal of the drone jammer (southeast corner) a priority. The base itself is on three tiered levels. The eastern side, south of the main automatic gate, features flat ground, a generator, and various warehouse buildings. The middle tier has a mortar and additional structures, including a cage with rebels, an armory, and a couple of barracks tents to the north. Over on the upper tier to the west is a minigun tower, with perimeter rocks along the western edge. It is here that you have the height advantage. All around the perimeter are minigun emplacements, so carry enough explosives to neutralize these.
North: Perimeter Defenses
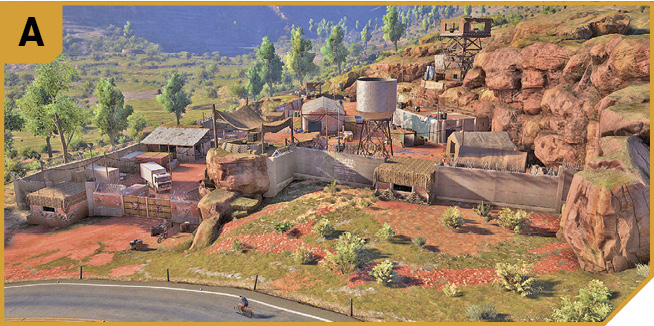
This perimeter features a gate you can only open if you’re driving a cartel-approved vehicle (any white-colored one), which is a reasonable plan if you know exactly where Sandoval is located. You can park at the gate, and let your teammates in while the gates remain open. Be aware, however, of the two minigun firing posts on either side of the door; avoid them, snipe from a distance, lob in a grenade, or attack them from behind (heading in from B or E, for example).
Though the north wall looks impenetrable, you can climb the rocky outcrop just right (northwest) of the gate, maneuvering around the left side of the outcrop and onto a tin roof inside the base.
East: Perimeter Wall and Minigun Nest
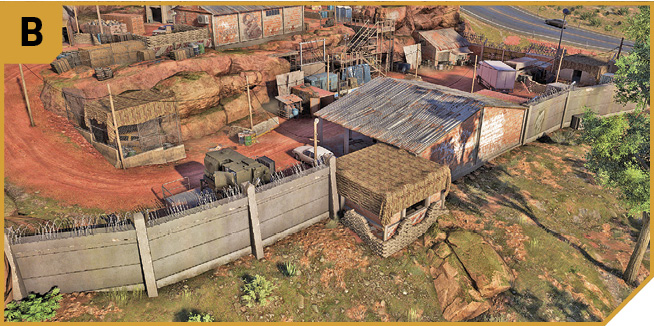
To the east, outside the base, are the remains of an old garage with exterior concrete steps up to a roof. Assuming you haven’t been seen (as this roof is exposed), hide behind the remains of a brick wall; this affords enough cover for you to tag the minigun tower operator and three or four foes inside the base.
The firing post on the east side of the base faces a stream, and isn’t really a problem, as you can creep under the window slit, and/or lob in a grenade to clear that foe.
Of greater interest is a concrete block against the wall between the nest and the garage. Climb it (it’s near a tree), and there’s a gap in the barbed wire, allowing you to drop into the base, almost landing on the metal container Sandoval is locked inside. You’re also across from the generator. This is obviously a hugely helpful route to take; just watch for the minigun nest foe nearby.
South: Stream and Rocks (Minigun Nest)
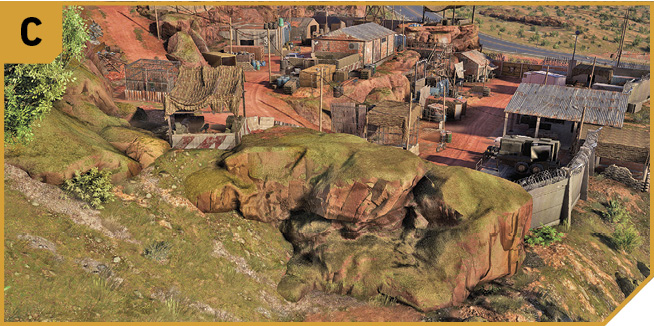
When the concrete wall ends at the southern edge of the perimeter, you can climb the rocks the wall connects to, and up into the base. Be watchful of the minigun operator at the covered tarp nest nearby; drop him, using the rocks as cover. You have partial visuals of the minigun tower foe, too. Head here to cause a distraction, release the rebel from the small prison cage adjacent to the nest, or to drop down and shut off the generator and/or the drone jammer. Remember the jammer can be deactivated, not just blown up (so you can stay stealthy).
Southwest: Flat Rocks and Minigun Tower
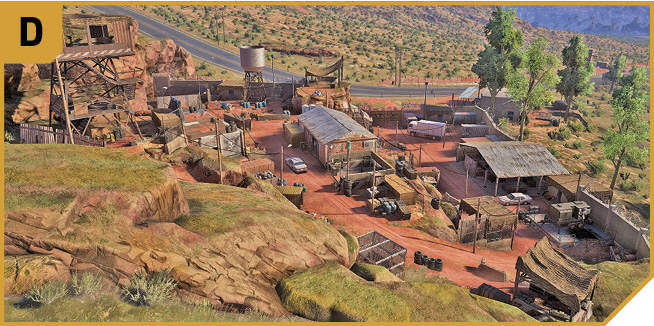
This is the favored direction to infiltrate the base, if you’re wanting to quickly neutralize the biggest offensive threat: the minigun tower. Head down from the hills, making sure you aren’t spotted, and use the flat rocks above the tower, and tag the foe (or foes) at the miniguns. From here, you have a great view of the base, and can start systematically removing foes (such as the mortar enemy) while remaining in cover. Feel free to head to the foot of the minigun tower (or the top of it), maintaining your height advantage. Then move to C or E and outflank the remaining enemies.
Northwest: Minigun Tower Gulley and Overlook
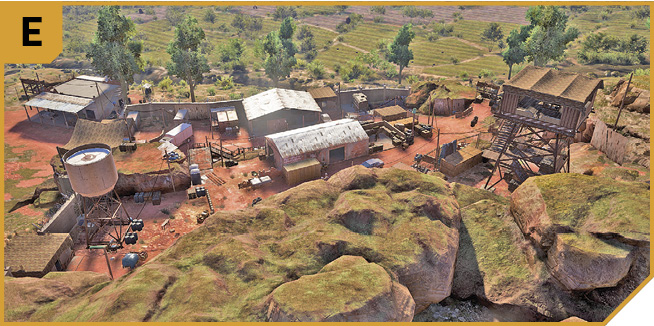
It pays to remove the minigun tower foes from D first, though it can’t be done from this angle. Assuming you’re able to climb up from the gulley onto the rocky overlook, you can snipe most of the targets (including the foe at the mortar), remain hidden, and not expect any foes to outflank you. Drop down from here when the coast is clear. Note the barracks tents in this area of the base, which are occupied during the night.
|
 Target: Sandoval’s Remains (Metal Container)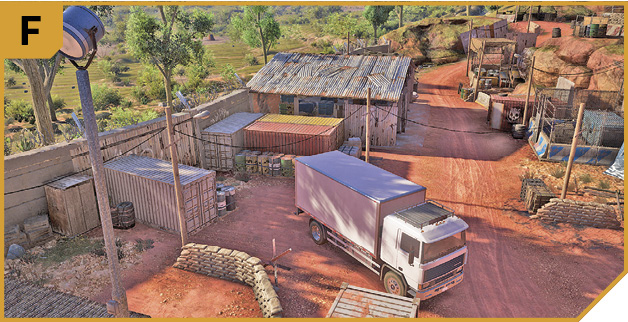
Outpost (South): Other Tactical Advice
 For those who wish to quickly end the search for Sandoval, head in under cover of the night via the concrete block and wall climb at B. Quickly ascertain the identity of Sandoval at the nearby container, then leave the way you came.
Or, you can start at D, removing the minigun operators in the tower, then drop the foe at the mortar, and remain on the high ground, sniping and lobbing down projectiles and other explosives until there are only a few foes left. Then drop down, finish off the enemies, and complete the objectives. Have your team storm into the base while you cover them, once the minigun threats are neutralized. Also try lobbing grenades into the rear entrances of the firing posts to trap and kill the minigun operators around the base perimeter.
Or, drive a cartel-approved truck in through the gates, park it next to the container Sandoval is in, and while using it as cover, check the corpse. Then drive it out of the base, or escape via B.
You could also approach at night, hop in via B, shut down the power, and attempt to strangle or bring down every foe using stealth tactics and night vision goggles. Work your way in a clockwise direction from B to C (shutting down the jammer), around to D, up the steps to the minigun tower, and across to the barracks to defeat any stragglers. Can you do this without any foes noticing? It’s possible!
 A variation on the Solo plan is fine to try in Co-op mode, though you have the added benefit of swarming in from different directions at the same time to neutralize minigun operators at different locations simultaneously. Move in from B, C, D, and E, with each of you responsible for different foes in various areas.
You can also drive more than one cartel vehicle through the front gates, and if you have two Ghosts per vehicle, with one operating a minigun or other weapon, you can waste a good proportion of foes, though the tight maneuvering around to the higher part of the base can cause you to abandon the vehicle sooner rather than later.