
Tom Clancy's Ghost Recon: Wildlands Guide Welcome to Bolivia Mojocoyo: Antonio
The Main Stash (Optional)

Objectives
- Gain access to the main cocaine cache
- Destroy the main cocaine cache
LOCATIONS
REWARDS
- + 1,000 XP
Brief
Antonio has given us the location of the primary cocaine stockpile in Mojocoyo. Get to the cache and destroy it.
Powder Keg
There’s little time to admire the spectacular views of the salt flats to the northwest in Koani Province from this hilltop High School. It’s been turned into one of the most heavily-guarded bases you’ve ever seen. Aside from the massive number of enemies (the majority of which are clustered inside the four floors of the main school structure in the southeast part of the area), there are installation defenses to counter, and close-quarter fighting as you battle down into a basement and out again.
Mojocoyo Base: Recon
TACMAP
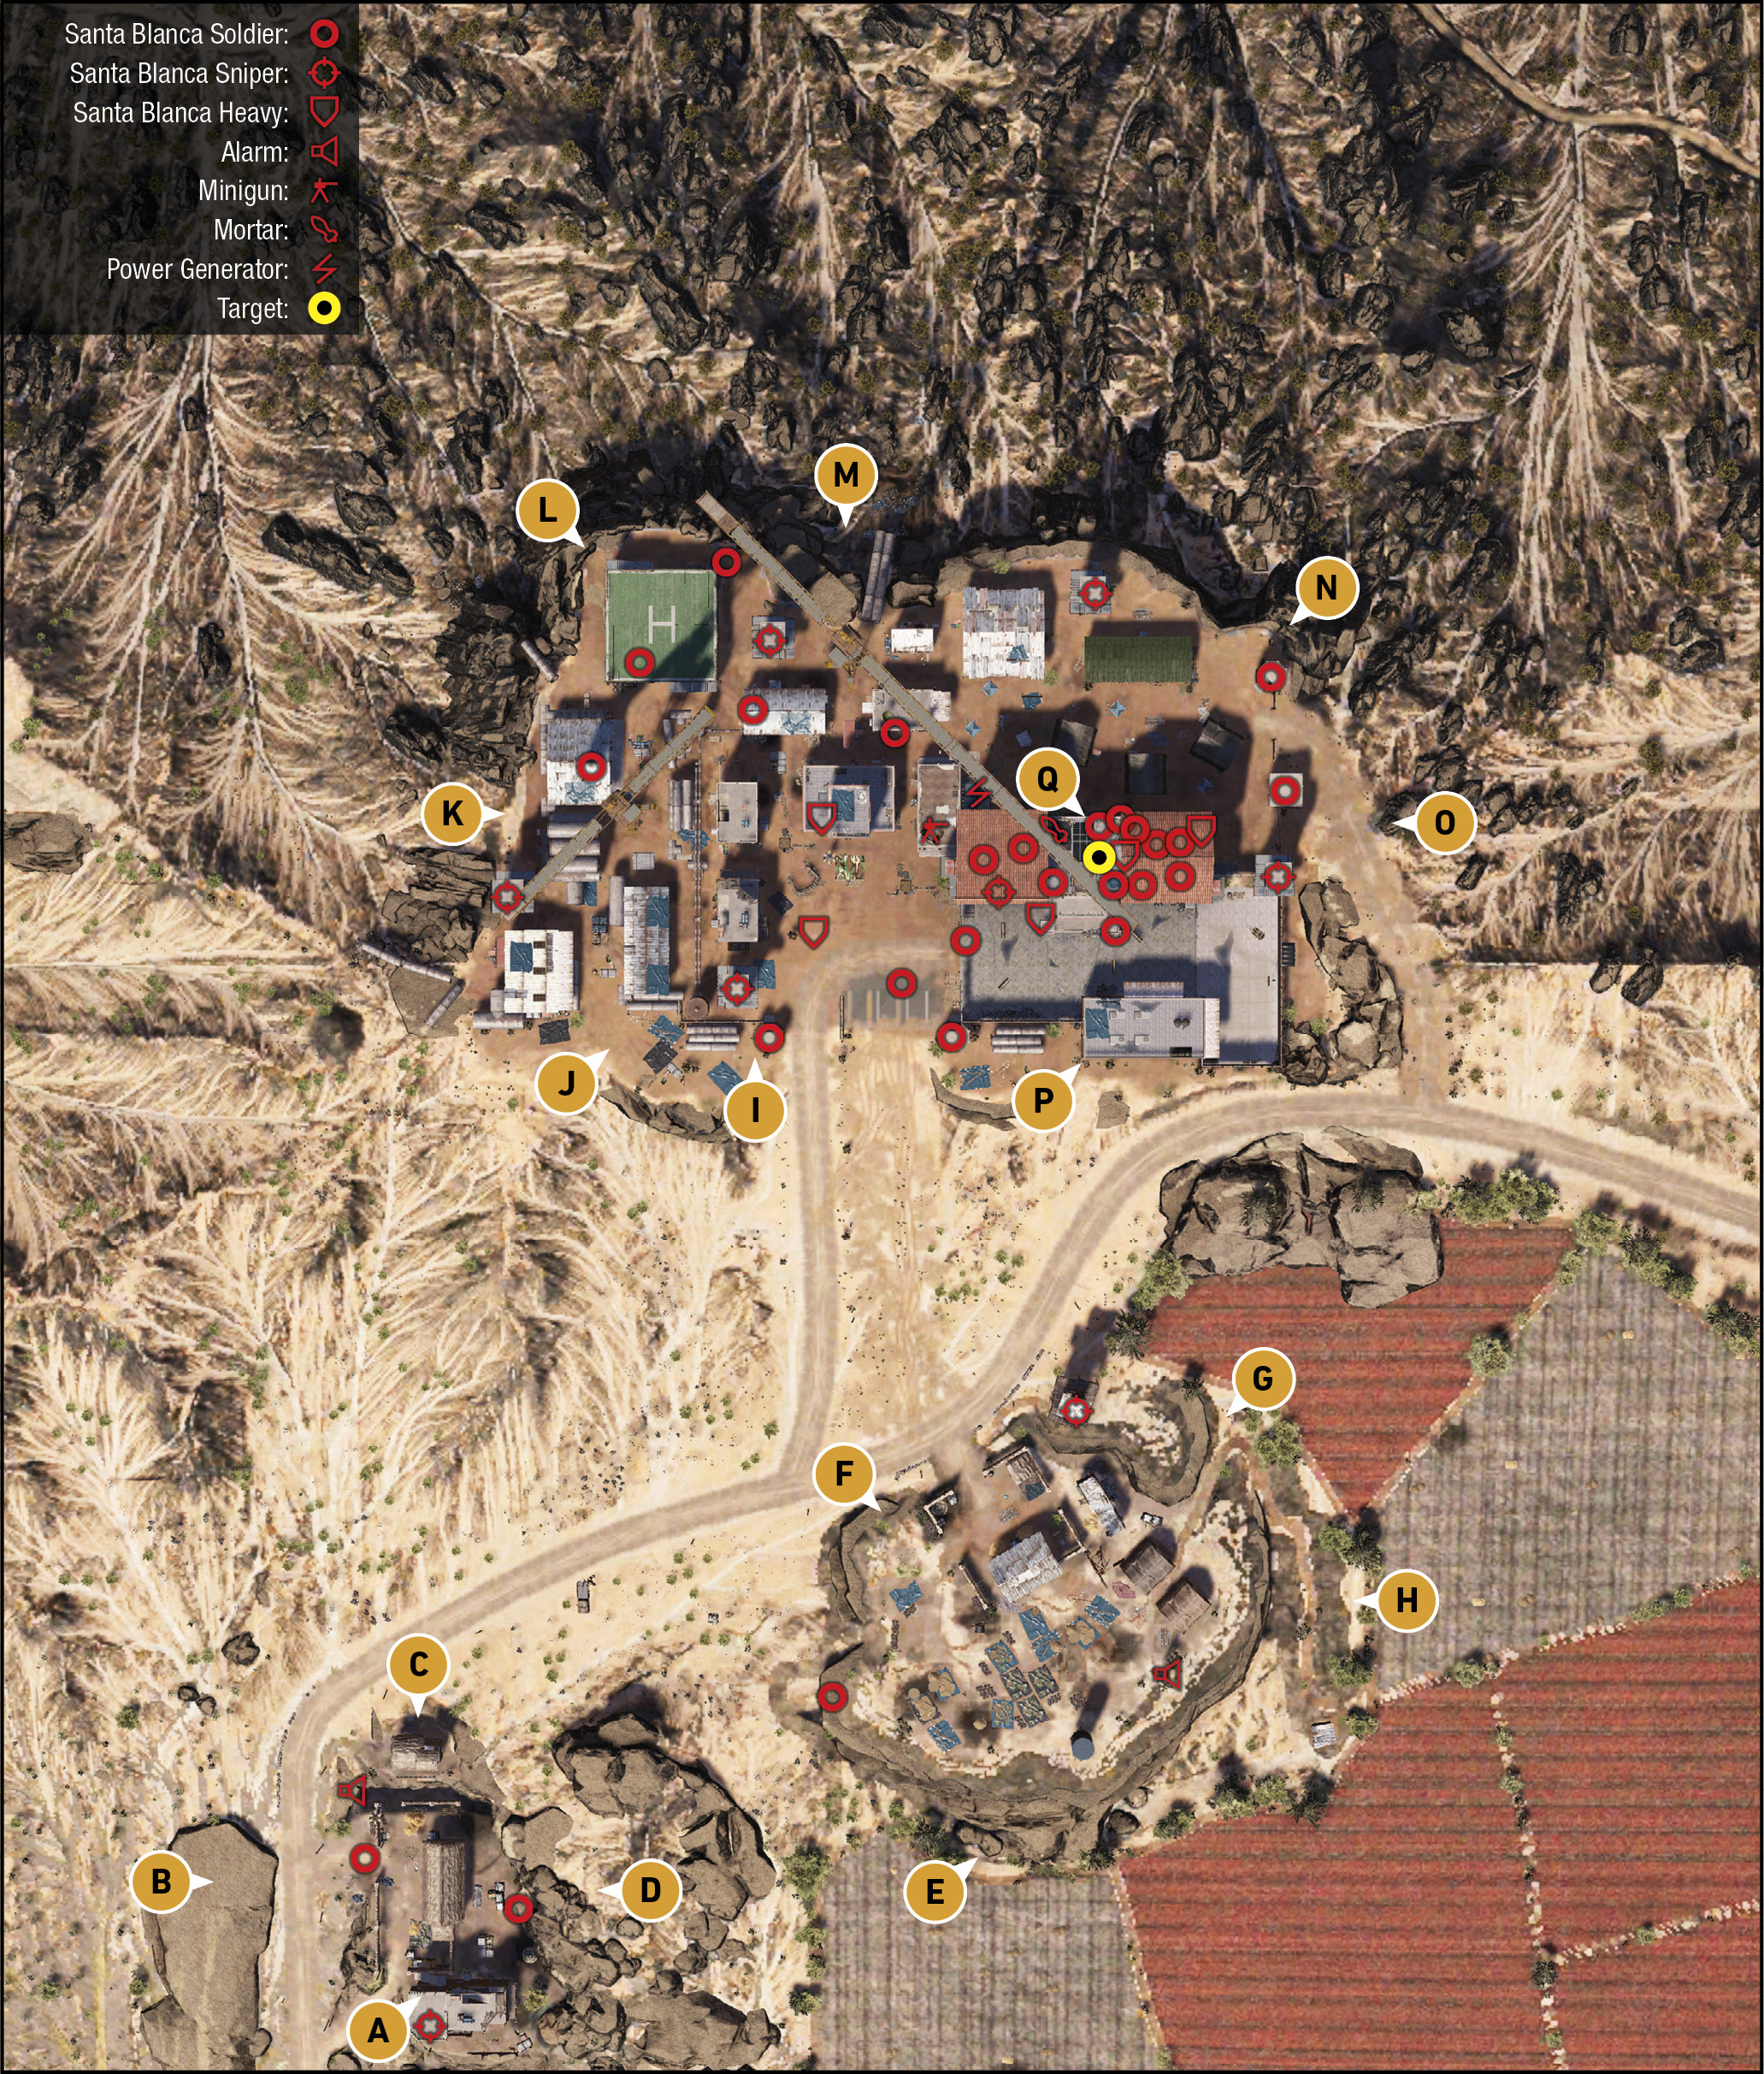
(SNIPER’S HOUSE): Threats are minimal at this Sniper’s House; which is simply a hastily-built observation building, an old farm cottage, and a chapel. There’s a sniper, and one or two additional foes to contend with. Approach this area only if you’re interested in shooting out the alarm panel (one of three for the entire base).
TACMAP
(QUISPE FARM): Threats are even more minimal at this small farmstead on a low plateau. Watch you don’t attract attention from the main base to the north. The biggest problem here is the sniper tower; remove that, then a possible second foe on the ground. Then shoot out the alarm panel (the second of three for the entire base).
TACMAP
(MAIN MISSION AREA): The vast majority of the mission occurs here (all of it, if you’re unconcerned with alarm panel destruction). The first problem to note is the alarm pole itself; it’s by the HQ building in the center of the compound, so shoot it out. Then note the five(!) sniper towers, and a sixth sniper on the roof of the school (looking out of the “designer” hole). The grounds of the base have foes mainly clustered around and in the four-story school structure. This structure is where the cocaine is stored, and it’s in the basement, accessible via a keypad at a door in the southwest corner of the ground floor.
Mojocoyo Base: Recon
Sniper’s House (South): Main Road
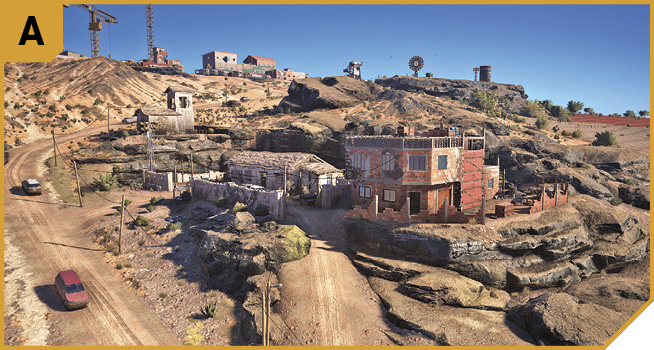
This location offers easy access to the alarm panel, but not a particularly clear shot to the sniper atop the brick structure. There are cartel patrol vehicles here, so take care infiltrating from this direction.
Sniper’s House (West): Rock Outcrop
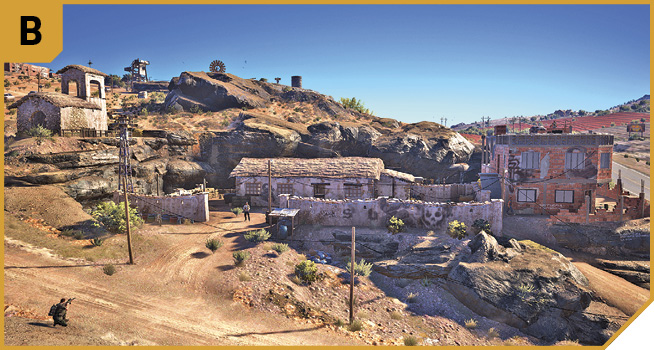
Sneak to this flat rock outcrop, and you can easily neutralize the alarm, and either storm the cottage and sniper’s brick building, or attempt to shoot the sniper from here before moving in and clearing the Sniper’s House completely.
Sniper’s House (North): Chapel
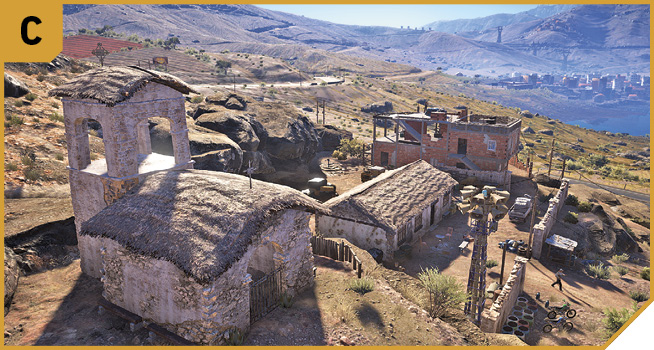
A great place to quickly remove the alarm panel, and ignore the other enemies as you head up to the farm or main base. However, you usually have a clear shot of the foes below and the sniper himself, so feel free to clear the entire area.
Sniper’s House (East): Rock Overlook
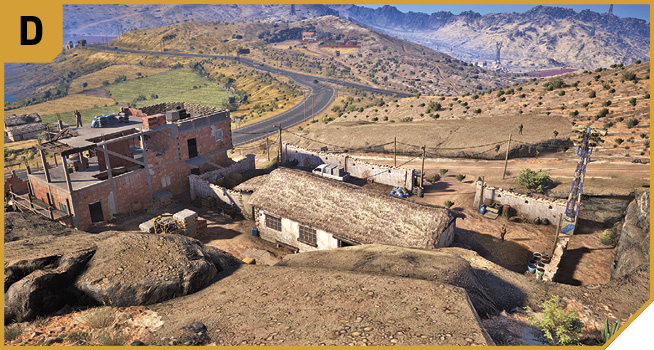
Arguably the best place to quickly remove the alarm and sniper threats, as well as swiftly dealing with foes on the ground before their shouts raise any other alarms.
Quispe Farm (South): Low Rocks
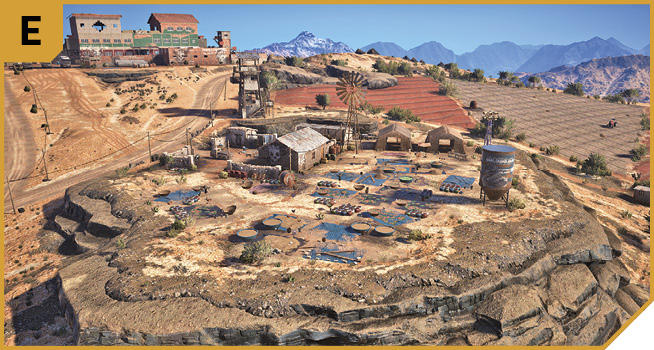
Climb up here from the south, and you can quickly remove the alarm panel to the northeast, as well as the top of the sniper’s head on the tower. As long as you’re quick, you can dispatch all threats before your exposed position is compromised. If you’re in danger of being seen to the north, drop down below the rocks.
Quispe Farm (West): Road Junction
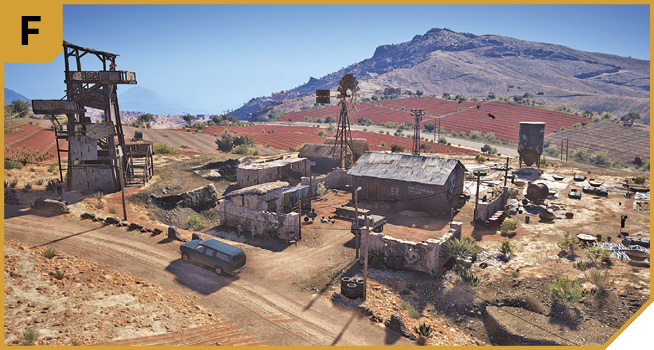
Not a good place to spend any time as you’re in danger of being spotted at the main base, the sniper has a good height advantage, and the alarm panel is obscured by the main farm building. Stay off the road.
Quispe Farm (Northeast): Coca Field
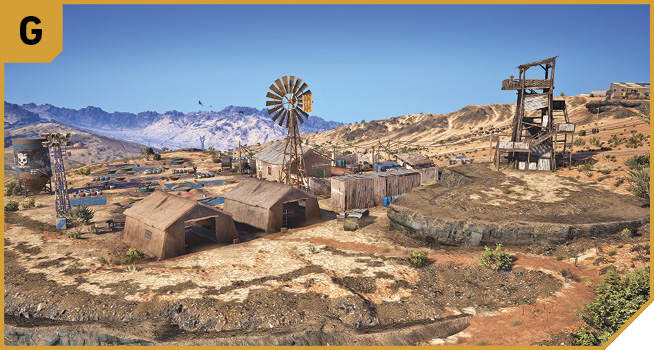
The small coca field to the northeast offers some reasonable protection, allows you to reach the sniper tower stairs without problems (if you’re wanting to remove the sniper at closer quarters) and the alarm panel is easily shot.
Quispe Farm (East): Lower Fields
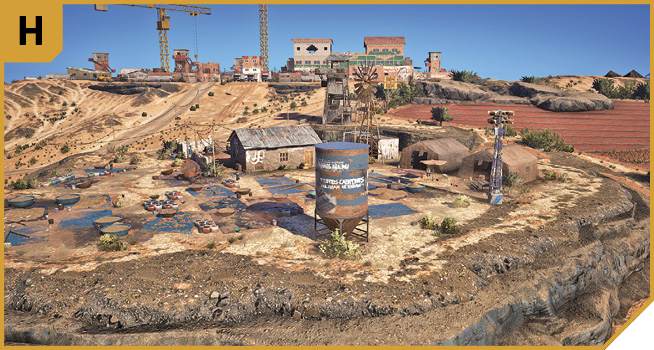
The lower coca fields to the east and southeast can be snuck through en route to a ranged removal of the alarm panel and sniper. Though you’re on lower ground, it’s easier to aim at the two targets from here, and you’re not likely to encroach on enemies at the main location.
Base (South): Main Entrance
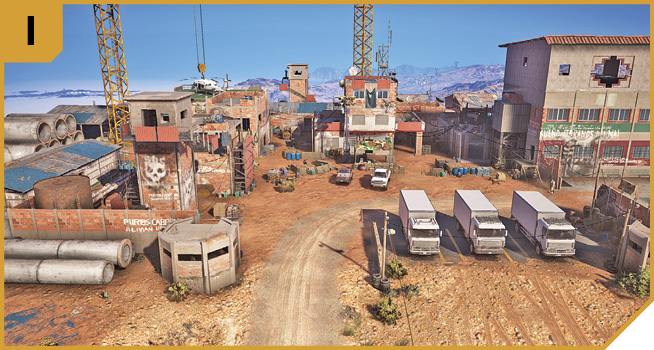
The main entrance up the dirt road to the south is in through here, passing a sniper tower and pillbox (left), the alarm panel and HQ building (ahead), and the armory and school building (to the right). Sneaking in here is exceptionally difficult, so use this entrance if you’re wanting a more rampaging way in (using the diggers parked to the west, for example). It’s wise to remove the alarm panel, but from a different location. If you’re driving into the base going hell-for-leather, park in the basketball court near O after driving through here.
Base (Southwest): Diggers, Pipes and Warehouses
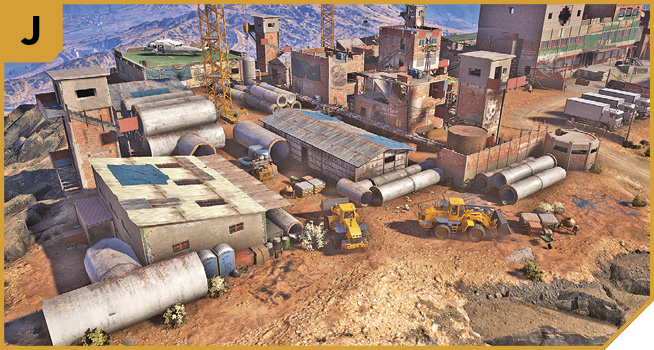
A good place to start a diversion while the rest of the team go for the objective, or a better place to sneak in, using the lack of enemies in this area to start clearing the base from west to east. Though you have two close sniper towers, the number of pipes to hide behind or in are large, and the warehouses here are usually empty of enemies.
Or, you can locate one of the two parked diggers, and use it to drive into the base under heavy enemy fire, park at O, and dive into the smaller school house to the southeast.
Base (West): Sniper Tower and Pipe Stacks
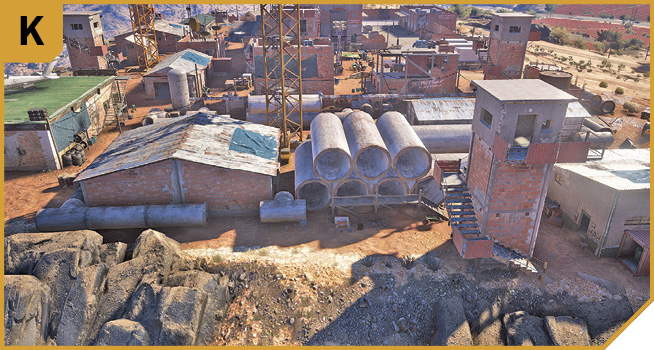
The large warehouse to the northwest, the masses of pipes, and a small crane you can actually parachute onto, comprise this area of the base, along with a sniper tower. Heading up here doesn’t give you much in the way of aiming opportunities as the foes are elsewhere (to the east). This does mean you can try stealthily moving east, dropping foes one at a time to whittle down the number until only those around the schoolhouse remain; then go in guns blazing.
Base (Northwest): Helipad
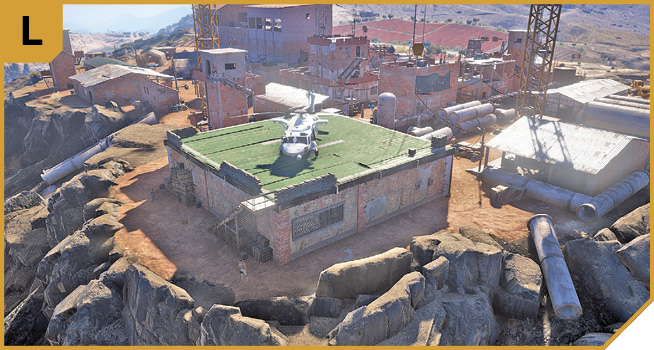
The helipad has sandbags for cover, two stairs up to the pad itself, and good views of the three sniper towers on the west side of the base, as well as the alarm panel. This is a good covering position, or you can fire from the top of the north sniper tower (which can drop a foe at the minigun nest). However, you’ll soon have few foes to hit when the majority are around the schoolhouse itself.
Base (North): Double Pipes to Northeast Yard
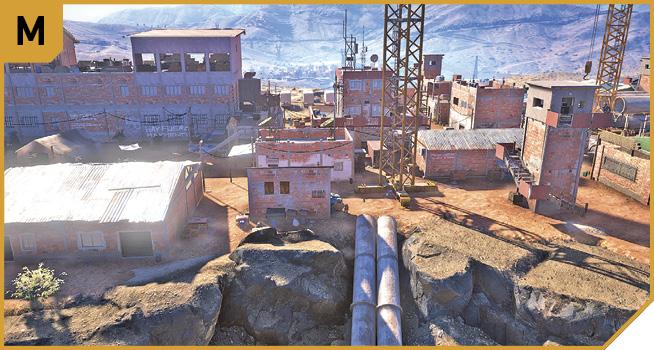
As long as someone else is removing the alarm panel or shutting down the generator, remain here and clear the north sniper tower, then use it to gain height and attack foes below in the north yard barracks tent area (lobbing projectiles down works, too), or stealthily remove all foes around the schoolhouse before the final push.
You can also easily head in from here, directly southward, and neutralize the minigun operator, but not before shutting down all the power to the facility.
There’s a huge crane in the central-north part of the base too. Parachute onto it, and drop grenades and snipe at the ant-like foes below. There’s nowhere really to go afterward, but it’s a possible plan.
Base (Northeast): Pillbox and Barracks
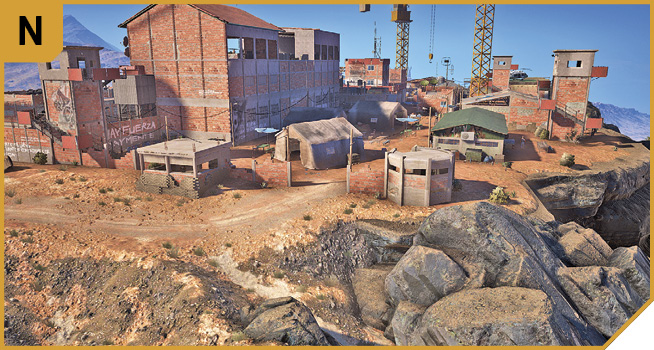
This is a good secondary location to drive a vehicle in to cause havoc, and coax foes into this part of the base to fight against.
A better plan is to use stealth, removing the sniper on the two nearest towers, and the foes in the pillbox and security hut. You then have free reign of this barracks area (allowing quick access to the generator), and can quickly drop foes in their sleep if you attack after dark.
Note there are two windows you can smash in the north wall of the schoolhouse, which can be climbed through, allowing you (or your team) into the schoolhouse itself. This is a great alternative to the south entrance, though you still need to reach the keypad (southeast corner) to get down to the basement.
Base (East): Sniper Tower and B-Ball Court
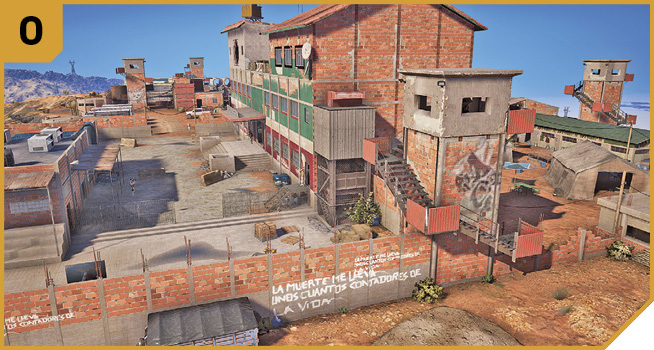
The perimeter wall here is mostly sturdy (at least, to the area of the schoolhouse you need to access), so hop over the broken section of wall between the sniper tower and security hut, climb the sniper tower steps (dispatching foes silently as you go), and once all immediate threats are neutralized, hop over the metal stair fence to land on the ground inches away from the schoolhouse entrance and objective keypad. This is the closest to a stealth infiltration you can manage.
Base (Southeast): Small Schoolhouse Window
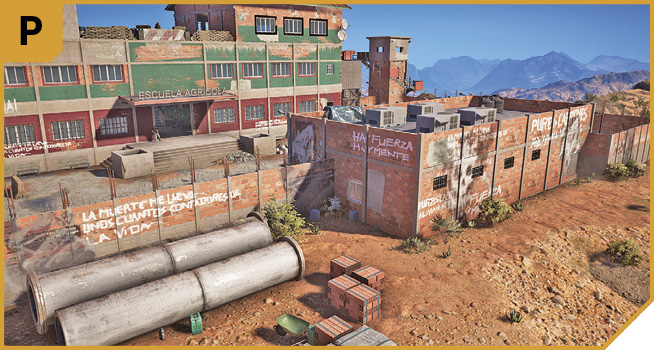
The pipes in front of the base provide cover, and sneaking in from the east allows you to move to a small window you can smash, and vault over, into the base and a school outbuilding. Though the enemies will hear the window, if you wait (and you’ve removed the alarms), they will go back to patrolling, allowing you to sneak in toward the objective. Or, storm the place quickly.
|
 Base: Schoolhouse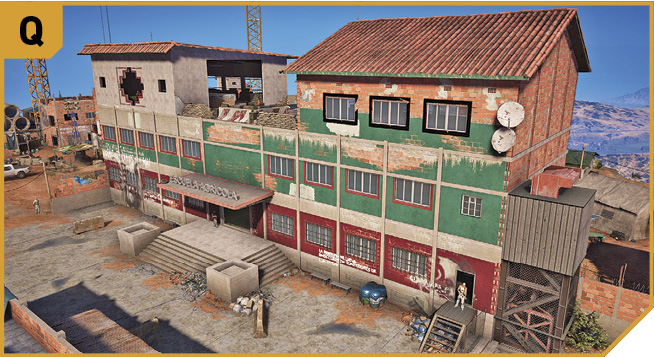
Mojocoyo Base: Other Tactical Advice
 This is a difficult mission, but if you’re after minimal takedowns, remove all three alarm panels. Then enter from N, stealthily take down foes in the barracks, order your team to head in from the south (just north of P) and smash one of the windows to the north. Hop into the ground floor, move to the keypad using close-assault weapons. Head into the basement, defeating all foes and leaving mines on the stairwell behind you. Then fix C4 to all the cocaine, back up away from the blast radius, and mop up any missed shipments using grenades or mines you shoot, or high-powered shotgun fire. Then leave the way you came, or if that’s too difficult, remain and fight, and open the southwest exit and flee to a vehicle.
A slightly safer option is actually to drive in a heavy vehicle, such as a military SUV, digger or truck, in through I (ideally after removing the three alarm panels so reinforcements don’t hinder your progress), parking it in front of the southwest basement steps. Then storm the schoolhouse using the previous plan. When you need to leave, you have a hard-wearing vehicle you can quickly utilize. If your team is keeping the south yard in front of the schoolhouse free of foes, so much the better.
Another option is to create a commotion (or a distract grenade) in the barracks or southeast basketball court, then enter the schoolhouse from the opposite direction.
A more ludicrous (but daring!) plan involves parachuting or leaping from a helicopter and landing on the roof, ideally after strafing the roof to remove enemies (the sniper and mortar operator). Then either shoot out the skylight and drop down onto the main steps, or head to the southeast stairwell and wait for every foe in the vicinity to head up and attempt to attack you. Once there’s a pile of foes here, descend gradually, to the basement, and complete the objective. This works better if you’ve killed the power (that is, there are no alarms, and no enemy helicopters buzzing you while you’re on the roof).
 The Solo plans are all excellent, even with a group, but splitting up your forces so the enemy is attacked from all angles is a plan you can only try in Co-op. Be sure you’ve killed the alarms before persuing any of the following options:
Have a teammate run “interference” in a digger by driving it into I from J, and then to the schoolhouse. Meanwhile, other Ghosts should enter from L and N to clear out those areas (starting with snipers), and a fourth Ghost should be strafing the area with helicopter gunfire (aiming at the mortar operator first). When all exterior threats are defeated, enter the schoolhouse and give each other enough room, especially when you’re attacking the foes locked in the basement. Remember you can’t be overly judicious with explosives, as innocents are in the schoolhouse, usually including the basement.
For true professionalism, speed and competence are key. Have two Ghosts enter via M, N, or O, usually at dark, smashing the windows on the ground floor of the schoolhouse (north). At the same time, have two Ghosts enter via O, but moving to the southeast entrance by the panel. Quickly access the basement, but sweep the ground floor along the way. Then destroy the cocaine, and flee with a sprint south from the southwest exit.
Imagine a fleet of four explosive drones all heading into the school house, each controlled by a teammate intent on clearing the majority of the foes on every floor before the basement is breached. Or, use these drones to remove alarm panels or snipers atop towers. Clearing the rooftop enemies on the schoolhouse offers the easiest way to utilize these drones.